• Skip to main content
  • Skip to primary sidebar
  • Skip to secondary sidebar

Sixth Street Sundries

Emily Midgett

  • Home
  • About Me
  • Contact
  • OLO Marker Color Swatch Chart
  • Shop

olo markers

Simon Says Stamp STAMPtember 2026 Collaboration with Pink & Main Release!

September 21, 2026

Hi friends! I am a day late due to a weather-induced migraine, but I wanted to pop on quickly and share the absolutely adorable STAMPtember collaboration set from Simon Says Stamp and Pink & Main! (Click HERE to see it on the website!) Here’s a sneak peek:

One of my fondest holiday memories is also somewhat bittersweet; one of the last Christmas celebrations that we had at my Grammy’s house with everybody together was an ugly Christmas sweater party for the grandkids. My cousins, husband, sister, and I had such fun combing thrift stores for the “ugliest” sweaters we could find! (We all know that an “ugly” sweater is 100% in the eye of the beholder though!) I was definitely thinking of that fun memory whilst creating my project for today.

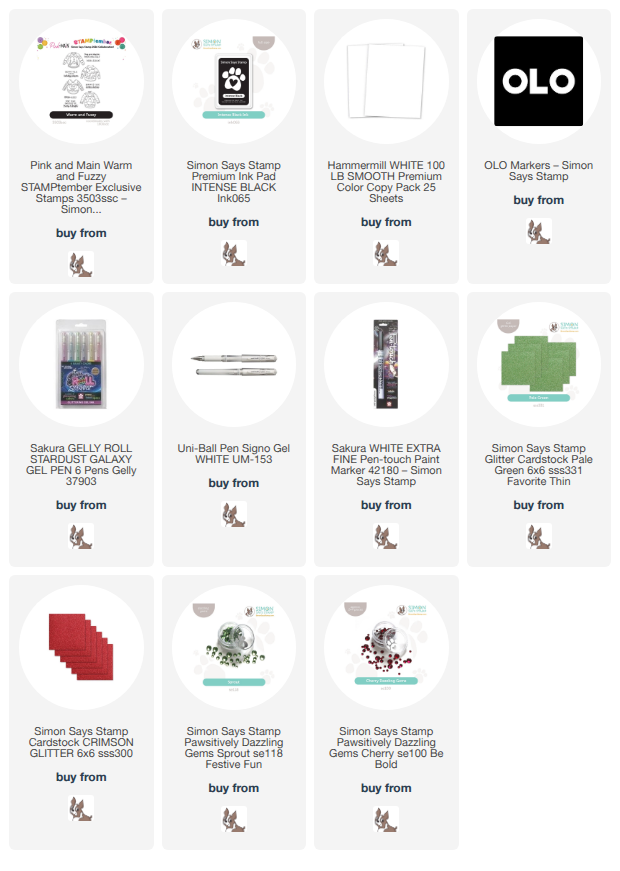
I began my project by stamping all four of the sweaters from the limited edition Warm and Fuzzy STAMPtember set using alcohol marker-friendly black ink on plain white cardstock. I then used my OLO Markers to add traditional holiday colors to the sweaters, embellishing the decorative accents with sparkle pens and metallic paint pens for a bit more festive flair!

Once I had finished coloring all of the images, I used the coordinating dies (which are sadly sold out-apologies for my tardiness in posting this!) to die cut all of the sweaters. I the used my guillotine trimmer to trim down some coordinating strips of glitter cardstock in red and green and adhered them to my card base. I arranged the sweaters all down the strips of glitter cardstock, almost as though they were hanging there in a holiday display!

After I had placed my sweaters on the card front with foam adhesive, I stamped a sentiment from Warm and Fuzzy with black ink, then tucked it amongst the sleeves, popping it up with some foam squares. The final touch was a few sparkling red and green Pawsitively Dazzling Gems!

Well, that’s all for my project!

Important note: these fabulous and exclusive STAMPtember collaboration sets are limited edition, meaning that once they sell out, they won’t be restocked. Don’t wait on these! You won’t want to miss out! Click HERE to see all of the collaboration sets that remain!

Thanks so much for stopping by today, and happy STAMPtember!!
Filed Under: Pink & Main, simon says stamp Tagged With: christmas card, holiday card, olo markers, stamptember, ugly christmas sweater, warm and fuzzy

Simon Says Stamp STAMPtember Exclusive Collaboration: Memory Box!

September 12, 2026

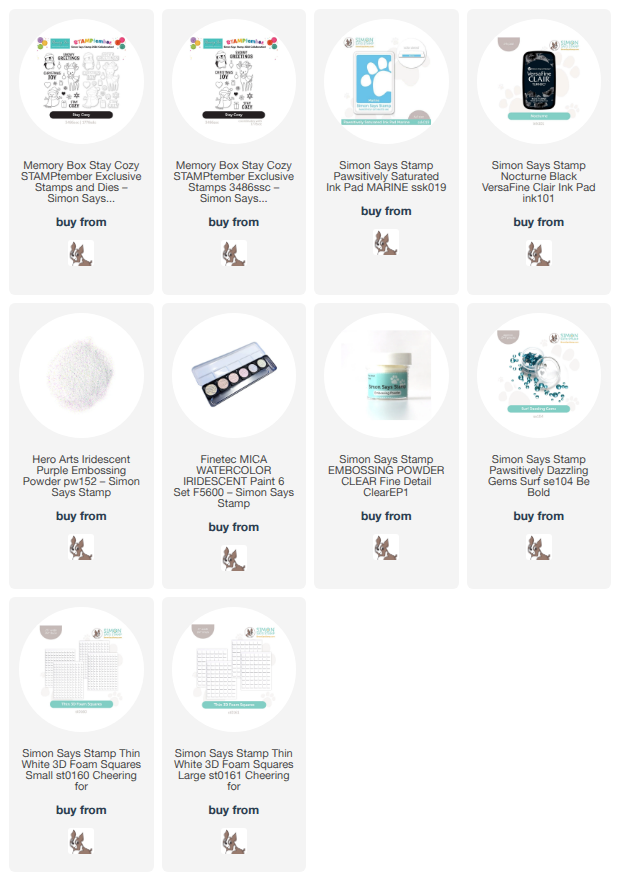
Hi friends! I am back with another darling collaboration from the Simon Says Stamp STAMPtember celebration! Today’s collaboration company is Memory Box, who makes not only darling stamp sets like Stay Cozy (click HERE to purchase this set!) but tons of spectacular standalone dies. I couldn’t resist the festive little deer in this set, though the snowman and penguin are equally as precious!! Here’s a sneak peek at today’s exclusive and limited edition set:

Simply adorable, right? **Reminder: the limited edition exclusive collaboration sets (check them out HERE) will not be restocked once they sell out, but the STAMPtember collection (check it out HERE) will be restocked if/when they sell out!** I created this icy little scene for my cozy reindeer with some ink blending, simple coloring, and a touch of shimmer. Let’s get started on the details for my project!

I began my project by stamping the adorable deer from Stay Cozy using black, alcohol marker-friendly ink. I then used OLO markers to add vibrant sky blue to the scarf and hat. I only used two markers; the more layers you add with the darker marker, the more contrast and shadow you can create!

To coordinate with the pretty blue scarf and hat, I created a wintry background by blending Simon Says Stamp’s Pawsitively Saturated Ink in Marine on an A2 white card front. I then stamped the individual snowflakes included with Stay Cozy on the blended area, using the stamping off method to create multiple levels of intensity for the snowstorm. I also splattered the background with some iridescent watercolors to add to the whimsy and magic of the snow falling. To add some extra dimension and interest, I stamped the snowflakes with the same Marine ink on a separate panel of white cardstock and added embossing ink over the top, then sprinkled on some iridescent embossing powder and die cut the snowflakes.

After I had created the focal point and snowy background, I stamped one of the sentiments from the Stay Cozy set with Nocturne ink and added clear embossing powder over the top to create a crisp and bold sentiment. I die cut the greeting with it’s coordinating die, then trimmed down a strip of white glitter cardstock and flagged the end with my scissors, creating a banner to back my sentiment and ground my snowy scene. I placed the banner on the card front with thin foam adhesive, then added the greeting with another layer of thin foam adhesive. I tucked the deer behind the very top of the greeting and added the die cut snowflakes around it with some more thin foam adhesive. Finally, I added a few Surf Pawsitively Dazzling Gems for added sparkle in my snowstorm!

Well, that’s all for my project today. Reminder: the Stay Cozy stamp and die STAMPtember collaboration set is limited edition and will not be restocked, so don’t wait!! Thanks so much for stopping by today, and happy STAMPtember!

Filed Under: memory box co, simon says stamp, Uncategorized Tagged With: collaboration, limited edition, olo markers, stamptember, stay cozy

Happy Birthday Little Fox with New Simon Says Stamp STAMPtember!

September 3, 2026

This post was sponsored by Simon Says Stamp. Thanks, Simon! *I have gathered links to all of the products used at the bottom of the post for your convenience, using affiliate links at no extra cost to you. Thank you for shopping with my links! I truly appreciate your support for my work!*

Hello friends! I have another project to share with you today featuring some adorable and festive new goodies from the Simon Says Stamp STAMPtember release (click HERE to see the whole release). I find that I never can have too many birthday cards, and I especially need child-friendly birthday cards with four kiddos and all of the birthday parties that come with so many kids! I absolutely love the “fable” line of critters that Simon Says Stamp has been releasing the last few months; they are drawn in a sweet storybook style that is not too “cutesy” but still has a sweet and whimsical aesthetic. I combined several different dies to create this cutie pie birthday card. Let’s get started with the details on my project!

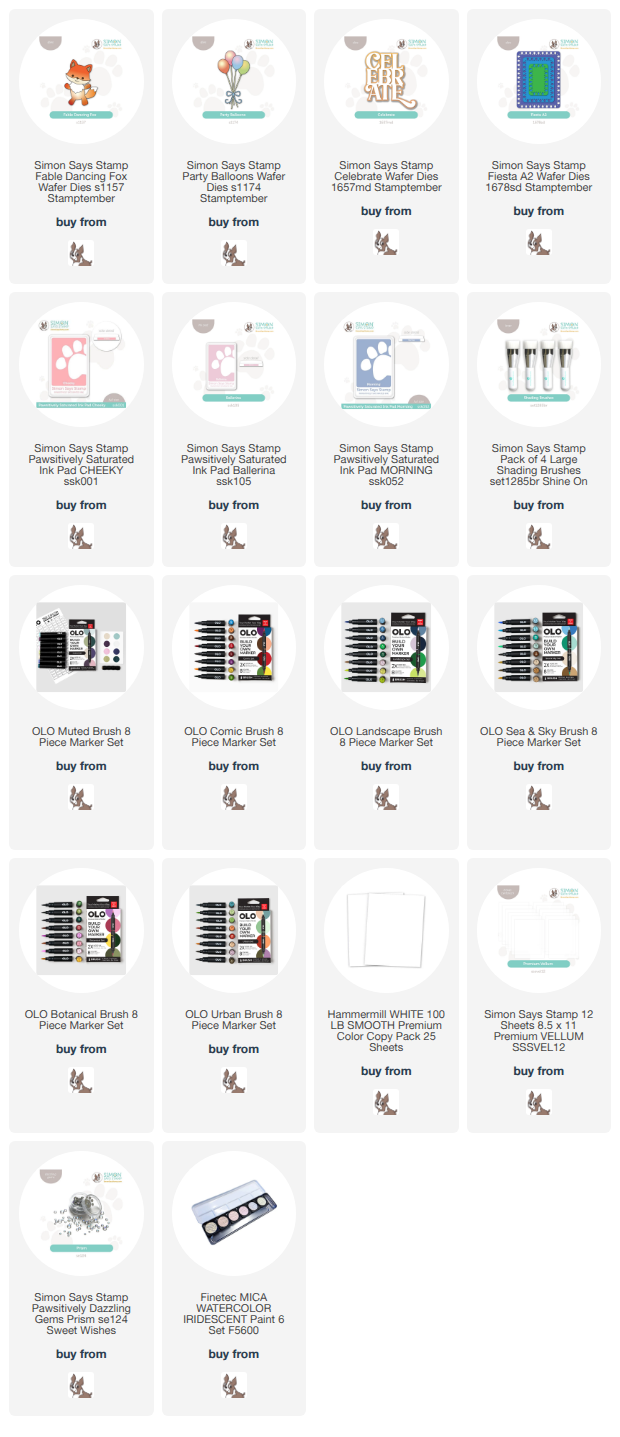
To begin, I die cut the pieces for the Fable Dancing Fox and the Party Balloons dies from plain white cardstock. I used OLO markers to add lots of color to the individual pieces, selecting a somewhat neutral color palette, tempering the pink and peach balloons with green and blue. In hindsight, I wish I would have colored the fox in a bit more of a pastel palette, but c’est la vie. I assembled the die cut pieces with liquid adhesive and set them aside.

For the background of my little birthday scene, I die cut the largest of the Fiesta A2 nesting dies from white cardstock. I selected Pawsitively Saturated Inks in shades of Cheeky, Ballerina, and Morning to coordinate with the balloons, avoiding the green in the balloon bouquet’s color palette to prevent the pink and peach mixing with it and creating a muddy mess. Once I had finished softly blending a colorful halo onto the background of my die cut, I splattered some shimmery iridescent watercolors on the blended area and adhered the die cut to my A2 card base with thin foam adhesive.

I die cut the new Celebrate die to add a chunky, bold sentiment to my cutie fox’s birthday scene. I cut the detail layer from iridescent white mirror cardstock and the shadow from vellum. I adhered the detail layer to the vellum with thin foam adhesive strips, then added more thin foam adhesive strips behind the solid die cuts on the vellum to create a double layer of foam tape that helps that sentiment pop from the background. I placed it over the blended and splattered background, then adhered the fox and balloons with more foam adhesive. Tons of dimension on this project!! Finally, I added some Prism Pawsitively Dazzling Gems for even more gorgeous shimmer on this festive birthday card.

Well, that’s all for my project today! The Simon Says Stamp STAMPtember company collaboration celebrations are starting tomorrow, and you won’t want to miss these limited edition sets. Be sure to bookmark my blog or become a subscriber so that you don’t miss anything fun! Thanks so much for stopping by today, and happy STAMPtember!!

Filed Under: simon says stamp Tagged With: alcohol markers, birthday card, celebrate, die cutting, fable dancing fox, ink blending, no line coloring, olo markers, party balloons, stamptember

Daisies are the Friendliest Flowers with Simon Says Stamp!

August 18, 2026

This post was sponsored by Simon Says Stamp. Thanks, Simon! *I have gathered links to all of the products used at the bottom of the post for your convenience, using affiliate links at no extra cost to you. Thank you for shopping with my links! I truly appreciate your support for my work!*

“Don’t you think that daisies are the friendliest flowers?” Name that movie!! It’s one of my favorites! I am so excited that I was able to design my newest stamp set for Simon Says Stamp called Daisy Frame (check it out HERE) featuring the friendliest of blooms. I created two different daisy floral arrangements for the stamp set, one with a wreath of daisies and foliage (check out THIS project and THIS project featuring the large wreath!) and for today’s project, I thought I’d turn my attention to the smaller swag included with the set. Let’s get started with the details on my project!

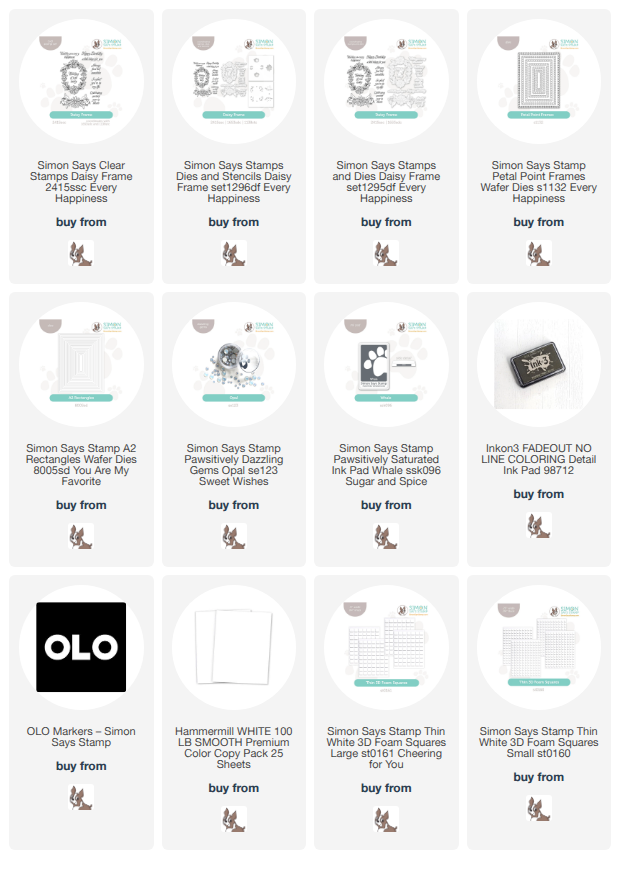
To begin, I stamped the swag from Daisy Frame using no-line coloring ink on plain white cardstock, then used OLO Markers to color the images in pretty shades of purple and soft green. I used the coordinating dies to cut the finished colored images out and set them aside. Daisies are such a fun floral to color, because the petals are fairly straightforward and don’t curl in on each other, making them great for practicing your shading!

After I had created my pretty daisy swags, I decided to ramp up the feminine factor with some pretry, lacy frames. I die cut the new Petal Point Frames twice: once alone for the medium-sized die cut and another paired with an A2 Rectangles die to create a lovely, lacy frame. I layered the two lacy die cuts on my white A2 card front, adhering the frame around the outside with liquid adhesive and using thin foam adhesive for the center die cut so that they were layered together. The straight edge of the exterior frame keeps the layered frames from being too visually busy.

After I had layered the frames on my card front, I used another layer of thin foam adhesive to add the daisy swags to the top and bottom of my middle lacy rectangle. The double layer of foam adhesive helps those daisies to pop from the layers of white cardstock! I also stamped a greeting from Daisy Frame using Whale Pawsitively Saturated Ink and die cut it with it’s coordinating die, then placed it in the absolute center of my middle lacy rectangle with some more thin foam adhesive. Finally, I added a few Opal Pawsitively Dazzling Gems for sparkle!

Well, that’s all for my project today! I just love the crisp white-on-white layers with that pop of vibrant purple, don’t you? It’s so feminine and delicate! Thanks so much for stopping by today, and have a marvelous day!

Filed Under: simon says stamp Tagged With: a2 rectangles, daisy frame, die cutting, no line coloring, OLO marker, olo markers, original illustration, petal point frames

Wildflower Arch with New Simon Says Stamp!

August 17, 2026

This post was sponsored by Simon Says Stamp. Thanks, Simon! *I have gathered links to all of the products used at the bottom of the post for your convenience, using affiliate links at no extra cost to you. Thank you for shopping with my links! I truly appreciate your support for my work!*

Hi friends! I am back with another project featuring some gorgeous new floral dies from the Simon Says Stamp Every Happiness release (click HERE to check out the entire release!). Sometimes the scale of dies doesn’t quite work for things to work together, but these new florals work beautifully together. I chose to cut them all from white cardstock and use my OLO markers to add color to each piece, and I love the effect. Let’s get started with the details!

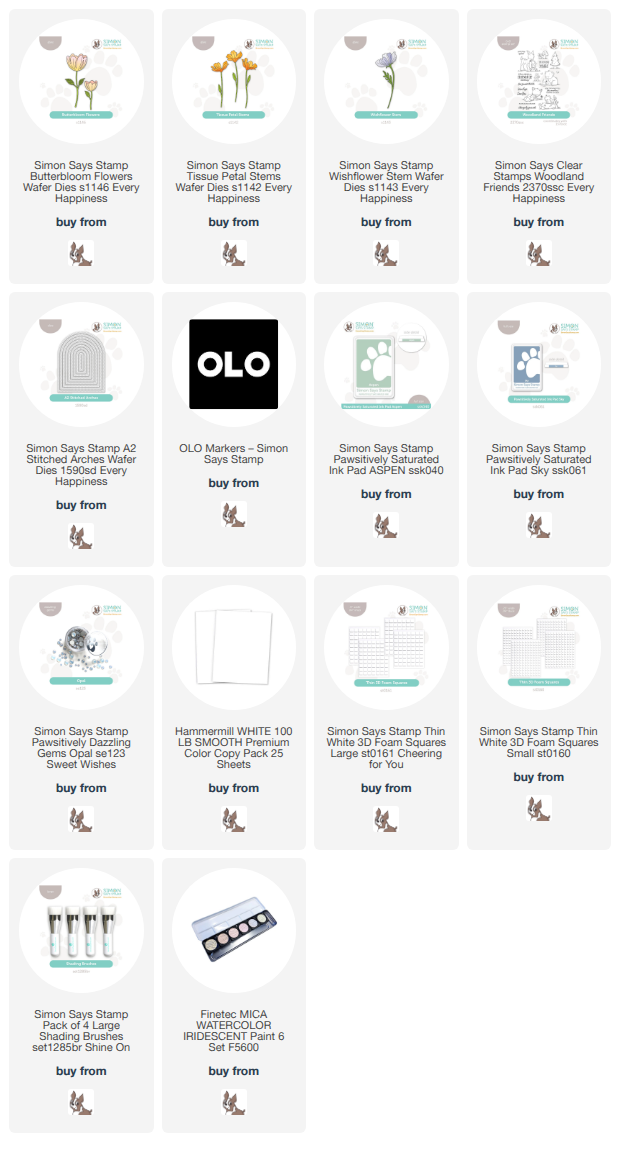
To begin, I die cut the new Wildflower Stem, Tissue Petal Stems, and Butterbloom Flowers dies from plain white cardstock. I then used my OLO Markers to color them in a gorgeous trio of peach, bubblegum, and mauve, taking care to add extra deep shadows on the die cuts that would be placed in the back of each flower to give a bit of extra dimension. Once I had colored all of the blooms, I assembled them with liquid and foam adhesive for lots of interest and dimension!

I wanted to create a simple frame around my blooms, so I die cut a new A2 Stitched Arches die from the center of an A2 panel of white cardstock. Behind the blooms, I needed a simple “sky” and a “meadow,” so I used Shading Brushes to blend Sky & Aspen Pawsitively Saturated Inks at the top and bottom of a new panel of white A2 cardstock, allowing the color to fade in the center so that they did not mix together. Once I had finished blending, I splattered the entire blended background with iridescent glitter watercolors for a bit of whimsy and shimmer!

For the greeting, I silver embossed a sentiment from the new Woodland Friends set and die cut it with it’s coordinating die. A simple, somewhat small sentiment nestles perfectly amongst my meadow of wildflowers! I popped up the arched frame on my blended panel with some thin foam adhesive, then arranged the blooms and foliage within the window, adhering the die cuts with both liquid and foam adhesive for maximum dimension. I tucked the greeting in a bare spot amongst the blooms, adhering it with a double layer of foam adhesive. Finally, I added some Opal Pawsitively Dazzling Gems for additional sparkle!

Well, that’s all for my project today! I just love when different products are scaled so perfectly that they work together seamlessly, like they were designed to do so! Thanks so much for stopping by today, and have a marvelous day!

Filed Under: simon says stamp Tagged With: a2 stitched arches, butterfbloom flowers, die cutting, ink blending, no line coloring, olo markers, tissue petal stems, wishflower stem, woodland friends

  • « Go to Previous Page
  • Page 1
  • Page 2
  • Page 3
  • Page 4
  • Interim pages omitted …
  • Page 26
  • Go to Next Page »

Primary Sidebar

  • Facebook
  • Instagram
  • Pinterest
  • YouTube

Favorite Shops

Secondary Sidebar

Subscribe

Enter your email address to subscribe to this blog and receive notifications of new posts by email.

Instagram
Something is wrong.
Instagram token error.
Follow
Load More

Archives

Tags

3D embossing folder alcohol markers better press birthday birthday card blog hop card kit christmas christmas card christmas tag colored pencil copic copic coloring Daniel Smith die cutting embossing folder embroidery felt giveaway holiday holiday card hot foil ink blending karin brushmarker pro layered stencil masculine my monthly hero new release no line coloring no line watercolor OLO marker olo markers original illustration pawsitively saturated rainbow shaker card slimline stamping stamptember stencil thank you thinking of you valentine's day video watercolor

Popular Posts

Simon Says Stamp Sending Cheer Blog Hop- Day 2 + Freebie + Giveaway!
Altenew October 2026 Release Blog Hop + Giveaway!
Altenew Build A Flower Sweet Violet+Giveaway!
Floral Follies on Canvas with New Simon Says Stamp STAMPtember!
Simon Says Stamp Card Kit November 2026: Jolly Season!
Simon Says Stamp STAMPtember Tim Holtz Collaboration: Festive Holidays!
Altenew March 2020 Release Blog Hop+Giveaway!
Honey Bee Stamps Bee Bold Release Blog Hop!
Waffleflower July Release Blog Hop!
Altenew Paint A Flower: Carnation Blog Hop+Giveaway!

Disclosure

Some affiliate links are used in my posts. This means that, should you click on one of my links and purchase something from that company, I will receive a small portion of the sale at no extra cost to you. I use the money earned from these sales to help maintain my blog. I so appreciate you visiting and, if you do choose to use one of my affiliate links, thank you so much for your support!
Copyright © 2026 ·Brunch Pro Theme · Genesis Framework by StudioPress · WordPress · Log in
Loading Comments...