• Skip to main content
  • Skip to primary sidebar
  • Skip to secondary sidebar

Sixth Street Sundries

Emily Midgett

  • Home
  • About Me
  • Contact
  • OLO Marker Color Swatch Chart
  • Shop

ombré

Sunset Valentines For Guys with New Simon Says Stamp!

January 27, 2026

This post was sponsored by Simon Says Stamp. Thanks, Simon! *I have gathered links to all of the products used at the bottom of the post for your convenience, using affiliate links at no extra cost to you. Thank you for shopping with my links! I truly appreciate your support for my work!*

Hi friends! I am back with some non-traditional valentines today that are perfect for that persnickety “man’s man” in your life, one who might not love flowers and lace on his valentine! My husband isn’t too bothered by feminine imagery, but he absolutely loves sunsets and has asked me for years to create a watercolored sunset painting for him. I thought this would be a perfect visual to incorporate into his valentine using some of the new goodies from the Heart to Heart Release from Simon Says Stamp (click HERE to check out the entire release!). Let’s get started on the details!

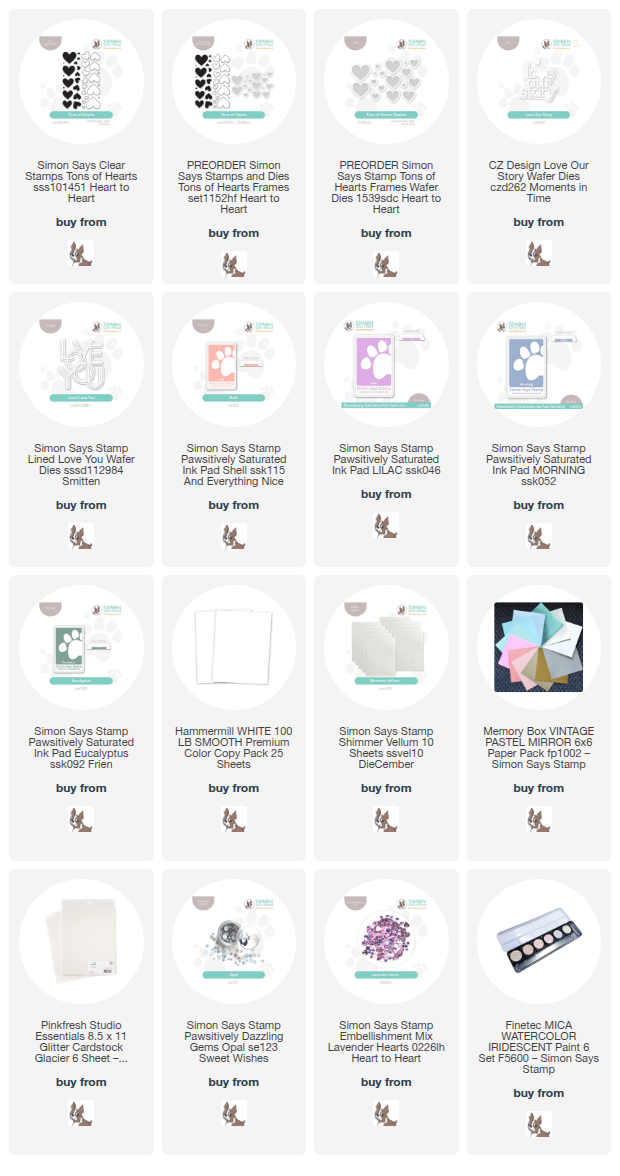
My projects evolved from this leftover watercolored ombré background. I had an extra background from some experimenting that I had been doing, and thought that it would make a perfect sunset valentine for my husband! I knew that I wanted to incorporate stamped hearts, so I selected Pawsitively Saturated Inks in shades of Shell, Lilac, Eucalyptus, and Morning and stamped a bunch of solid heart images using the new Tons of Hearts stamps, then cut them out with their coordinating dies.

For my first project, I started by using the shadow die from the new Love Our Story sentiment die set to cut a window in a panel of white A2 cardstock. I then backed that window with some vellum and added an iridescent white die cut “love our story” detail cut, created with iridescent mirror gloss cardstock. To add a little extra interest, I filled the area behind the vellum window with the new Lavender Hearts Embellishment to create a fun shaker card!

I created a visual cascade down the card front with some of the stamped solid hearts, working in rainbow order from pink to green, and filling in some of the gaps with sparkling white glitter die cuts created using the Tons of Hearts Frames dies. I popped some up with thin foam adhesive, then used liquid glue to adhere the glittering hearts. The final touch was a few sparkling Opal Pawsitively Dazzling Gems! The white space, the muted colors, the shaker component… I think this is a great valentine for a not-super-mushy kind of guy!

This card features the watercolored background that started both of today’s projects. It was from this background that I selected the ink colors to use with the solid stamped hearts with Pawsitively Saturated Inks in shades of Shell, Lilac, Eucalyptus, and Morning. I used some of the leftover stamped hearts from the first card, as well as a die cut Lined Love You. I die cut the shadow of the sentiment die cut using Simon Says Stamp Shimmer Vellum, then cut the detail sentiment layer from some iridescent white mirror cardstock. I love the subtle iridescent shimmer that it brings to the card!

Before I started arranging the die cuts on the watercolored background, I used some sparkling mica watercolors to splatter some shimmer on the background. The color fading from warm blush to muted turquoise definitely puts me in mind of a Caribbean sunset, so I had to add some water “sparkles”! After the splatters were dried, I used clear dimensional adhesive to add the sentiment die cut to the center of the watercolor panel, then tucked stamped hearts in a variety of sizes, as well as a few standalone glitter heart die cuts. Finally, I added a few Opal Pawsitively Dazzling Gems for some added sparkle and texture!

Well, that’s all for my projects today! Do you find it easy to make valentines for the guys in your life? I have three boys so I’m going to have to keep working on this genre!! Thanks so much for stopping by today, and have a marvelous day!
Filed Under: simon says stamp, Uncategorized Tagged With: ink blending, lined love you, love our story, masculine, ombré, shaker card, tons of hearts, valentine, valentine's day, watercolor

Ombré Groovy Flowers with New Simon Says Stamp!

August 5, 2025

This post was sponsored by Simon Says Stamp. Thanks, Simon!

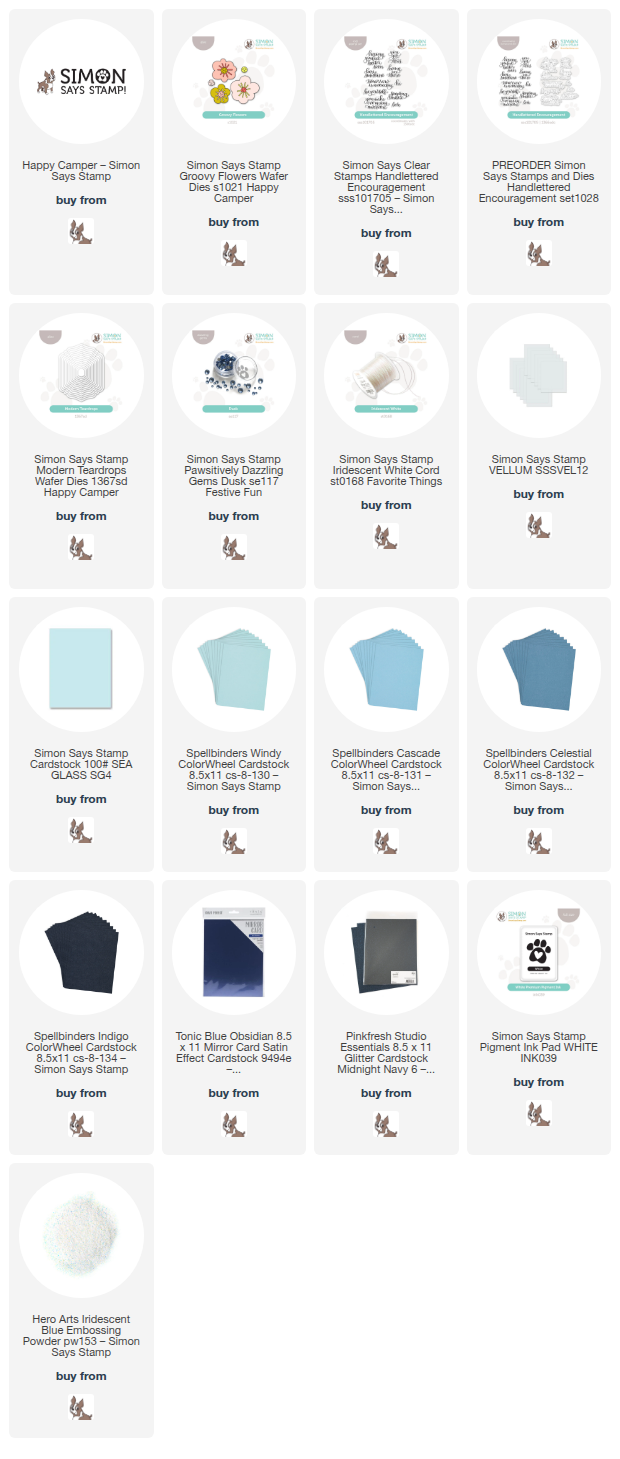
Hi friends! I am back with another blue-tiful project today using goodies from the new Simon Says Stamp Happy Camper release! I was inspired by the colors that I used for THIS project to create a blue ombré floral cascade as a background for my project. I pulled out a bunch of blue cardstock, some gorgeous mirror foil cardstock, and some exquisite navy blue glitter cardstock to create this unique background. Let’s get started with the details on my project!

*I have gathered links to all of the products used at the bottom of the post for your convenience, using affiliate links. Thank you for shopping with my links! I truly appreciate your support for my work!*

I began my project by selecting 5 different shades of blue cardstock from my stash that worked beautifully together going from light to dark. I die cut the three sizes of florals from the Groovy Flowers die set twice from each color so that I would have plenty of flowers available to build my background. I also die cut the flower centers from navy blue foil and Pinkfresh Midnight Navy cardstock. I assembled each flower with liquid adhesive, then began arranging the flowers on my background, working in a diagonal ombré down the front of my A2 card panel in a sixth shade of blue! I just love how these blue shades pop so beautifully from that mid-blue background.

After I had assembled my flowers and determined placement on my card front, I used Simon Says Stamp Thin Adhesive Squares to adhere each flower to the card front, adding a touch of dimension without adding a ton of bulk to my card. I arranged them in a diagonal in an attempt to create a background that was a bit different from the typical horizontal ombré arrangement.

Once I had the background finished, I turned my attention to the sentiment. I stamped a lovely greeting from the newly-redesigned Handlettered Encouragement set onto some of the same mid-blue cardstock that I used for the background of my ombré florals. I stamped the sentiment using Simon Says Stamp White Pigment Ink, then added my favorite Iridescent Blue Embossing Powder over the top to lock the crisp white stamped sentiment in and add some gorgeous iridescent shimmer.

I die cut the finished greeting with it’s coordinating die, then die cut a Modern Teardrops die from some vellum. The vellum behind the sentiment helps keep the greeting from getting lost in the busy background without adding any additional color or bulk to the card! I popped up the sentiment die cut on the vellum with some more Thin Foam Adhesive, then trimmed off the excess vellum and added liquid adhesive behind the solid die cut to keep the vellum nice and clean. Finally, I added some Dusk Pawsitively Dazzling Gems and a pretty bow tied with some Simon Says Stamp Iridescent White Cord.

Well, that’s all for my project today! I love a good ombré moment, don’t you? I am always up for new ways to use my copious collection of colored cardstock! (Does anybody watch Paw Patrol with their kids? I sound like Cap’n Turbot with that alliteration! Ha!) I think that this card would look lovely in so many different colorways. Thanks for stopping by today, and have a marvelous day!

Filed Under: simon says stamp Tagged With: colored cardstock, die cutting, groovy flowers, handlettered encouragement, modern teardrops, ombré, vellum

Thanks for Everything with New Simon Says Stamp + SALE!

May 9, 2025

This post was sponsored by Simon Says Stamp. Thanks, Simon!

Hi friends! Boy do I have a fun card for you today using the new Sweet Tiny Flowers die from the latest  You Are My Favorite Release! Sometimes, small images are tricky to work into a card outside of accenting a larger focal point. However, whenever I am presented with a tiny image, my initial thought is “repetition.” Tiny images can be tricky to work with, but if you repeat them or create a fun pattern, they can become a focal point on their own merit. For today’s project, I used some pretty colored cardstock scraps that I had in my stash to create this vibrant and dramatic cascading floral rainbow. Let’s get started with the details on my card!

*I have gathered links to all of the products used at the bottom of the post for your convenience, using affiliate links. Thank you for shopping with my links! I truly appreciate your support for my work!*

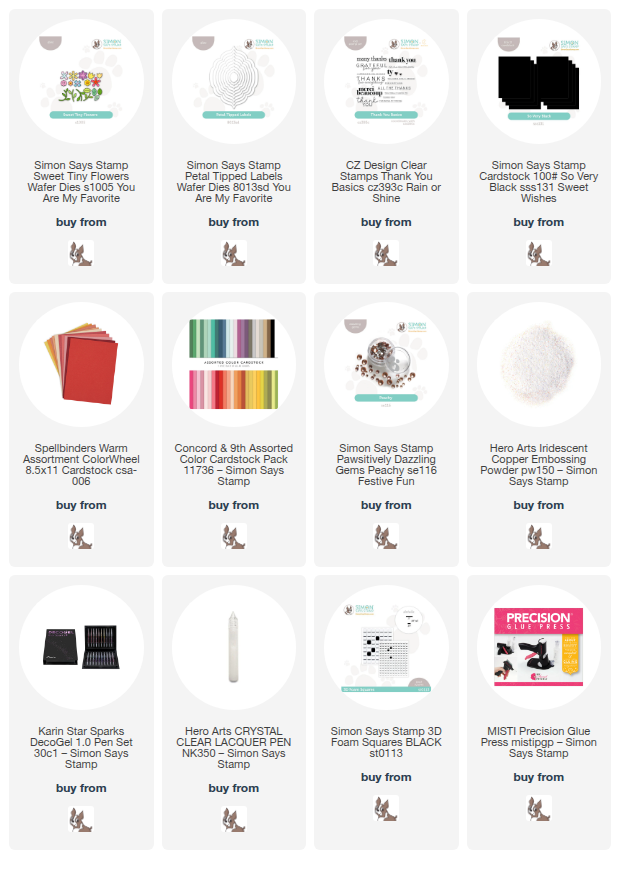
To begin, I die cut the flowers from the new Sweet Tiny Flowers die set from six different shades of cardstock, creating a pale peach to vibrant fuchsia ombré. I also die cut the foliage from some gorgeous and intense teal cardstock. I love this orange and fuchsia combination; I like to think of it as my “fiesta” color palette! It looks so striking on the stark black cardstock.

I knew that I wanted to arrange the flowers around a heat embossed sentiment, so my next step was to heat emboss a greeting from Thank You Basics onto some more black cardstock using Hero Arts Iridescent Copper Embossing Powder. I used my sharp scissors to cut the sentiment out, then die cut one of the new Petal Tipped Labels from some Simon Says Stamp So Very Black cardstock and mounted it in the center of a full A2 panel of the same black cardstock using Simon Black Foam Squares. I adhered the sentiment piece to the label with some more black foam adhesive squares, offsetting it to the left to leave plenty of room for my ombré floral cascade.

Once I had my background complete, I then began arranging the flowers on the Petal Tipped Label die cut, curving them around the sentiment and arranging them in a lush swag, keeping the individual colors together to create that ombré effect. I used foam adhesive to pop some flowers up, while I used liquid adhesive to adhere the foliage and some of the smaller flowers. To accent the center of each flower, I added dots of sparkling gel pen and then covered that with some Hero Arts Clear Lacquer to add that touch of height and texture. Finally, I added a few Peachy Pawsitively Dazzling Gems to fill in any gaps in the bouquet and add some sparkle!

Well, that’s all for my project today.

Use code MAMA to take $15 off of your purchase of $100 or more! This offer expires at 11:59 pm on May 11, so be sure to take advantage! What a great way to treat yourself or a special momma in your life!

Thanks so much for stopping by today, and have a marvelous day!

Filed Under: simon says stamp Tagged With: CZ design, die cutting, ombré, petal tipped labels, sweet tiny flowers, thank you basics, thank you card

Create A Colorful Life Shaker Card with Simon Says Stamp!

June 26, 2024

This post was sponsored by Simon Says Stamp. Thanks, Simon!

Hi friends! I have a fun ombré shaker card to share with you today using some beautiful new goodies from the Simon Says Stamp Sunny Vibes release from last week! You might have seen this project during the live last week (you can catch the replay HERE) and so I thought I would give a rundown of how I created this project. I am going to try to get a video filmed featuring this technique, so be on the lookout for that! I took a poll in my Instagram Stories asking whether videos with no voice over, just occasional subtitles and music, would be of interest, and the answers were overwhelmingly yes! So now I am going to try to get at least one video posted a week with this simpler format. If there are any techniques or projects from past posts that you would like to see on video, please don’t hesitate to let me know! Let’s get started on the details for this project.

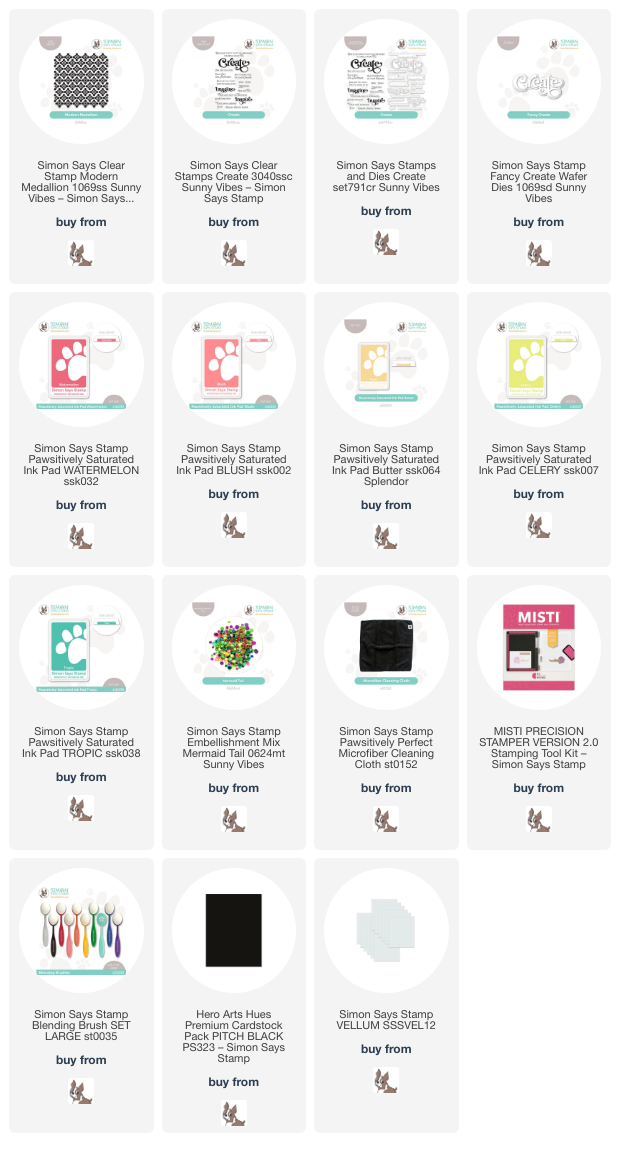
For today’s project, I am using the beautiful new Modern Medallions stamp set. The bold pattern was perfect for this ombré stamping technique, and when paired with tone-on-tone ombré blending, it creates such a beautifully vibrant background, perfect for a shaker card! I started by stamping the Modern Medallions background stamp onto a panel of white cardstock with my MISTI using the following Pawsitively Saturated Inks: Watermelon, Blush, Butter, Celery, Tropic. To achieve this smooth ombré, I first tapped my Watermelon ink pad on the top of the stamp, then used the new Simon Says Stamp Microfiber Cloth to tap the edge of the ink line, smoothing it out and creating an area for a smoother fade into the next color. I stamped the first color, cleaned my stamp, then tapped Blush ink onto the next “strip” of the stamp, tapping both the top and bottom of the ink stripe to create that smooth fade from one color into the next. I repeated the process with all of the ink colors until I had this pretty rainbow ombré!

Before moving the stamped panel and stamp from my MISTI, I inked up the Modern Medallions stamp once more, covering the entirety of the image with embossing ink and adding clear embossing powder to the image. The paper shifted ever so slightly when I was doing my stamping, so the clear embossing was just the tiniest bit off from the colorful stamped image. I then used blending brushes to blend the same colors over the top of the stamped image, creating a tone-on-tone ombré overlay. The colors of the stamped image are much more intense than the blended version, creating this fun tone-on-tone backgorund. I trimmed the panel down slightly and created a shaker pocket with some leftover stamp packaging. I filled the shaker with the new Mermaid Tail sequins and mounted it on a full sized A2 panel of black cardstock, creating a crisp black border around the edge of my colorful shaker background.

For the greeting, I kept things simple with a heat embossed sentiment from the new Create stamps and coordinating dies. I heat embossed this uplifting sentiment onto Pitch Black cardstock using white embossing powder, then die cut it with the coordinating dies. I also die cut the Create die, cutting the detail layer from more Pitch Black cardstock and the shadow layer from vellum. I popped up the sentiment pieces on the front of the shaker panel using foam adhesive squares!

Well, that’s all for my project today! I tend to stick to cooler rainbow colors, so it was fun to go outside of my normal comfort zone, and especially to create this shimmery shaker card. I will try to get the video posted for this technique early next week, if you are interested!! Thanks so much for stopping by today, and have a marvelous day!
Filed Under: simon says stamp Tagged With: create, flat shaker, modern medallion, ombré, rainbow, shaker, sunny vibes

Boo and Some EEK!

October 30, 2023

This post was sponsored by Simon Says Stamp. Thanks, Simon!

Hi friends! While I was working with the autumnal color palette on the project in THIS post, I was inspired to make a Halloween card using some cute Halloween goodies from Simon Says Stamp. I don’t really do “scary” Halloween, because the world is scary enough, but cute kitties and pumpkins are definitely okay with me, and a kitty with a witch hat is just about as cute as it gets!! I added in some red and pale peach to the more traditional Halloween color palette to create this unique ombré background. Let’s get started with the details!

To start, I used blending brushes to blend Rainbow Splash Scarlet, Pawsitively Saturated Pucker, Rainbow Splash Pumpkin, and Pawsitively Saturated Peachy ink down the front of a white A2 card front. (I actually created two panels, intended to do some tone-on-tone die cut layers, but ended up saving the second blended panel for an upcoming project!) I love how this ombré background positively glows with color, but it’s definitely a unique color palette for a Halloween card! I die cut the Halloween Stack die from the bottom right corner, reserving the center of the die cut pieces. I added some orange glitter cardstock behind the negative die cut space and added centers of the die cut letters back to their proper spot with some liquid adhesive.

Next, I die cut the Spooky Cat die from some black Pawsitively Velvet Luxury Cardstock, cutting the details and hat from some black and orange glitter papers. Nothing says “cute kitty witch” like a glittery black witch hat! I also die cut some pumpkins and leaves using the Lovely Layers Fall Bounty from Honey Bee Stamps and colorful cardstock, blending around the edges with the same shades of ink used for the background.

I arranged the die cuts in a cluster on the blended background, using foam and liquid adhesive to add extra dimension and interest. Finally, I added some Topaz Twinkle gems from Trinity Stamps for one more bit of sparkle!

Well, that’s all for my project today! It turned quite cold in time for Halloween, so it will be a chilly evening taking all of my kiddos trick-or-treating. We have Bumblebee the Transformer, one of the witches from Hocus Pocus, a knight, and a prince to escort around. I hope it’s warmer where you are!! Thanks so much for stopping by today, and Happy Halloween!

Filed Under: simon says stamp Tagged With: halloween, halloween stack, lovely layers fall bounty, ombré, spooky cat

  • Page 1
  • Page 2
  • Go to Next Page »

Primary Sidebar

  • Facebook
  • Instagram
  • Pinterest
  • YouTube

Favorite Shops

Secondary Sidebar

Subscribe

Enter your email address to subscribe to this blog and receive notifications of new posts by email.

Instagram
Something is wrong.
Instagram token error.
Follow
Load More

Archives

Tags

3D embossing folder alcohol markers better press birthday birthday card blog hop card kit christmas christmas card christmas tag colored pencil copic copic coloring Daniel Smith die cutting embossing folder embroidery felt giveaway holiday holiday card hot foil ink blending karin brushmarker pro layered stencil masculine my monthly hero new release no line coloring no line watercolor OLO marker olo markers original illustration pawsitively saturated rainbow shaker card slimline stamping stamptember stencil thank you thinking of you valentine's day video watercolor

Popular Posts

Simon Says Stamp Sending Cheer Blog Hop- Day 2 + Freebie + Giveaway!
Altenew October 2026 Release Blog Hop + Giveaway!
Rustic Monochromatic Stars for Christmas with Rainbow Splash!
Hero Arts Partners Blog Hop: Lawn Fawn!
Waffleflower July Release Blog Hop!
December 2018 My Monthly Hero Blog Hop + Giveaway!
March 2020 Essentials By Ellen Blog Hop+Giveaway!
The Ton Anniversary Release: Day 1!
The Ton Stamps Summer Release: Day 1
Autumn Legs with Colorado Craft Company and Catherine Pooler!

Disclosure

Some affiliate links are used in my posts. This means that, should you click on one of my links and purchase something from that company, I will receive a small portion of the sale at no extra cost to you. I use the money earned from these sales to help maintain my blog. I so appreciate you visiting and, if you do choose to use one of my affiliate links, thank you so much for your support!
Copyright © 2026 ·Brunch Pro Theme · Genesis Framework by StudioPress · WordPress · Log in
Loading Comments...