• Skip to main content
  • Skip to primary sidebar
  • Skip to secondary sidebar

Sixth Street Sundries

Emily Midgett

  • Home
  • About Me
  • Contact
  • OLO Marker Color Swatch Chart
  • Shop

ombre

Once Upon A Dream with Simon Says Stamp!

August 30, 2024

This post was sponsored by Simon Says Stamp. Thanks, Simon!

Hi friends! I am back with a pair of projects today featuring a new stamp set illustrated by my incredibly talented friend Alberto Gava for Simon Says Stamp: Once Upon A Dream. I definitely had to keep this set under lock and key from my 10 year old daughter… she immediately started squealing when it arrived in the mail! I thought I would make some customized projects for today’s post using this adorable set, including a custom notebook just for her. Let’s get started with the details!

I wanted to use as many of the images in the sweet Once Upon A Dream set, so I stamped lots of them on some white cardstock using black pigment ink and embossed them with clear embossing powder. While it’s not recommended to use alcohol markers with embossed images, I occasionally will use my Copic or OLO markers with clear embossed black outline images, because the clear embossing powder seems to make those black lines so much crisper and more visible. When using cute images like these, I want to have those crisp black lines to help the images stand out even more!

For my first project, I used the Princess Aurora image with the fairies, coloring her dress with some pretty pink and adding some violet down at the bottom of her skirt, channeling the final scene in the movie when her dress is changing from pink to blue over and over! I stamped the images from Once Upon A Dream using black pigment ink and clear embossed them, then used Copic markers to add color to the images in the classic Sleeping Beauty color palette.

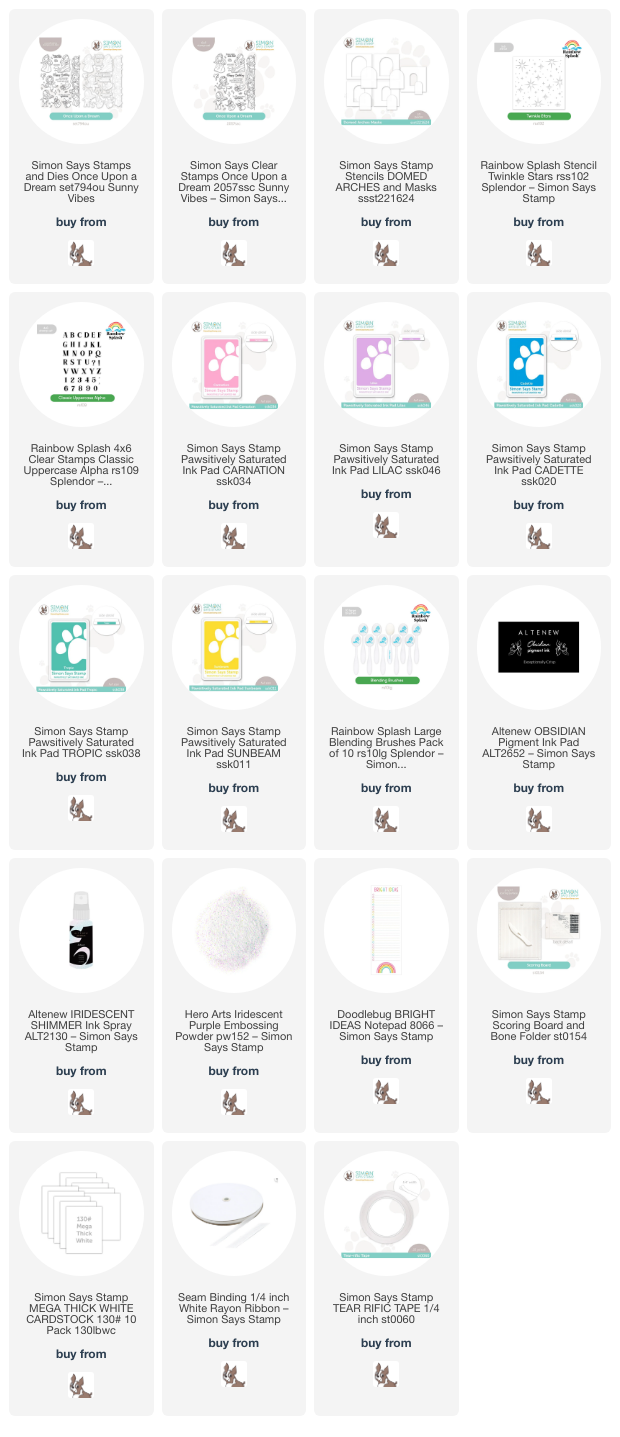
To create the background for my die cut images, I placed one of the Nested Domed Arches Masks + Stencils in the center of a white A2 card front, then used blending brushes to blend Pawsitively Saturated Ink in shades of Carnation, Lilac, Cadette, and Tropic inks in an ombré. With the arch stencil still in place, I added the Rainbow Splash Twinkle Stars stencil over the top of the open area and spritzed the twinkling star pattern with iridescent shimmer spray. I love this technique; it adds just the right amount of magical sparkle, which works perfectly with the sweet sentiment from Once Upon A Dream! Just for extra shimmer, I splattered some iridescent glitter watercolors on the stenciled dome, too. I trimmed down the sides (I hadn’t gotten the arch stencil centered 100% perfectly, and so needed to do some maneuvering) and added strips of holographic foil cardstock on either side. I popped up the images and greeting die cuts with foam adhesive, then added a few shimmering gems for added sparkle!

As a bonus project, I decided to create this sweet little notebook for my daughter. I have been trying to organize some of my older craft supplies, and I found a stash of skinny notepads perfect for customizing with inspirational sentiments and colorful images! (I’m not sure where exactly I purchased the notepads that I used, but these notepads from Doodlebug are similar!) The princesses from Once Upon A Dream peeking around the corner was the perfect size to adorn the front of my notebook cover, which I created using the Simon Says Stamp Score Board and some of the heavyweight 130 lb Mega Thick Cardstock from Simon, customizing the cover to the measurements of the notepad. (I will have a video on how I created this project very soon!) I closed the cover for the notebook by adding some 1/4″ white ribbon and adhering it with some Tear-rific Tape.

To decorate the cover of the notebook, I used Pawsitively Saturated Ink in shades of Carnation, Lilac, Cadette, Tropic, and Sunbeam to blend a vibrant rainbow down a panel of white cardstock that fit perfectly over the front of my notebook cover. I also splattered it with some more iridescent glitter watercolors for added shimmer and magic!

After I’d created my notebook cover, I decided to personalize it for my daughter. She’s like me and loves a pretty notebook and a good pen, and she is always on the lookout for things with her initials, so I knew that she would flip out over a completely personalized notebook with rainbows and princesses! I used the Rainbow Splash Classic Uppercase Alpha to personalize it, stamping the letters in black pigment ink and covering them with Iridescent Purple embossing powder. The combination of the black letters with the shimmery, semi-translucent purple embossing powder creates such a unique look! I added all of the die cut elements to the front of the notebook cover with some foam adhesive, finally finishing the project off with some sparkling gems! And yes, I gave it to my daughter, and yes, she did love it. 🙂

Well, that’s all for my projects today! It’s so fun to step outside of my comfort zone with cute and sweet images like these from Once Upon A Dream. Thanks so much for stopping by today, and don’t forget that Simon Says Stamp’s month-long STAMPtember celebration begins on September 1! There are so many amazing surprises in store for you… I can’t wait! Have a marvelous day, friends!
Filed Under: simon says stamp Tagged With: classic uppercase alpha, copic coloring, ink blending, nested domed arches, notebook, notepad, ombre, personalized, princess, rainbow, stencils, twinkle stars stencil

Hero Arts Winter 2020 Catalog Release Blog Hop+Giveaway!

August 26, 2020

Hi there! Are you ready for some Christmas spirit today? Hero Arts is officially unveiling their Winter 2020 Catalog today, and we are celebrating all of the gorgeous new products with a blog hop and giveaway! You should have arrived here from Debi Adams’s blog, and your next stop is Ilina Crouse. I have two non-traditional holiday projects for you today, both an homage to my favorite shade of ink from Hero Arts: Raspberry Jam. (It’s just the perfect shade of pinky red, and something so fun and different for holiday cards!) Let’s get started with the details on my projects.

For my first project, I combined the new Christmas Rose Bold Prints background stamp with the beautiful Color Layering Poinsettia Tree and dies. I began by stamping the Christmas Rose background on a panel of Peony Hero Hues cardstock using Soft Blossom ink. I then used a blender brush to blend some Unicorn White ink in the center to soften the pattern a bit and create a more solid background for my floral Christmas tree!

I stamped the beautiful new Color Layering Poinsettia Tree on some more Peony cardstock using Raspberry Jam, Bubble Gum, and Unicorn White inks, as well as some gifts. I cut everything out with the coordinating Frame Cuts. For the greeting, I heat embossed the “Happy Holidays” on a strip of Plum cardstock using white embossing powder. I trimmed down the floral, tone-on-tone background panel and matted it on an A2 panel of Plum cardstock, then mounted the tree and gift die cuts in the center using foam adhesive.

For my second project, I used the fabulous new Snowflake Swirl Bold Prints for my background, doing some ombre inking using the Hero Arts branded MISTI. To achieve this look, I first stamped the top third of the Snowflake background using Rose Madder ink, softening the edges of it a bit with a microfiber towel. I stamped it on my white cardstock and repeated the process again to get a good saturation of color. Next, I did the same thing across the center segment of the stamp using Raspberry Jam ink, softening the edges at top and bottom to create a seamless blend between the two cards. Finally, I added Grape Juice ink on the bottom, creating a lovely, non-traditional snowflake ombré on my white cardstock! The formulation on the Hero Arts inks make techniques like this so much easier, because the formula actually spreads and smooths as it dries, so the colors change smoothly, as well.

To create the shaker window, I die cut the new Joy Ornament Fancy Die from the center of the snowflake card front, as well as from some white cardstock. I backed the circular cutout on the card front using acetate, then inlaid the Joy die cut on the acetate using liquid adhesive. I added foam adhesive around the shaker opening, then added some fun iridescent sequins, finally backing it with a full A2 panel of Plum cardstock.

Well, that’s all for my projects today! These new holiday products are absolutely marvelous. Totally will get you in the holiday cardmaking spirit, even if it is super hot outside haha! Now, for some fun giveaway information:

Hero Arts will give away three $50 gift cards, drawn from the comments left across the hop. Enter by leaving a comment between now and Sunday, September 6th at 11:59pm Pacific, and the winner will be announced on the Hero Arts blog the following week. The more comments you leave, the more chances you have to win!

Your next stop is Ilina Crouse. Thanks so much for stopping by today, and happy hopping!

Filed Under: Hero Arts, holiday card Tagged With: christmas rose, color layering poinsettia tree, ink blending, joy ornament, ombre, shaker card, snowflake swirl

Watercolor Blog Hop with Avery Elle and Ellen Hutson!

March 23, 2018

 Good morning! Today, the Ellen Hutson Design Team has a special treat for you today… we are partnering with the Avery Elle Design Team to bring you a blog hop featuring the new Avery Elle Liquid Watercolors!

For today’s hop, I have created a fairly whimsical card… a far different aesthetic than the card that I created for my video. I love how Avery Elle has such an eclectic collection of styles! I have really enjoyed playing with these liquid watercolors recently. I had a video up on the Ellen Hutson blog earlier this week (which you can see here or watch here on YouTube) in which I discuss my thoughts on these new watercolors. They are great fun, especially if you’re new to watercoloring. They have a great price point for just getting your feet wet, too.

For my project, I use the absolutely darling Pixie Dust stamp and die set from Avery Elle and combined it with a pretty ombre wash background to create a whimsical fairy card! To create the ombre wash, I taped my Arches A2 sized panel to a cutting board, then used a wide wash brush to add Sapphire Liquid Watercolors to the top of the panel and Cherry to the bottom, mixing the two in the center to create a sunset effect. (You can watch the technique in action in the video mentioned above!)

For the fairies, I die cut and silver heat embossed the fairies and some clouds onto some more Arches Cold Press watercolor paper, then watercolored them with a variety of the Liquid Watercolors, mixing and matching to create the hair and skin tones. For brown, I mix colors on the opposite sides of the color wheel, mainly oranges and greens. For the silvery black haired fairy on the bottom, I mixed Sapphire with Mimosa and Sea Glass. I don’t know that I could replicate these exact shades again… there was a lot of mixing and matching going on until I got what I wanted haha!

I also die cut some vellum clouds (the Avery Elle clouds that I used are discontinued, but I’ve linked some comparable dies at the bottom!) and arranged my little scene on my card front. I adhered everything using dimensional adhesive, hiding the adhesive behind the fairies and solid clouds so that it wouldn’t show through the vellum. I also silver heat embossed the greeting from Pixie Dust onto the ombre card front. The final touch was some jewels from Pretty Pink Posh.

Well, that’s all for my project today! You definitely don’t want to miss any of the stops on this hop; the inspiration and tips on these new watercolors are absolutely fantastic! What’s a blog hop without prizes, right? Head on over to The Classroom to learn all of the details on how you can win some blog candy!!

Avery Elle
Julie Ebersole
Caryn Davies
Lisa Spangler
Heather Campbell
Emily Midgett<— you are here!
Yainea
Melania Deasy
Carissa Wiley
Katie Gehring
Amy Kolling
Carly Tee Minner
Ashley Marcu
Elena Roussakis
Laurel Beard

Sandy Allnock

Well, that’s all for me today! Have a marvelous Friday! Happy Hopping! 🙂


Filed Under: avery elle, Ellen Hutson, watercolor Tagged With: blog hop, fairies, liquid watercolors, ombre

World Cardmaking Day!

October 7, 2017

Hi again! I hope you all are enjoying the festivities for World Cardmaking Day! To see my collaboration project with Honey Bee Stamps and Chibitronics, click here. 

One of my absolute most favorite companies, Concord and 9th, is hosting a celebration for World Cardmaking Day, as well! To enter, you just have to post a Concord and 9th project on social media using the #C9WCMD. Here’s my project:
I’m starting to get a little anxious that I have so few holiday cards completed… like truly, it gives me anxiety lol. I have a long list of people to whom I send holiday cards, and for some reason, I haven’t been in the holiday cardmaking spirit yet. I usually start listening to my holiday Pandora station in August to get myself ready for it… maybe it has something to do with the limited snatches of time I get to work in my office. Anyway, I’m trying to build up my stash. I love the fonts in the Concord and 9th word dies… I’m a sucker for a beautiful font. The Season of Cheer stamps and dies immediately called to me. I started by stamping the pine boughs in an ombre color scheme using the lightest three of the Sea Shore inks from Altenew and my MISTI.

I wanted my sentiment to pop on those pretty greens, so I die cut the greeting from some cranberry red card stock and adhere dit to the card front, then covered it with Icicle Stickles. Finally, I added a few of the greenery sprigs and berries (included in the Season of Cheer dies) and covered them with Stickles, as well.

That’s it! Simple, easily mailed… that’s like the biggest challenge of my Christmas cardmaking. “How can I make this flat enough to be mailed without extra postage?” Ha!

I hope you’ve had some fun today on World Cardmaking Day! Have a fabulous weekend!

Filed Under: altenew, Concord and 9th Tagged With: holiday card, ombre, one layer card, stamping

Primary Sidebar

  • Facebook
  • Instagram
  • Pinterest
  • YouTube

Favorite Shops

Secondary Sidebar

Subscribe

Enter your email address to subscribe to this blog and receive notifications of new posts by email.

Instagram
Something is wrong.
Instagram token error.
Follow
Load More

Archives

Tags

3D embossing folder alcohol markers better press birthday birthday card blog hop card kit christmas christmas card christmas tag colored pencil copic copic coloring Daniel Smith die cutting embossing folder embroidery felt giveaway holiday holiday card hot foil ink blending karin brushmarker pro layered stencil masculine my monthly hero new release no line coloring no line watercolor OLO marker olo markers original illustration pawsitively saturated rainbow shaker card slimline stamping stamptember stencil thank you thinking of you valentine's day video watercolor

Popular Posts

Simon Says Stamp October 2026 Card Kit of the Month: Homespun Gratitude!
Honey Bee Stamps Cheerful Love Blog Hop!
Altenew Craft A Flower: Poppy Blog Hop+Giveaway!
Autumn Legs with Colorado Craft Company and Catherine Pooler!
Simon Says Stamp Cozy & Bright Inspiration, Part Two!
February 2018 My Monthly Hero Blog Hop!
The Ton Anniversary Release- Day 2
Sunflower Home Decor with Simon Says Stamp!
Simon Says Stamp STAMPtember Surprise: Boo Bundle Halloween Card Kit!
Hero Arts Spring 2020 Catalog Release Blog Hop+Giveaway!

Disclosure

Some affiliate links are used in my posts. This means that, should you click on one of my links and purchase something from that company, I will receive a small portion of the sale at no extra cost to you. I use the money earned from these sales to help maintain my blog. I so appreciate you visiting and, if you do choose to use one of my affiliate links, thank you so much for your support!
Copyright © 2026 ·Brunch Pro Theme &middot; Genesis Framework by StudioPress &middot; WordPress &middot; Log in
Loading Comments...