• Skip to main content
  • Skip to primary sidebar
  • Skip to secondary sidebar

Sixth Street Sundries

Emily Midgett

  • Home
  • About Me
  • Contact
  • OLO Marker Color Swatch Chart
  • Shop

ornament

Floral Holiday Inspiration with New Simon Says Stamp!

January 23, 2026


This post was sponsored by Simon Says Stamp. Thanks, Simon!

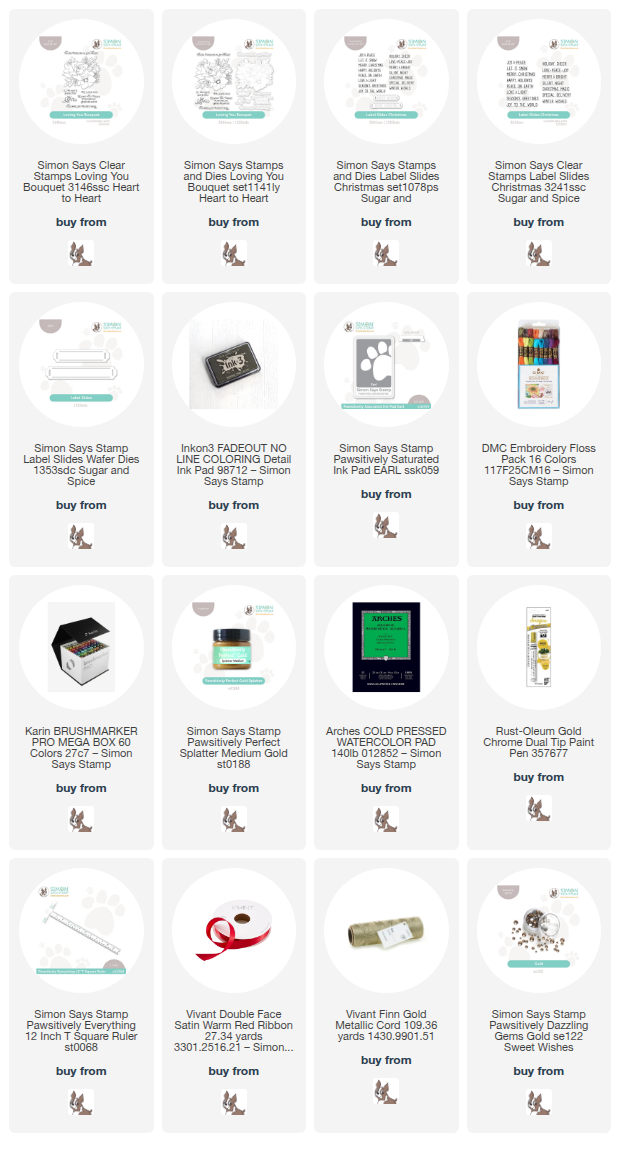
Hi friends! I am back today with some holiday inspiration using one of my new stamp sets from the Heart to Heart Release  from Simon Says Stamp (click HERE to check out the entire release!) called Loving You Bouquet. When I was originally illustrating this floral bouquet, I had envisioned it as a holiday bouquet, but Simon Says Stamp decided to accompany it with more versatile sentiments so that it could be used not just for Christmas, but for Valentine’s Day and beyond! The talented designers working with Simon Says Stamp have showcased it in a variety of beautiful colors, but I wanted to share my projects today using more traditional holiday colors, first with an embroidered ornament, then with a beautiful coordinating A7 watercolored card. It’s easy to customize floral bouquets to suit whatever your occasion might be with the appropriate colors and sentiment. Let’s get started with the details on my projects!

*I have gathered links to all of the products used at the bottom of the post for your convenience, using affiliate links at no extra cost to you. Thank you for shopping with my links! I truly appreciate your support for my work!*

An acquaintance of mine got married several years ago and shared photos of her wedding bouquet on social media, featuring utterly lush and luxurious red anemone flowers. I was instantly smitten with them and have seen them used in holiday floral arrangements all over Pinterest and the florist accounts that I follow on social media! That stunning red anemone was the inspiration for my projects today, featuring a beautifully creamy white gardenia paired with that lush scarlet anemone. I wanted to do some crewel work with needle and thread to create a holiday keepsake as well as a matching holiday card.

I stamped the bouquet from Loving You Bouquet onto some creamy white linen (an old cloth napkin that I found at the thrift store worked perfectly for this project!) using a light gray ink. I then placed the stamped cloth within a 5″ embroidery hoop and began my crewel work. I used what I call a “stained glass” technique, keeping each individual petal unique with one shade of thread on each petal, rather than trying to do too much elaborate shading with multiple shades of thread on each petal. Once I had finished embroidering the image, I added some metallic bronze seed beads from my stash to the flower centers and the tops of the berries. I love the additional texture and shimmer these beads add to the overall effect! I cleaned up the back of the ornament and added some ribbon to hang it from a tree, finally using my hot glue gun to add a coordinating red satin bow at the top. I think this will look so pretty on our Christmas tree next year!

For the coordinating card, I gave myself the freedom to do some detailed no-line watercoloring. When illustrating a new image, I try to add enough details and intricacies to the floral bouquets that they look lovely stamped on their own or with simple coloring, but I also love to just sit down and let my cares fall away as I become absorbed in super detailed watercoloring. I stamped the image from Loving You Bouquet onto some cold press watercolor paper using Inkon3’s Fadeout Ink, then used Karin Brushmarker Pro markers to color the images. With watercolor markers, I like to scribble the color out onto my glass craft mat or porcelain palette, then pick up the color with my damp paintbrush and apply it to the image. This technique allows me maximum control over the intensity of the color on my watercolor paper, as well as keeping the edges and contrast super clean and crisp.

Once I had finished coloring the images, I splattered the edges of the panel with some Simon Says Stamp Gold Splatter Medium. I also used my Simon Says Stamp T-Square to create a gold frame around the edges, bringing the eye towards the center of the card front. I trimmed the edges down slightly, then created a gold embossed sentiment slide using the Label Slides Christmas and coordinating Label Slides dies, through which I threaded some gold cord and adhered to the center of my card, securing the gold cord around the back of the panel. Once everything was complete, I mounted the finished panel on a piece of A7 Rainbow Splash Scarlet cardstock, giving a thin red accent frame around the exterior of the watercolored panel. Finally, I added a gold cord bow beneath the sentiment slide, then added some Gold Pawsitively Dazzling Gems for additional sparkle!

Well, that’s all for my projects today! I am always tickled when I can use the same stamp set for multiple occasions. It’s so important to be able to get as much bang for your crafting buck, and my new Loving You Bouquet definitely fits that bill! Thanks so much for stopping by today, and have a marvelous day!
Filed Under: simon says stamp, Uncategorized Tagged With: A7 card, christmas card, die cutting, embroidery, holiday card, label slides, label slides christmas, loving you bouquet, no line coloring, no line watercolor, ornament, t square, watercolor

Holiday Fun with Felt-Day 3: Holly Berries!

December 10, 2025

This post was sponsored by Simon Says Stamp. Thanks, Simon!

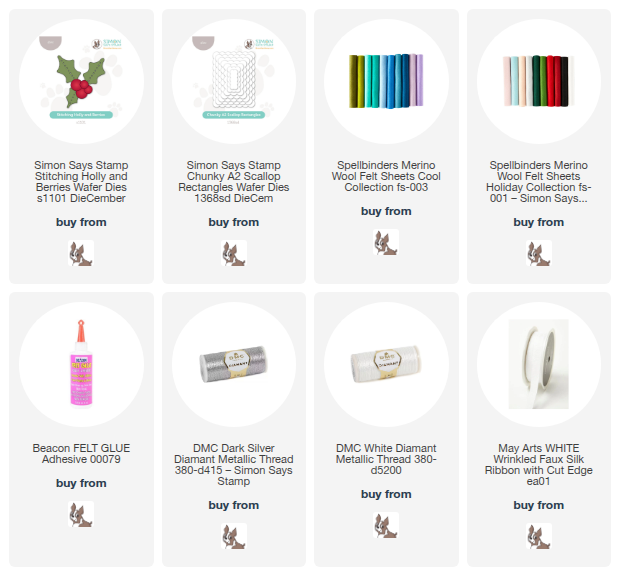
Hi friends! I am back with another installment of my Holiday Fun With Felt series, this time finishing off my trio of pillow ornaments using several of the new stitching dies from the Simon Says Stamp DieCember release! (Check out the full DieCember release HERE!) As soon as I saw the stitching dies, I knew that I wanted to create a little coordinating ornament suite, because as much as I love kitschy, eclectic Christmas trees, I also love a beautifully curated themed tree! (We actually have one of each-a family tree with colorful lights and popsicle stick ornaments, and one sparkling, crystalline white tree with pearls and white velvet!) Let’s get started on the details for the last of my stitching die ornaments!

*I have gathered links to all of the products used at the bottom of the post for your convenience, using affiliate links at no extra cost to you. Thank you for shopping with my links! I truly appreciate your support for my work!*

To begin, I die cut one of the smaller Chunky A2 Scallop Rectangles twice from some pale blue felt. These scalloped rectangle dies are not technically intended for felt crafts, but I have found that basically all of the dies that we use for papercrafting can be used for felt, as well! It makes for such versatility and can be such a lovely creative palate cleanser from paper to work with felt, thread, and needle.

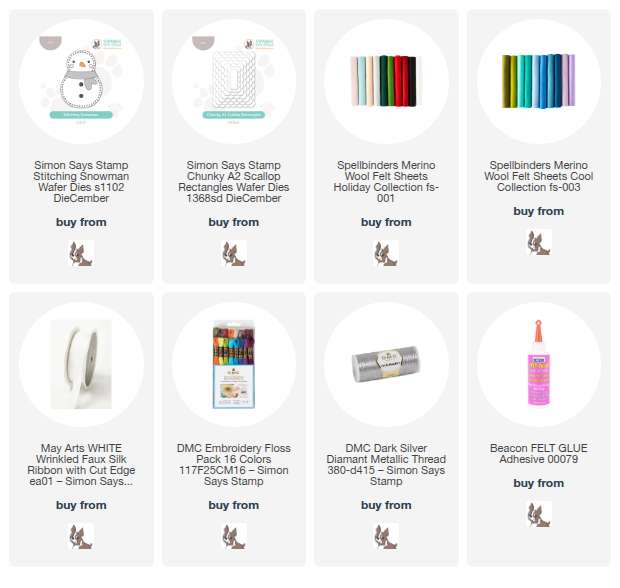
Before stitching the two scalloped rectangles together, I used felt glue and thread to add the new Stitching Holly & Berries die cuts to one of the rectangles, adding embellishments with seed beads and silver thread. I stitched up the scalloped rectangles with coordinating pale blue thread, adding some silky white ribbon to create the hanger for my ornament.

Here are all three of the ornaments together, and I just think they look so sweet as a group! I love creating coordinating, but not necessarily matching, decor. It’s super easy to create cohesive sets by keeping the color palette simple and consistent throughout each individual project. These can easily be customized to fit your own holiday color palette, as well!

Here they are on my super skinny craft room Christmas tree. Don’t they look so cute together?

Well, that’s all for my trio of felt ornaments! I have been felting up a storm, though, and have some more projects to share with you that combine tons of different companies. Those projects combine dies that are not created specifically for stitching, and I am so excited to share the versatility! Thanks so much for stopping by today, and have a marvelous day!

Filed Under: simon says stamp Tagged With: christmas, chunky a2 scallop rectangles, die cutting, diecember, felt, holiday, ornament, stitching, stitching holly and berries

Holiday Fun with Felt Week- Day 2: Snowman with Simon Says Stamp!

December 9, 2025

This post was sponsored by Simon Says Stamp. Thanks, Simon!

Hi friends! I am back again with another stitching project using some of the darling new stitching dies from Simon Says Stamp’s DieCember release (Check out the full DieCember release HERE!) during my Holiday Fun with Felt Week! I love the ease of these stitching dies; the holes are punched for you, and the die sets come with everything you need to create the sweetest little snowman friends. I added another scalloped pillow ornament to my collection with today’s project, so let’s get started with the details!

*I have gathered links to all of the products used at the bottom of the post for your convenience, using affiliate links at no extra cost to you. Thank you for shopping with my links! I truly appreciate your support for my work!*

As I shared in THIS post, I die cut the new Chunky A2 Scallop Rectangles twice from some pale blue felt. Before stitching them together, however, I die cut one of the new Stitching Snowman dies from white felt and stitched him onto one of the scalloped rectangles with some iridescent white embroidery thread from my stash. I also used felt glue to adhere the scarf, coal eyes and buttons, and carrot nose, placing them beneath a heavy glass paperweight to dry.

After the felt glue had dried completely, I added some snowy details behind my snowman with seed beads and iridescent white embroidery thread, but silver would be super pretty too! I think those little extra details make it super special!

Once I had finished all of the details, I used the same shade of pale blue thread to stitch the two scalloped rectangles together, filling the pillow with some polyfill before sealing it up and adding some white ribbon for a hanger. It’s just so darn cute hanging on a tree, don’t you think?

Well, that’s all for my felt project for today! How sweet would this be to give as a gift set or to add as a little decoration on a gift bag? Love the ease of these stitching dies! Thanks so much for stopping by today, and have a marvelous day!

Filed Under: simon says stamp Tagged With: christmas, chunky a2 scallop rectangles, diecember, felt, holiday, ornament, sewing, stitching, stitching snowman

Holiday Fun with Felt Christmas Week- Day 1: Mittens with New Simon Says Stamp!

December 8, 2025

This post was sponsored by Simon Says Stamp. Thanks, Simon!

Hi friends! In between paper crafting and blogging, I have been up to my eyeballs in holiday felt projects. I discovered the joy that felt and embroidery brings me last year, and I haven’t looked back! There’s something so satisfying about creating something tangible with felt and beads and embroidery, something that will hopefully be cherished by the recipient for more than a few weeks. Today, I am starting off a week of Fun with Felt projects using one of the darling new stitching dies that Simon Says Stamp released for DieCember: the Stitching Mitten! (Check out the full DieCember release HERE!) I created a trio of coordinating fluffy pillow ornaments using the new stitching dies (which you can purchase individually or in a bundle-love having options!), and today we’re starting off Fun with Felt Week with the sweet mittens. Let’s get started with the details!

*I have gathered links to all of the products used at the bottom of the post for your convenience, using affiliate links at no extra cost to you. Thank you for shopping with my links! I truly appreciate your support for my work!*

I love blue for Christmas; my first tree after my husband and I got married was an homage to our wedding colors, with Delft blue and white with lots of sparkles. It was so elegant and put to good use the blue Christmas lights that we’d purchased for wedding decor, ha! (Waste not, want not, right?) Blue and white has always had a special place in my heart because of our wedding, so I am always happy to use my favorite color palette to create pretty holiday decor. I used the Stitching Mitten die both on it’s own and paired with the new Chunky A2 Scallop Rectangles to create a pretty pair of ornaments to bedeck our tree!

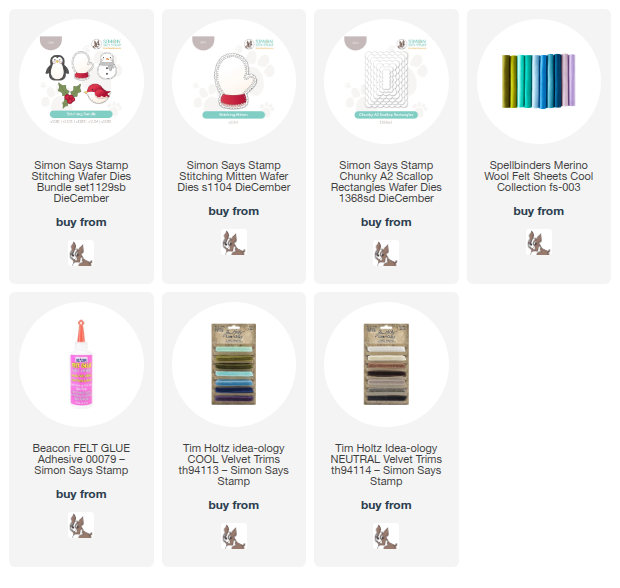
To begin my pillow ornament, I die cut two Chunky A2 Scallop Rectangles large enough to fit my mitten from pale blue felt. I also die cut each layer of the Stitching Mitten and assembled with needle and thread before doing some freehand embellishment. I love adding simple snowflakes with both sparkling embroidery floss as well as seed beads and bugle beads. The beads add the perfect amount of sparkle, I think, as well as additional texture and general elegance! Once I had finished embellishing my mitten, I used felt glue to adhere it to one layer of the A2 Scallop Rectangles and placed it under some heavy paperweights to ensure that it dried evenly and securely. Once it had dried completely, I used tone-on-tone blue thread to stitch around the edge of the scalloped rectangles and filled it with some polyfill to create a little pillow, stitching some ribbon at the top to create my hanger. It’s just so cute!!

My second ornament features the new Stitching Mitten die on it’s own, cutting two layers of each element and stitching them together to allow that lovely scalloped shadow to “frame” the blue mitten. I again encrusted the front of my mitten with some sweet and sparkling beaded snowflakes, which I think adds just a tiny touch of icy elegance!

Once I had finished embellishing the front of my mitten, it was time to put both sections together and fill with polyfill. I thought you might like to see the back of the ornament; the running stitch that I used to neatly connect each of the pierced holes on the front looks not quite as neat and tidy in the back, but not too bad! I added a Tim Holtz Velvet Trim bow and loop to the top of my finished mitten to make for easy hanging on the tree.

Here are the two mitten ornaments together on my craft room tree and I just love how homey and yet elegant they are! The new Stitching Dies from Simon Says Stamp make for such quick and easy felt gifts that are truly made with love and can be saved to use over and over again. Handmade memories that can be customized in so many fabulous ways!!!

Well, that is all for my projects today for my first installment of Fun With Felt: Christmas Week! I can’t get enough of working with felt, and if you haven’t tried it out yet, I highly encourage you to do so. You can use so many of your papercrafting dies to create fun felt projects. I can’t wait to share more of what I’ve created! Thanks so much for stopping by today, and have a marvelous day!

Filed Under: simon says stamp Tagged With: chunky a2 scallop rectangles, embroidery, felt, ornament, stitching dies

Simon Says Stamp Bright Christmas December 2025 Card Kit of the Month- Now Available for Preorder!

November 14, 2025

This post was sponsored by Simon Says Stamp. Thanks, Simon!

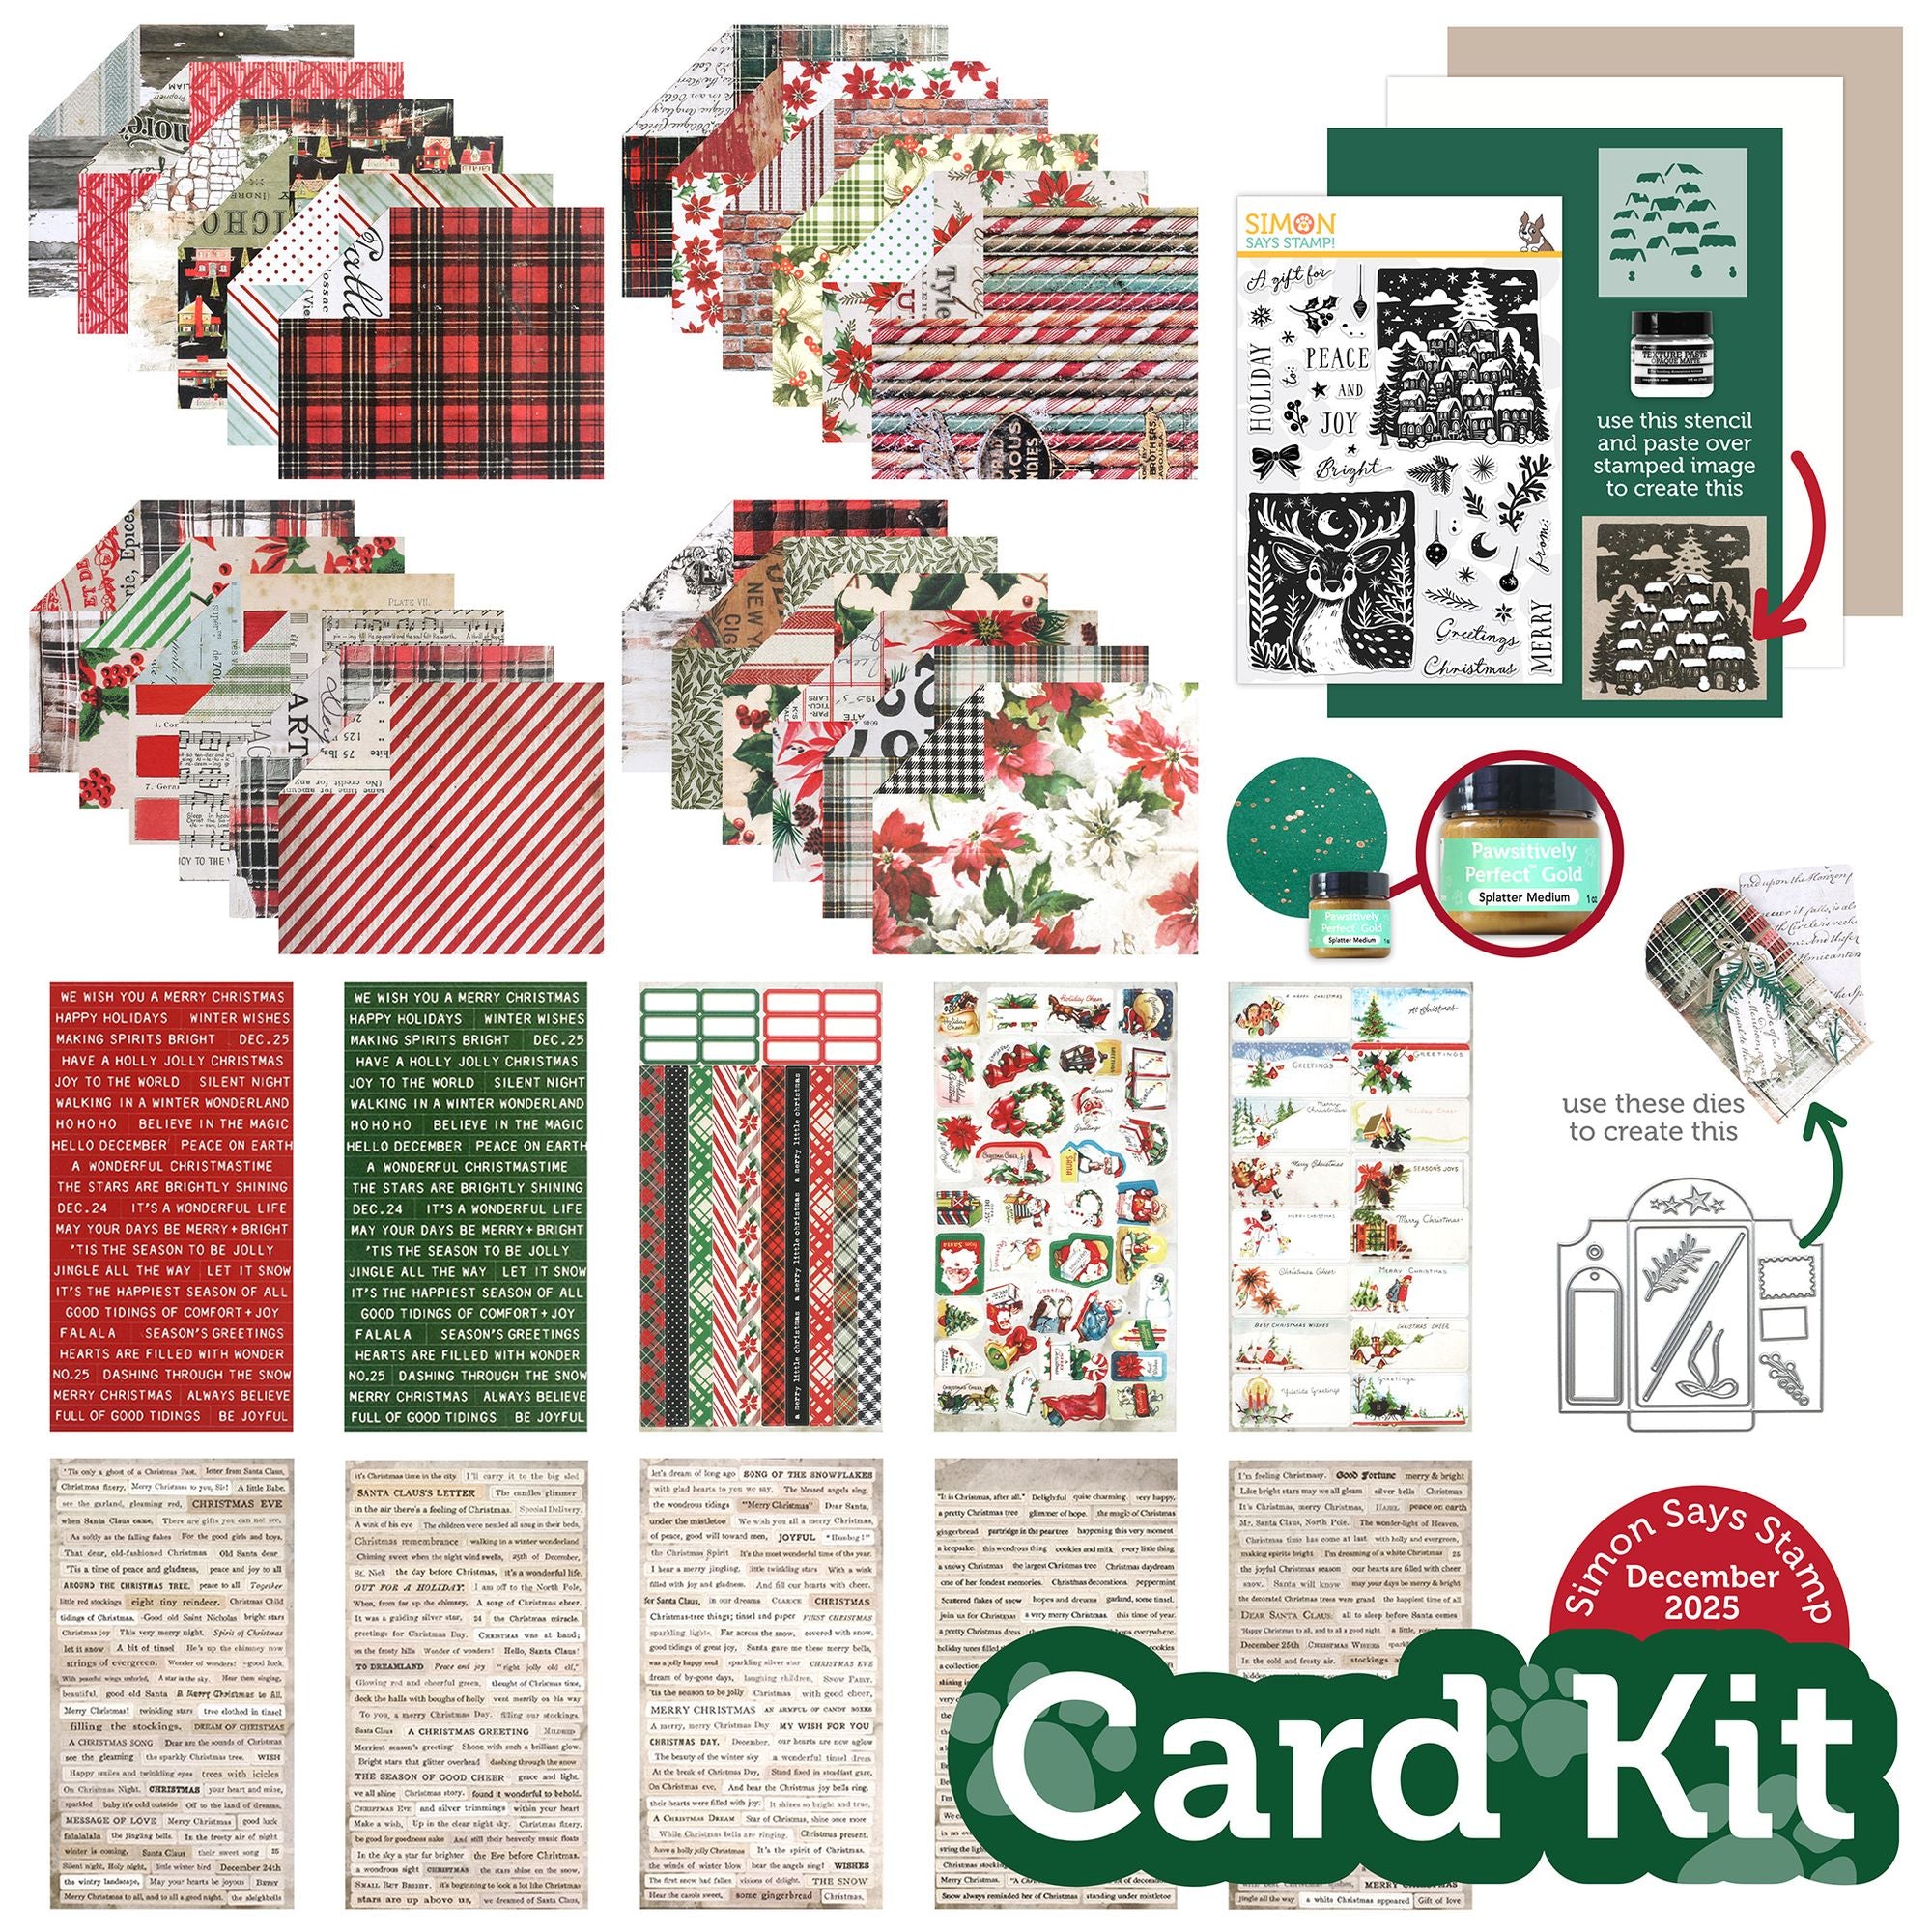
Hi friends! Simon Says Stamp is back again this month with another spectacular Card Kit of the Month, called Bright Christmas! (Click HERE to see the product page for the kit!) This kit is filled with stunning patterned papers and stickers in a gorgeous vintage style, as well as a stamp set that creates the most beautifully detailed vintage-inspired imagery in a reverse image technique, similar to linocut illustrations from mid-20th century, as well as a fabulous little gift card envelope die that is filled with accessories to dress it up! Check out the contents in the photo below:

The individual contents of this kit retail for nearly $85, but you can purchase the entire kit for only $44.99 (or less if you choose to become a kit subscriber HERE). I have created two different suites of goodies using the contents of this kit, so let’s get started with the details for today’s projects!

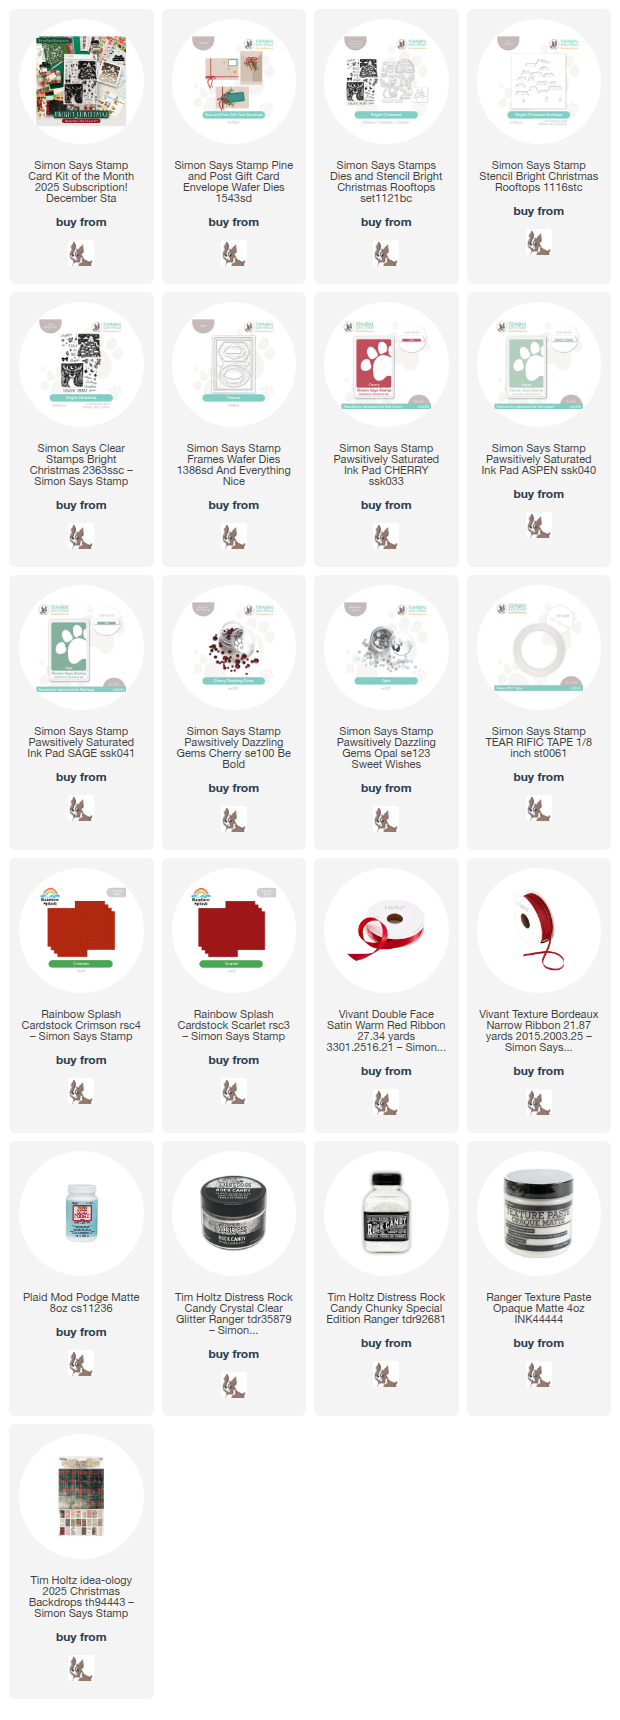
*I have gathered links to all of the products used at the bottom of the post for your convenience, using affiliate links at no extra cost to you. Thank you for shopping with my links! I truly appreciate your support for my work!*

I always enjoy the inspiration provided to me by the patterned papers included in these Card Kits of the Month! The beautiful vintage papers with their unique vintage color palettes were so striking, particularly the mint and red palette on one of the striped sheets, so I used that piece of patterned paper as the inspiration for my entire suite of projects for today with a vibrant cherry red, mint, and crisp white color palette.

Putting that patterned paper to use was super easy with the new Pine and Post Gift Card die set. I simply die cut the one-piece envelope die from the patterned paper, folded it up, and used Tear-Rific double sided tape to adhere the sides together. I then used coordinating red and mint cardstock to die cut the little extra bits and bobs included with the die set to make it extra special, finishing it off with a tag die cut that I embellished with some foliage stamps using the stamp set in the kit! I just love how this came out, and it was super quick to put together too; great for mass-producing!

My card came together equally quickly, keeping the color palette the same minty green and vibrant red. I began by stamping the detailed linocut snowy neighborhood image from Bright Christmas using Sage Pawsitively Saturated Ink. I wanted to add a pretty holiday swag above using the individual berry and leaf stamps in the Bright Christmas set, so I centered the square main focal point in the center of the card, leaving room at top and bottom for embellishment! The Bright Christmas Card Kit also includes a coordinating stencil specifically to add some fun details to the snowy rooftops, so I used that with the included Distress Texture Paste and some Rock Candy Glitter to add extra texture and sparkle to the card! To help draw the eye to the center of the card, I used the new Frames die set to die cut some bright red cardstock frames, adhering them around the edges of the main focal point. I just love how delicate and yet festive these frames are with the main image!

Once I had created the main card front, I used Cherry, Sage, and Juniper Pawsitively Saturated Inks to stamp individual foliage, berries, and that darling bow image, then used my sharp scissors to cut everything out. (There are coordinating dies available to purchase separately, which would make that step so much simpler!) I arranged the swag at the top of the card front, adhering all of the components with a mixture of foam and liquid adhesive. I also stamped a greeting using three individual stamps from Bright Christmas, trimming the strip down with my trimmer and popping it up at the bottom of my card front. Finally, I added a few touches of sparkle with some Opal Pawsitively Dazzling Gems!

For my final project, I used a technique that I haven’t used in literal years: decoupage! While scrolling on Pinterest the other day, I saw someone use pretty printed napkins with Mod Podge to create pretty holiday plates and thought how fun it would be to combine stamping with that same technique! I got my hands on some plain ceramic ornaments, then pulled out some tissue paper and Mod Podge. To start, I painted the ceramic ornament a crisp white with simple acrylic paint, then stamped the wreath using the individual foliage and berry images and same Pawsitively Saturated Inks on plain white tissue paper. I also stamped the beautiful deer image from Bright Christmas on another piece of plain tissue paper and allowed them to dry completely.

Next, I used a foam brush to add some Mod Podge to the painted ornament, smoothed the stamped tissue paper over the still-wet Mod Podge, and allowed it to dry for several minutes. Once the initial layer of Mod Podge had dried, I applied another layer of Mod Podge directly over the top of the tissue paper and covered the wet glue with Rock Candy Glitter, creating the most elegant and sparkly ornament! I used some red ribbons from my stash to add a loop and a bow on each side. I just love how this one came out and am excited to experiment more with this technique!

Well, that’s all for my projects today! I have another suite of projects to share with you using this marvelous kit, so be on the lookout for that post!

The Simon Says Stamp Card Kits are such an incredible value; the value of the individual elements of each kit equals far more than the $44.99 price tag, so you’re getting incredible bang for your buck. If you are consistently interested in the Simon Says Stamp Card Kit of the Month, you can sign up HERE to become a subscriber for an even bigger discount on these carefully curated products. As always, Simon also makes each individual element of the kits available a la carte, so that you can pick and choose what you would like to purchase if buying the entire kit isn’t really your thing. Options galore! Who can say no to such incredible value though, right?

Thanks so much for stopping by today, and have a marvelous day!
Filed Under: simon says stamp Tagged With: bright christmas, card kit, card kit of the month, christmas, christmas card, decoupage, die cutting, frames dies, holiday card, ornament, rock candy

  • Page 1
  • Page 2
  • Page 3
  • Go to Next Page »

Primary Sidebar

  • Facebook
  • Instagram
  • Pinterest
  • YouTube

Favorite Shops

Secondary Sidebar

Subscribe

Enter your email address to subscribe to this blog and receive notifications of new posts by email.

Instagram
Something is wrong.
Instagram token error.
Follow
Load More

Archives

Tags

3D embossing folder alcohol markers better press birthday birthday card blog hop card kit christmas christmas card christmas tag colored pencil copic copic coloring Daniel Smith die cutting embossing folder embroidery felt giveaway holiday holiday card hot foil ink blending karin brushmarker pro layered stencil masculine my monthly hero new release no line coloring no line watercolor OLO marker olo markers original illustration pawsitively saturated rainbow shaker card slimline stamping stamptember stencil thank you thinking of you valentine's day video watercolor

Popular Posts

Simon Says Stamp Sending Cheer Blog Hop- Day 2 + Freebie + Giveaway!
Altenew October 2026 Release Blog Hop + Giveaway!
Altenew Build A Flower Sweet Violet+Giveaway!
Floral Follies on Canvas with New Simon Says Stamp STAMPtember!
Simon Says Stamp STAMPtember Tim Holtz Collaboration: Festive Holidays!
Altenew March 2020 Release Blog Hop+Giveaway!
Honey Bee Stamps Bee Bold Release Blog Hop!
Waffleflower July Release Blog Hop!
Altenew Paint A Flower: Carnation Blog Hop+Giveaway!
Autumn Legs with Colorado Craft Company and Catherine Pooler!

Disclosure

Some affiliate links are used in my posts. This means that, should you click on one of my links and purchase something from that company, I will receive a small portion of the sale at no extra cost to you. I use the money earned from these sales to help maintain my blog. I so appreciate you visiting and, if you do choose to use one of my affiliate links, thank you so much for your support!
Copyright © 2026 ·Brunch Pro Theme · Genesis Framework by StudioPress · WordPress · Log in
Loading Comments...