• Skip to main content
  • Skip to primary sidebar
  • Skip to secondary sidebar

Sixth Street Sundries

Emily Midgett

  • Home
  • About Me
  • Contact
  • OLO Marker Color Swatch Chart
  • Shop

pawsitively saturated

Autumn Cascade with New Simon Says Stamp!

September 17, 2025

This post was sponsored by Simon Says Stamp. Thanks, Simon!

Hi friends! I know that we are deep into the STAMPtember celebrations, but I want to keep sharing inspiration using new products that are not limited edition, but will be restocked once they initially sell out! I love autumn; my birthday is at the end of September, so I have always enjoyed that transition from summer into fall, with the switch from the vibrant summer colors to the muted orange, burgundy, and deep greens that mark our switch from hot to cool (depending on where you are, of course.) I live in the Midwest, and while the foliage frequently is beautiful, I would love to go “leaf peeping” in the more northern climes. Autumn is about the only time of year that I truly enjoy being outside, haha! (Definitely an “indoor girl.”) Today’s project was inspired by my dreams of being a leaf peeper, combined with my favorite autumnal colors: burnt orange, deep mauve, and chocolatey brown. Let’s get started with the details on my project!

*I have gathered links to all of the products used at the bottom of the post for your convenience, using affiliate links. Thank you for shopping with my links! I truly appreciate your support for my work!*

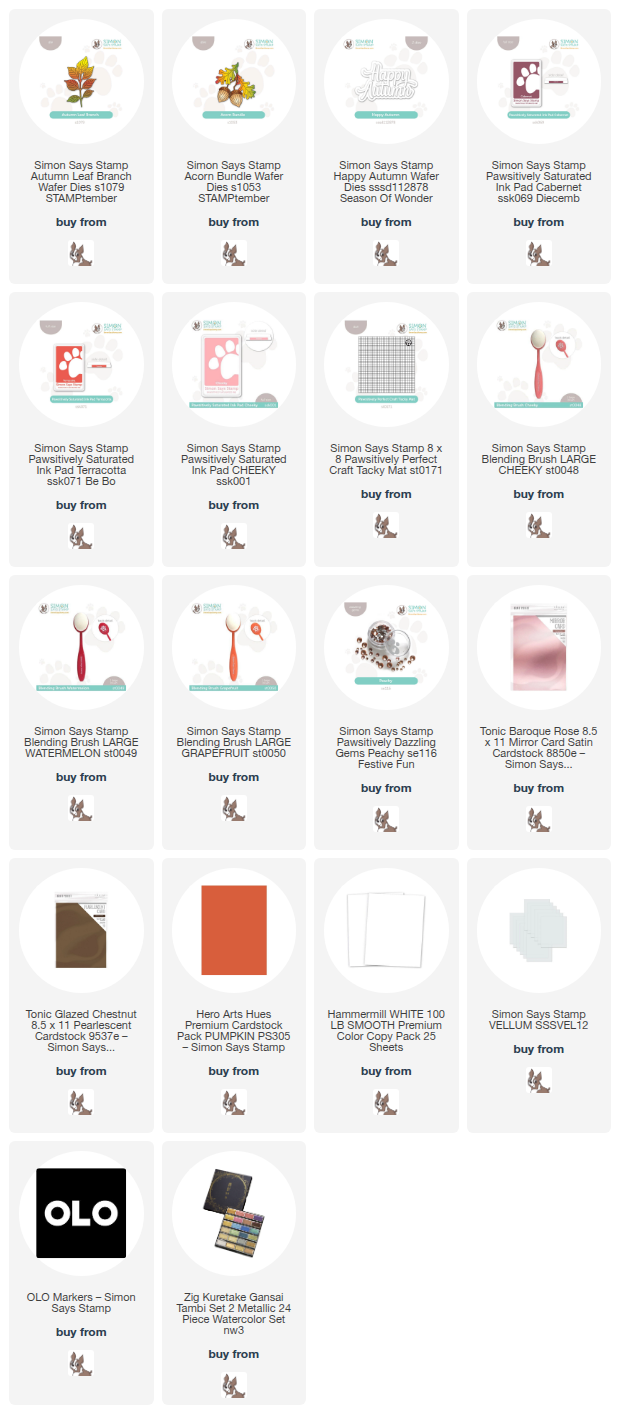
I began my project by die cutting several sets of foliage from white cardstock using the new Autumn Leaf Branch and Acorn Bundle dies. I kept the die cuts in their negative die cut space and placed them on a Simon Says Stamp Craft Tacky Mat so that I could do some ink blending using Pawsitively Saturated Inks in shades of Cabernet, Terracotta, and Cheeky. These three inks together are such a bold and lovely combination and create such a beautiful autumn color palette! Keeping them in their negative die cut spaces on the sticky mat helps stabilize the delicate die cuts so that I can ink blend easily. Once I had finished blending, I removed the colorful cuts and die cut a few more Autumn Leaf Branches from some rosy mauve mirror cardstock, as well, for a bit of shine and textural variety.

I also used my OLO Markers to customize the acorn die cuts from the Acorn Bundle die set. You could also use your brown inks to blend these colors! I love customizing die cuts with my alcohol markers, so I chose to go that route and create deeply saturated browns to go with my abundance of foliage. Behind my autumnal cascade, I used a blending brush to blend some Terracotta Ink on a panel of deep burnt orange cardstock, keeping my blending to one corner and tapering off as I got closer to the opposite corner. I used metallic copper watercolors to splatter some additional texture and shimmer to the background before arranging my leafy cascade in the blended corner, adhering the foliage with double and single layers of foam adhesive squares.

For the greeting, I die cut the previously-released Happy Autumn die set, cutting the detail layer from some pearlescent brown cardstock and backing the detail layer with a vellum shadow. I nestled the sentiment pieces amongst the foliage, adhering them with thin strips of foam adhesive, then added my acorns and a few stray leaves to complete my foliage cascade. Finally, I added some sparkling Peachy Pawsitively Dazzling Gems, adding one final touch of sparkle and shine!

Well, that’s all for my project today! Autumn is my favorite season, and I can’t wait for things to cool down, the colors to change, and all of the festivities the changing seasons bring. (Also-begone, bugs!) Thanks so much for stopping by today, and have a marvelous day!
Filed Under: simon says stamp Tagged With: acorn bundle, autumn, autumn leaf branch, die cutting, fall, happy autumn, ink blending, olo markers, pawsitively saturated

Patient Sunflowers with New Simon Says Stamp!

September 15, 2025

This post was sponsored by Simon Says Stamp. Thanks, Simon!

Hi friends! I have a sunny project to share with you today pairing my new Sunflower Dreams background stamp with some new and old goodies from Simon Says Stamp. (The stamp is currently sold out-yay that you guys like it!-but you can sign up to be notified by email for when it comes back in stock!) When I was creating the Sunflower Dreams stamp, I wanted something that was large enough that it would be super enjoyable to color, but also something detailed enough that it could be used as a background without coloring. For today’s project, I did some emboss-resist with iridescent embossing powder and sunny yellow ink blending to create a bright canvas behind my die cut autumn floral bouquet. Let’s get started with the details on my card!

*I have gathered links to all of the products used at the bottom of the post for your convenience, using affiliate links. Thank you for shopping with my links! I truly appreciate your support for my work!*

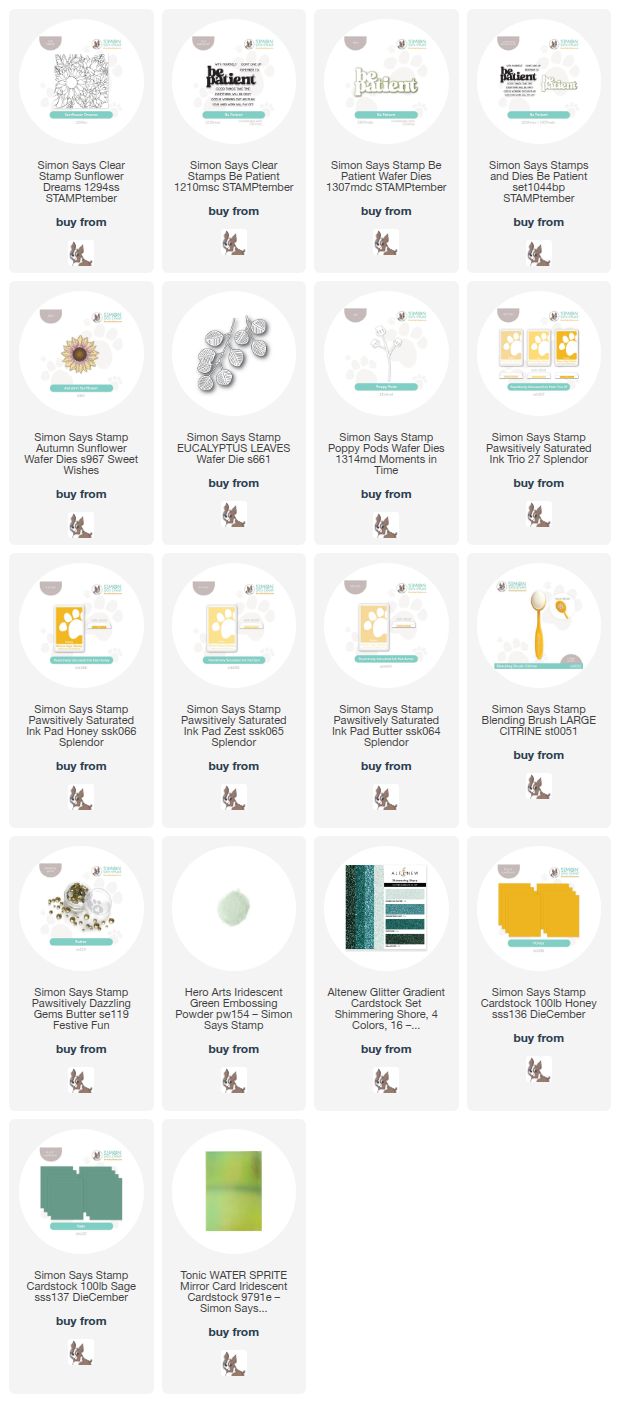
To begin, I used Hero Arts Iridescent Green Embossing Powder to emboss the Sunflower Dreams stamp on a panel of white cardstock. I trimmed the panel down in order to be able to frame it with a contrasting colored cardstock, then blended Pawsitively Saturated Inks in shades of Honey, Zest, Butter in an ombré on the panel, allowing the details of the stamp to shine through more visibly with the vibrant blended background and shimmering green embossing. I adhered the panel to the center of a full-sized A2 Sage card front, creating a contrasting frame.

To adorn the embossed background, I die cut the makings of an autumnal bouquet using the Autumn Sunflower, Eucalyptus Leaves, and Poppy Pods dies, cutting them each using colored cardstock. I used a blending brush to blend the edges of the sunflower petals before adhering the different layers together with foam adhesive squares. I also used some deep green glittery cardstock to die cut the Poppy Pods, as well as some iridescent green foil cardstock for a couple of the Eucalyptus Leaves, adding more texture and shimmer to the bouquet. In order to create a lush, full bouquet, I did some selective trimming with my scissors on the Poppy Pods and Eucalyptus Leaves, so that I could tuck the foliage around the sunflower and fill in any blank spots!

Before assembly, I die cut the detailed layer of the new Be Patient stamp and die set from more of the deep green glitter cardstock, then added the vellum shadow layer behind it. I also heat embossed a greeting from the coordinating stamp set on a strip of Sage cardstock. Once I had all of the die cuts complete, I began assembling my bouquet, tucking the sentiment components in the curve of the swag, adhering everything with both liquid and foam adhesive for lots of dimension. Finally, I added a few Butter Pawsitively Dazzling Gems for a touch of sparkle!

Well, that’s all for my project today! I am so thrilled that people seem to be enjoying Sunflower Dreams; it’s always a thrill to see my illustrations come to life, and even more of a thrill when people actually like them! Thanks so much for stopping by today, and have a marvelous day!

Filed Under: simon says stamp, Uncategorized Tagged With: autumn, autumn sunflower, be patient, die cutting, eucalyptus leaves, heat embossing, ink blending, pawsitively saturated, poppy pods, sunflower, sunflower dreams

Christmas In July: Stenciled Snowflake Shaker with Simon Says Stamp!

July 23, 2025

This post was sponsored by Simon Says Stamp. Thanks, Simon!

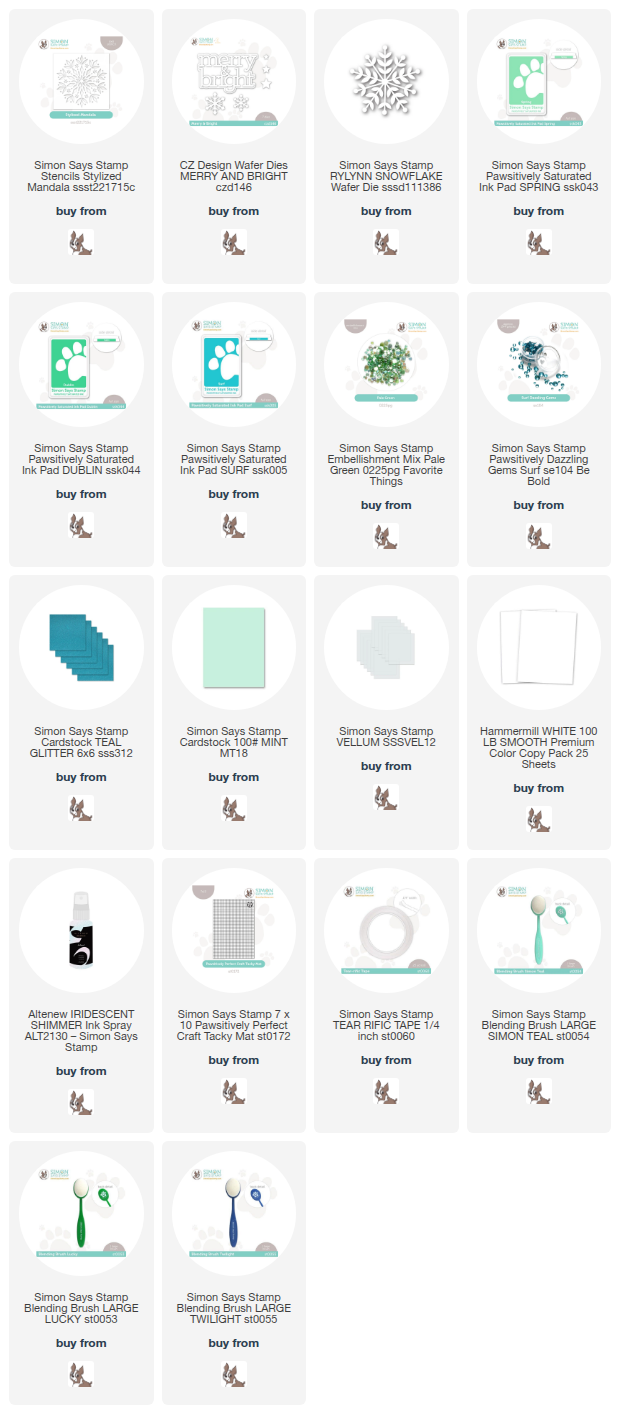
Hi friends! I’m back today with another “transitional” holiday card for my Christmas In July series, this time featuring icy aquas and greens to create this fabulous stenciled flat shaker card! I am someone who enjoys non-traditional holiday color schemes, and this time of year, when it’s difficult to get in the traditional red and green holiday mood, I find that pairing traditional holiday imagery like snowflakes with non-traditional color palettes still conveys the holiday mood very nicely. I chose to create a tone-on-tone shimmering snowflake shaker card (say that three times fast!) using some beautiful inks and supplies from Simon Says Stamp’s holiday collection. Let’s get started on the details for my project!

*I have gathered links to all of the products used at the bottom of the post for your convenience, using affiliate links. Thank you for shopping with my links! I truly appreciate your support for my work!*

To begin, I blended Pawsitively Saturated Ink in shades of Spring, Dublin, and Surf around the edges of my white A2 card front, starting with the darker Surf around the edges, then blending Dublin next, finally finishing with Surf, working my way from the outer edges to the center of the card front. Once I had finished blending the background, I placed the panel on my Craft Tacky Mat and placed the Stylized Mandala stencil over the top, allowing the sticky surface of the Craft Tacky Mat to hold the stencil in place in the center of my card front. I used the same shades of ink to blend my snowflake stencil, using slightly more pressure to allow for more saturated color. Before removing the stencil, I also sprayed the image with Altenew’s Iridescent Shimmer Spray, adding some fabulous shimmer and iridescent sparkle to the snowflake!

Once I had finished blending the background and allowed it to dry sufficiently, I used some leftover stamp packaging to create a flat shaker card using Simon Says Stamp’s Tear-Rific Tape, which has a super strong grip and holds the thin cellophane in place beautifully without adding any bulk to the card! Before sealing the shaker up, I added lots of the Pale Green Embellishment Mix, which perfectly matched my icy color palette for the card.

For the greeting, I die cut the detail layer of the Merry & Bright from Simon Says Stamp Mint Cardstock, adhering it to the shadow layer cut from Simon Says Stamp’s Vellum cardstock. I popped it up on the stenciled shaker card front using thin strips of foam adhesive, then tucked a few sparkling snowflakes, cut using the Rylynn Snowflake die and the additional snowflakes included with the Merry & Bright die set, behind the sentiment. Finally, I added a smattering of Surf Pawsitively Dazzling Gems to finish off my sparkling visual cascade on the card front!

Well, that’s all for my project today! I love a good shaker card for Christmas, don’t you? I so enjoy looking at my holiday supplies in a fresh light and season, and I hope you’re enjoying this foray into Christmas crafting! Thanks so much for stopping by today, and have a marvelous day!

Filed Under: simon says stamp, Uncategorized Tagged With: christmas card, die cutting, holiday card, ink blending, merry and bright, pawsitively saturated, rylynn snowflake, shaker card, stencil, stylized mandala

Rainbow Hummingbird with New Simon Says Stamp!

July 17, 2025

This post was sponsored by Simon Says Stamp. Thanks, Simon!

Hi friends! I have a super colorful project to share with you today featuring white cardstock, dies, and ink… that’s basically it! I love the magical transformation that can happen with white cardstock die cuts, applying your favorite coloring medium to them, whether it’s ink blending, watercolor, alcohol markers, or whatever your heart desires. For today’s project, I blended my little heart out, selecting a vibrant pastel rainbow of inks from multiple companies to add beautiful and soft colors to these plain die cuts. Let’s get started with the details!

*I have gathered links to all of the products used at the bottom of the post for your convenience, using affiliate links. Thank you for shopping with my links! I truly appreciate your support for my work!*

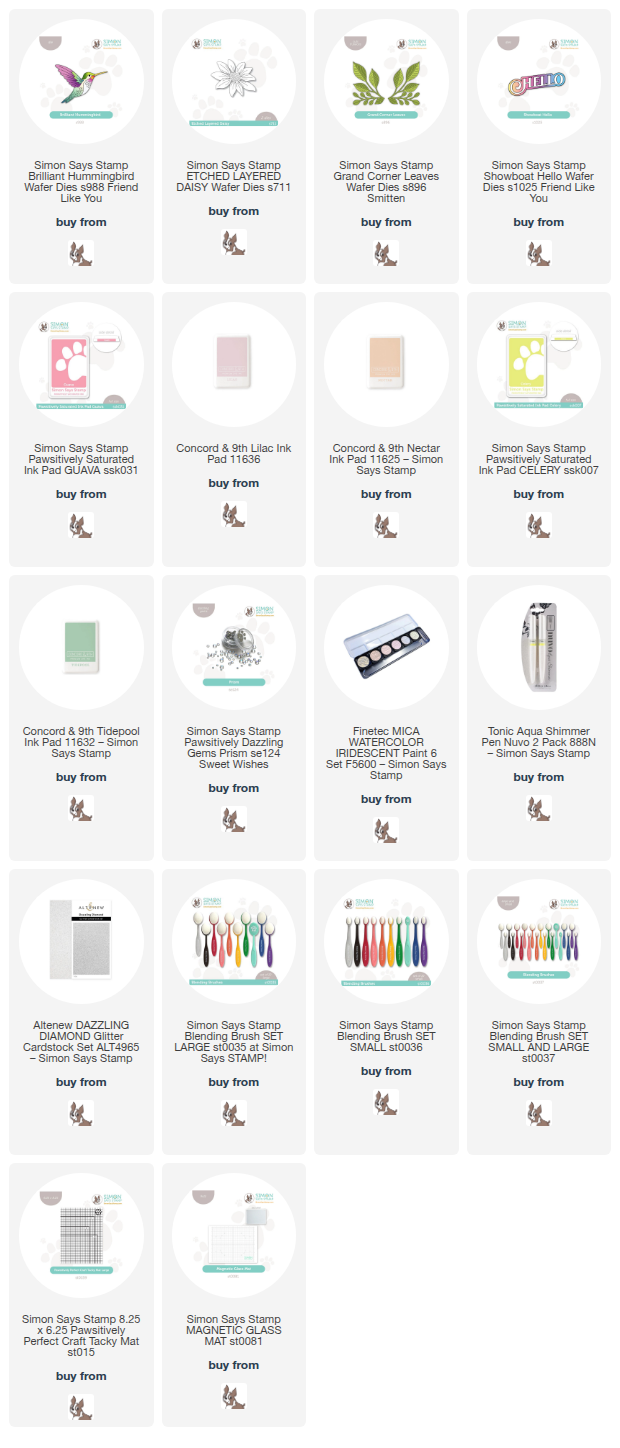
I began my project by die cutting Brilliant Hummingbird, Grand Corner Leaves and Etched Layered Daisy dies, all from Simon Says Stamp. I selected the following inks for blending: Pawsitively Saturated Ink Guava, Concord and 9th Lilac, Concord and 9th Nectar, Pawsitively Saturated Ink Celery, and Concord and 9th Tidepool. I softly blended a diagonal rainbow on a plain A2 card front using blending brushes, keeping my pressure minimal so as to create a very subtle and lovely pastel rainbow background that I think looks almost iridescent! I splattered the background with some shimmering glitter watercolors, almost giving the effect of sparkling raindrops in front of my rainbow!

After I had created my background, I set my sights to adding color to the beautifully detailed die cuts. I used the same shades of ink that I used to create the background to add lots of soft color to each die cut, adding multiple layers of color to each to create lots of visual interest on each image and create distinction between them. The Simon Says Stamp Craft Tacky Mat is an amazing tool to help keep your die cuts in place while blending; I keep one attached to a glass craft mat on my desk at all times so that I can easily grab it for stenciling or blending on die cuts! Once I had finished adding color to my cardstock pieces, I adhered the pieces together using liquid adhesive, then added some sparkle to the hummingbird with a shimmer pen, further enhancing the iridescent effect on these delicate, lovely birds!

After I had finished customizing and assembling all of the die cut pieces, I arranged the flowers and foliage on my rainbow card front, adhering them with a mixture of liquid and foam adhesive for tons of added dimension. For a simple greeting, I die cut the detail layer of the new Showboat Hello from white glitter cardstock, then added a shadow cut from some iridescent mylar cardstock that I found my stash. I popped the greeting die cut up with some more foam adhesive, tucking it in a bare spot in the arrangement of die cuts, and finally added some sparkling Prism Pawsitively Dazzling Gems to complete the overall iridescent effect!

Well, that’s all for my projec today. I have some super fun Christmas in July projects planned next, a huge departure from today’s project, so I hope you will come back to check those out! Thanks so much for stopping by today, and have a marvelous day!
Filed Under: simon says stamp Tagged With: brilliant hummingbird, die cutting, etched layered daisy, grand corner leaves, ink blending, pawsitively saturated, rainbow, showboat hello

Serene Green and White with New Simon Says Stamp!

July 7, 2025

This post was sponsored by Simon Says Stamp. Thanks, Simon!

Hi friends! I have a serene pair of projects to share with you featuring some of the gorgeous new goodies from the Simon Says Stamp Friend Like You release, including the beautifully serene Ink Trio 31. Green is always an underrated color in my craft room, frequently playing second fiddle to the vibrant pinks and purples that I use in my floral projects. Well, for today’s projects, that gorgeous eucalyptus green is the star of the show! Let’s get started with this pair of calming cards.

*I have gathered links to all of the products used at the bottom of the post for your convenience, using affiliate links. Thank you for shopping with my links! I truly appreciate your support for my work!*

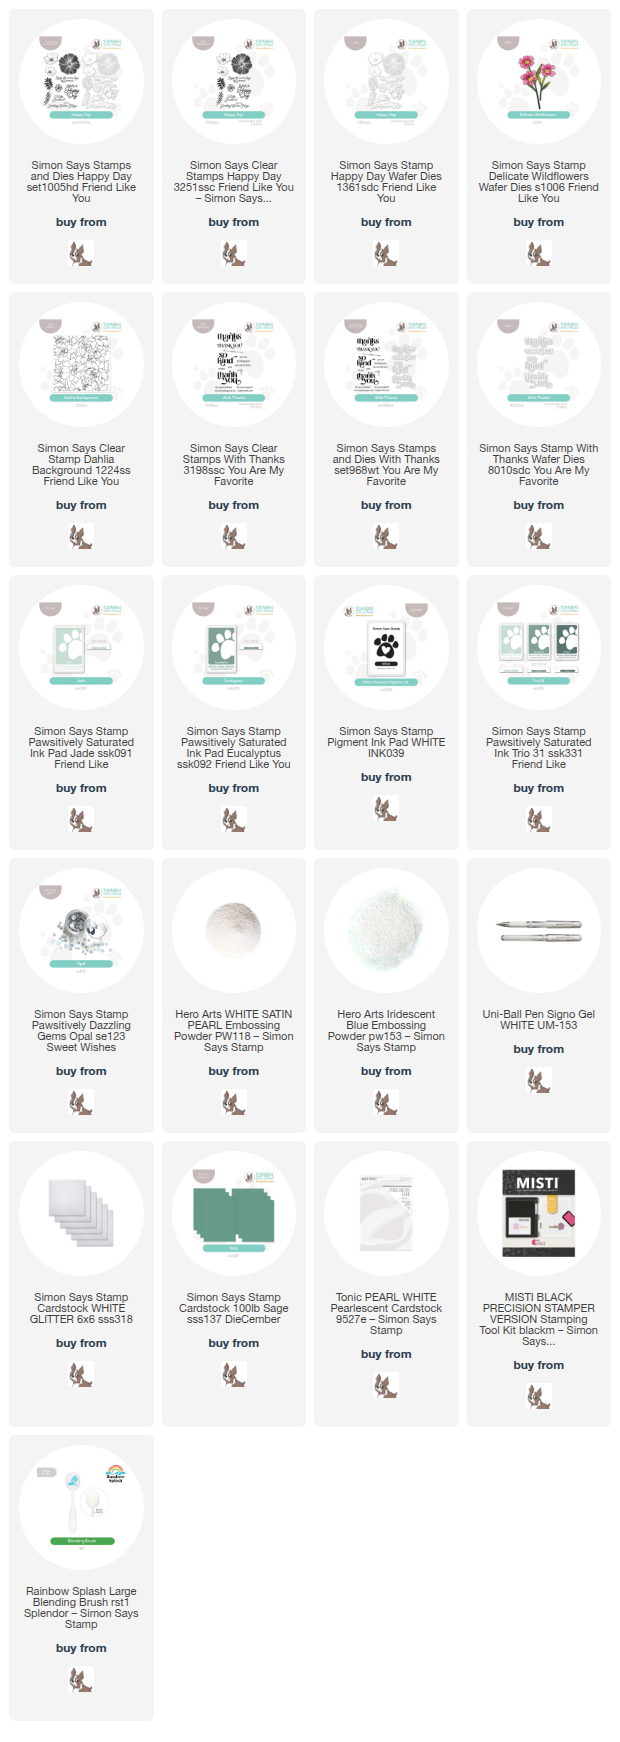
The new Ink Trio 31 features Jade, Eucalyptus, and Juniper inks, which are just the most perfect shades of muted minty green. They are definitely destined to be favorites at my desk! The color palette is so soothing and coordinates beautifully with so many different color palettes, but I thought that they were so beautiful that they needed to shine all on their own with some simple floral projects.

For my first project, I stamped a custom floral background using the individual floral elements from the new Happy Day stamp set, stamping them with Eucalyptus Pawsitively Saturated Ink on Simon Says Stamp Sage cardstock. To create this background, I first stamped clusters of three flowers, rotating the stamp block with each new impression to create an interesting and random pattern. Once I had stamped my floral clusters, I added the foliage to the clusters, filling in blank areas of the stamped background with multiple styles of foliage from the Happy Day set. Once I had finished stamping the background, I used a blending brush to blend some more Eucalyptus ink around the edges of the panel, creating almost a vignette effect on the background. I also used a white gel pen to dot the centers of the flowers to add a little extra special detail to the background pattern.

For the greeting, I stamped a sentiment from the Happy Day stamp set onto some white cardstock using Eucalyptus ink, then stamped again using embossing ink and added some Iridescent Blue embossing powder to add a little shimmer to the sentiment. I die cut the greeting with it’s coordinating die, then used some residual Eucalyptus ink from the blending brush to add a touch of color to the sentiment die cut. I adhered the greeting in the center of the stamped panel with some foam adhesive, then tucked a few Delicate Wildflowers die cuts that I had created from white glitter and white pearl cardstock around the sentiment, adding another pop of white to the card. Finally, I added one more pop of white with some Opal Pawsitively Dazzling Gems, completing the “rule of three” for accent colors. Isn’t this such a delicate, pretty card? I love that the majority of it was created with just one stamp set!

For my second card, I decided to put the details of my new Dahlia Background stamp set to work creating a simple stamped background. I stamped the Dahlia Background using Jade Pawsitively Saturated Ink from Ink Trio 31, creating a delicate pastel floral pattern that stands beautifully on it’s own without any need for coloring! I trimmed the edges 1/8″ on each side, then mounted the floral panel in the center of a full size A2 panel of Sage cardstock, creating a simple frame around my floral background.

For the greeting, I stamped a sentiment from the With Thanks set, stamping both the large “thank you” and the small coordinating strip onto Sage cardstock with Simon Says Stamp White Pigment Ink, then adding White Satin Pearl embossing powder over the top to add a touch of shimmer and to help the subtle sentiment stand out against the medium-green cardstock. I die cut the large sentiment with it’s coordinating die, then used my sharp scissors to fussy cut the sentiment strip, mounting both pieces in the center of my floral background with foam adhesive. I added a few more die cut Delicate Wildflowers to accent the sentiment, then tucked a simple white silk bow amongst the die cuts and added a smattering of Opal Pawsitively Dazzling Gems for added sparkle!

Well, that’s all for my projects today! I love a saturated color palette, but sometimes simplistic is just what the doctor ordered, don’t you think? Thanks so much for stopping by today, and have a marvelous day!

Filed Under: simon says stamp Tagged With: dahlia background, delicate wildflowers, die cutting, happy day, ink blending, original illustration, pawsitively saturated, stamping, with thanks

  • « Go to Previous Page
  • Page 1
  • Page 2
  • Page 3
  • Page 4
  • Interim pages omitted …
  • Page 9
  • Go to Next Page »

Primary Sidebar

  • Facebook
  • Instagram
  • Pinterest
  • YouTube

Favorite Shops

Secondary Sidebar

Subscribe

Enter your email address to subscribe to this blog and receive notifications of new posts by email.

Instagram
Something is wrong.
Instagram token error.
Follow
Load More

Archives

Tags

3D embossing folder alcohol markers better press birthday birthday card blog hop card kit christmas christmas card christmas tag colored pencil copic copic coloring Daniel Smith die cutting embossing folder embroidery felt giveaway holiday holiday card hot foil ink blending karin brushmarker pro layered stencil masculine my monthly hero new release no line coloring no line watercolor OLO marker olo markers original illustration pawsitively saturated rainbow shaker card slimline stamping stamptember stencil thank you thinking of you valentine's day video watercolor

Popular Posts

Simon Says Stamp Sending Cheer Blog Hop- Day 2 + Freebie + Giveaway!
Altenew October 2026 Release Blog Hop + Giveaway!
Rustic Monochromatic Stars for Christmas with Rainbow Splash!
December 2018 My Monthly Hero Blog Hop + Giveaway!
March 2020 Essentials By Ellen Blog Hop+Giveaway!
The Ton Stamps Summer Release: Day 1
Hero Arts Partners Blog Hop: Lawn Fawn!
Waffleflower July Release Blog Hop!
Simon Says Stamp STAMPtember Tim Holtz Collaboration: Festive Holidays!
Honey Bee Stamps Autumn Blessings Blog Hop-Day 2!

Disclosure

Some affiliate links are used in my posts. This means that, should you click on one of my links and purchase something from that company, I will receive a small portion of the sale at no extra cost to you. I use the money earned from these sales to help maintain my blog. I so appreciate you visiting and, if you do choose to use one of my affiliate links, thank you so much for your support!
Copyright © 2026 ·Brunch Pro Theme · Genesis Framework by StudioPress · WordPress · Log in
Loading Comments...