• Skip to main content
  • Skip to primary sidebar
  • Skip to secondary sidebar

Sixth Street Sundries

Emily Midgett

  • Home
  • About Me
  • Contact
  • OLO Marker Color Swatch Chart
  • Shop

pawsitively saturated

Happy Easter Toile with Simon Says Stamp!

April 4, 2025

This post was sponsored by Simon Says Stamp. Thanks, Simon!

Hi friends! I have an elegant Easter project to share with you using some of the new goodies from the latest Simon Says Stamp release, called Rain or Shine. I love using individual stamps to create a fun and totally unique background, and the super detailed floral images in the new Loving Thoughts stamp set were perfect for creating an elegant and refined custom patterned panel. Let’s get started with the details!

*I have gathered links to all of the products used at the bottom of the post for your convenience, using affiliate links. Thank you for shopping with my links! I truly appreciate your support for my work!*

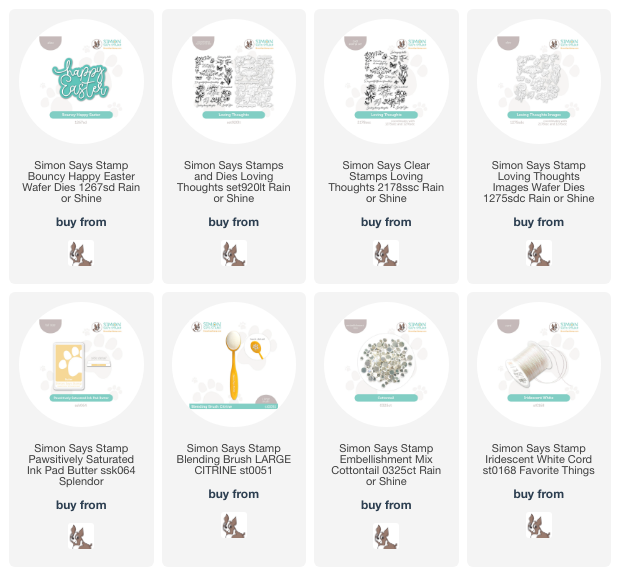
To start, I used several of the images from the new Loving Thoughts to create a beautiful background. I began by stamping the largest image first on the panel, rotating the stamp and the panel to create a unique, continuous pattern. I used the next smallest stamp to fill in some of the blank areas, again rotating the stamp and the panel, and repeated the process with smaller and smaller stamps until I had covered the entire panel. I used Butter Pawsitively Saturated Ink for all of the images, creating a springy, sunny pattern with a touch of elegance. I used my trimmer to trim 1/4″ off of each edge and backed it with some coordinating pale yellow and white glitter cardstock peeking out on each side for a touch of added texture and sparkle for the background.

For the greeting, I used a blending brush to blend some more Butter Pawsitively Saturated Ink over the stamped background to create a blank area for my sentiment. I die cut the new Bouncy Happy Easter sentiment die three times from white cardstock, adhering each of the die cuts together with liquid adhesive so as to create a dimensional die cut. I adhered the dimensional die cut to the blended area; that little extra bit of height on the dimensional die cut helps to make that sentiment pop from the muted yellow haze on the background!

To frame the sentiment die cut, I stamped a few more individual images from the Loving Thoughts set onto some spare white cardstock, again using Butter ink, and die cut the images with their coordinating dies. I arranged the die cuts around the die cut sentiment with foam adhesive, then added some Cottontail Embellishment Mix confetti and a pretty Iridescent White Cord bow to help fill in a visual gap on the bottom of the card.

Well, that’s all for my project today! The gorgeous Loving Thoughts stamp set is perfect for creating unique backgrounds like these, and the super detailed images mean that you don’t have to worry about coloring; they do beautifully standing on their own! Thanks so much for stopping by today, and have a marvelous day!
Filed Under: simon says stamp, Uncategorized Tagged With: bouncy happy easter, loving thoughts, pawsitively saturated

New Simon Says Stamp Rain or Shine Release-Now Available!

March 19, 2025

This post was sponsored by Simon Says Stamp. Thanks, Simon!

Hi friends! The new Simon Says Stamp Rain or Shine release is now available, and my gosh does it have some absolutely darling new products!! From sweet little bunnies to flowers to farm critters to elegant embossing folders, this release truly has such a wide variety that there’s something for everybody! I am a sucker for gorgeous silhouette images with intricate patterns inlaid in them, which remind me of Scandinavian artwork and are so elegant. The bunnies in the super affordable new Hoppy Birthday mini stamp set are just precious, with an air of elegant simplicity that makes for a super cute card. Let’s get started with the details on my project!

*I have gathered links to all of the products used at the bottom of the post for your convenience, using affiliate links. Thank you for shopping with my links! I truly appreciate your support for my work!*

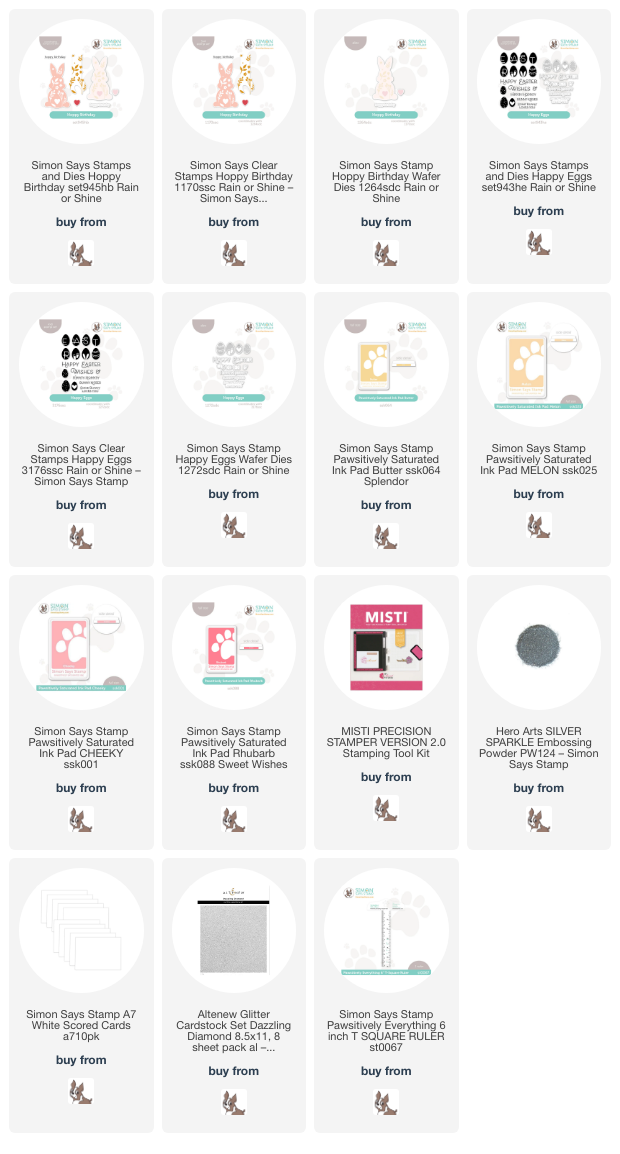
To begin my project, I wanted to channel my inner Laura Bassen and stamp a row of bunnies from Hoppy Birthday in a warm rainbow, so I stamped the bunny silhouettes in Butter, Melon, Cheeky, and Rhubarb Pawsitively Saturated Inks, using a MISTI to get extra vibrant and crisp stamped images. After I had finished stamping all of the bunnies, I used the coordinating die to die cut them. The stamp set comes complete with an “insert” stamp so that you can have a multicolored image, but I was going for crisp white with a pop of warm colors, so I left the pattern blank and allowed the bright white cardstock to do the work for me!

Because these bunnies are generously-sized, I increased the size of my card base to an A7 in order to accommodate them all in a horizontal line. I trimmed down a 4″x6″ panel of white cardstock, then used the Simon Says Stamp 6″ T-square ruler to line the bunnies up perfectly straight, adhering them with thin foam adhesive squares. I matted the 4″x6″ bunny panel with an ever-so-slightly larger piece of Dazzling Diamond Glitter Cardstock from Altenew, adding a teeny bit of sparkle.

For the greeting, I stamped several of the sentiment components from the new Happy Eggs stamp set and heat embossed them with silver glitter embossing powder. I die cut the finished embossed sentiments with their super-detailed dies and arranged them beneath the line of bunnies. Finally, I adhered the glitter-matted bunny panel to an A7 card base with some Tear-rifically Tacky Tape!

Well, that’s all for my project today. Be sure to check out the rest of the new Simon Says Stamp Rain or Shine release and check back here later this week for even more inspiration using these beautiful new products! Thanks so much for stopping by today, and have a marvelous day!

Filed Under: simon says stamp, Uncategorized Tagged With: A7 card, easter, easter card, happy eggs, hoppy birthday, pawsitively saturated

Bold Bunny Easter Card with New Simon Says Stamp Favorite Things Release!

March 6, 2025

This post was sponsored by Simon Says Stamp. Thanks, Simon!

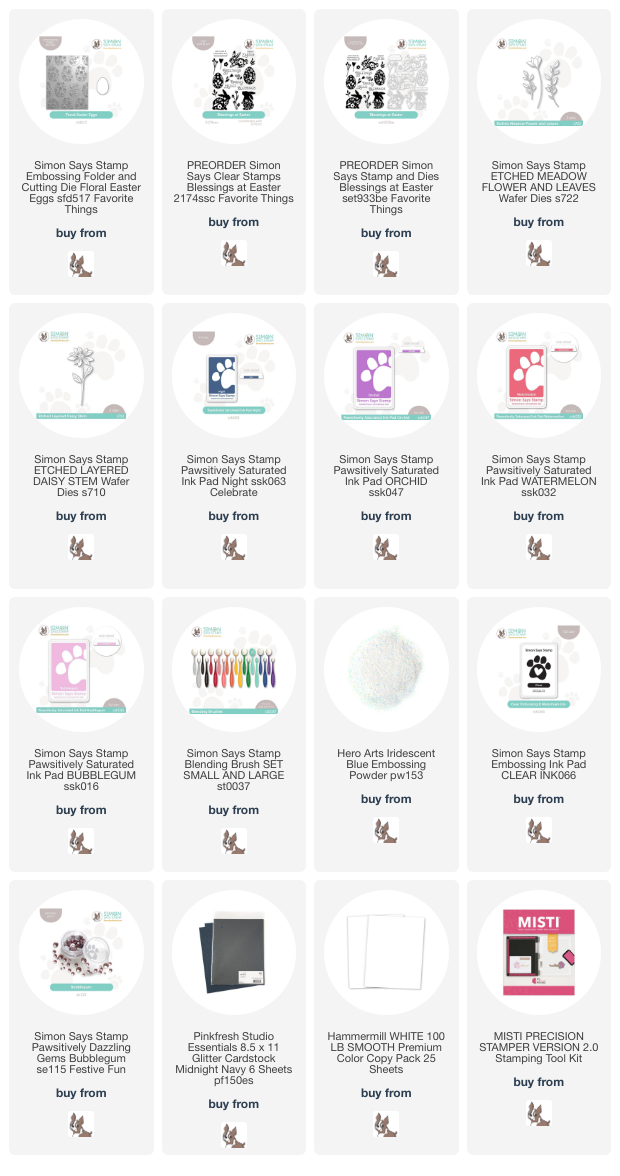
Hi friends! I have a dramatic navy blue Easter card to share with you today. I have always loved navy blue with pastel colors for springtime, taking the dark navy blue from winter and brightening it up with cheery springtime colors. I paired some of the new Easter goodies from the Favorite Things release with some older botanical dies and pretty inks to create this bold project. Let’s get started with the details!

*I have gathered links to all of the products used at the bottom of the post for your convenience, using affiliate links. Thank you for shopping with my links! I truly appreciate your support for my work!*

To begin, I created an embossed panel using some white cardstock and the new Floral Easter Eggs embossing folder. This embossing folder comes complete with coordinating dies, so that you can create gorgeously textured embossed egg die cuts, but I wanted to create a delicate floral background pattern and so used the entirety of the embossed panel. I flipped the embossed panel over so that the pattern was debossed into the cardstock, rather than raised up, and did some ink blending on the debossed areas. I used blending brushes to blend Orchid, Watermelon, and Bubblegum Pawsitively Saturated Inks on the debossed floral images, then swiped the Night ink pad directly on the raised areas of the cardstock, creating a multicolored, debossed, super textured background!

After I had created my background, I worked on my focal point. I began by stamping one of the adorable bunnies in the Blessings At Easter stamp set, stamping it once with Night ink and then again directly over the top with embossing ink and adding Iridescent Blue Embossing Powder from Hero Arts. This sheer iridescent embossing powder adds the most gorgeous and lustrous iridescent sheen to the stamped images while still allowing the colorful ink beneath to still show! I also die cut the Etched Meadow Flower & Leaves and Etched Layered Daisy Stem dies from coordinating colored cardstock and some super glittery navy blue cardstock.

After trimming the debossed panel down and nestling it in the upper left hand corner of a full size A2 panel of the same navy blue glittered cardstock, I arranged all of the die cuts on the floral background, adhering them with both liquid and foam adhesive squares to create lots of dimension. I nestled a stamped, embossed, and die cut “Spring Greetings” sentiment amongst the die cuts, then added a few shimmering Bubblegum Pawsitively Dazzling Gems.

Well, that’s all for my project today! It’s a busy card, but it’s so fresh and floral and springy! I love the pretty floral bunny paired with the colorful florals! Now for a fun sale:

Simon Says Stamp is celebrating 23 fabulous years, and as a special treat, they are offering an equally fabulous gift with purchase: buy any gift card valued at $100 or more and get a FREE $23 gift card!! Isn’t that incredible? Click HERE to purchase a gift card!

Thanks so much for stopping by today, and have a marvelous day!

Filed Under: simon says stamp Tagged With: 3D embossing folder, blessings at easter, die cutting, easter card, embossing folder, etched layered daisy stem, etched meadow flower and leaves, floral easter eggs, ink blending, ink swiping, pawsitively saturated

Faith, Love, and Pixie Dust with New Simon Says Stamp!

January 13, 2025

This post was sponsored by Simon Says Stamp. Thanks, Simon!

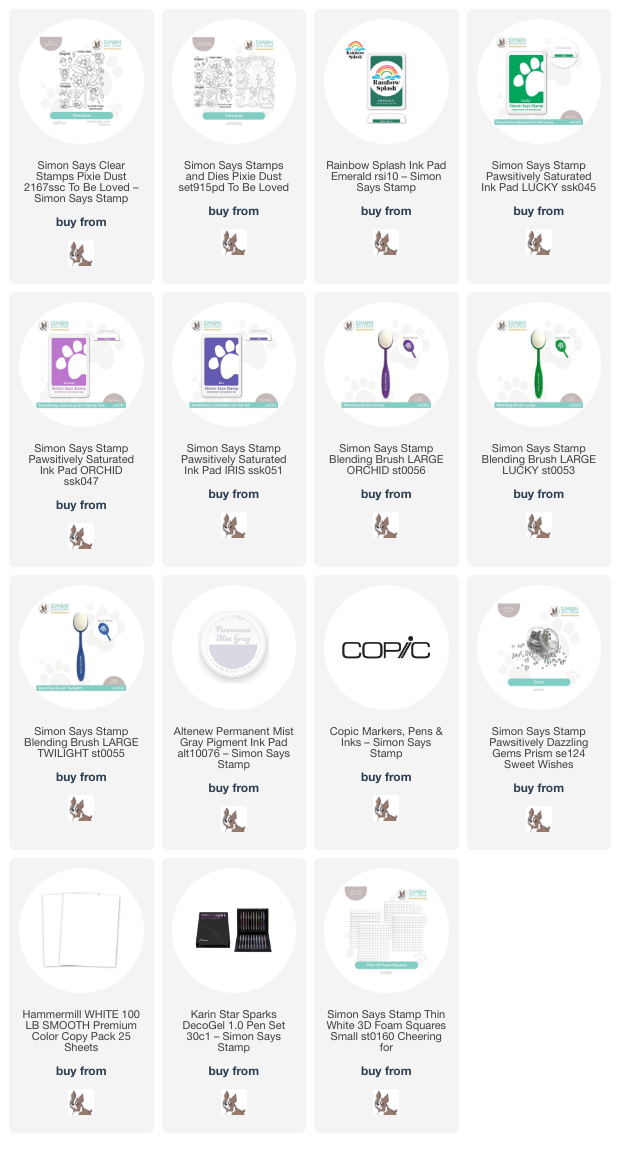
Hi friends! I have another no-line coloring project featuring the darling new Pixie Dust stamp set from the Simon Says Stamp To Be Loved release. I was immediately drawn to the large scale flowers, especially the graceful movement of the floral stems. I have been trying to work with styles that are a bit outside of my creative wheelhouse, attempting to stretch my creative muscles such as they are. The sweet characters in the Pixie Dust set were perfect for this creative exercise, while still adapting the images to my own style with very detailed no-line Copic coloring. Let’s get started with the details!

*I have gathered links to all of the products used at the bottom of the post for your convenience, using affiliate links. Thank you for shopping with my links! I truly appreciate your support for my work!*

To start, I stamped the little fairies, bees, and fungi from Pixie Dust onto some white cardstock using Altenew’s Permanent Gray Mist ink, as well as the large floral arrangement onto some plain white cardstock, cut to 3.5″ x 8.5″ to create a slimline card base. I then used a variety of Copic markers in cool shades of mauve, periwinkle, and deep emerald green to do some no-line coloring, then adding some details to the flower centers, skirts, and mushrooms with sparkling gel pens. The sparkling accents work perfectly with the magical little fairies and overall scene!

After the coloring was completed, I used the coordinating dies to cut all of the images out and began arranging my scene. Before adhering everything with foam adhesive, however, I decided to add to the magical feel by blending some “grass” with Lucky Pawsitively Saturated Ink and Emerald Rainbow Splash Ink on the bottom right corner of my card base, as well as creating a luminous sky background with Pawsitively Saturated Ink in shades of Iris and Orchid. I was careful not to do too much blending over my colored areas, creating a glow around the edges of the card to hint at the background very subtly.

I adhered all of the die cuts on the colored and blended slimline card base using thin foam adhesive squares, as well as a sentiment that I had stamped with Iris ink and embossed using Iridescent Purple embossing powder from Hero Arts to add some more magical shimmer to the card. Finally, I added a smattering of Prism Pawsitively Dazzling Gems for even more sparkle!

Well, that’s all for my project today. I love adapting different styles of designs to my own personal style and preferences. The detailed coloring on these sweet characters was such a fun way to push myself outside of my comfort zone. Also, if you haven’t hopped along on the To Be Loved Blog Hop, you’re missing out; the inspiration is a vision to behold!! Click HERE to see my post for Day 1 and get linked up to the rest of the hop. Thanks so much for stopping by today, and have a marvelous day!

Filed Under: simon says stamp Tagged With: fairies, ink blending, no line coloring, pawsitively saturated, pixie dust, slimline card

Rich Red Ink Blending with New Simon Says Stamp Pawsitively Saturated Inks!

October 25, 2024

This post was sponsored by Simon Says Stamp. Thanks, Simon!

Hi friends! The new Sweet Wishes release from Simon Says Stamp contains a gorgeous new ink trio of luscious, vibrant reds that I used as the inspiration point for my projects today. I always love new ink colors, as color is frequently the first element that I decide when mentally designing my project, and these vibrant, cool reds are absolutely perfect for the holiday season. I used two different techniques with the same embossing folder for today’s projects, so let’s get started with the details!

*I have linked all of the products used at the bottom of the post for your convenience using affiliate links. Thank you for shopping with my links! I truly appreciate your support for my work!*

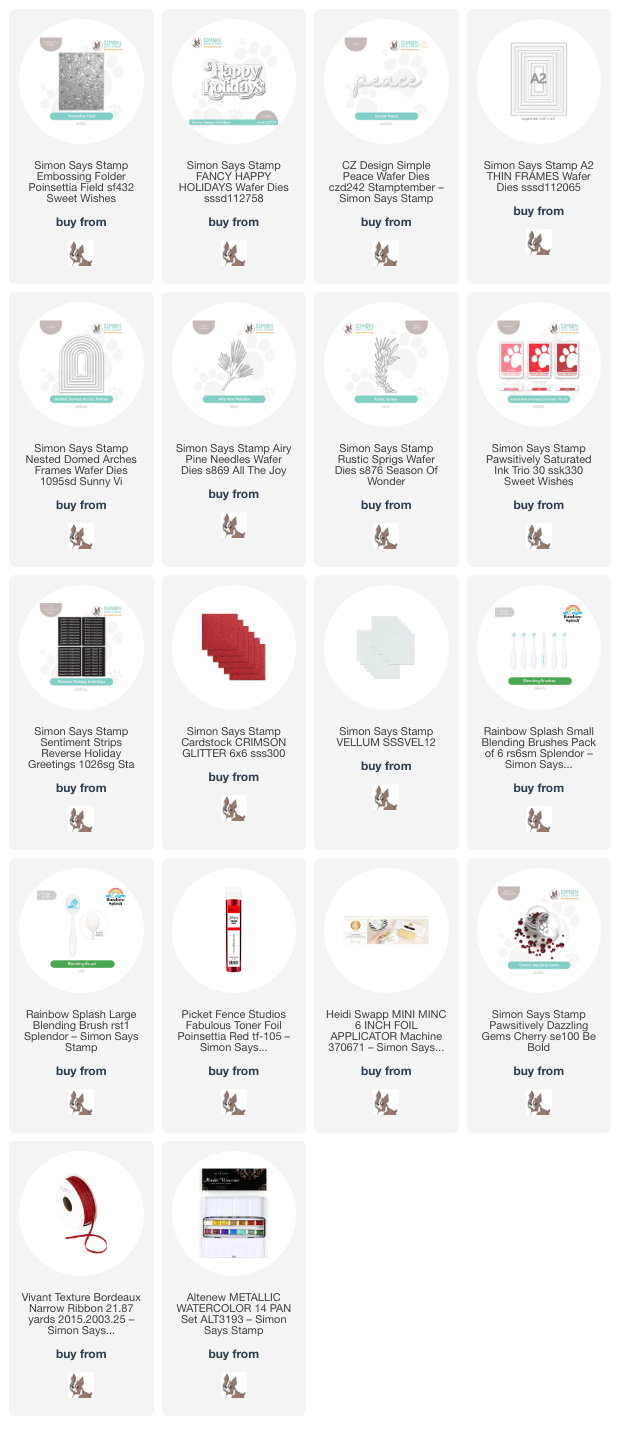
For both of my projects today, I put the new Ink Trio 30 to use with the beautifully intricate new Poinsettia Field Embossing Folder. The 3D embossing folders from Simon Says Stamp are amongst my most favorite products from every release, because there are so many ways to use them, and so many mediums with which to pair them. I’ve used two different techniques for my projects today, creating two completely different looks with almost identical supplies.

For my first project, I ran a panel of white cardstock through my die cutting machine using the new Poinsettia Field Embossing Folder. To add color to the panel, I flipped the embossed image over to reveal the debossed background, with the images impressed into the cardstock rather than popped up. I then used small blending brushes to blend the two lighter inks in the new Ink Trio 30 in the center of each flower, blending the lightest over most of each flower and enhancing the center of each flower with a small amount of the middle shade from the trio. After I had finished blending on each flower (which sounds time consuming, but actually went quite quickly!), I swiped the darkest shade from the Ink Trio 30 over the raised areas, putting the ink pad directly onto the cardstock, which enhances the pattern and creates such unique texture! I blended that same deeper red around the edges, creating a halo, and splattered the entire panel with metallic red watercolor.

After I had finished creating the background, I die cut a frame from some glittery red cardstock using the Nested Domed Arches Frames and adhered it to the card front using liquid adhesive. I used the same glittery red cardstock to die cut the detail layer of the Fancy Happy Holidays die set and added a vellum shadow behind it. To enhance the sentiment, I die cut some foliage using the Airy Pine Needles die and Rustic Sprigs die, tucking the monochromatic die cuts behind the sparkling dimensional sentiment. Finally, I added a few Cherry Pawsitively Dazzling Gems for added sparkle!

For my second card, I did some simple ink blending using the new Ink Trio 30, using blending brushes to blend a smooth ombré horizontally across a white A2 card front. After ink blending, I made sure that the cardstock was completely dry with my heat tool and ran the panel through my die cutting machine with the Poinsettia Field Embossing Folder. The color saturated panel enhances the incredibly detailed background so beautifully, adding texture and pattern to the panel.

After I had finished the background, I die cut another glittering frame, this time using the A2 Thin Frames and the same Crimson glitter cardstock from Simon Says Stamp. I adhered the frame around the edges of the blended, embossed background. The frames help to draw the eye towards the focal point in the center of the card, as well as add texture to the monochromatic card. I die cut the detail layer of the Simple Peace die from some coordinating red cardstock and the shadow layer from more red glitter cardstock, adhering the two layers together with liquid adhesive. I popped the sentiment die cut up with some foam adhesive squares, then tucked a sentiment strip from the Reverse Holiday Greetings sentiment card set, to which I had added some red toner foil using my Minc machine. To accent the sentiment pieces and add a bit more botanical softness to the card, I die cut a deep red Airy Pine Needles sprig and tucked it beneath the sentiment pieces. Finally, I added a Bordeaux ribbon bow and some shimmering gems.

Well, that’s all for my projects today! Each of these cards is so different while still being exactly the same color palette. It’s amazing what a difference technique makes for the color saturation with these embossing folders! Thanks so much for stopping by today, and have a marvelous day!
Filed Under: simon says stamp Tagged With: A2 thin frames, airy pine needles, christmas card, die cutting, fancy happy holidays, holiday card, ink blending, ink swiping, minc, nested domed arches frames, pawsitively saturated, poinsettia field, reverse holiday greetings, rustic sprigs, simple peace, toner foil

  • « Go to Previous Page
  • Page 1
  • Page 2
  • Page 3
  • Page 4
  • Page 5
  • Interim pages omitted …
  • Page 9
  • Go to Next Page »

Primary Sidebar

  • Facebook
  • Instagram
  • Pinterest
  • YouTube

Favorite Shops

Secondary Sidebar

Subscribe

Enter your email address to subscribe to this blog and receive notifications of new posts by email.

Instagram
Something is wrong.
Instagram token error.
Follow
Load More

Archives

Tags

3D embossing folder alcohol markers better press birthday birthday card blog hop card kit christmas christmas card christmas tag colored pencil copic copic coloring Daniel Smith die cutting embossing folder embroidery felt giveaway holiday holiday card hot foil ink blending karin brushmarker pro layered stencil masculine my monthly hero new release no line coloring no line watercolor OLO marker olo markers original illustration pawsitively saturated rainbow shaker card slimline stamping stamptember stencil thank you thinking of you valentine's day video watercolor

Popular Posts

Simon Says Stamp Sending Cheer Blog Hop- Day 2 + Freebie + Giveaway!
Altenew October 2026 Release Blog Hop + Giveaway!
Rustic Monochromatic Stars for Christmas with Rainbow Splash!
December 2018 My Monthly Hero Blog Hop + Giveaway!
March 2020 Essentials By Ellen Blog Hop+Giveaway!
The Ton Stamps Summer Release: Day 1
Hero Arts Partners Blog Hop: Lawn Fawn!
Waffleflower July Release Blog Hop!
Simon Says Stamp STAMPtember Tim Holtz Collaboration: Festive Holidays!
Honey Bee Stamps Autumn Blessings Blog Hop-Day 2!

Disclosure

Some affiliate links are used in my posts. This means that, should you click on one of my links and purchase something from that company, I will receive a small portion of the sale at no extra cost to you. I use the money earned from these sales to help maintain my blog. I so appreciate you visiting and, if you do choose to use one of my affiliate links, thank you so much for your support!
Copyright © 2026 ·Brunch Pro Theme · Genesis Framework by StudioPress · WordPress · Log in
Loading Comments...