• Skip to main content
  • Skip to primary sidebar
  • Skip to secondary sidebar

Sixth Street Sundries

Emily Midgett

  • Home
  • About Me
  • Contact
  • OLO Marker Color Swatch Chart
  • Shop

peonies

Hero Arts 2018 Summer Catalog Blog Hop!

May 15, 2018

Good morning! Today is an exciting event in the Hero Arts family… we are officially debuting the new 2018 Summer Catalog with a fantastic Blog Hop featuring the Creative Team and some utterly fantastical guests! You should have arrived here from Clare’s blog and your next stop is Ilina’s blog. You can find the full hop list here. We have some amazing inspiration for you today using new products that can be found in this beautiful catalog (which you can peruse here in PDF form), as well as two $50 Hero Arts shopping sprees up for grabs!

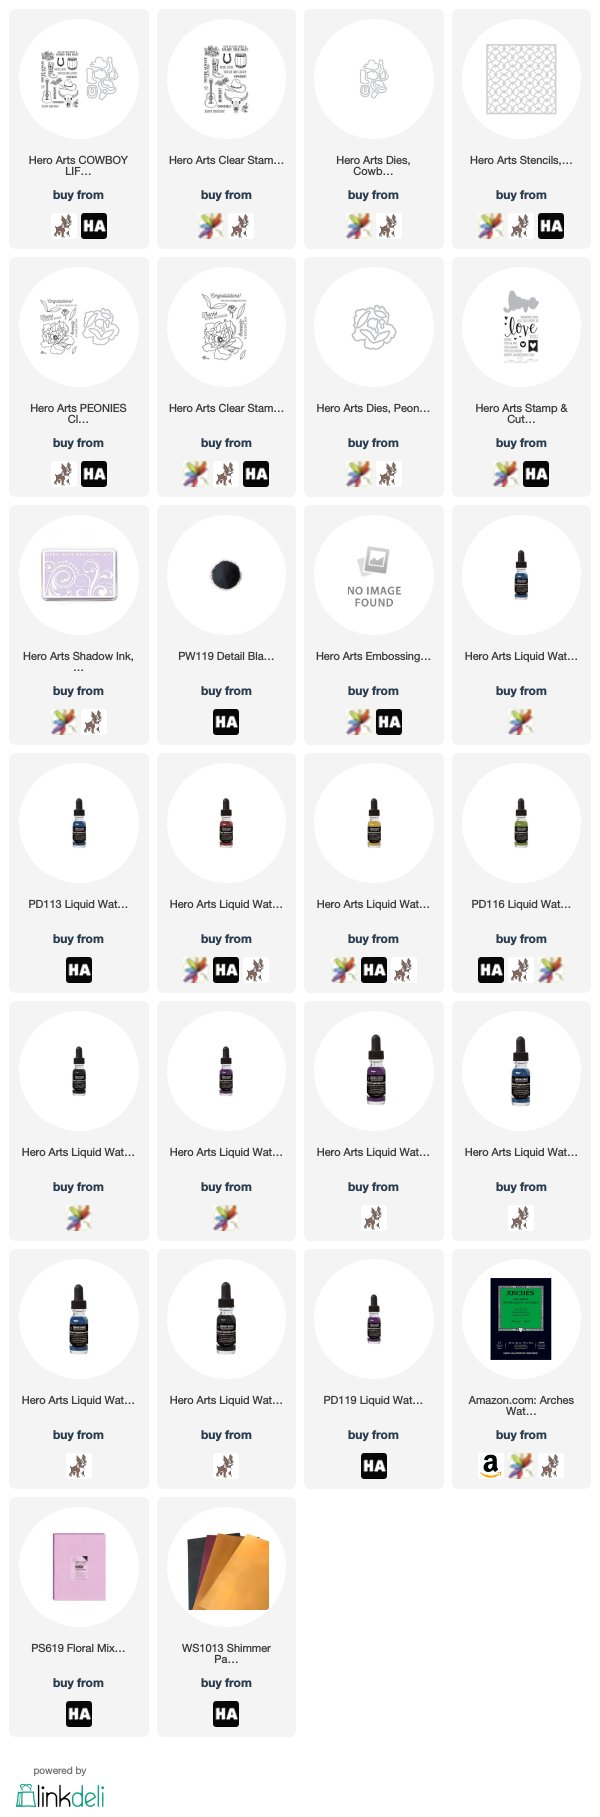
For my first project, I wanted to use the darling new Cowboy Life stamp and frame cuts set. When I first met my husband, he fancied himself a cowboy…. boots, belt buckle, tight cowboy jeans, multiple hats, weird caped duster thing… (Did I mention we live in Illinois? Not exactly cowboy territory. Anyway.) The new Cowboy Life and Cowboy Adventure sets called to me, which I found interesting since these sets are not my usual style! I’m blaming my 19 year old self, the one who fell in love with a cowboy. 😉 I particularly liked the Cowboy Life set, because it includes some sweet little floral bouquets…. Flowers=instant Emily magnet.

I started by black heat embossing the cow skull and some flowers onto Arches watercolor paper using black embossing powder, then used the Hero Arts Liquid Watercolors to do some soft watercoloring. (Can you believe how soft and subtle you can make those super pigmented colors?? Amazing.) I die cut all of the pieces using the coordinating Frame Cuts and black embossed a greeting from the Cowboy Life stamp set onto a flagged strip of card stock. For the card base, I did some soft tone-on-tone blending using the new Scrollwork Stencil and Soft Purple ink onto some Floral Mix Layering Papers. I popped up all of the components with dimensional adhesive.

For my second project today, you knew I wouldn’t be able to resist the absolutely stunning new Peonies stamp set. It’s unbelievably beautiful… and so big. Gah. I love it. One of my favorite things about watercoloring flowers is that you can get so many different looks with them, depending on which mediums and colors you decide to use. Here, I’ve paired white heat embossing with mauve watercoloring, but I created another project (which I’ll share soon! ;)) using no line pencil coloring and it looks totally different.

I started by white heat embossing one of the new Peonies stamps in the corner of an A2 panel of Arches card stock. I then taped it down to a cutting board, because I knew that I wanted to do a heavy watercolor wash around my peony, and I wanted the panel to stay nice and flat. I watercolored the peony using a combination of Purple, Moss, Black, Dandelion, and Strawberry Liquid Watercolors. I began by watercoloring the peony using only the Strawberry shade, then adding layers of Purple and a Strawberry/Purple/Black mixture to get lots of depth and dimension. I love that you can see undertones of the bright Strawberry but still have the cool, mauve-y overall look from the additions of the Purple and Black watercolors.

After I’d finished coloring the peony, I added some more washi tape to the top so that I could add my black watercolor wash around the edges. I did a “wet-on-wet” technique, first wetting the card stock, then dropped the color in and letting it bloom organically. I did go back in and manipulate the color a bit to cover bare spots, as well as dissipate out into a nice fade. The final step was to add the greeting from the Love Stamp and Cut.

Well, that’s all for my projects today! We have a stellar lineup of inspiration for you today. Here’s the full hop list:

The Hero Arts Blog
Amy Tsuruta
Clare Prezzia
Emily Midgett
Ilina Crouse
Janette Kausen
Jessica Frost-Ballas
May Sukyong Park
Michelle Short
Yana Smakula
Kathy Racoosin
Kelly Latevola
Lydia Fiedler
Wanda Guess
Cynde Whitlow
Ericka Strange
Jeanne Jachna
Juhi Khanna
Karen Bull
Kim Hamilton
Lisa Stein
Meghan Peterson
Michelle Yuen
Libby Hickson
Jennifer McGuire

Now, for the GIVEAWAY. Hero Arts is giving away two $50 shopping sprees to the Hero Arts Store! All you have to do to be entered win is leave comments on the blog hop stops. The more comments you leave, the more chances you have to win! You have until 11:59 P.M. PST on Sunday, May 20 to leave your comments. The winners will be chosen the following day! Thanks for dropping by, and have a marvelous day!


Filed Under: Hero Arts, watercolor Tagged With: blog hop, catalog, cowboy, new release, peonies

Get To Know the Ellen Hutson Design Team Blog Hop!

March 3, 2018


Good morning! Even as a seasoned cardmaker, I enjoy enjoy learning tips & tricks from other crafters. My favorite tip/trick is to use artwork and fashion found on Pinterest as inspiration for my cards. You can find some really beautiful and unique color combinations, layouts, and technique ideas from fashion and artwork photos on Pinterest. I get a lot of help on floral layouts from looking at wedding bouquets and floral patterned clothes on Pinterest.

Today, the new Ellen Hutson Design Team is having a special blog hop to help introduce all of the new team members! We were supposed to use our “favorite-” medium, stamp set, colors, etc. I combined several of those to create this pretty watercolored card!

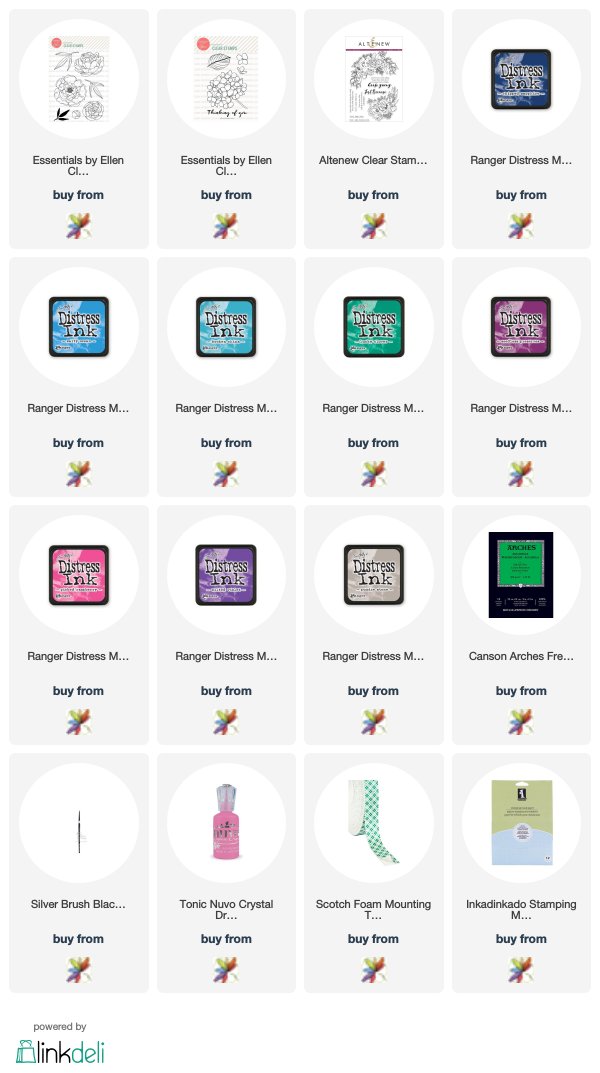
For my project today, I chose to create a no-line (almost) one layer card using some of my absolute favorite Essentials By Ellen products and Distress Inks for watercolors. I started by cutting a mask from the Mondo Hydrangea stamp set for the main flower, then stamping that same image again on some Arches watercolor paper using very pale gray ink. I placed the mask over the hydrangea, then stamped the leaves from Mondo Hydrangea and some of the smaller blooms and foliage from Mondo Peony using the same light gray ink. The nice thing about no-line coloring is that, even if your masking isn’t perfect and you get some overlapping lines (ahem, don’t look closely at my foliage in this next photo), you can still fudge it because those lines are mostly covered up by the coloring.

To watercolor the flowers, I chose to use a looser style of watercoloring, not quite so detailed as I normally would have done with my Daniel Smith or my Zigs… Distress Inks are a different animal when it comes to blending and shading, so you have to adjust accordingly. 🙂 I will list the different inks individually at the bottom of the post, but the main colors are Picked Raspberry, Wilted Violet, Salty Ocean, and Lucky Clover. I simply tapped them onto a piece of laminated card stock and picked the ink up with my paintbrush. For the shadows, I added in deeper shades of the same colors on the second layer for the shading, occasionally adding in some Pumice Stone to my color mixture to create shadows and depth.

The key with no-line watercolor is to work in sections that are not right next to each other. Watercolor a petal or two, then move to a completely different area. This helps to avoid the colors bleeding into each other, which also has the unpleasant effect of losing your crisp edges, and thus making your project a muddy mess. 🙂 After I had finished coloring all of the flowers, I allowed plenty of drying time before adding my halo of Wilted Violet around the edge of my bouquet. I added a few splatters with a flick of my paintbrush and added a few Nuvo Drops in Carnation Pink to help round out the bouquet and add some texture.

I trimmed down the edges to mount it on a royal purple mat and added a sentiment from Altenew’s Just Because stamp set heat embossed in white on navy blue card stock and popped up with dimensional adhesive. And that’s all for that project! Very loose watercoloring, but those bright Distress Ink colors really make those flowers pop off the page!

In the spirit of getting to know the new Ellen Hutson Design Team, here is a little info about me that you might not know:
~Coffee or tea? Depends on the time of day and the temperature outside. 😉 Coffee in the morning, tea in the afternoon. Sometimes iced, sometimes hot…. But I am an equal opportunity caffeinator.
~How did you come up with your blog name? Our first house was on Sixth Street. When I started blogging, I intended to blog about many different types of crafts, including scrapbooking, party decor, cardmaking, home decor, etc, so Sixth Street Sundries seemed perfect. Plus, I like alliteration haha.
~Tell us one silly/random/interesting tidbit about yourself! I have a master’s degree in vocal performance and have performed as the soprano soloist for Faure’s Requiem at The Kennedy Center in Washington, DC! I am also pretty tall, 5’10″… which makes my last name even funnier!

Well, that’s all for me today! If you’ve never been to my blog before, I hope you have enjoyed getting to know me a little bit. I’m so happy you’re here! And for old friends, welcome back! This year is going to be fantastic, I think! Here are links the rest of my esteemed Design Team compatriots:

Ardyth Percy-Robb
Carissa Wiley 
Carly Tee Minner
Carolyn Peeler
Elena Roussakis
Emily Midgett
Heather Campbell
Julia Stainton
Julie Ebersole
Justine Hovey
Kelly Griglione 
Kittie Caracciolo
Laurel Beard
Lisa Adametz
Lisa Spangler
Lydia Evans
Michele Ferguson
Sandy Allnock
Sharon Harnist
Therese Calvird

Filed Under: Ellen Hutson Tagged With: distress ink, distress watercolor, hydrangeas, masking, no line coloring, peonies, watercolor

Getting my peony fix. 

October 13, 2017

Good morning! My crafty destash sales have allowed me to purchase a few new sets that have been calling to me, case in point: Altenew’s Just Because. I haven’t played with peonies much lately, so I needed to get my peony fix…. and this absolutely stunning new set was just what the doctor ordered.

I started by heat embossing the larger of the two bouquets from Just Because using Altenew’s Golden Peach embossing powder onto some Canson Montval watercolor paper. I added a few sprigs of foliage from the smaller bouquet in the stamp set to fill out the corner.

After I had embossed the bouquet, I colored the blooms with my Zig markers and damp Silverwhite paintbrush. I added a pale gray halo around the edge of the bouquet. (If you’d like to watch my Zig technique in action, click here or here to watch my videos!) I die cut Altenew’s Script Words once from rose gold glitz paper and three times from white card stock, then glued them all together to create a dimensional die cut. I heat embossed the greeting from the Just Because stamp set onto a thin strip of raspberry colored card stock using the Golden Peach embossing powder.


I added a few sequins from my stash just to add some sparkle.

That’s all for me today! I volunteered to be a helper for my kiddos’ pumpkin patch field trip… 20 three year olds and a muddy pumpkin patch. What could be more fun? (haha) Have a marvelous weekend, friends!

Filed Under: altenew, watercolor, Zig Clean Color Tagged With: floral card, heat embossing, just because, peonies, thank you card, zig watercoloring

Love you so much

May 15, 2017

Good morning! Happy Monday! I hope everybody had a lovely Mother’s Day weekend. My hubby had to work most of the weekend, so I’ve been promised a “do-over” next weekend. We shall see. 😉

So if you have followed my blog or on instagram for very long, you will have noticed that I have a slight obsession with peonies. All flowers, really, but peonies in particular. I will never have enough peony stamps. So when Wplus9 came out with their new Modern Peonies set, my jaw immediately dropped, and I waited impatiently for it to arrive. I will admit, though, that after I received them, I was a little intimidated by just how intricate they were. Hopefully I’ve done them justice. I started by heat embossing them with silver detail embossing powder onto some Canson Montval watercolor paper, then die cutting them with their coordinating dies. I have been experimenting with my other watercoloring mediums lately, but wanted to start out with my Zig markers for a bit of shading “practice” such as it is.

I chose a lavender and coral color scheme, because as I looked through my Instagram feed one evening, I realized that literally every card that I make is primarily pink. So, I’ve made a vow to branch out into other combinations. There’s just something about pink flowers, though, that makes my little heart go pitter-patter.

Anyway, After watercoloring the blooms with my Zig markers and a damp paintbrush, I die cut one of Wplus9’s Lattice Frame die from some shimmery pewter card stock from my stash. (Have you guys seen the wonderful new mini stacks from DCWV that you can find at the big box stores? They have shimmer and glitz papers in a huuuuge array of colors. I basically bought them all. They’re great for die cuts and die cut sentiments, because they cut like butter!) I arranged my peony bouquet, picked it up with Press ‘n Seal, then adhered it  to the front of my lattice die cut. I added some dimensional adhesive to the back of the lattice die cut, then laid it down on some dark coral-ish red card stock, a perfect complement to the coral flowers.

For my greeting, I chose to use the beautiful “love” stamp and cut set from Hero Arts. I die cut the “love” die from dark purple card stock, then heat embossed the “so very much” from the included stamp set onto a thin strip of vellum that I flagged at the end. I tucked it under one of the flowers, then scattered a few cherry red sequins around, just to add a bit more sparkle. 🙂 I’m planning on giving this to my mom with her bag of sugar free Russell Stover goodies and a mug that says “Keep Calm and Call Mom,” which is pretty much my mantra since I had kids haha!

I hope you all had a wonderful Mother’s day, and for those who are mothers only in their hearts and in their dreams, I send out a special hug. I’ve been there. Mother’s Day can be rough.

Wishing you all a fabulous week. 🙂

Filed Under: watercolor Tagged With: peonies, watercolor, wplus9

  • « Go to Previous Page
  • Page 1
  • Page 2

Primary Sidebar

  • Facebook
  • Instagram
  • Pinterest
  • YouTube

Favorite Shops

Secondary Sidebar

Subscribe

Enter your email address to subscribe to this blog and receive notifications of new posts by email.

Instagram
Something is wrong.
Instagram token error.
Follow
Load More

Archives

Tags

3D embossing folder alcohol markers better press birthday birthday card blog hop card kit christmas christmas card christmas tag colored pencil copic copic coloring Daniel Smith die cutting embossing folder embroidery felt giveaway holiday holiday card hot foil ink blending karin brushmarker pro layered stencil masculine my monthly hero new release no line coloring no line watercolor OLO marker olo markers original illustration pawsitively saturated rainbow shaker card slimline stamping stamptember stencil thank you thinking of you valentine's day video watercolor

Popular Posts

Simon Says Stamp Sending Cheer Blog Hop- Day 2 + Freebie + Giveaway!
Altenew October 2026 Release Blog Hop + Giveaway!
Simon Says Stamp Sending Cheer Release: Now Available!
Simon Says Stamp October 2026 Card Kit of the Month: Homespun Gratitude!
A Double Leftovers Card Set with New Simon Says Stamp Stencils and Dies!
Simon Says Stamp November 2025 Card Kit: Give Thanks!
Joyful Snowman with New Simon Says Stamp Sending Cheer Release!
Hero Arts Partners Blog Hop: Lawn Fawn!
Altenew Standalone Die Blog Hop+Giveaway!
March 2020 My Monthly Hero Blog Hop+Giveaway!

Disclosure

Some affiliate links are used in my posts. This means that, should you click on one of my links and purchase something from that company, I will receive a small portion of the sale at no extra cost to you. I use the money earned from these sales to help maintain my blog. I so appreciate you visiting and, if you do choose to use one of my affiliate links, thank you so much for your support!
Copyright © 2026 ·Brunch Pro Theme · Genesis Framework by StudioPress · WordPress · Log in
Loading Comments...