• Skip to main content
  • Skip to primary sidebar
  • Skip to secondary sidebar

Sixth Street Sundries

Emily Midgett

  • Home
  • About Me
  • Contact
  • OLO Marker Color Swatch Chart
  • Shop

petal point frames

Blended Hydrangeas with Simon Says Stamp!

August 27, 2026

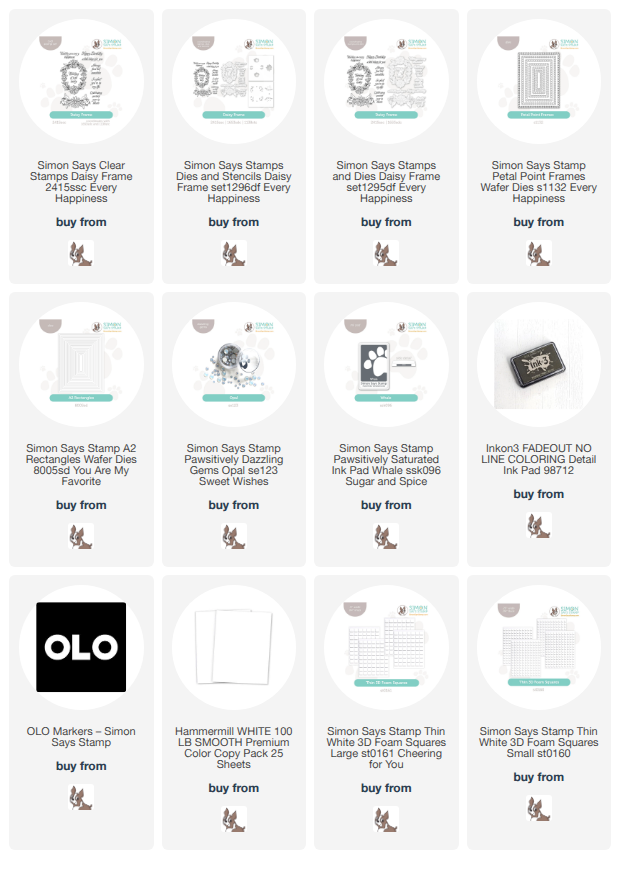
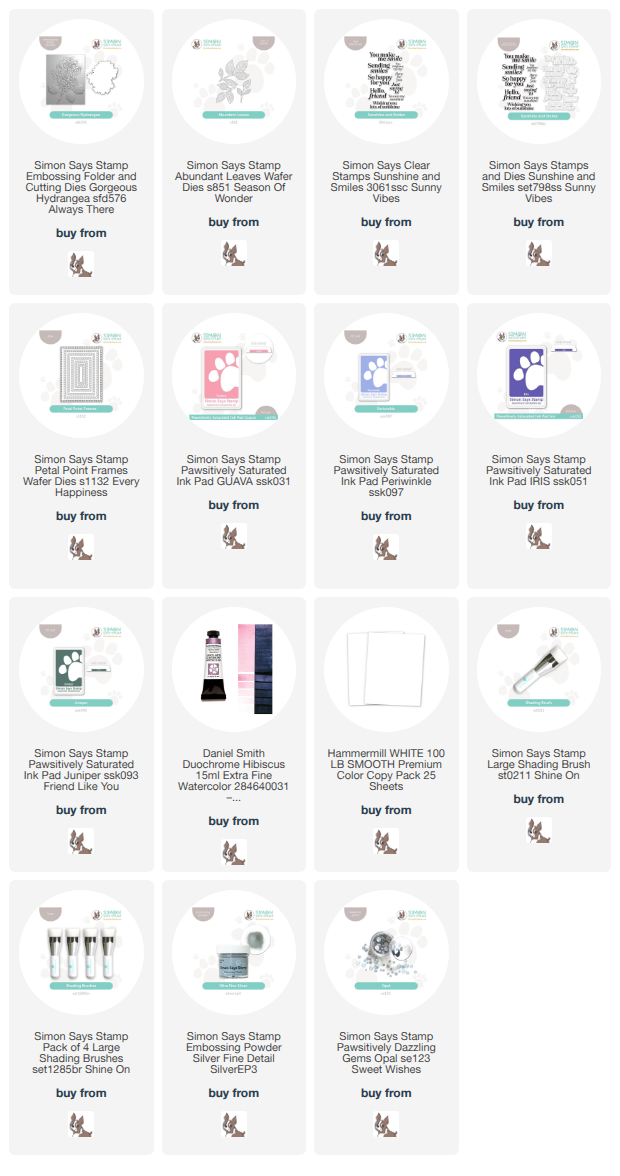
This post was sponsored by Simon Says Stamp. Thanks, Simon! *I have gathered links to all of the products used at the bottom of the post for your convenience, using affiliate links at no extra cost to you. Thank you for shopping with my links! I truly appreciate your support for my work!*

Hi friends! I have another hydrangea project for you today, this time without the stencils! The details that stencils can provide on embossed images is incredible, but sometimes I don’t want the details to be quite so crisp and clean, preferring instead to have the details a bit more fluid and ethereal. The Gorgeous Hydrangea embossing folder and die set allows you to create those exquisite details with or without stencils, depending on your method of coloring. In THIS post, I used the embossing folder alone with the stencils, but for today’s project, I thought I would showcase the beauty in the detailed die cut alone. Let’s get started with the details on my project!

To begin, I die cut the large floral image from the Gorgeous Hydrangea folder/die set using white cardstock, then placed the die cut in the appropriate spot inside the embossing folder and ran it through my die cutting machine. Once I had the blossoms ready for color, I blended Pawsitively Saturated Inks in shades of Guava, Periwinkle, and Iris on the die cut using Shading Brushes, making sure to spread the colors out throughout the bloom as an homage to the gorgeous hydrangeas from my trip to the East Coast as a child. The color palette reminds me of cotton candy or a Bubbleberry Sno-Cone! Once I had completed the blending, I added some pink shimmery watercolor to each bloom for a touch of sparkle.

Once I had completed the large hydrangea bloom, I knew I needed to add some greenery. I die cut one of my favorite foliage die sets, called Abundant Leaves, from white cardstock, then used a Shading Brush to add Juniper ink to the leaves, tapering the color off at the edges of each leaf. I also knew that I wanted a frame upon which I could build my bouquet and frame my sentiment, so I die cut the medium Petal Point Frames from some more white cardstock. I adhered the frame on a white A2 card front using foam adhesive, allowing the frame’s edge to spill off of the left side and trimming it with my sharp scissors. I arranged the blended hydrangea over the top and tucked the foliage behind it, adhering everything with foam adhesive.

After I had completed the bouquet, I embossed a greeting from the Sunshine & Smiles stamp set, using silver embossing powder and die cutting it with it’s coordinating die. I tucked the sentiment in the bouquet with some more foam adhesive, finishing everything off with some Opal Pawsitively Dazzling Gems at the center of each blossom!

Well, that’s all for me today! I think that detail that is captured with the embossed die cut is absolutely scrumptious. It’s so fun to watch it come to life with some gorgeous ink colors and sparkles! Thanks so much for stopping by today, and have a marvelous day!
Filed Under: simon says stamp Tagged With: abundant leaves, die cutting, embossing folder, gorgeous hydrangea, hydrangea, petal point frames, sunshine and smiles

Daisies are the Friendliest Flowers with Simon Says Stamp!

August 18, 2026

This post was sponsored by Simon Says Stamp. Thanks, Simon! *I have gathered links to all of the products used at the bottom of the post for your convenience, using affiliate links at no extra cost to you. Thank you for shopping with my links! I truly appreciate your support for my work!*

“Don’t you think that daisies are the friendliest flowers?” Name that movie!! It’s one of my favorites! I am so excited that I was able to design my newest stamp set for Simon Says Stamp called Daisy Frame (check it out HERE) featuring the friendliest of blooms. I created two different daisy floral arrangements for the stamp set, one with a wreath of daisies and foliage (check out THIS project and THIS project featuring the large wreath!) and for today’s project, I thought I’d turn my attention to the smaller swag included with the set. Let’s get started with the details on my project!

To begin, I stamped the swag from Daisy Frame using no-line coloring ink on plain white cardstock, then used OLO Markers to color the images in pretty shades of purple and soft green. I used the coordinating dies to cut the finished colored images out and set them aside. Daisies are such a fun floral to color, because the petals are fairly straightforward and don’t curl in on each other, making them great for practicing your shading!

After I had created my pretty daisy swags, I decided to ramp up the feminine factor with some pretry, lacy frames. I die cut the new Petal Point Frames twice: once alone for the medium-sized die cut and another paired with an A2 Rectangles die to create a lovely, lacy frame. I layered the two lacy die cuts on my white A2 card front, adhering the frame around the outside with liquid adhesive and using thin foam adhesive for the center die cut so that they were layered together. The straight edge of the exterior frame keeps the layered frames from being too visually busy.

After I had layered the frames on my card front, I used another layer of thin foam adhesive to add the daisy swags to the top and bottom of my middle lacy rectangle. The double layer of foam adhesive helps those daisies to pop from the layers of white cardstock! I also stamped a greeting from Daisy Frame using Whale Pawsitively Saturated Ink and die cut it with it’s coordinating die, then placed it in the absolute center of my middle lacy rectangle with some more thin foam adhesive. Finally, I added a few Opal Pawsitively Dazzling Gems for sparkle!

Well, that’s all for my project today! I just love the crisp white-on-white layers with that pop of vibrant purple, don’t you? It’s so feminine and delicate! Thanks so much for stopping by today, and have a marvelous day!

Filed Under: simon says stamp Tagged With: a2 rectangles, daisy frame, die cutting, no line coloring, OLO marker, olo markers, original illustration, petal point frames

Primary Sidebar

  • Facebook
  • Instagram
  • Pinterest
  • YouTube

Favorite Shops

Secondary Sidebar

Subscribe

Enter your email address to subscribe to this blog and receive notifications of new posts by email.

Instagram
Something is wrong.
Instagram token error.
Follow
Load More

Archives

Tags

3D embossing folder alcohol markers better press birthday birthday card blog hop card kit christmas christmas card christmas tag colored pencil copic copic coloring Daniel Smith die cutting embossing folder embroidery felt giveaway holiday holiday card hot foil ink blending karin brushmarker pro layered stencil masculine my monthly hero new release no line coloring no line watercolor OLO marker olo markers original illustration pawsitively saturated rainbow shaker card slimline stamping stamptember stencil thank you thinking of you valentine's day video watercolor

Popular Posts

Simon Says Stamp Sending Cheer Blog Hop- Day 2 + Freebie + Giveaway!
Altenew October 2026 Release Blog Hop + Giveaway!
Altenew Build A Flower Sweet Violet+Giveaway!
Floral Follies on Canvas with New Simon Says Stamp STAMPtember!
Simon Says Stamp STAMPtember Tim Holtz Collaboration: Festive Holidays!
Altenew Paint A Flower: Carnation Blog Hop+Giveaway!
Autumn Legs with Colorado Craft Company and Catherine Pooler!
Hero Arts Partners Blog Hop: Lawn Fawn!
Rustic Monochromatic Stars for Christmas with Rainbow Splash!
Altenew March 2020 Release Blog Hop+Giveaway!

Disclosure

Some affiliate links are used in my posts. This means that, should you click on one of my links and purchase something from that company, I will receive a small portion of the sale at no extra cost to you. I use the money earned from these sales to help maintain my blog. I so appreciate you visiting and, if you do choose to use one of my affiliate links, thank you so much for your support!
Copyright © 2026 ·Brunch Pro Theme · Genesis Framework by StudioPress · WordPress · Log in
Loading Comments...