• Skip to main content
  • Skip to primary sidebar
  • Skip to secondary sidebar

Sixth Street Sundries

Emily Midgett

  • Home
  • About Me
  • Contact
  • OLO Marker Color Swatch Chart
  • Shop

santa

Snowflake Shaker Card with New Simon Says Stamp DieCember Goodies + FREE Gift With Purchase!

December 2, 2024

This post was sponsored by Simon Says Stamp. Thanks, Simon!

Hi friends! I am back with another project featuring some of the fabulous goodies from the new Simon Says Stamp DieCember release. I love a good shaker card; there’s something so festive and just plain fun about receiving a card that is filled with fantastic shaker bits and sequins. A shaker card always puts a smile on the recipient’s face, right? So it only makes sense to send Christmas Cheer with a super fun shaker card created with some creative die cutting and sparkling sequins. Let’s get started with the details!

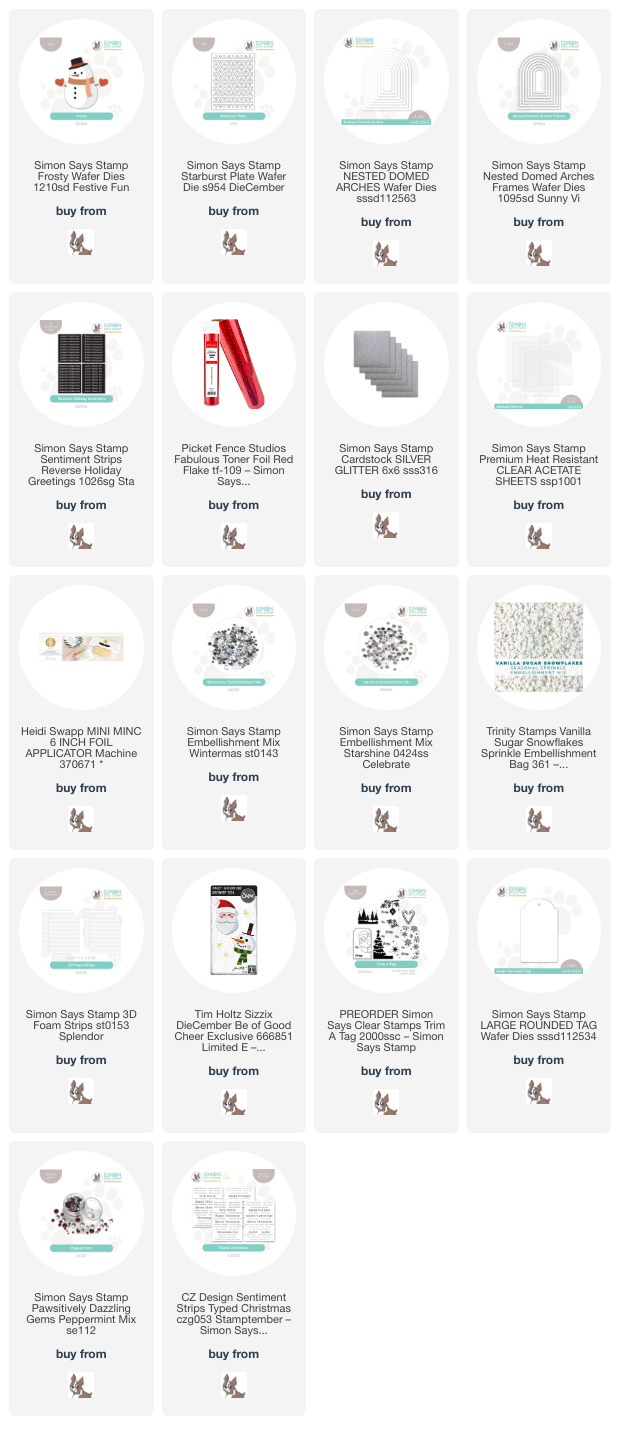
*I have gathered links to all of the products used at the bottom of the post for your convenience, using affiliate links. Thank you for shopping with my links! I truly appreciate your support for my work!*

I absolutely adore cover plates; they create such an enormous impact with one piece of cardstock and one pass through your die cutting machine. The new Starburst Plate is so beautifully intricate that I wanted to stretch that easily-created die cut even further by creating a die cut window with the negative space and a second card with the positive space! (More about that in a future post.) I began my project today by die cutting an A2 panel of white cardstock using the Starburst Plate, then placing the one of the Nested Domed Arches in the center of the die cut and running it through my die cutting machine again. I made sure to reserve the patterned, arched die cut for a future project, and backed the remaining negative piece with an A2 piece of acetate, creating a large, plain window to start my shaker card! I added an appropriately-sized Nested Domed Arches Frame die cut, cut from some Simon Says Stamp Silver Glitter Cardstock, creating a border around my window opening.

After creating my background, I used the previously-released Frosty snowman die with some colored cardstock to create the focal point for my project. The finished Frosty fits perfectly inside my arched window! I used the Simon Says Stamp 3D Foam Adhesive Strips around the edges of the back of my shaker front, then filled the entire shaker with some gorgeous and fun wintry sequins, adding a few plain red sequins to coordinate with the cheerful red scarf, mittens, and hat on my Frosty. I sealed up the shaker with a panel of plain white cardstock. I love how the sparkling sequins peek through the snowflake windows from the Starburst Plate die cut!!

For the greeting, I used my Minc Machine with Picket Fence Studios Red Flake foil to make the Reverse Holiday GreetingsĀ set look super shiny and festive. I trimmed the strip down and tucked it beneath my snowman with some more thin foam adhesive. Tucking the sentiment right beneath Frosty helps to ground him a bit so that he’s not floating in midair in my window!

Well, that’s all for my project today. Simon Says Stamp DieCember celebration is in full swing, and to make things even more special and fun, Simon Says Stamp is offering an exclusive freebie: Be of Good Cheer die set

You can receive this adorable Be of Good Cheer die set set from Tim Holtz with any $25 Tim Holtz purchase! Click HERE to check out all of the goodies eligible for the promotion!

I created a fairly quick tag using the sweet Santa die from Be of Good Cheer:

Some white embossed snowflakes on a cheerful red tag created the perfect backdrop for my happy Santa!

I added a few Peppermint Pawsitively Dazzling Gems, a cherry red bow, and a jingle bell to make things extra special.

Well, that’s all for me today. This fantastic freebie (valued at $16.99!) is only available while supplies last, so don’t wait! Thanks so much for stopping by today, and Happy DieCember!
Filed Under: simon says stamp Tagged With: christmas card, christmas tag, diecember, freebie, frosty, holiday card, hot foil, minc, nested domed arches, nested domed arches frames, pawsitively dazzling, reverse holiday greetings, santa, shaker card, starburst, tag, tim holtz, toner foil

Monochromatic Mint with DieCember!

December 12, 2023

This post was sponsored by Simon Says Stamp. Thanks, Simon!

Hi friends! I have a few monochromatic holiday projects to share with you today. As you can probably tell from my last several posts, red and green are on my naughty list right now, so I am trying to get my fill of my holiday cardmaking with unique, non-traditional color palettes. I feel like any shade of green will work for Christmas, even those green-adjacent shades of teal and mint, so I’ve used both of those in spades for my projects today. Let’s get started with the details!

My first projects are a pair of tags using some of the marvelous new snowflake products from DieCember. I started by die cutting the Large Rounded Tag four times from some medium teal colored cardstock. I ran two of the panels through my die cutting machine using the Snowflake Burst Plate, then blended Peacock ink from Concord and 9th around the edges of the patterned die cuts to add some extra drama and dimension to the background. I adhered the tags together, one embellished and one plain, with the scarred backs facing each other so that the “pretty” side faced out.

To continue the intense emerald and turquoise palette, I die cut the new Fretwork Snowflake die from some Malachite Glitter Paper from the Shimmering Shore Gradient Glitter Paper pack a few times and adhered them to the blended side of the tags, switching up the arrangement a bit on each tag to create different layouts.

I love adding foil to the CZ Designs Sentiment cards. They’re printed with toner, so are able to be used with toner foil and the Minc foiling machine. I foiled the Reverse Typed Christmas CZ cards with some minty green foil, then trimmed them out with my trimmer. I popped the sentiments up with some foam tape, then added a few sparkling gems, topping the tag off with some sparkling silver twine for a loop.

For my second project, I used the Tim Holtz Jolly Holiday cling stamp set and the Simon Says Stamp-Exclusive Jolly Holiday dies. I stamped the images on some Mint cardstock using Tropic Pawsitively Saturated ink using my MISTI, then keeping them in place, stamped them again using embossing ink and covered them with White Satin Pearl embossing powder. The Tropic ink creates a subtle tone-on-tone stamped image, while the pearl embossing powder adds a festive shimmer and shine to the image. I die cut the finished images with the Jolly Holiday dies, as well as trimming the sentiment strips down with my trimmer.

I ran a full size A2 panel of minty cardstock through my die cutting machine using the Tim Holtz Sparkle embossing folder. To help enhance the embossed pattern, I used blending brushes to blend Tropic and Aegean Pawsitively Saturated inks around the edges of the embossed panel. I also used the Karin Star Sparks Deco Gel Pens to add some sparkling accents to the raised images.

After I had finished embellishing the embossed background, I popped up the Santa and foliage images using foam adhesive, then added a double layer of adhesive for the sentiment strips. Finally, I added a few shimmering gems for a bit more sparkle!

Well, that’s all for my projects today. Just a reminder: if you purchase $25 worth of Tim Holtz products (like the Jolly Holiday cling stamp set) and add the darling, limited edition Walter the Penguin die set to your cart, you will receive Walter for free! (FYI- the Simon Says Stamp branded coordinating dies released for DieCember do not count towards the $25, but the cling stamps do!) This special freebie will be available as long as supplies last, and you can make as many $25 purchases to receive as many Walter dies as you would like!

Thanks so much for stopping by today, and have a marvelous day!

Filed Under: simon says stamp Tagged With: christmas card, christmas tag, diecember, holiday tag, santa, snowflake burst, tag, tim holtz

Hero Arts My Monthly Hero October 2020 Blog Hop+Giveaway!

October 5, 2020

Hi there! Hero Arts’s My Monthly Hero kit for October 2020 launches today, and we are celebrating this gorgeous kit and fantastic add-ons with a fun blog hop! You should have arrived here from Debi Adams, and your next stop is Ilina Crouse. This month’s kit has a beautiful holiday-theme, filled with traditional holiday silhouettes with a Nordic/folksy twist, a gorgeous ornament, and some super fun dies to create tags, ornaments, shakers…. so many options with this kit! The kit includes:

• 6″ x 8″ Clear Stamp Set
• 12 Coordinating Frame Cuts
• 1 Ornament Shape Die
• 2 Inner Ornament Dies
• 3 Embossing Powders (Red, Glacier Blue, White Sparkle), 1/2 oz. each
• 1 Watermark & Embossing Ink Cube

This individual items in this kit are valued at over $75, but is priced at only $34.99! Don’t wait too long on this one… I predict it will sell like hotcakes. You can also subscribe to be guaranteed your My Monthly Hero kit each month. And don’t forget to check out the add-ons; this month’s extras have a fantastic folksy theme, and I love all of them. I have a two projects using the main kit and one with some of the add-ons, so let’s get started with the details!

I tend to only use red at Christmas, and for these projects I thought I’d make things super fun and modern with a bright, lime-y green and super vibrant firetruck red. I created a tag and a card using the same color scheme, but these would be super pretty in shades of blue or aqua, as well!

For the tag, I began by die cutting the solid tag from the kit from white cardstock, then again with the oval insert in the center to create a frame. (There are SO many fun things that you can do with these ornament die cuts. Hello, shaker ornament with a family portrait!?) I stamped the greeting using Intens-ified Black ink, then added the folksy accents using Fresh Lawn, Neon Red, and Silver Dye inks in symmetrical pattern. I popped up the white frame using foam adhesive, then added some red and white twine to finish it off.

For the matching card, I used the new Northern Winter Cover Plate add-on die as a backdrop for the oval labels included in the kit. I die cut it from some Kiwi cardstock and layered it on an A2 panel of glittery white cardstock. I love the sparkle and subtle texture the glittery cardstock adds to the background!

I die cut one of the scalloped ovals from the main kit, then blended Neon Red ink around the edges to create a colorful mat for the sentiment oval (the leftovers from the ornament made earlier!). I stamped the greeting, again using Intens-ified Black ink, then stamped the Christmas trees included in the kit with Fresh Lawn ink, stamping off once to keep the tree images from overwhelming the sentiment. I popped everything up with some foam adhesive, then added some bright red gems to the Northern Winter Cover Plate die cut for a bit of extra texture and sparkle!

My next project uses the new Christmas Folks stamps and dies, as well as the new Holiday Graphic Patterns Bold Prints. I began by stamping the Santa and Mrs. Claus from Christmas Folks on some white cardstock using Intens-ified Black ink, then colored them using Copic markers in the same fire-engine red and neon green color scheme used previously, this time adding in some black accents, as well. I die cut the finished images using the coordinating frame cuts.

Next, I heat embossed the Holiday Graphic Patterns Bold Prints on some plain white cardstock using the white sparkle embossing powder included in the kit for some subtle, sparkling, tone-on-tone texture for the background.

I trimmed the embossed panel down just slightly, then mounted it on an A2 panel of Cherry cardstock. I popped up Santa and the Mrs. using foam adhesive, then stamped a greeting from Christmas Folks (love that font!) and matted it with some Pitch Black cardstock and popped it up, too. Clean and bright but with lots of texture and dimension!

Well, that’s all for my projects today. To celebrate this release, Hero Arts is giving away a $50 gift certificate to their online store! All you have to do to enter is leave a comment on participating blogs. The more comments you leave, the more chances you have to win! Your next stop is Ilina Crouse. Thanks so much for stopping by, and have a marvelous day!

Filed Under: Hero Arts Tagged With: christmas, christmas tag, cover plate, holiday card, my monthly hero, nordic, santa

Primary Sidebar

  • Facebook
  • Instagram
  • Pinterest
  • YouTube

Favorite Shops

Secondary Sidebar

Subscribe

Enter your email address to subscribe to this blog and receive notifications of new posts by email.

Instagram
Something is wrong.
Instagram token error.
Follow
Load More

Archives

Tags

3D embossing folder alcohol markers better press birthday birthday card blog hop card kit christmas christmas card christmas tag colored pencil copic copic coloring Daniel Smith die cutting embossing folder embroidery felt giveaway holiday holiday card hot foil ink blending karin brushmarker pro layered stencil masculine my monthly hero new release no line coloring no line watercolor OLO marker olo markers original illustration pawsitively saturated rainbow shaker card slimline stamping stamptember stencil thank you thinking of you valentine's day video watercolor

Popular Posts

Simon Says Stamp October 2026 Card Kit of the Month: Homespun Gratitude!
February 2018 My Monthly Hero Blog Hop!
Altenew Craft A Flower: Poppy Blog Hop+Giveaway!
Felted Gourd Wall Hanging with Simon Says Stamp!
Sunflower Home Decor with Simon Says Stamp!
Craft Your Life Project Kit: Feathered Lilies Blog Hop+Giveaway!
Simon Says Stamp October 2025 Card Kit of the Month!
Altenew Standalone Die Blog Hop+Giveaway!
The Ton Anniversary Release- Day 2
Honey Bee Stamps Cheerful Love Blog Hop!

Disclosure

Some affiliate links are used in my posts. This means that, should you click on one of my links and purchase something from that company, I will receive a small portion of the sale at no extra cost to you. I use the money earned from these sales to help maintain my blog. I so appreciate you visiting and, if you do choose to use one of my affiliate links, thank you so much for your support!
Copyright © 2026 ·Brunch Pro Theme · Genesis Framework by StudioPress · WordPress · Log in
Loading Comments...