• Skip to main content
  • Skip to primary sidebar
  • Skip to secondary sidebar

Sixth Street Sundries

Emily Midgett

  • Home
  • About Me
  • Contact
  • OLO Marker Color Swatch Chart
  • Shop

shaker card

Easter Greetings with Simon Says Stamp!

April 5, 2026

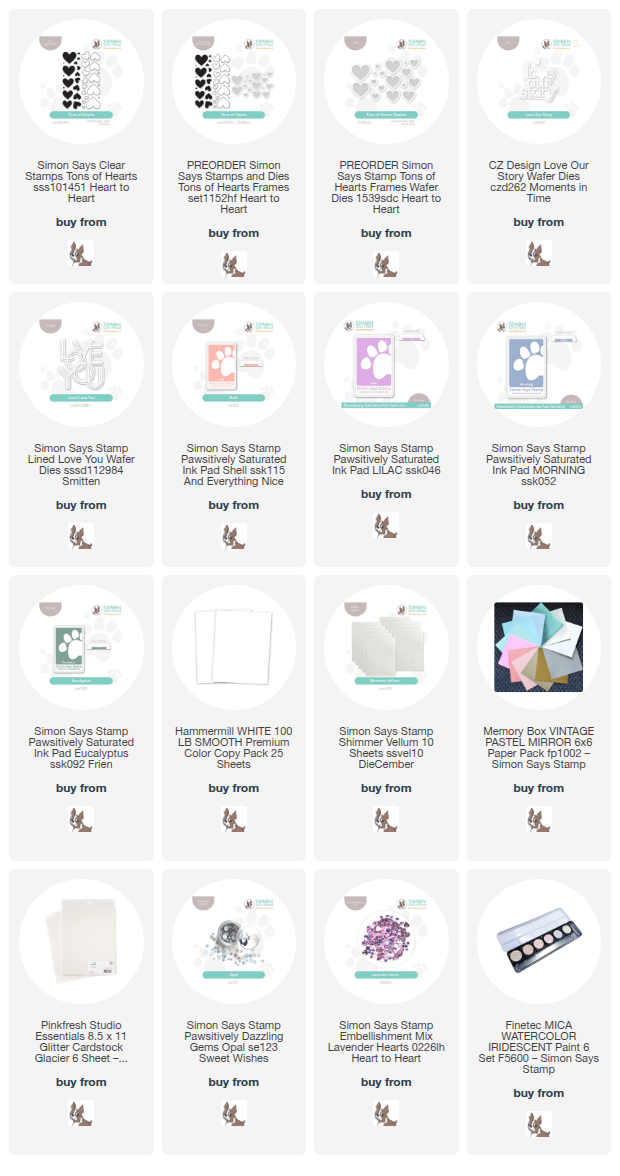
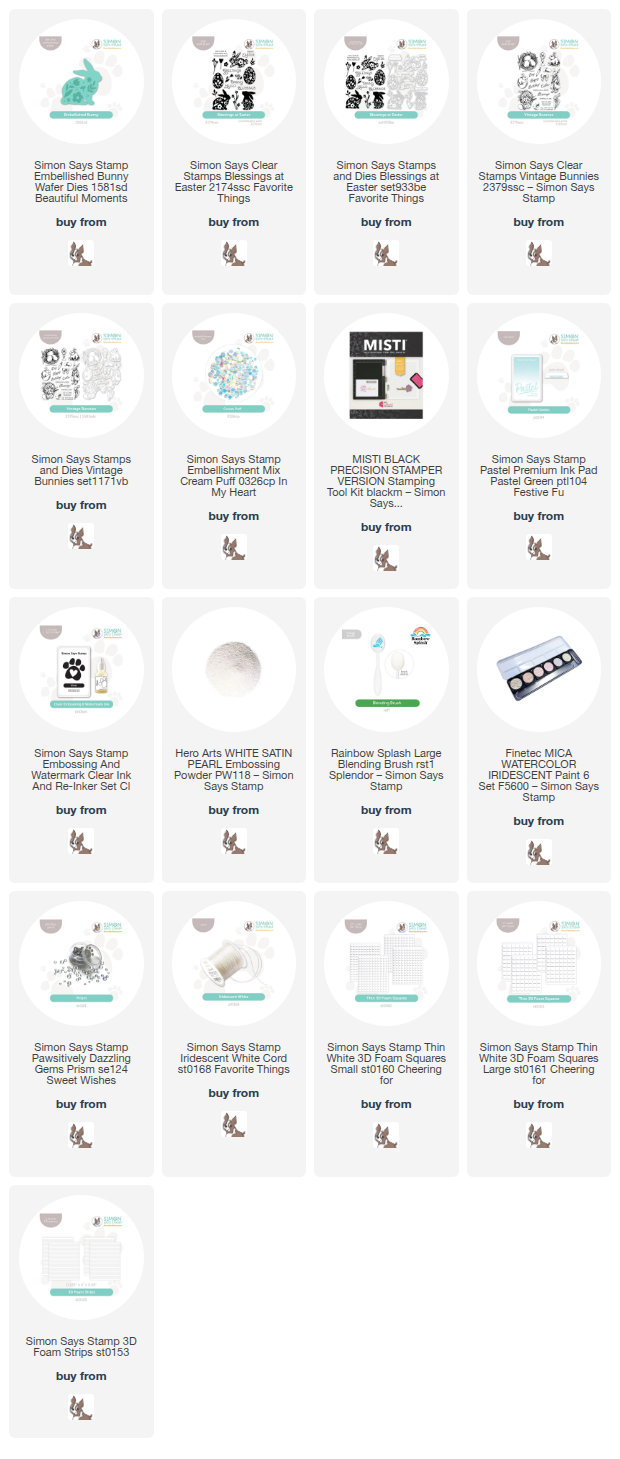
This post was sponsored by Simon Says Stamp. Thanks, Simon! *I have gathered links to all of the products used at the bottom of the post for your convenience, using affiliate links at no extra cost to you. Thank you for shopping with my links! I truly appreciate your support for my work!*

Happy Easter, my friends! Today, we are celebrating with family, and I am so thankful to be able to create these wonderful memories for our kiddos, filled with a lovely church service, laughter, family time, and even some yummy treats. I hope that you are able to celebrate with your own family today, as well! I have an Easter two-fer to share with you today, featuring a fabulous new die from the Simon Says Stamp In My Heart release! (Click HERE to see the entire new release!) I love being able to get two cards from one die cut, and the new Embellished Bunny die is perfect for this positive/negative space twofer. Let’s get started with the details on my projects!

The linchpin for both cards is the new Embellished Bunny die set, which features a solid bunny silhouette as well as a separate die that debosses a lovely floral pattern into the bunny. By carefully placing the bunny die in the center of my A2 panel, I was able to use the negative space surrounding my bunny die cut to create a shaker card as well as using the positive die cut itself to create a second card!

I began by placing just the bunny silhouette die in the center of my A2 panel of white cardstock, then running the panel through my die cutting machine. I reserved the die cut itself, then backed the negative space with some clear acetate to create a clear window. I trimmed 1/8″ from each edge of the panel to create a thin border around the edges. To create a bit of interest behind my shaker window, I used one of the flower stamps from the older Blessings at Easter stamp set, which has a similar whimsical aesthetic. I stamped a row of blooms using Simon Says Stamp’s Pastel Green Pigment Ink in approximately where the window opening would be.

After I had created my window and decorated behind it, I used Simon Says Stamp Foam Strips to create a continuous border around the edges of the window on the back, creating a pocket in which my sequins could move freely. I filled the shaker pocket with Cream Puff sequins and sealed everything up, centering the slightly-smaller-than-A2 card front on my full sized A2 card front, creating a slim frame around the edges. For the greeting, I stamped a sentiment from Blessings at Easter using the same Pastel Green Pigment Ink, then stamped again over the top with sticky embossing ink and added some White Satin Pearl embossing powder. The combination of this pearlescent sheer embossing powder plus the minty green stamped greeting creates a soft, super springy sentiment! I die cut the finished greeting with its coordinating dies, then popped the die cuts up beneath my bunny window using thin foam adhesive. Finally, I added the cutest little white silk bow to the bunny’s neck to finish the project off!

For my second project, I used the leftover bunny die cut from the Embellished Bunny set, running it through my die cutting machine again with the debossed floral pattern die, impressing the pretty details down into the solid bunny die cut. To enhance the impressed pattern, I used a matching minty green alcohol marker to add some color to the pattern. I also added a few sparkling Prism Pawsitively Dazzling Gems to some of the details!

On the card front, I wanted to create a simple pop of coordinating color behind my bunny, so I blended the Pastel Green Pigment Ink using a blending brush on my white A2 card front, then splattered some iridescent glitter watercolors on the background. For the greeting, I stamped two individual sentiments from the Vintage Bunnies set, again using Pastel Green Pigment Ink, stamping the color first and then stamping embossing ink directly over the top (made much simpler with my MISTI!) and adding more White Satin Pearl embossing powder to create that pearlescent shimmer on my sentiment. I used sharp scissors to cut the sentiment strip, but used the coordinating die for the larger Easter script sentiment. I popped up the bunny on the blended background using thin foam adhesive squares, then used a double layer of foam adhesive to add the sentiment pieces, creating a bit more height on the greeting so that it would stand out from the background. Finally, I tucked a bow created using Iridescent White Cord beneath the greeting, adding one final touch of shimmer and texture to this simple card!

Well, that’s all for my projects today! I hope you’ve had a lovely Easter day with your family, if you celebrate. Thanks so much for stopping by today, and have a marvelous day!
Filed Under: simon says stamp Tagged With: clean and simple, die cutting, easter, embellished bunny, ink blending, shaker card, twofer, vintage bunnies

Springtime Bunny Shaker with New Simon Says Stamp!

March 9, 2026

This post was sponsored by Simon Says Stamp. Thanks, Simon! *I have gathered links to all of the products used at the bottom of the post for your convenience, using affiliate links at no extra cost to you. Thank you for shopping with my links! I truly appreciate your support for my work!*

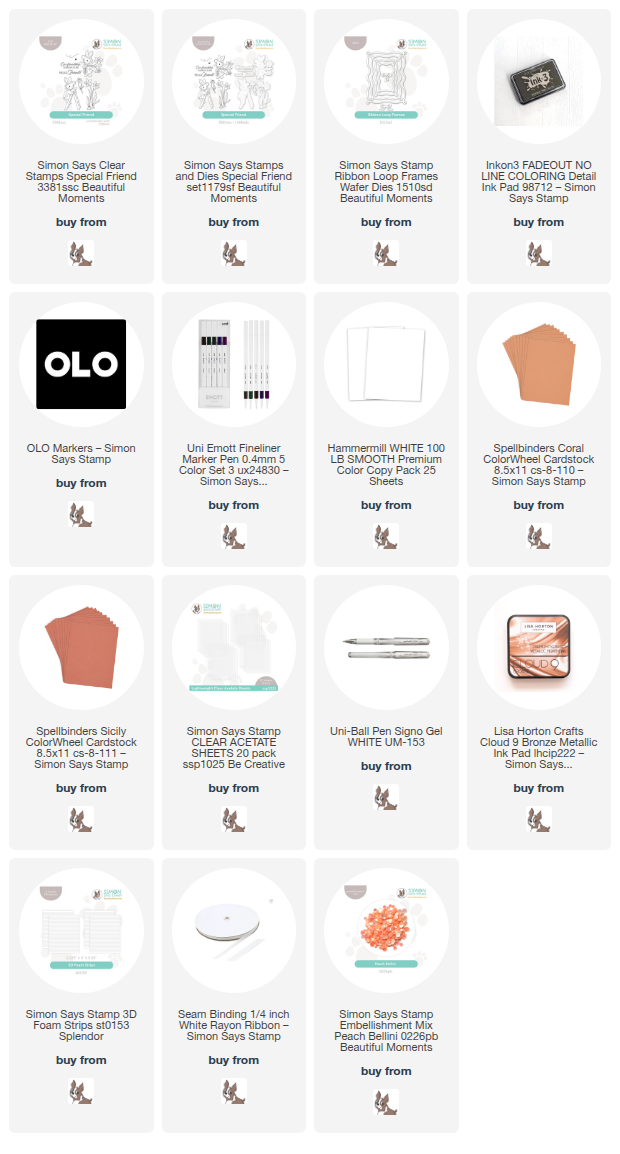
Hi friends! I have such a sweet card to share with you today featuring some gorgeous new goodies from the new Beautiful Moments release from Simon Says Stamp! (Check out the full Beautiful Moments release HERE!) We’re playing with all things springtime for this month’s release, and I couldn’t resist doing some no-line coloring with this sweet gardening bunny from Special Friend. Simon Says Stamp also released some new embellishment mixes, and my color palette came directly from the new Peach Bellini Embellishment mix. Let’s get started with the details on my card!

To begin, I stamped the bunny from Special Friend with her bouquet of daffodils, as well as some standalone daffodils, using no-line coloring ink. I then used OLO Markers to color the images with pale peach, warm gray, and zingy spring green, adding a pop of sunset yellow to the daffodils. After I had finished coloring all of the images, I went back in with my dark gray fine tipped pen and added the details to the bunny’s nose, whiskers, and eyes, as well as with a gold gel pen to add the centers to the daffodils. I used the super detailed coordinating dies to cut the finished images out.

To create my shaker frame, I first centered one of the new Ribbon Loop Frames over a panel of dark coral A2 cardstock, then die cut the frame, reserving the positive die cut for later and adding a panel of acetate behind the opening on the negative frame piece. I also die cut another of these Ribbon Loop Frames from some white cardstock so that it would pop nicely from the deep coral background. I adhered the white frame to the acetate, adding one of the looped bows to the top. I ran foam adhesive strips around the back of the opening to the window, then filled the shaker with the new Peach Bellini Embellishment and backed it with a piece of pale peachy cardstock.

Once I had assembled the shaker part of the card, I used thin foam adhesive squares to add the bunny and daffodils, adding a die cut greeting from Special Friend that I’d stamped with some metallic rose gold ink. Finally, I nestled a small white silk bow beneath the bunny’s feet, adding the perfect touch of texture and sweetness to this springtime card!

Well, that’s all for my project today! This sweet storybook critter set really spoke to me. It reminds me of Peter Rabbit, the anthology of which I am reading to my little boys at bedtime; it is a timeless illustration style that I just adore! The new Beautiful Moments release has so many gorgeous stamp and die sets (check out the whole release HERE!)-don’t hesitate to check it out. And if you find something is out of stock, don’t forget to sign up to receive an email when it comes back in stock! Thanks so much for stopping by today, and have a marvelous day!

Filed Under: simon says stamp Tagged With: die cutting, easter, fadeout ink, no line coloring, olo markers, ribbon loop frames, shaker card, special friend, spring

Sunset Valentines For Guys with New Simon Says Stamp!

January 27, 2026

This post was sponsored by Simon Says Stamp. Thanks, Simon! *I have gathered links to all of the products used at the bottom of the post for your convenience, using affiliate links at no extra cost to you. Thank you for shopping with my links! I truly appreciate your support for my work!*

Hi friends! I am back with some non-traditional valentines today that are perfect for that persnickety “man’s man” in your life, one who might not love flowers and lace on his valentine! My husband isn’t too bothered by feminine imagery, but he absolutely loves sunsets and has asked me for years to create a watercolored sunset painting for him. I thought this would be a perfect visual to incorporate into his valentine using some of the new goodies from the Heart to Heart Release from Simon Says Stamp (click HERE to check out the entire release!). Let’s get started on the details!

My projects evolved from this leftover watercolored ombré background. I had an extra background from some experimenting that I had been doing, and thought that it would make a perfect sunset valentine for my husband! I knew that I wanted to incorporate stamped hearts, so I selected Pawsitively Saturated Inks in shades of Shell, Lilac, Eucalyptus, and Morning and stamped a bunch of solid heart images using the new Tons of Hearts stamps, then cut them out with their coordinating dies.

For my first project, I started by using the shadow die from the new Love Our Story sentiment die set to cut a window in a panel of white A2 cardstock. I then backed that window with some vellum and added an iridescent white die cut “love our story” detail cut, created with iridescent mirror gloss cardstock. To add a little extra interest, I filled the area behind the vellum window with the new Lavender Hearts Embellishment to create a fun shaker card!

I created a visual cascade down the card front with some of the stamped solid hearts, working in rainbow order from pink to green, and filling in some of the gaps with sparkling white glitter die cuts created using the Tons of Hearts Frames dies. I popped some up with thin foam adhesive, then used liquid glue to adhere the glittering hearts. The final touch was a few sparkling Opal Pawsitively Dazzling Gems! The white space, the muted colors, the shaker component… I think this is a great valentine for a not-super-mushy kind of guy!

This card features the watercolored background that started both of today’s projects. It was from this background that I selected the ink colors to use with the solid stamped hearts with Pawsitively Saturated Inks in shades of Shell, Lilac, Eucalyptus, and Morning. I used some of the leftover stamped hearts from the first card, as well as a die cut Lined Love You. I die cut the shadow of the sentiment die cut using Simon Says Stamp Shimmer Vellum, then cut the detail sentiment layer from some iridescent white mirror cardstock. I love the subtle iridescent shimmer that it brings to the card!

Before I started arranging the die cuts on the watercolored background, I used some sparkling mica watercolors to splatter some shimmer on the background. The color fading from warm blush to muted turquoise definitely puts me in mind of a Caribbean sunset, so I had to add some water “sparkles”! After the splatters were dried, I used clear dimensional adhesive to add the sentiment die cut to the center of the watercolor panel, then tucked stamped hearts in a variety of sizes, as well as a few standalone glitter heart die cuts. Finally, I added a few Opal Pawsitively Dazzling Gems for some added sparkle and texture!

Well, that’s all for my projects today! Do you find it easy to make valentines for the guys in your life? I have three boys so I’m going to have to keep working on this genre!! Thanks so much for stopping by today, and have a marvelous day!

Filed Under: simon says stamp, Uncategorized Tagged With: ink blending, lined love you, love our story, masculine, ombré, shaker card, tons of hearts, valentine, valentine's day, watercolor

Simon Says Stamp New Heart to Heart Release- Now Available!

January 7, 2026

This post was sponsored by Simon Says Stamp. Thanks, Simon!

Hi friends! The first Simon Says Stamp release for 2026 is now live, and it’s super duper sweet. The Heart to Heart Release (click HERE to check out the entire release!) is filled with great transitional products, from wintry snowflakes and snowmen to hearts for Valentine’s Day to some pretty floral bouquets (called Loving You Bouquet and Make My Heart Flutter… illustrated by me, so it’s extra exciting in my book!). I have several things planned for my own illustrations, but my family and I were sick for what felt like weeks on end, so those projects are not quite ready yet. I thought I would share a sweet Valentine’s Day shaker card created with an adorable snowman die and some fabulous new nested heart dies. Let’s get started with the details on my project!

*I have gathered links to all of the products used at the bottom of the post for your convenience, using affiliate links at no extra cost to you. Thank you for shopping with my links! I truly appreciate your support for my work!*

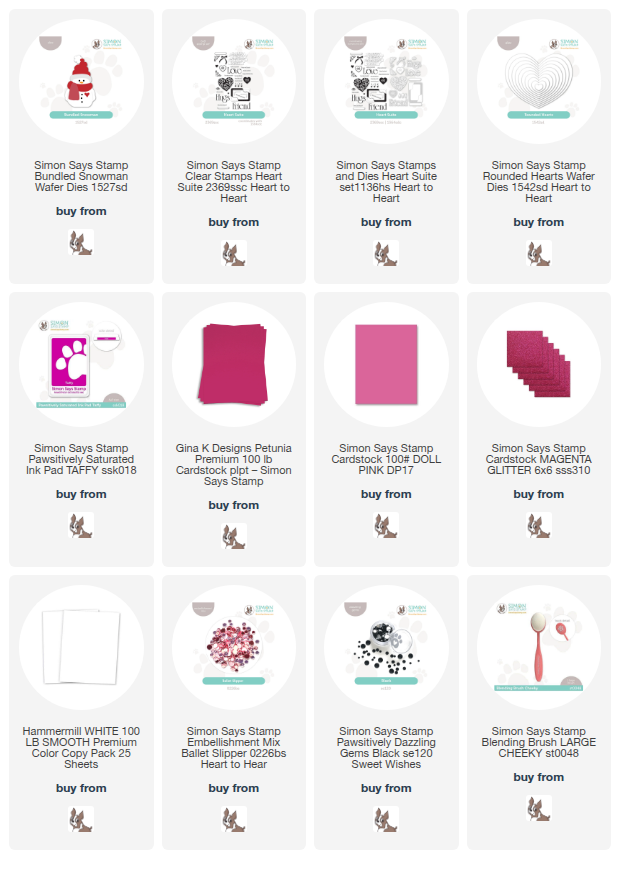
The project began with the darling little Bundled Snowman. This little guy was sneak peeked during DieCember, but now he’s officially available for sale…. isn’t he just the cutest?! I die cut the snowman from plain white cardstock and added a few swipes of super pale gray alcohol marker to add some subtle shadows, then die cut the hat and scarf from some super vibrant magenta cardstock and coordinating Magenta glitter cardstock. I added some more alcohol marker shadows on the hat and scarf, just to add a bit of shape and dimension to the image. I adhered all of the pieces with liquid adhesive, then added some Black Pawsitively Dazzling Gems for “coal” eyes and buttons and a sweetly glittering pink die cut heart on his chest. Adorable, right?

To create the shaker card base, I used some pink cardstock with one of the new Rounded Hearts nesting dies to create a shaker window, which I backed with some leftover stamp packaging. I blended some Taffy Pawsitively Saturated Ink on two of the corners, the filled the shaker with the new Ballet Slipper Embellishments, which are just the prettiest shade of pale pink. I also die cut a few extra hearts from some more Magenta glitter cardstock and the same deep magenta cardstock that I used for the snowman’s hat and scarf.

Before assembling the snowman and hearts on my card front, I used Taffy ink to stamp the large “hugs” greeting from the new Heart Suite stamp set, which has some gorgeous, super useful, large scale sentiment stamps that also have detailed coordinating dies. (Isn’t that great when the dies are so super detailed?! I think it makes projects look so much more professional and polished.) I arranged all of the die cuts on my shaker card front, tucking the snowman towards the bottom and creating a visual ping pong from top to bottom, adhering everything with liquid and foam adhesive for lots of dimension.

Well, that’s all for my project today! The new Heart to Heart release is full of so many different styles and cardmaking occasions, surely something for everybody. (Click HERE to check out the entire release!) Thanks so much for stopping by today, and don’t forget to come back later this week for the two day Blog Hop!

Filed Under: simon says stamp Tagged With: bundled snowman, die cutting, heart suite, hugs, shaker card, valentine's day

Simon Says Stamp January Card Kit: The Small Things- Now Available for Preorder!

December 14, 2025

This post was sponsored by Simon Says Stamp. Thanks, Simon!

Hi friends! The new Simon Says Stamp January 2026 (say what?!) Card Kit of the Month was just released and is now available for preorder! The The Small Things Kit such a lovely, peaceful kit filled with so many carefully curated products that work beautifully together or individually or with other products! Here’s a sneak peek at the contents of the kit:

The Small Things Kit features an absolutely beautiful stamp set that could be used for holiday cards and well beyond, layering stencils and coordinating dies, a spectacular embossing folder, patterned papers, embellishments, cardstock… so much value in one package and at a great price! The individual contents of the kit are valued at well over the $44.99 price tag (or $39.99 for subscribers, making an even better value! Click HERE to subscribe!)

I created two cards to share with you today, featuring a serene navy, teal, and turquoise color palette that I pulled from some of the absolutely stunning patterned papers included with the kit, perfect for creating those winter-but-not-holiday cards. Let’s get started with the details!

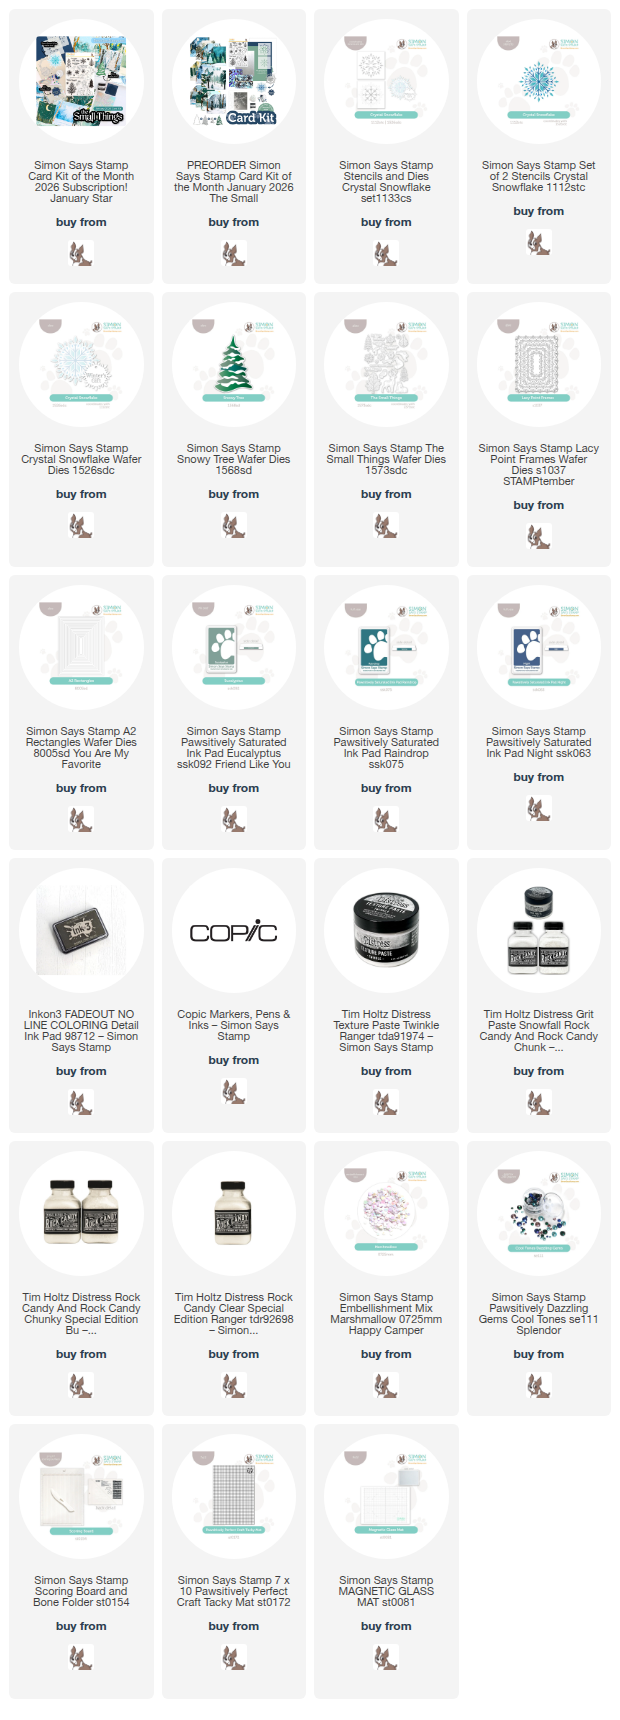
*I have gathered links to all of the products used at the bottom of the post for your convenience, using affiliate links at no extra cost to you. Thank you for shopping with my links! I truly appreciate your support for my work!*

When creating a card set like this, I like to first decide on my color palette. I loved the gorgeous teal, navy, and green color palette with which the patterned paper was designed, so I selected a snowy night scene and then selected cardstock and ink colors to match.

My shaker card began with that gorgeous panel of patterned paper, which I made into a flat shaker background with some gorgeous sequins and leftover acetate packaging. I used the A2 Rectangles dies with the Lacy Point Frames to create an intricate frame which I popped up on my shaker front with thin foam adhesive squares. To embellish this peaceful scene, I stamped the beautiful deer images from The Small Things using no-line coloring ink, then used Copic markers to do some coloring, adding black Micron pen and white gel pen to the details on the eyes and hoofs. I cut them out (you could use the coordinating dies which are available for purchase separately!) and then created a snowy tree using the new Snowy Tree die. I arranged all of the die cuts in the corner of my shaker frame, then added a leftover holiday sentiment strip. Such a pretty, serene card. I can feel the crisp and cold night air when I look at this card!

My second card features a fun fold, allowing that gorgeous Crystal Snowflake Stencil set and coordinating die to be the star of the show! I blended the snowflake image using Eucalyptus, Raindrop, and Night, adding a layer of the Twinkle Texture Paste included in the kit over the second stencil and sprinkling Rock Candy Glitter over the top for gorgeous, ice-encrusted sparkle! I die cut the completed and dried snowflake with its coordinating die and added some shimmering Pawsitively Dazzling Gems to the snowflake for even more sparkle!

For the card base itself, I trimmed a 5.5″ x 8.5″ panel of white cardstock, then used my Simon Says Stamp Score Board to score lines at 2 1/8″ from the edge of each side, creating my A2 card base with a fun fold! I used some small pieces of painter’s tape to keep the flaps folded down, then used the “kissing” method to stamp the individual snowflakes from The Small Things with the same shades of ink that I used to blend the snowflake stencil! I simply loaded up the snowflake stamps with ink, stamped once (or twice depending on how vibrant the color was to start) on some scratch paper, then stamped a lovely and soft snowflake pattern all over the card front. I layered a strip of the included silver foil cardstock with the Sage cardstock over the center of the gate-fold card, then adhered the stenciled snowflake to the center. Finally, I added a silver embossed sentiment strip in the center of the snowflake!

Well, that’s all for my projects today. This card kit is available for preorder right now and will begin shipping in early January, so it will be perfect for those winter cards or to get a jumpstart on next year’s Christmas cards! (Can you even believe that Christmas is less than 2 weeks away?!)

The Simon Says Stamp Card Kits are such an incredible value; the value of the individual elements of each kit equals far more than the $44.99 price tag, so you’re getting incredible bang for your buck. If you are consistently interested in the Simon Says Stamp Card Kit of the Month, you can sign up HERE to become a subscriber for an even bigger discount on these carefully curated products. As always, Simon also makes each individual element of the kits available a la carte, so that you can pick and choose what you would like to purchase if buying the entire kit isn’t really your thing. Options galore! Who can say no to such incredible value though, right?

Thanks so much for stopping by today, and have a marvelous day!
Filed Under: simon says stamp Tagged With: card kit, christmas card, crystal snowflake, flat shaker, holiday card, lacy point frames, layering stencil, shaker card, snowy tree, stencil, the small things, winter card

  • « Go to Previous Page
  • Page 1
  • Page 2
  • Page 3
  • Page 4
  • Interim pages omitted …
  • Page 18
  • Go to Next Page »

Primary Sidebar

  • Facebook
  • Instagram
  • Pinterest
  • YouTube

Favorite Shops

Secondary Sidebar

Subscribe

Enter your email address to subscribe to this blog and receive notifications of new posts by email.

Instagram
Something is wrong.
Instagram token error.
Follow
Load More

Archives

Tags

3D embossing folder alcohol markers better press birthday birthday card blog hop card kit christmas christmas card christmas tag colored pencil copic copic coloring Daniel Smith die cutting embossing folder embroidery felt giveaway holiday holiday card hot foil ink blending karin brushmarker pro layered stencil masculine my monthly hero new release no line coloring no line watercolor OLO marker olo markers original illustration pawsitively saturated rainbow shaker card slimline stamping stamptember stencil thank you thinking of you valentine's day video watercolor

Popular Posts

Simon Says Stamp Sending Cheer Blog Hop- Day 2 + Freebie + Giveaway!
Altenew October 2026 Release Blog Hop + Giveaway!
Rustic Monochromatic Stars for Christmas with Rainbow Splash!
December 2018 My Monthly Hero Blog Hop + Giveaway!
March 2020 Essentials By Ellen Blog Hop+Giveaway!
The Ton Anniversary Release: Day 1!
The Ton Stamps Summer Release: Day 1
Hero Arts Partners Blog Hop: Lawn Fawn!
Waffleflower July Release Blog Hop!
Simon Says Stamp STAMPtember Tim Holtz Collaboration: Festive Holidays!

Disclosure

Some affiliate links are used in my posts. This means that, should you click on one of my links and purchase something from that company, I will receive a small portion of the sale at no extra cost to you. I use the money earned from these sales to help maintain my blog. I so appreciate you visiting and, if you do choose to use one of my affiliate links, thank you so much for your support!
Copyright © 2026 ·Brunch Pro Theme · Genesis Framework by StudioPress · WordPress · Log in
Loading Comments...