• Skip to main content
  • Skip to primary sidebar
  • Skip to secondary sidebar

Sixth Street Sundries

Emily Midgett

  • Home
  • About Me
  • Contact
  • OLO Marker Color Swatch Chart
  • Shop

shaker

Stenciled Twofer, Part One: Coral Floral Thanks with New Simon Says Stamp!

July 30, 2026

This post was sponsored by Simon Says Stamp. Thanks, Simon! *I have gathered links to all of the products used at the bottom of the post for your convenience, using affiliate links at no extra cost to you. Thank you for shopping with my links! I truly appreciate your support for my work!*

Hi friends! Life with four kids is always a little crazy even when it’s relatively calm, and I am always on the lookout for ways to save myself some time when crafting. I love creating “twofer” projects, using leftover from one project to create another! This particular twofer set started with a lovely floral stenciled panel, created using the new Bellflower Blossoms. Let’s get started with the details on today’s project!

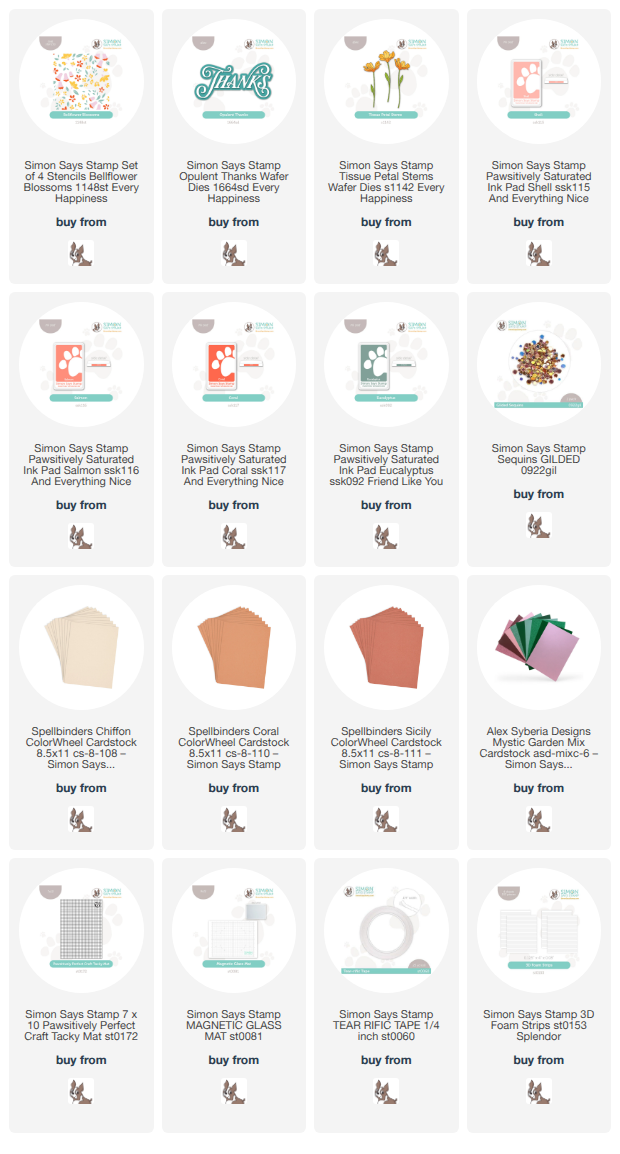
To begin, I firmly placed my white A2 panel of cardstock on my Stencil Station, then used the Simon Says Stamp Shading Brushes to blend Pawsitively Saturated Inks in shades of Shell, Salmon, Coral, & Eucalyptus using the new Bellflower Blossoms all over the panel. I love the beautiful blushy coral tones with this pretty floral pattern! Once I had finished adding all of the stenciled layers to the panel, I placed the shadow layer from the new Opulent Thanks set on the bottom right corner and ran it through my die cutting machine, creating a window with which I could create my shaker.

After I had created my die cut window, I trimmed the stenciled panel down slightly so that it was a wee bit smaller than my A2 card front, creating a delicate white frame around the edge of my patterned panel. I backed the opening with some leftover stamp packaging and adhered it with some super sticky double sided tape. I also added some foam adhesive around the window, creating a complete ring around the opening to hold my sequins with foam adhesive strips. I filled the window with some Gilded Sequin Mix and placed it on my white card base, creating a pretty backdrop for the detail layer of the sentiment!

Once I had created the shaker window and card base, it was time to embellish the front. I cut the detail layer of the Opulent Thanks set from some deep green pearlescent cardstock and adhered it directly over the shaker window with liquid adhesive. I also die cut some pretty blooms using the new Tissue Petal Stems, cutting coordinating shades of coral cardstock and some foliage with the same pearly green cardstock. I arranged the blooms around the shaker window, adhering them with liquid and thin foam adhesive for added dimension. Isn’t it so pretty? And I have leftovers for a future project!!

Well, that’s all for me today. I will be back in a day or two with part two of my Stenciled Twofer series to show you how I used the leftover die cuts. Thanks so much for stopping by today, and have a marvelous day!
Filed Under: simon says stamp Tagged With: bellflower blossoms, die cutting, ink blending, opulent thanks, shaker, stencil, stencil station, tissue petal stems, twofer

Happy Peachy Shaker with Simon Says Stamp!

July 28, 2026

This post was sponsored by Simon Says Stamp. Thanks, Simon! *I have gathered links to all of the products used at the bottom of the post for your convenience, using affiliate links at no extra cost to you. Thank you for shopping with my links! I truly appreciate your support for my work!*

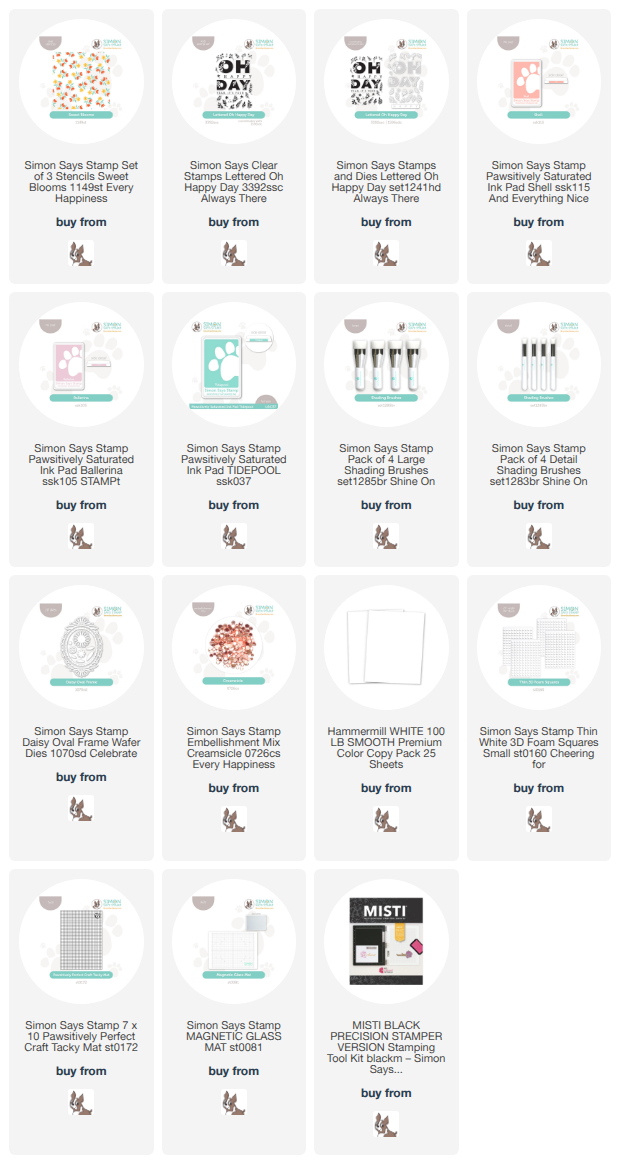
Hi friends! Have you seen the new Every Happiness release? (click HERE to check out the entire release!) It’s full to the brim of beautiful new goodies: stamps, dies, stencils, embellishments…. so much to tickle your crafty fancy! I used the beautiful new Sweet Blooms stencil with some older products to create this pretty, peachy shaker card, and I just love how dainty and feminine it came out. Let’s get started with the details on my project!

This project hinges on the delicate, dainty blooms from the new Sweet Blooms stencil that was released with the Every Happiness collectin. I used my Stencil Station to safely hold my white A2 card front, then blended each layer of the Sweet Blooms set using Pawsitively Saturated Inks in shades of Shell, Ballerina, & Tidepool. I love how delicate this floral pattern is…. it’s neutral enough to be super versatile with whatever focal point you want to add to it!! It reminds me of a baby blanket or pretty nursery wallpaper!

After I had finished stenciling the background, I used the same ink shades to stamp several elements from the recently-released Lettered Oh Happy Day stamp set, which features some chunky greetings and floral accents. The simplicity of the floral accents work beautifully with the simplistic floral backdrop of the stenciled panel! I stamped all of the elements with my MISTI and used the coordinating dies to cut each piece.

To create my flat shaker panel, I used super sticky double sided tape to create a clear pouch over my stenciled background with some leftover stamp packaging. Before sealing it, I added plenty of Creamsicle Embellishments, which move beautifully in the pouch! Before I began adhering the stamped elements to the front of my shaker panel, I die cut a crisp white Daisy Oval Frame (an older die, but still a favorite of mine!) to help add a little more dainty whimsy to the card. I adhered it to the shaker panel with some liquid adhesive, then added the stamped elements over the top with thin foam adhesive squares. I just love how delicate and dainty this project is!

Well, that’s all for my project today! If you haven’t checked out the new Every Happiness release (click HERE to check out the entire release!) I highly encourage you to do so…. so many fun new goodies to play with! Thanks so much for stopping by today, and have a marvelous day!

Filed Under: simon says stamp Tagged With: birthday, daisy frame, die cutting, ink blending, lettered oh happy day, shaker, stencil, stencil station, Sweet Blooms

Pink and Purple Snowflakes with New Simon Says Stamp!

November 4, 2024

This post was sponsored by Simon Says Stamp. Thanks, Simon!

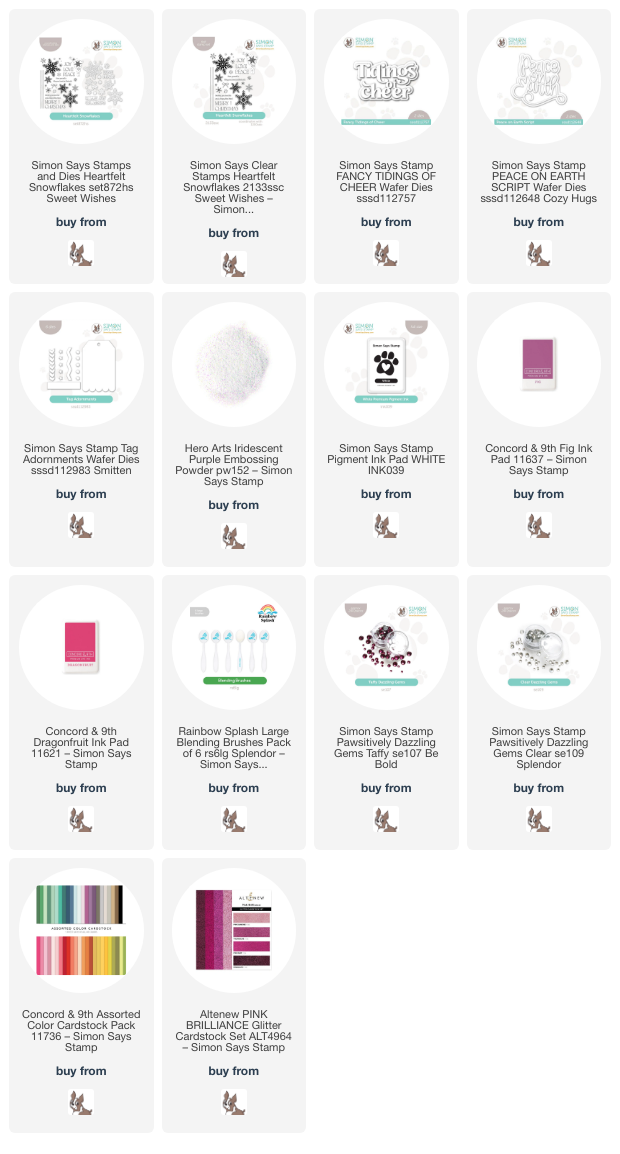
Hi friends! It is, somehow, the beginning of November, so I am going to be leaning in to the holiday posts as much as I possibly can while it’s “acceptable,” which I deem to be until Epiphany next year! I adore Christmas, I adore crafting, and I am absolutely tickled pink that it’s officially time to lean in to all things Christmas, sparkly, and cheerful. I think we all need some extra joy this year, and who doesn’t need a little more sparkle in their lives? I think that snowflakes are among the most beautiful and somewhat neutral imagery in the holiday arsenal; you can use them for simple winter cards or you can pair them with other imagery to make them specifically Christmas-themed. I have paired the gorgeous new Heartfelt Snowflakes stamps and dies from the Simon Says Stamp Sweet Wishes release with a vibrant fuchsia and plum color palette to create this trio of sparkling “winter” cards and tag, perfect for those who might not celebrate Christmas but still enjoy winter festivities. Let’s get started with the details!

*I have linked all of the products used at the bottom of the post using affiliate links for your convenience. Thank you for shopping with my links! I truly appreciate your support for my work!*

For my projects today, I wanted to select a unique color palette that didn’t necessarily fit the typical “Christmas” color palette, since we were working with the beautifully unique snowflakes of the Heartfelt Snowflakes stamp set. I selected Dragonfruit and Fig from Concord and 9th’s gorgeous color palette. I began by arranging several of the snowflake images on an A2 panel of Fig cardstock, stamping the images first with Simon Says Stamp white pigment ink and embossing them with Hero Arts Iridescent Purple embossing powder. Pairing the white pigment ink and iridescent embossing powder creates a most beautiful, shimmery combination on the vibrant purple cardstock! I repeated the process with a second panel of Fig cardstock, creating two full panels of embossed snowflake patterned paper.

After I had created two panels of snowflake paper, I used the coordinating dies from the Heartfelt Snowflakes product suite to die cut the images, dividing them to create multiple projects. I trimmed down the remaining intact snowflake panel, then used a blending brush to blend Dragonfruit and Fig inks around the edges of the panel, creating a vibrant glow on the embossed panel. I also splattered the background with some sparkling handmade watercolors to add further texture and shimmer.

For the greeting, I die cut the detail layer of the Fancy Tidings of Cheer from pink glitter cardstock and the shadow layer from vellum, adhering the two together using liquid adhesive. I adhered the blended snowflake panel in the center of an A2 Dragonfruit panel of cardstock, leaving a bright pink mat around the edges, then used foam adhesive to add the sentiment die cut and some individual snowflake die cuts. I added Taffy gems to the center of the snowflake die cuts, finishing the card off with a sparkling pink twine bow!

For my second card, I used some of the leftover Heartfelt Snowflakes embossed die cuts to adorn a vibrant shaker card. I used blending brushes to blend Fig and Dragonfruit ink down the diagonal on an A2 panel of Dragonfruit cardstock, splattering the entire panel with some more sparkling watercolors. I used some leftover packaging to create a “flat” shaker pocket, filling the shaker with a variety of color-coordinated sequins and gems.

For the greeting, I die cut the detail layer of the Peace On Earth Script die set using some brushed lavender foil cardstock, backing it with a vellum shadow layer. I arranged some of the leftover embossed snowflake die cuts around the sentiment die cut, adhering them with liquid adhesive, then hiding the dimensional foam squares behind the solid die cuts. I added some Taffy gems to the center of the individual snowflake die cuts, creating a vibrant shaker card that is so festive and fun!

I had one large Heartfelt Snowflakes embossed die cut left, so I decided to use it as a focal point on a smaller tag. I die cut the scalloped tag die from the Tag Adornments die set using some super sparkly pink glitter cardstock, then mounted the snowflake die cut in the center of the tag using foam adhesive. I added some extra sparkle to the details of the snowflake die cut with some Taffy and Clear Pawsitively Dazzling Gems, finally adding a coordinating pink ribbon loop from which I could hang my tag on a package!

Well, that’s all for my projects today! Can you believe that I was able to create all of these projects from just two panels of embossed snowflakes? I love a good two-fer! Or in this case, a three-fer, ha! Thanks so much for stopping by today, and have a marvelous day!

Filed Under: simon says stamp, Uncategorized Tagged With: christmas card, christmas tag, die cutting, embossing, heartfelt snowflakes, holiday card, ink blending, iridescent embossing powder, peace on earth script, shaker, snowflakes, tag adornments

Create A Colorful Life Shaker Card with Simon Says Stamp!

June 26, 2024

This post was sponsored by Simon Says Stamp. Thanks, Simon!

Hi friends! I have a fun ombré shaker card to share with you today using some beautiful new goodies from the Simon Says Stamp Sunny Vibes release from last week! You might have seen this project during the live last week (you can catch the replay HERE) and so I thought I would give a rundown of how I created this project. I am going to try to get a video filmed featuring this technique, so be on the lookout for that! I took a poll in my Instagram Stories asking whether videos with no voice over, just occasional subtitles and music, would be of interest, and the answers were overwhelmingly yes! So now I am going to try to get at least one video posted a week with this simpler format. If there are any techniques or projects from past posts that you would like to see on video, please don’t hesitate to let me know! Let’s get started on the details for this project.

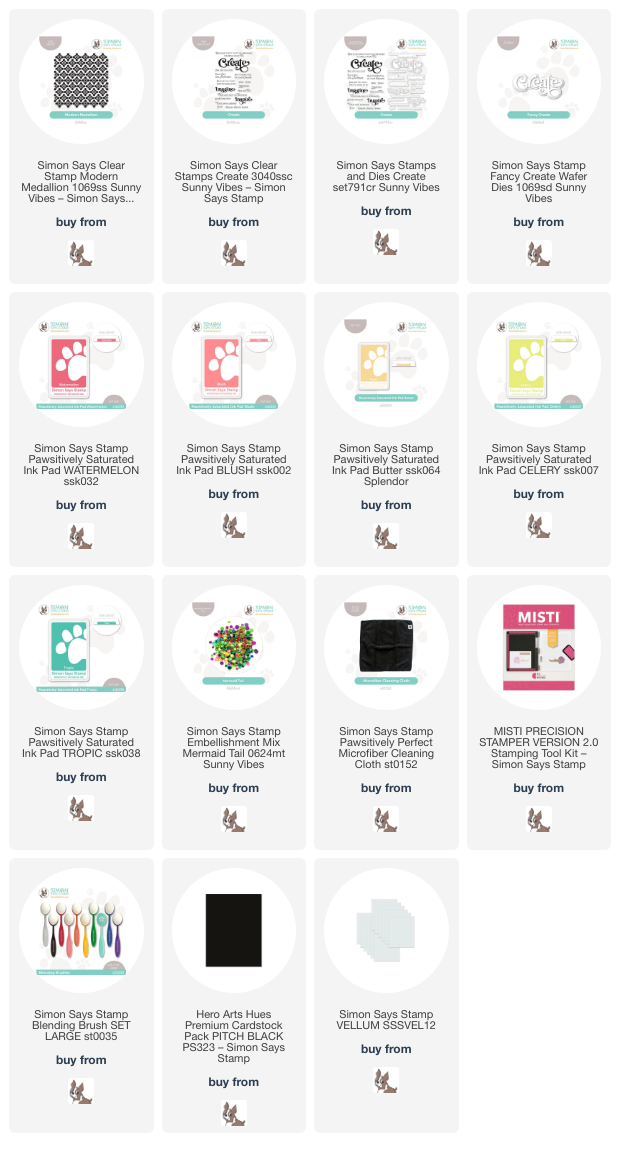
For today’s project, I am using the beautiful new Modern Medallions stamp set. The bold pattern was perfect for this ombré stamping technique, and when paired with tone-on-tone ombré blending, it creates such a beautifully vibrant background, perfect for a shaker card! I started by stamping the Modern Medallions background stamp onto a panel of white cardstock with my MISTI using the following Pawsitively Saturated Inks: Watermelon, Blush, Butter, Celery, Tropic. To achieve this smooth ombré, I first tapped my Watermelon ink pad on the top of the stamp, then used the new Simon Says Stamp Microfiber Cloth to tap the edge of the ink line, smoothing it out and creating an area for a smoother fade into the next color. I stamped the first color, cleaned my stamp, then tapped Blush ink onto the next “strip” of the stamp, tapping both the top and bottom of the ink stripe to create that smooth fade from one color into the next. I repeated the process with all of the ink colors until I had this pretty rainbow ombré!

Before moving the stamped panel and stamp from my MISTI, I inked up the Modern Medallions stamp once more, covering the entirety of the image with embossing ink and adding clear embossing powder to the image. The paper shifted ever so slightly when I was doing my stamping, so the clear embossing was just the tiniest bit off from the colorful stamped image. I then used blending brushes to blend the same colors over the top of the stamped image, creating a tone-on-tone ombré overlay. The colors of the stamped image are much more intense than the blended version, creating this fun tone-on-tone backgorund. I trimmed the panel down slightly and created a shaker pocket with some leftover stamp packaging. I filled the shaker with the new Mermaid Tail sequins and mounted it on a full sized A2 panel of black cardstock, creating a crisp black border around the edge of my colorful shaker background.

For the greeting, I kept things simple with a heat embossed sentiment from the new Create stamps and coordinating dies. I heat embossed this uplifting sentiment onto Pitch Black cardstock using white embossing powder, then die cut it with the coordinating dies. I also die cut the Create die, cutting the detail layer from more Pitch Black cardstock and the shadow layer from vellum. I popped up the sentiment pieces on the front of the shaker panel using foam adhesive squares!

Well, that’s all for my project today! I tend to stick to cooler rainbow colors, so it was fun to go outside of my normal comfort zone, and especially to create this shimmery shaker card. I will try to get the video posted for this technique early next week, if you are interested!! Thanks so much for stopping by today, and have a marvelous day!
Filed Under: simon says stamp Tagged With: create, flat shaker, modern medallion, ombré, rainbow, shaker, sunny vibes

Pinkfresh Studio “Delightful” Release Blog Hop

April 29, 2024

Hi friends! Today, Pinkfresh Studio is hopping along to celebrate not only their new Delightful release, but also their tenth anniversary! How exciting is that?! We have a blog hop chock full of inspiration and prizes, as well as a fun freebie available while supplies last. I have two projects bursting with peachy pink color and fun, sparkling details to share with you today, so let’s get started with the details!

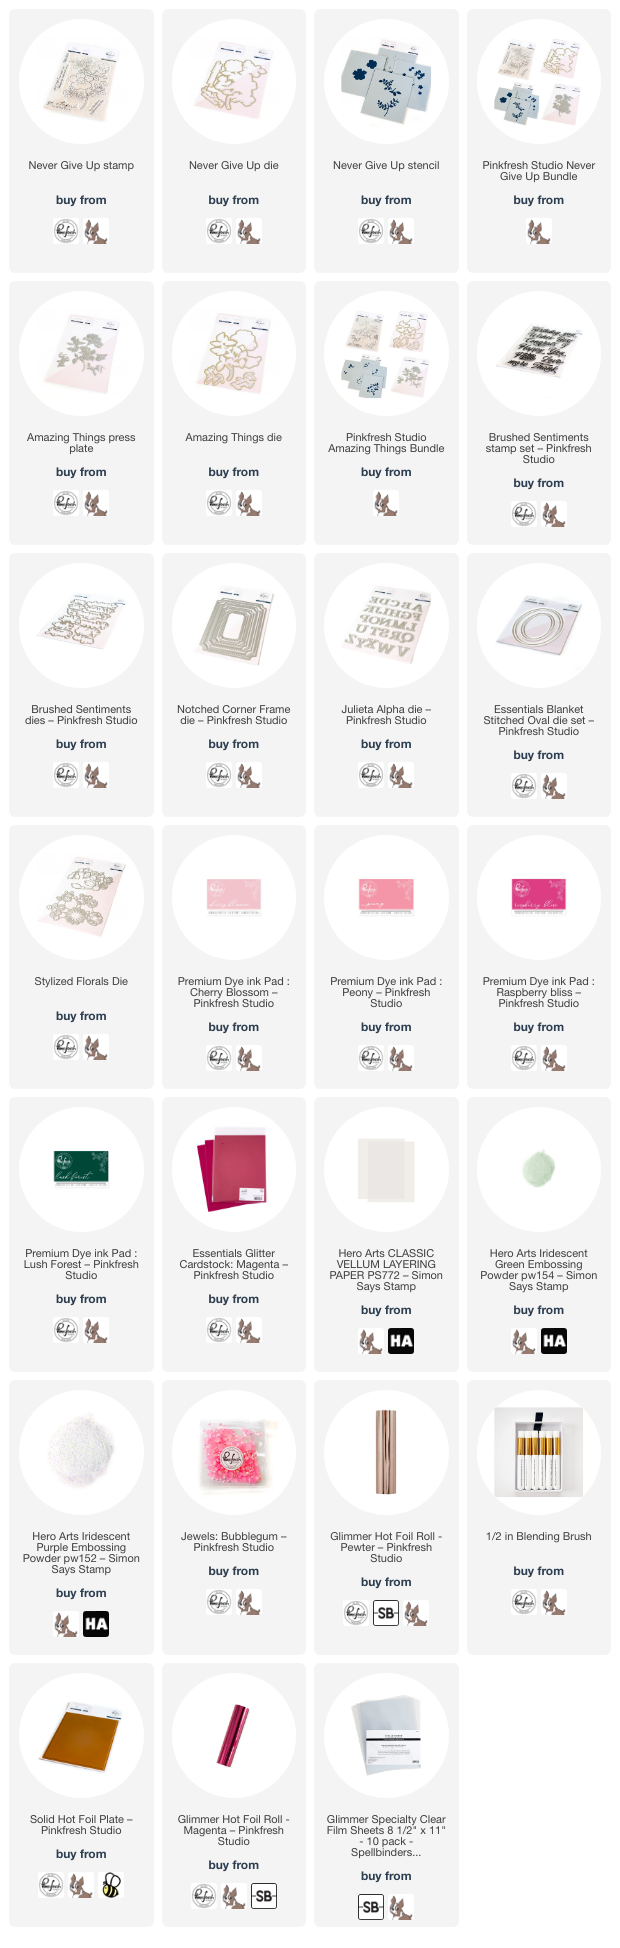
Whenever I am stuck for how to start a project, I head to my Pinterest board for color combinations. From there, I match inks and cardstock and color mediums and begin to get a picture of what the finished project will look like in my head! I selected one of my color combination pins, then plucked Cherry Blossom, Peony, Raspberry Bliss, and Lush Forest inks to use with the new products.

For my first project, I used my MISTI to emboss the main image from Never Give Up with Hero Arts Iridescent Green embossing powder around the edges of a white A2 card front, creating an intricate floral border. I also heat embossed the floral bouquet in its entirety on a separate panel of white cardstock, again with the Hero Arts Iridescent Green embossing powder. I used blending brushes to blend Cherry Blossom, Peony, Raspberry Bliss, and Lush Forest inks with the coordinating Never Give Up layering stencils on the images around the edge of the card front and on the separate image. I used the coordinating dies to die cut the standalone image.

Once I had finished blending with the stencils, I used a larger blending brush to blend the Peony and Raspberry Bliss inks around the edge of the card front, creating a soft pink glow around the clean center.

For the greeting, I die cut one of the dies from the Notched Corner Frame die set from some Hero Arts vellum. Using semi-transparent vellum allows you to add another layer of height without really adding any additional weight to the card front. I heat embossed one of the greeting from Never Give Up using more of the iridescent green embossing powder, then die cut it and used residual ink left over on the blending brushes to add a bit of peachy color to the die cut. I also die cut “MOM” with the Julieta Alpha dies from Magenta glitter cardstock to create a custom Mother’s Day sentiment. (Alpha dies are always nice to have on had so that you can create unique and sometimes unexpected greetings with simple sentiment stamps!) I popped up the greeting pieces on the vellum die cut using foam adhesive, then trimmed the individual flowers from the stenciled Never Give Up die cut and arranged them so that they were in the foreground framing the greeting. A few Bubblegum jewels finished it off!

For my second project, I wanted to put to use the beautiful new Amazing Things press plate. I cannot get enough of hot foiling with the press plates, as the coating for the letter press seems to help give almost flawless results with hot foil. I hot foiled the main image from Amazing Things onto the center of an A2 white cardstock panel using Pewter foil. I used OLO markers to color the image in magenta and peach tones to coordinate with the color palette from the first project. Once I had finished coloring the image, I trimmed the panel down slightly and used blending brushes to blend Cherry Blossom, Peony, and Raspberry Bliss ink around the edge of the card front, creating a soft halo around the colored image. I carefully splattered some shimmering glitter watercolors around the edge of the blended area, then mounted the entire panel in the center of a piece of A2 Magenta glitter cardstock.

To create the greeting, I hot foiled one of the sentiments included with the Amazing Things press plate set, then used the negative leftovers with the Solid Hot Foil Plate to create a reverse white on pewter sentiment, which I cut with the coordinating die. I die cut a vellum oval using the Blanket Stitched Ovals die set and let it hang over the edge of the card front, trimming off the excess. I created a custom colored bow by using one of the same pink markers used to color the image to color some plain white silk ribbon in my stash. I tucked the bow beneath the vellum oval with some liquid adhesive, then added a smattering of Bubblegum jewels for added sparkle!

To celebrate ten marvelous years of Pinkfresh Studio, they are offering a free gift with purchase while supplies last! The gorgeous Make a Wish press plate will not be available for individual purchase, but as a free gift with your purchase of $50 or more! I created a fun shaker card using the new Make A Wish press plate as a hot foil plate.

I love using press plates as hot foil plates, and I think it is so fun and unique to use them with heat-resistant acetate. I used some magenta foil with the new Make A Wish press plate freebie on some Spellbinders Glimmer Specialty Film Sheets to create a detailed foiled overlay for my shaker window. I used the same Cherry Blossom, Peony, and Raspberry Bliss inks to blend around the edges of my A2 card front, helping to add some interest behind the foiled window. I die cut the foiled acetate background using the Notched Corner Frame die, then created a frame from some Magenta glitter cardstock and adhered the two together. I added a continuous line of foam adhesive around the back side of the frame and filled my shaker with some coordinating pink sequins from my stash.

For a simple birthday greeting, I stamped the Brushed Sentiments stamp set with Raspberry Bliss ink, then stamped directly over the top with some sticky embossing ink and added some Hero Arts Iridescent Purple embossing powder over the top to create a custom-colored embossed sentiment. I die cut the greeting with the coordinating dies and used some residual ink on the blending brushes to add some color to the die cut edges. I embellished the greeting with a few pink Stylized Florals die cuts, adding some Bubblegum jewels for a bit more sparkle!

Well that’s all for my projects today. Now for some fun giveaway information!

Pinkfresh Studio will be giving away the full release on the Pinkfresh blog & YouTube channel. They will also be giving away a total of TEN $25  gift cards along the hop. The winners will be selected from the comments across the hop participants. Winners will be posted on May 7, 2024 on our GIVEAWAY PAGE. Winners must check that page & claim their prize within 2 weeks.

Here’s the full hop list in case you get lost:

You are invited to the Inlinkz link party!

Click here to enter

Thanks so much for stopping by today, and happy hopping!

Filed Under: pinkfresh studio Tagged With: amazing things, birthday, birthday shaker, blanket stitched oval, brushed sentiments, freebie, julieta alpha, never give up, notched corner frame, olo markers, shaker, stylized florals

  • Page 1
  • Page 2
  • Go to Next Page »

Primary Sidebar

  • Facebook
  • Instagram
  • Pinterest
  • YouTube

Favorite Shops

Secondary Sidebar

Subscribe

Enter your email address to subscribe to this blog and receive notifications of new posts by email.

Instagram
Something is wrong.
Instagram token error.
Follow
Load More

Archives

Tags

3D embossing folder alcohol markers better press birthday birthday card blog hop card kit christmas christmas card christmas tag colored pencil copic copic coloring Daniel Smith die cutting embossing folder embroidery felt giveaway holiday holiday card hot foil ink blending karin brushmarker pro layered stencil masculine my monthly hero new release no line coloring no line watercolor OLO marker olo markers original illustration pawsitively saturated rainbow shaker card slimline stamping stamptember stencil thank you thinking of you valentine's day video watercolor

Popular Posts

Simon Says Stamp Sending Cheer Blog Hop- Day 2 + Freebie + Giveaway!
Altenew October 2026 Release Blog Hop + Giveaway!
Rustic Monochromatic Stars for Christmas with Rainbow Splash!
Hero Arts Partners Blog Hop: Lawn Fawn!
Waffleflower July Release Blog Hop!
December 2018 My Monthly Hero Blog Hop + Giveaway!
March 2020 Essentials By Ellen Blog Hop+Giveaway!
The Ton Anniversary Release: Day 1!
The Ton Stamps Summer Release: Day 1
Autumn Legs with Colorado Craft Company and Catherine Pooler!

Disclosure

Some affiliate links are used in my posts. This means that, should you click on one of my links and purchase something from that company, I will receive a small portion of the sale at no extra cost to you. I use the money earned from these sales to help maintain my blog. I so appreciate you visiting and, if you do choose to use one of my affiliate links, thank you so much for your support!
Copyright © 2026 ·Brunch Pro Theme · Genesis Framework by StudioPress · WordPress · Log in
Loading Comments...