• Skip to main content
  • Skip to primary sidebar
  • Skip to secondary sidebar

Sixth Street Sundries

Emily Midgett

  • Home
  • About Me
  • Contact
  • OLO Marker Color Swatch Chart
  • Shop

simon says stamp card kit of the month

Simon Says Stamp April 2026 Card Kit of the Month: A Little Artsy!

March 10, 2026

This post was sponsored by Simon Says Stamp. Thanks, Simon! *I have gathered links to all of the products used at the bottom of the post for your convenience, using affiliate links at no extra cost to you. Thank you for shopping with my links! I truly appreciate your support for my work!*

Hi friends! The fabulous new April 2026 Card Kit of the Month is now available for preorder, and it’s SO gorgeous! We’re giving you a few extra days to take a peek at this month’s kit by going live today, March 10, 2026, so that you have plenty of time to peruse the inspiration and the kit contents. These kits are always jam-packed with goodies and value, but this one is truly amazing. Stamps, stencils, patterned papers, rub ons, cardstock… and an (amazingly awesome) Distress Oxide cube quartet!! Like how incredible, right? Here’s a sneak peek at this month’s kit:
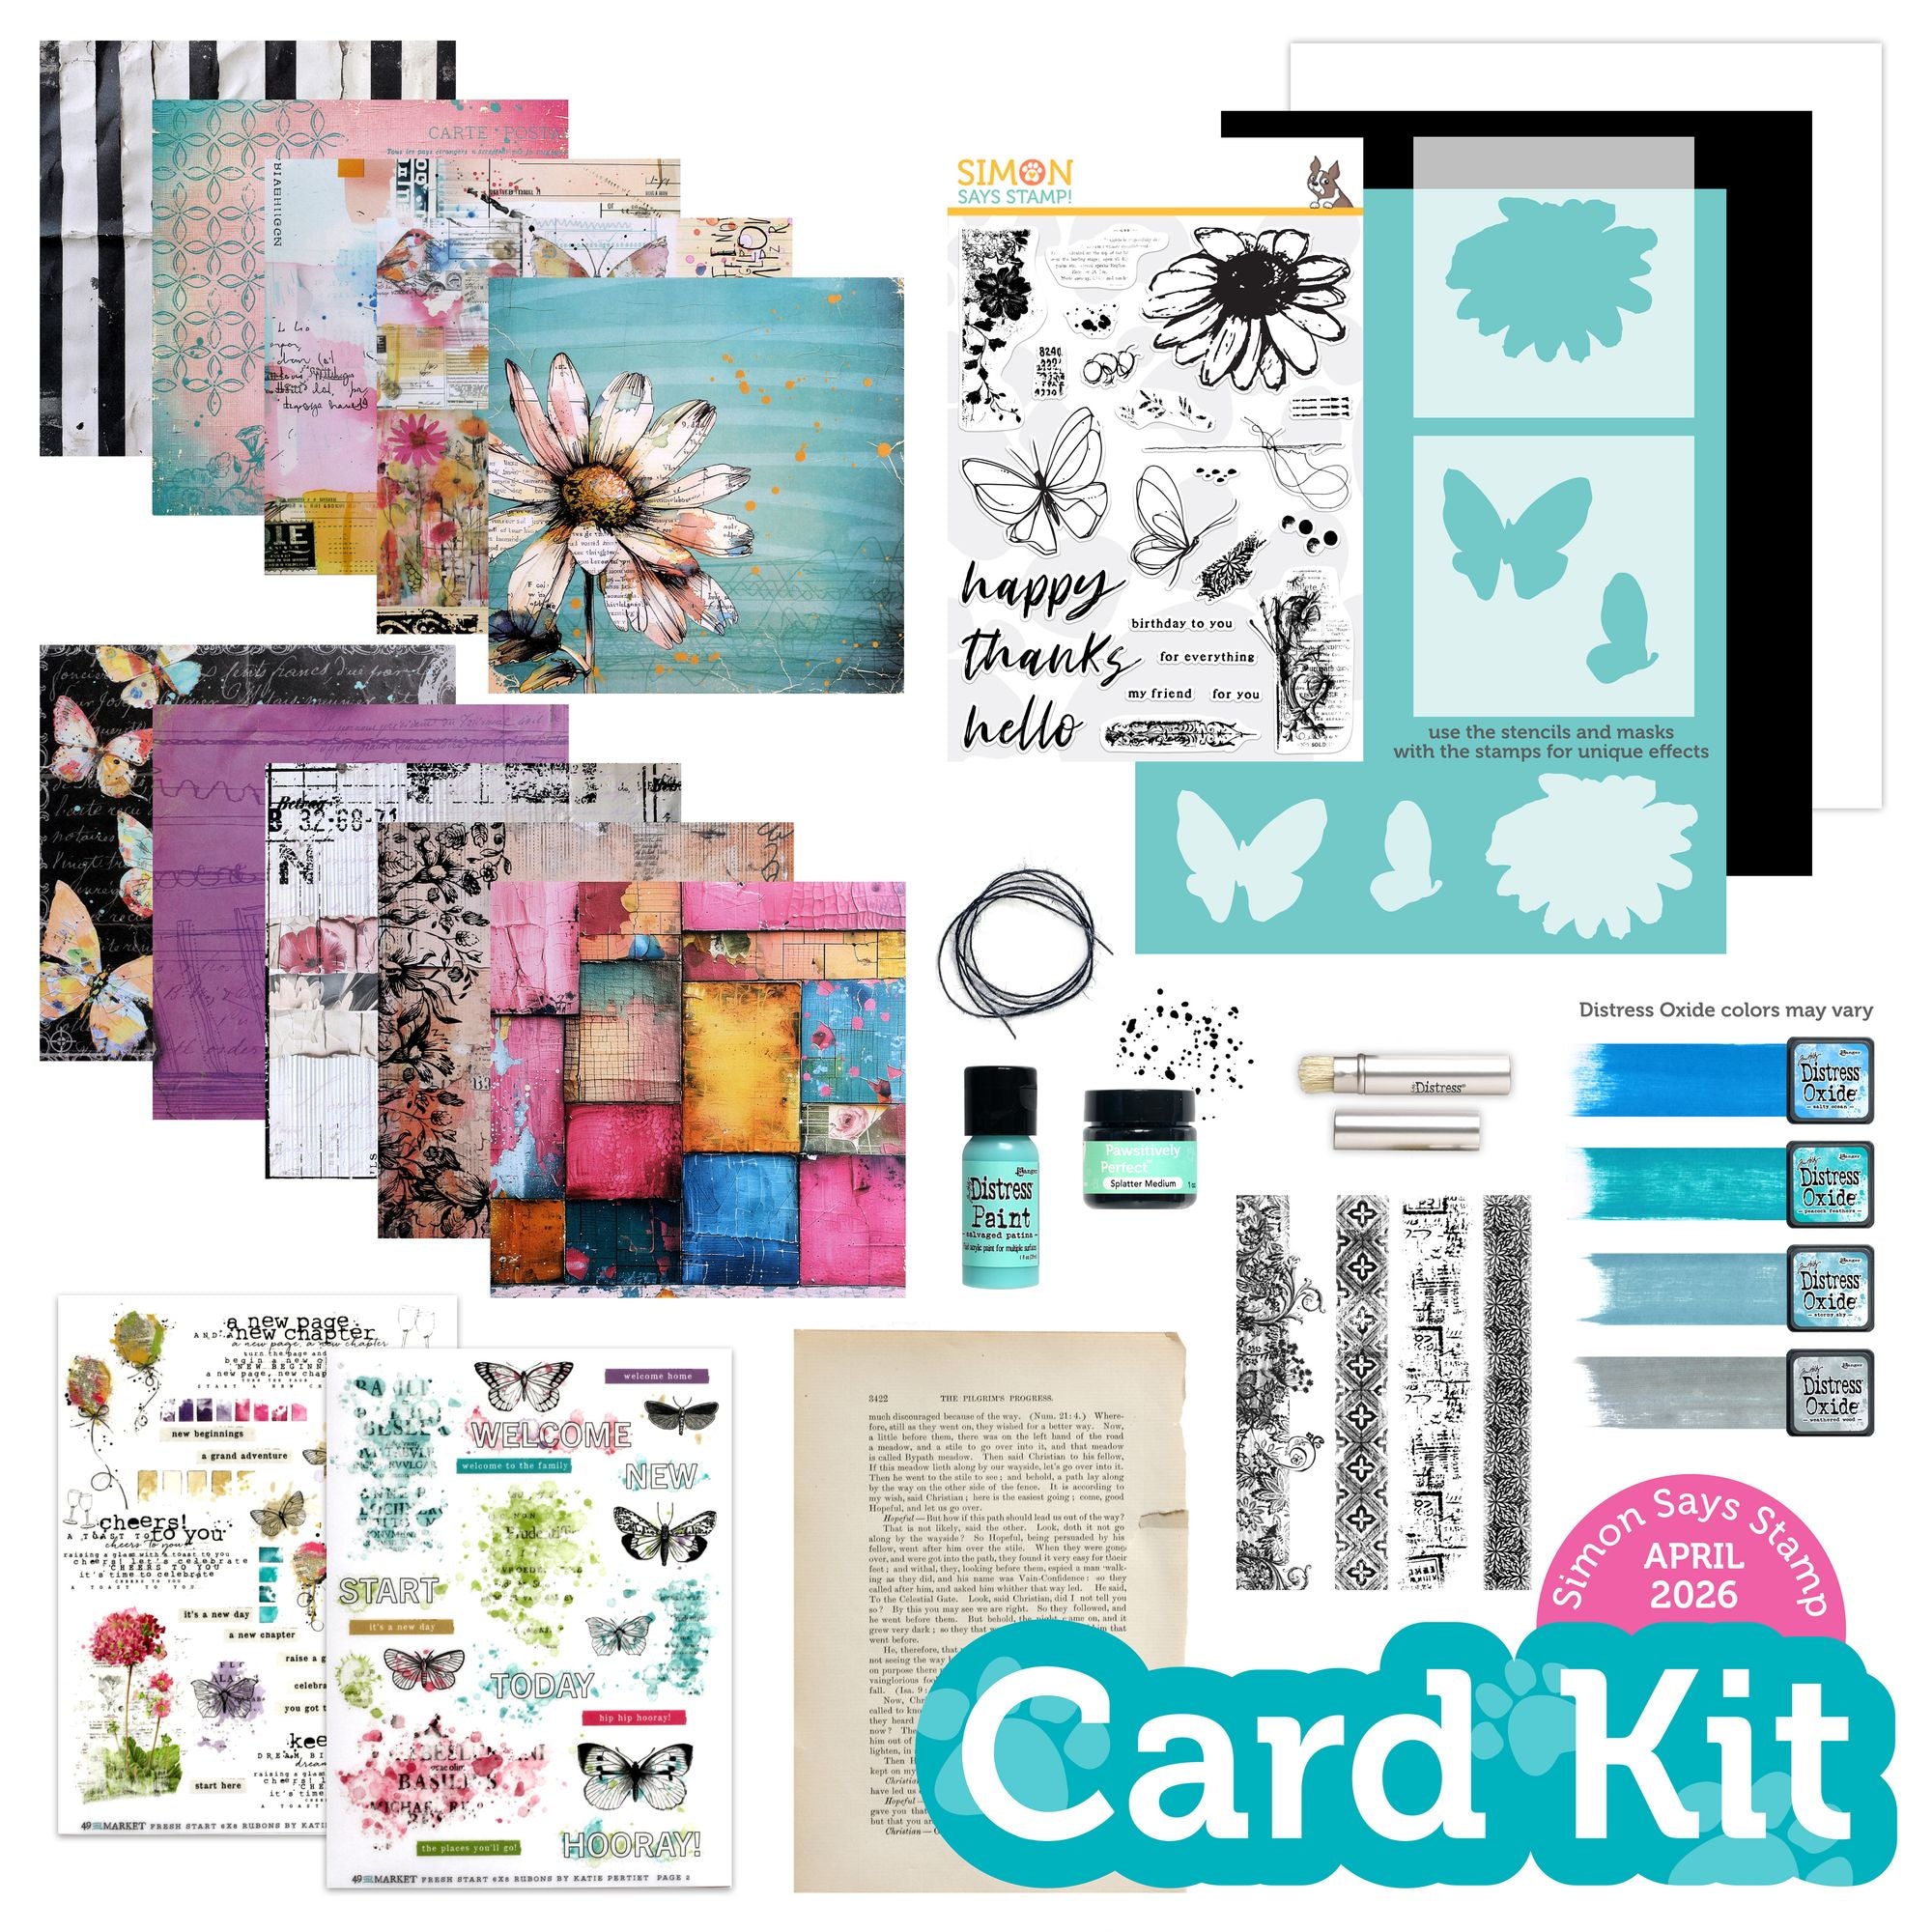
The contents of this KIT retail individually for over $80, but you can purchase the kit for only $44.99! Such a great value. You can save even more by becoming a kit subscriber (click HERE to see the subscription details!). If you love receiving this type of curated kit filled to the brim with goodies to make your cardmaking even more simplified and enjoyable, you definitely want to hit that subscribe button!

I’ve only had time to create one project with this earlier release date, but this kit is so filled with products that I have a bunch more ideas ruminating. So many ideas, so little time! Let’s get started on the details for this project.

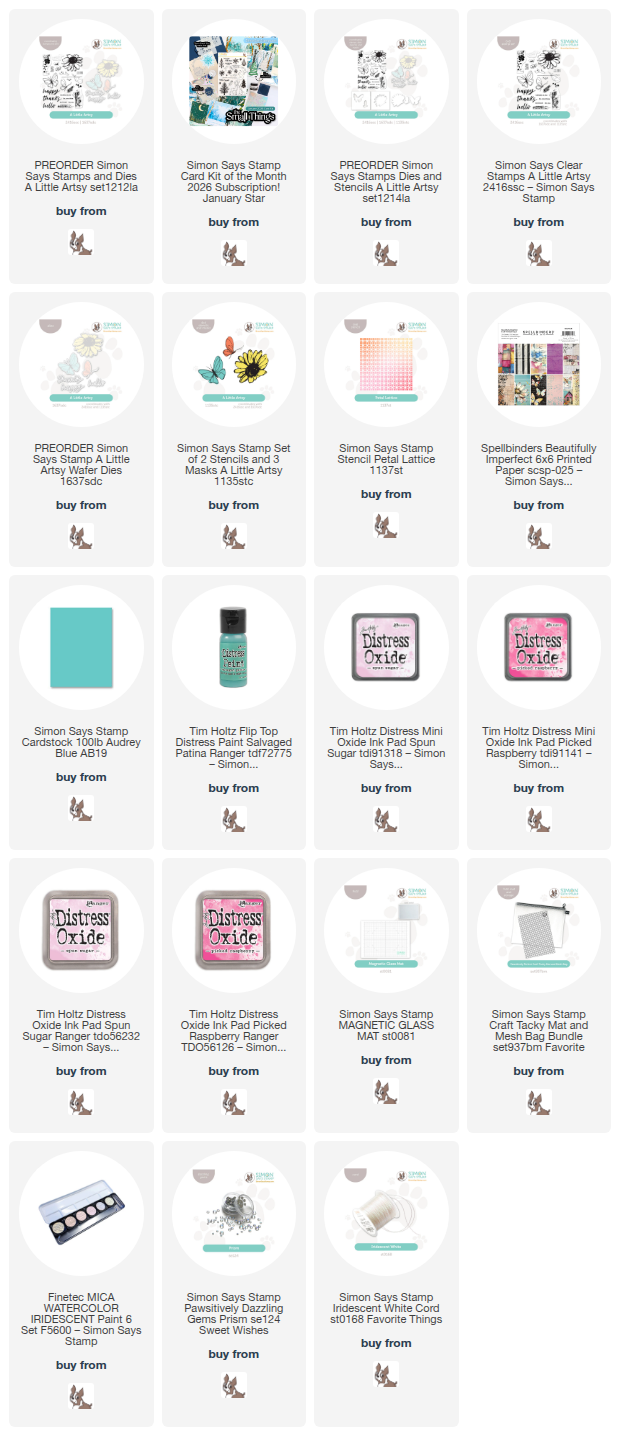
The April 2026 Card Kit of the Month features a gorgeous, mixed media-aesthetic stamp set, along with beautiful patterned papers with a variety of color palettes and patterns, as well as some gorgeous Audrey Blue cardstock. This Simon Says Stamp-exclusive color is one of my absolute favorites, and it worked so beautifully with the pink and red Oxide Ink Minis that I received with my kit. I started by setting up an A2 panel of Audrey Blue cardstock on my stencil station (a glass mat with the Craft Tacky Mat on top, which I leave set up all the time to make stenciling super quick and easy!) and placed the Petal Lattice 6×6 stencil add-on over the top of my cardstock. I then used blending brushes to blend my two favorite Oxide pinks: Spun Sugar and Picked Raspberry. The opaque nature of the Oxide inks means that they pop beautifully from the vibrant turquoise cardstock. Isn’t that look just marvelous?!

Continuing on the background, I used the same two inks to stamp some of the stamps from the A Little Artsy stamp set included with the kit, using my MISTI to create some two-toned stamped butterfly and corner adornment images. I also splattered some iridescent watercolor as well as the Salvaged Patina Distress Paint included in the kit all over the background panel. I love the colorful, textured look that all of these steps create!

Once I had created the background, I used Simon Says Stamp White Pigment Ink to stamp the sentiment, daisy, and smaller butterfly image from A Little Artsy onto some more Audrey Blue cardstock, then covered it with Hero Arts Iridescent Blue embossing powder to create exquisite shimmer and iridescence on the images. I then placed the embossed images on my stencil station and used the coordinating stencils, included with the kit, to blend more of the Spun Sugar and Picked Raspberry Oxide inks on the flower and butterfly. The colors pop so perfectly from that bright blue cardstock!

To help ground the individual images on my textured background, I trimmed a thick strip of one of the patterned papers in that same vibrant magenta included with the kit, then flagged the end with my sharp scissors. I arranged the embossed and cut images atop the flagged cardstock strip, then popped all of the images up using foam tape in multiple heights to create lots of visual interest on the card. For a final touch, I added some sparkling Prism Pawsitively Dazzling Gems and a Simon Says Stamp Iridescent White Cord bow for additional sparkle and texture!

Well, that’s all for my project today.

The Simon Says Stamp Card Kits are such an incredible value; the value of the individual elements of each kit equals far more than the $44.99 price tag, so you’re getting incredible bang for your buck. If you are consistently interested in the Simon Says Stamp Card Kit of the Month, you can sign up HERE to become a subscriber for an even bigger discount on these carefully curated products. As always, Simon also makes each individual element of the kits available a la carte, so that you can pick and choose what you would like to purchase if buying the entire kit isn’t really your thing. Options galore! Who can say no to such incredible value though, right?

Thanks so much for stopping by today, and have a marvelous day!
Filed Under: simon says stamp Tagged With: a little artsy, distress oxide, patterned paper, petal lattice, simon says stamp card kit of the monht, simon says stamp card kit of the month, stencil, stencil station

Introducing Simon Says Stamp March 2026 Card Kit of the Month: Watercolor Bouquet!

February 15, 2026


This post was sponsored by Simon Says Stamp. Thanks, Simon! *I have gathered links to all of the products used at the bottom of the post for your convenience, using affiliate links at no extra cost to you. Thank you for shopping with my links! I truly appreciate your support for my work!*

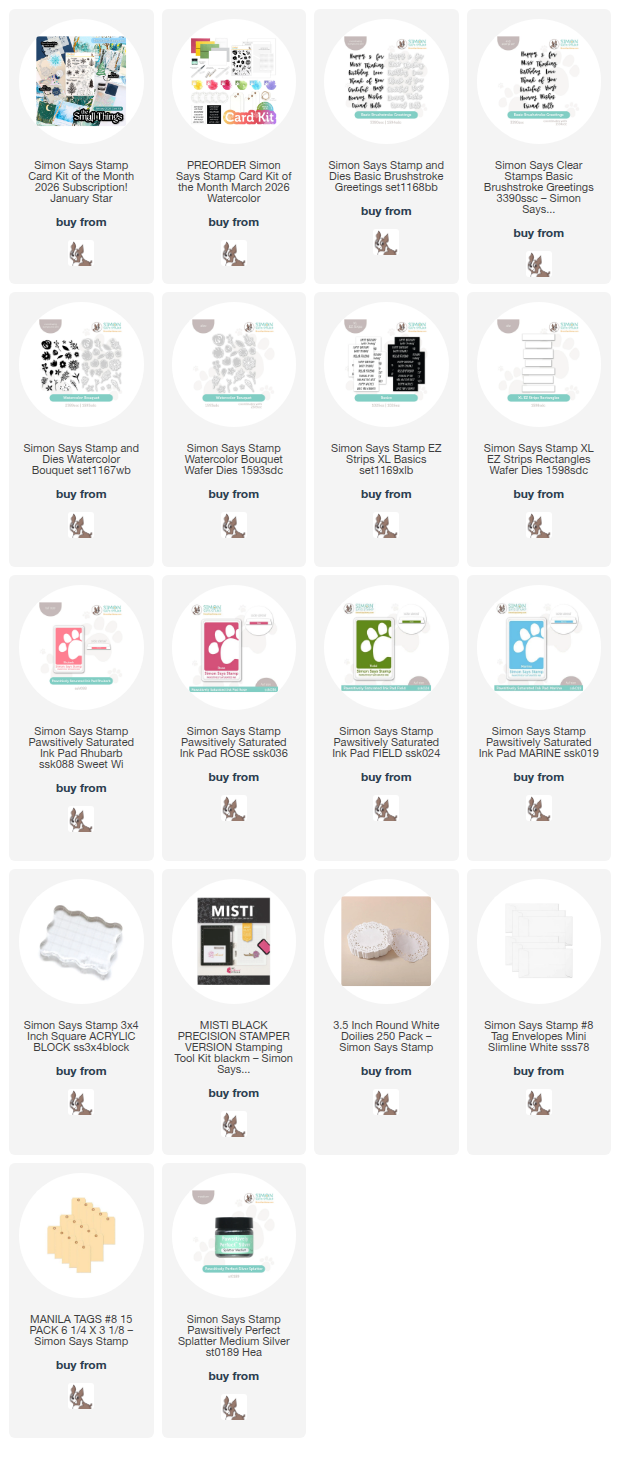
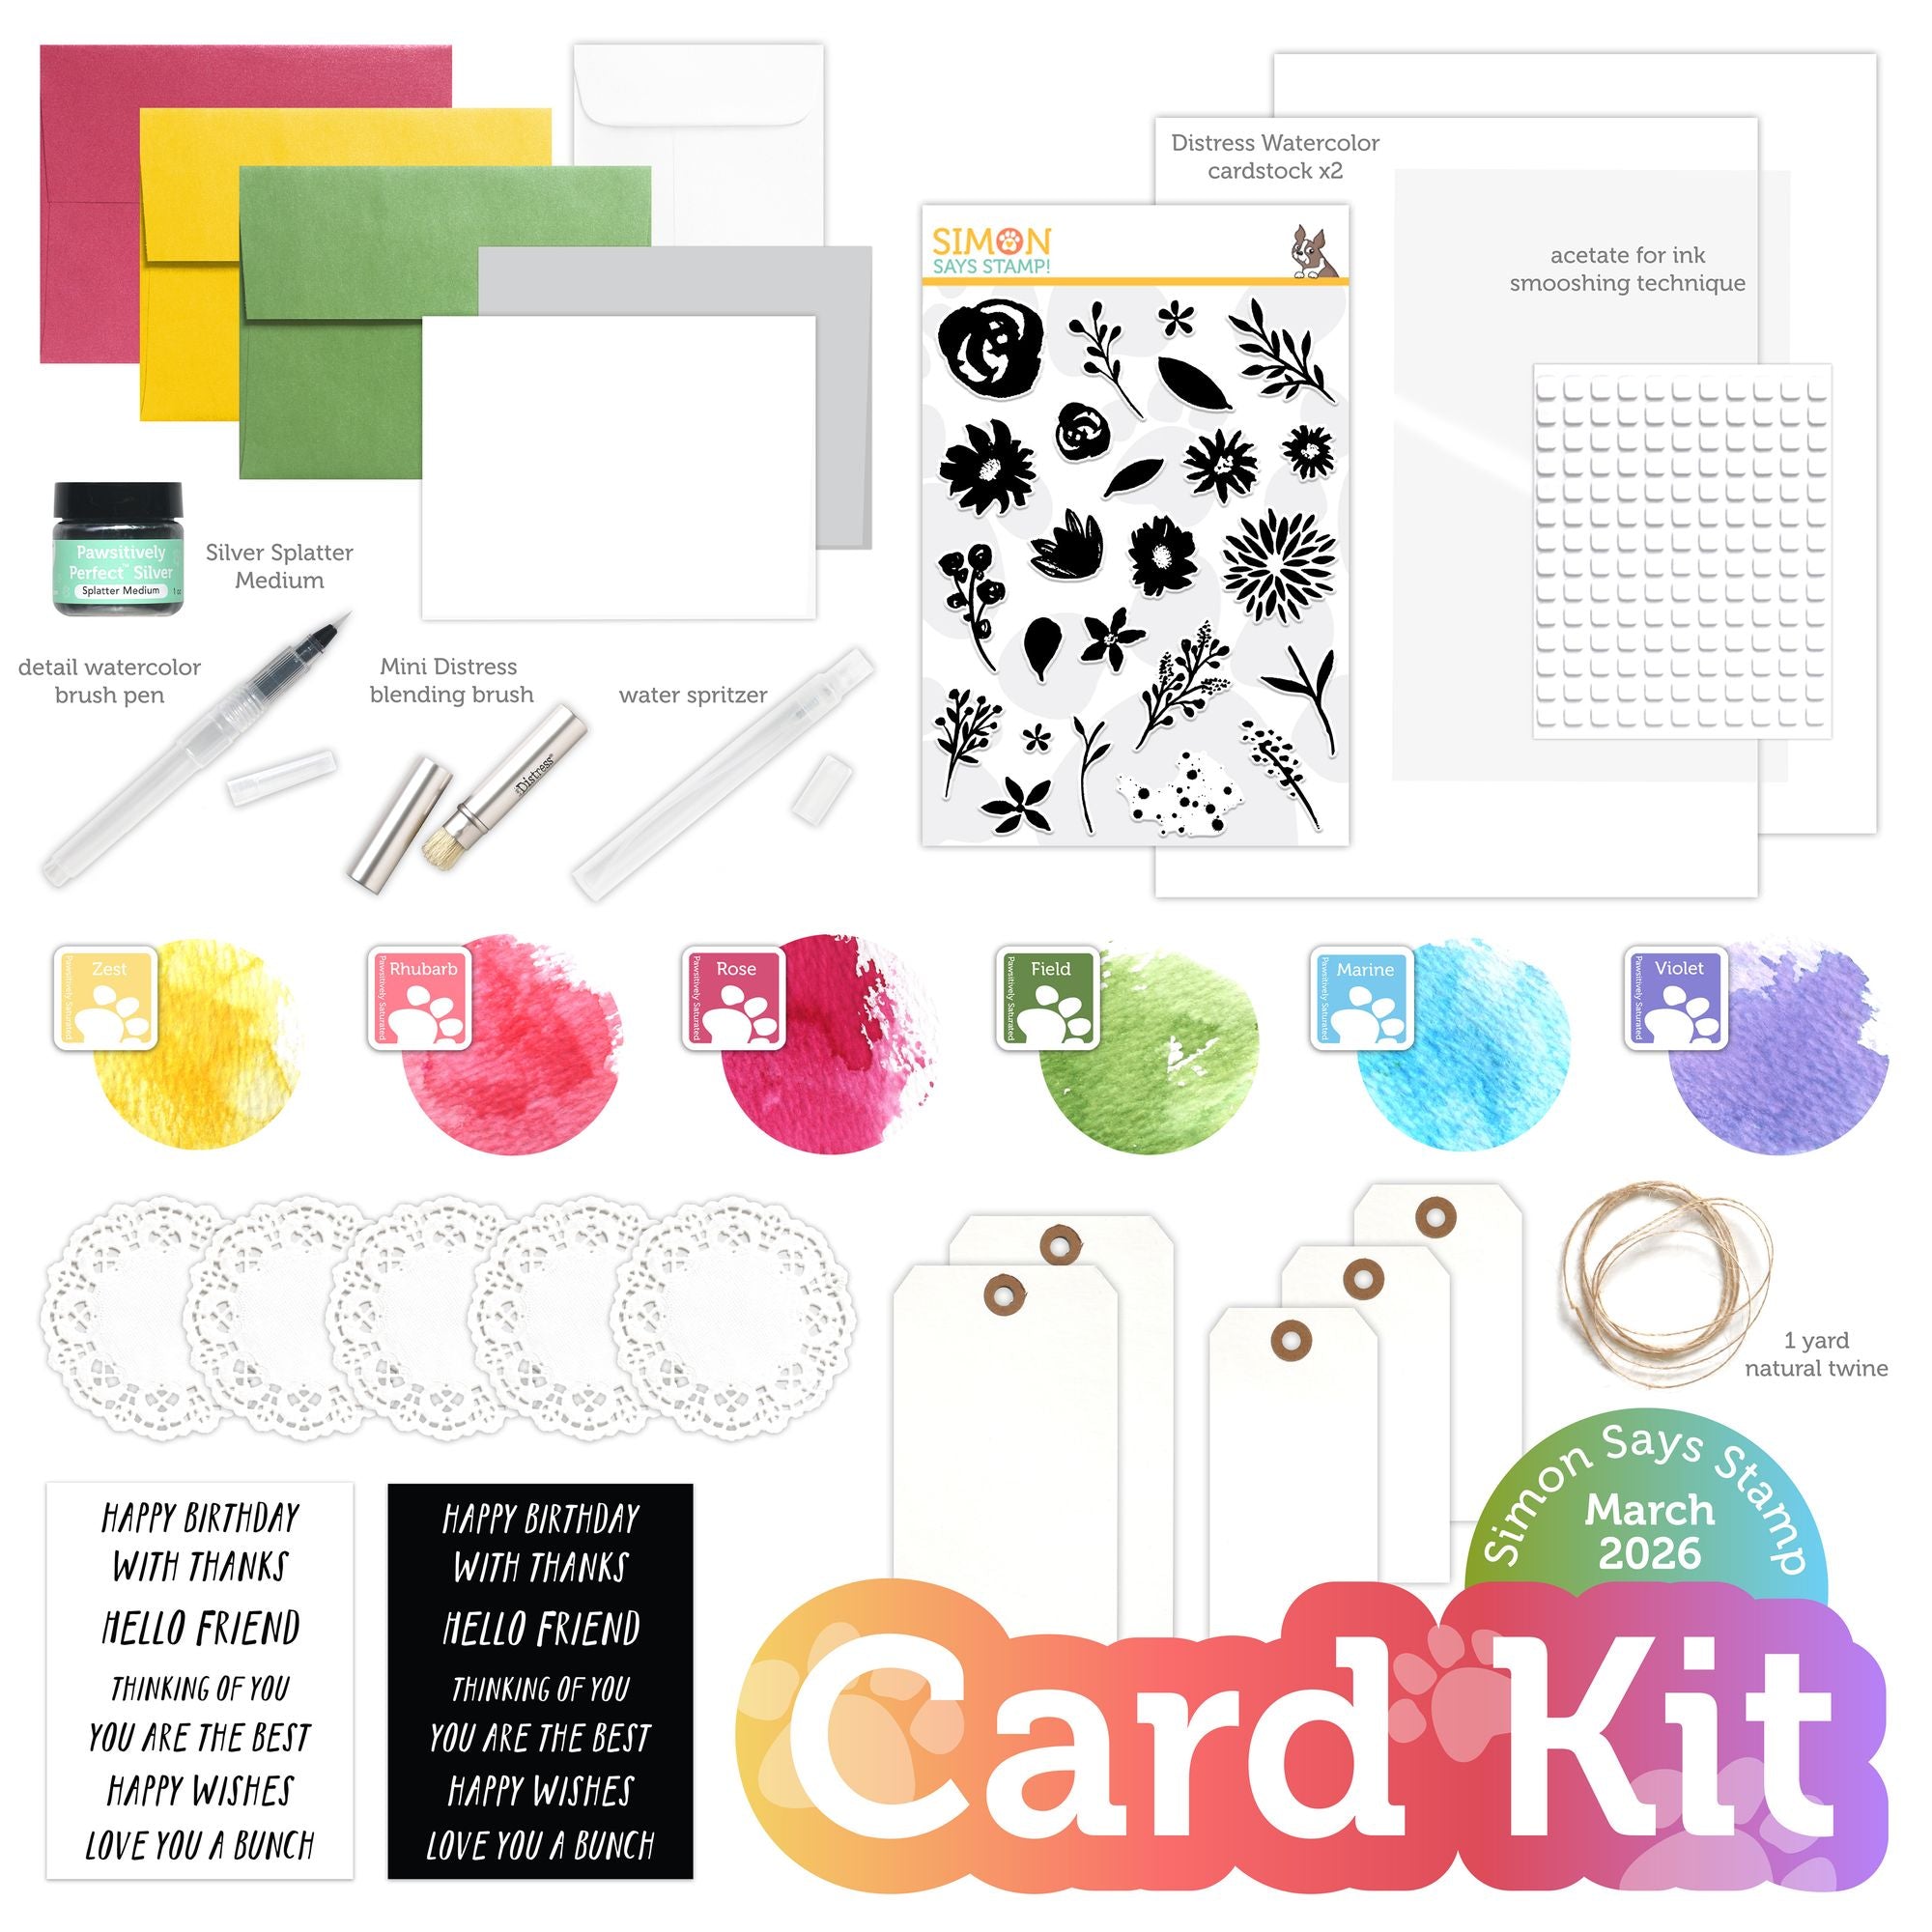
Hi friends! I have some cheery, colorful inspiration to share with you today using goodies from the Simon Says Stamp Card Kit of the Month for March 2026 (click HERE to see all of the details!). These card kits are always filled with such an exquisite array of products, and this month not only are there marvelous products in the kit itself, but there are some fabulous add-ons that you can use to create an endless supply of gorgeous cards. I have created three different projects to share with you using the beautiful Watercolor Bouquet stamp set that comes in the main kit, but for today I thought I would start with a fun gift tag set created using several elements of the new card kit. Here’s a sneak peek of the different goodies included with the card kit:

This kit contains so many fun individual components to create beautifully colorful projects that are sure to bring a smile to the recipient! For my project today, I used two of the large, pre-cut tags included with the kit to create this fun gift card holder complete with decorated envelope. Let’s get started with the details!

To start, I selected the two large tags included with the Watercolor Bouquet Card Kit of the Month and trimmed off the top of one of the tags using my trimmer. I then used super strong double sided tape to add adhesive to the two long sides and the bottom, creating a simple pocket into which my gift card could nestle.

To decorate the front of my gift card holder, I stamped a few blooms from the Watercolor Bouquet stamp set included with the kit using a few of the ink cubes included. The wide variety of colors makes it really easy to create a multitude of color palettes! I also took things one step further by creating custom colors. For the small sprig of greenery, I stamped once with full strength Marine ink, then inked up the stamp again with Field, stamping off on a piece of scrap paper to make it much lighter, then stamped again directly over the top of the blue sprig with the green ink residue left on the stamp. The result is a pretty blue-green that is unique to the green included with the kit! I also stamped the large rose bloom using Rose ink, creating a less-intense version of the deep pink by stamping multiple layers of second generation ink. (The MISTI is invaluable for this layering technique!) I also created the individual leaves using this layered second generation technique with Field ink. Using this stamping-off technique allows you to create a wide variety of color intensities with only a few inks!

I stamped the remaining floral images full strength Rose and Rhubarb inks, then die cut them using the coordinating dies, which can be purchased separately from the kit. (I know it’s an added expense, but I highly recommend the dies for sets like this, in which you might be inclined to stamp multiples of the same image to create bouquets; fussy cutting all of these images would take a long time!).

I also stamped a greeting using another add-on product, called Basic Brushstroke Sentiments, which is a great basic set that allows you to build tons of custom sentiments. I stamped the sentiments in black and die cut them with their coordinating dies, then began layering the different components on my gift card holder. I offset one of the included doilies on the side of the gift card holder, trimming off the excess, then arranged the flower and sentiment die cuts on the front of the doily. To tie in the black from the sentiment, I trimmed some thin strips of black cardstock and layered them at the top of the pocket. I added some twine from the kit, creating both a loop and a bow in the hole at the top of the tag for easy removal from the envelope.

To create the coordinating envelope, I chopped off the flap of the white mini slimline envelope included with the kit, making sure that I trimmed enough of the envelope off so that the gift card holder would barely peek out the top! I used the same ink colors to stamp a little wreath on the center of the envelope, stamping off once for a couple of the leaves and layering ink colors for the greenery sprigs to create that pretty blue-green. I tucked the gift card holder inside the decorated envelope! I think this would make such a special gift for a friend, perhaps to say thank you or just to remind them how special they are to you!

Well, that’s all for my project today!

The Simon Says Stamp Card Kits are such an incredible value; the value of the individual elements of each kit equals far more than the $44.99 price tag, so you’re getting incredible bang for your buck. If you are consistently interested in the Simon Says Stamp Card Kit of the Month, you can sign up HERE to become a subscriber for an even bigger discount on these carefully curated products. As always, Simon also makes each individual element of the kits available a la carte, so that you can pick and choose what you would like to purchase if buying the entire kit isn’t really your thing. Options galore! Who can say no to such incredible value though, right?

I have a few more projects to share using components of this kit, because I just love it! I hope you do too! Thanks so much for stopping by today, and have a marvelous day!

Filed Under: simon says stamp Tagged With: basic brushstroke greetings, card kit of the month, ez strips xl basics, gift card holder, gift card holer, simon says stamp card kit of the month, subscription, watercolor bouquet

Peachy Bokeh with the New Simon Says Stamp Card Kit of the Month!

January 19, 2026

This post was sponsored by Simon Says Stamp. Thanks, Simon!

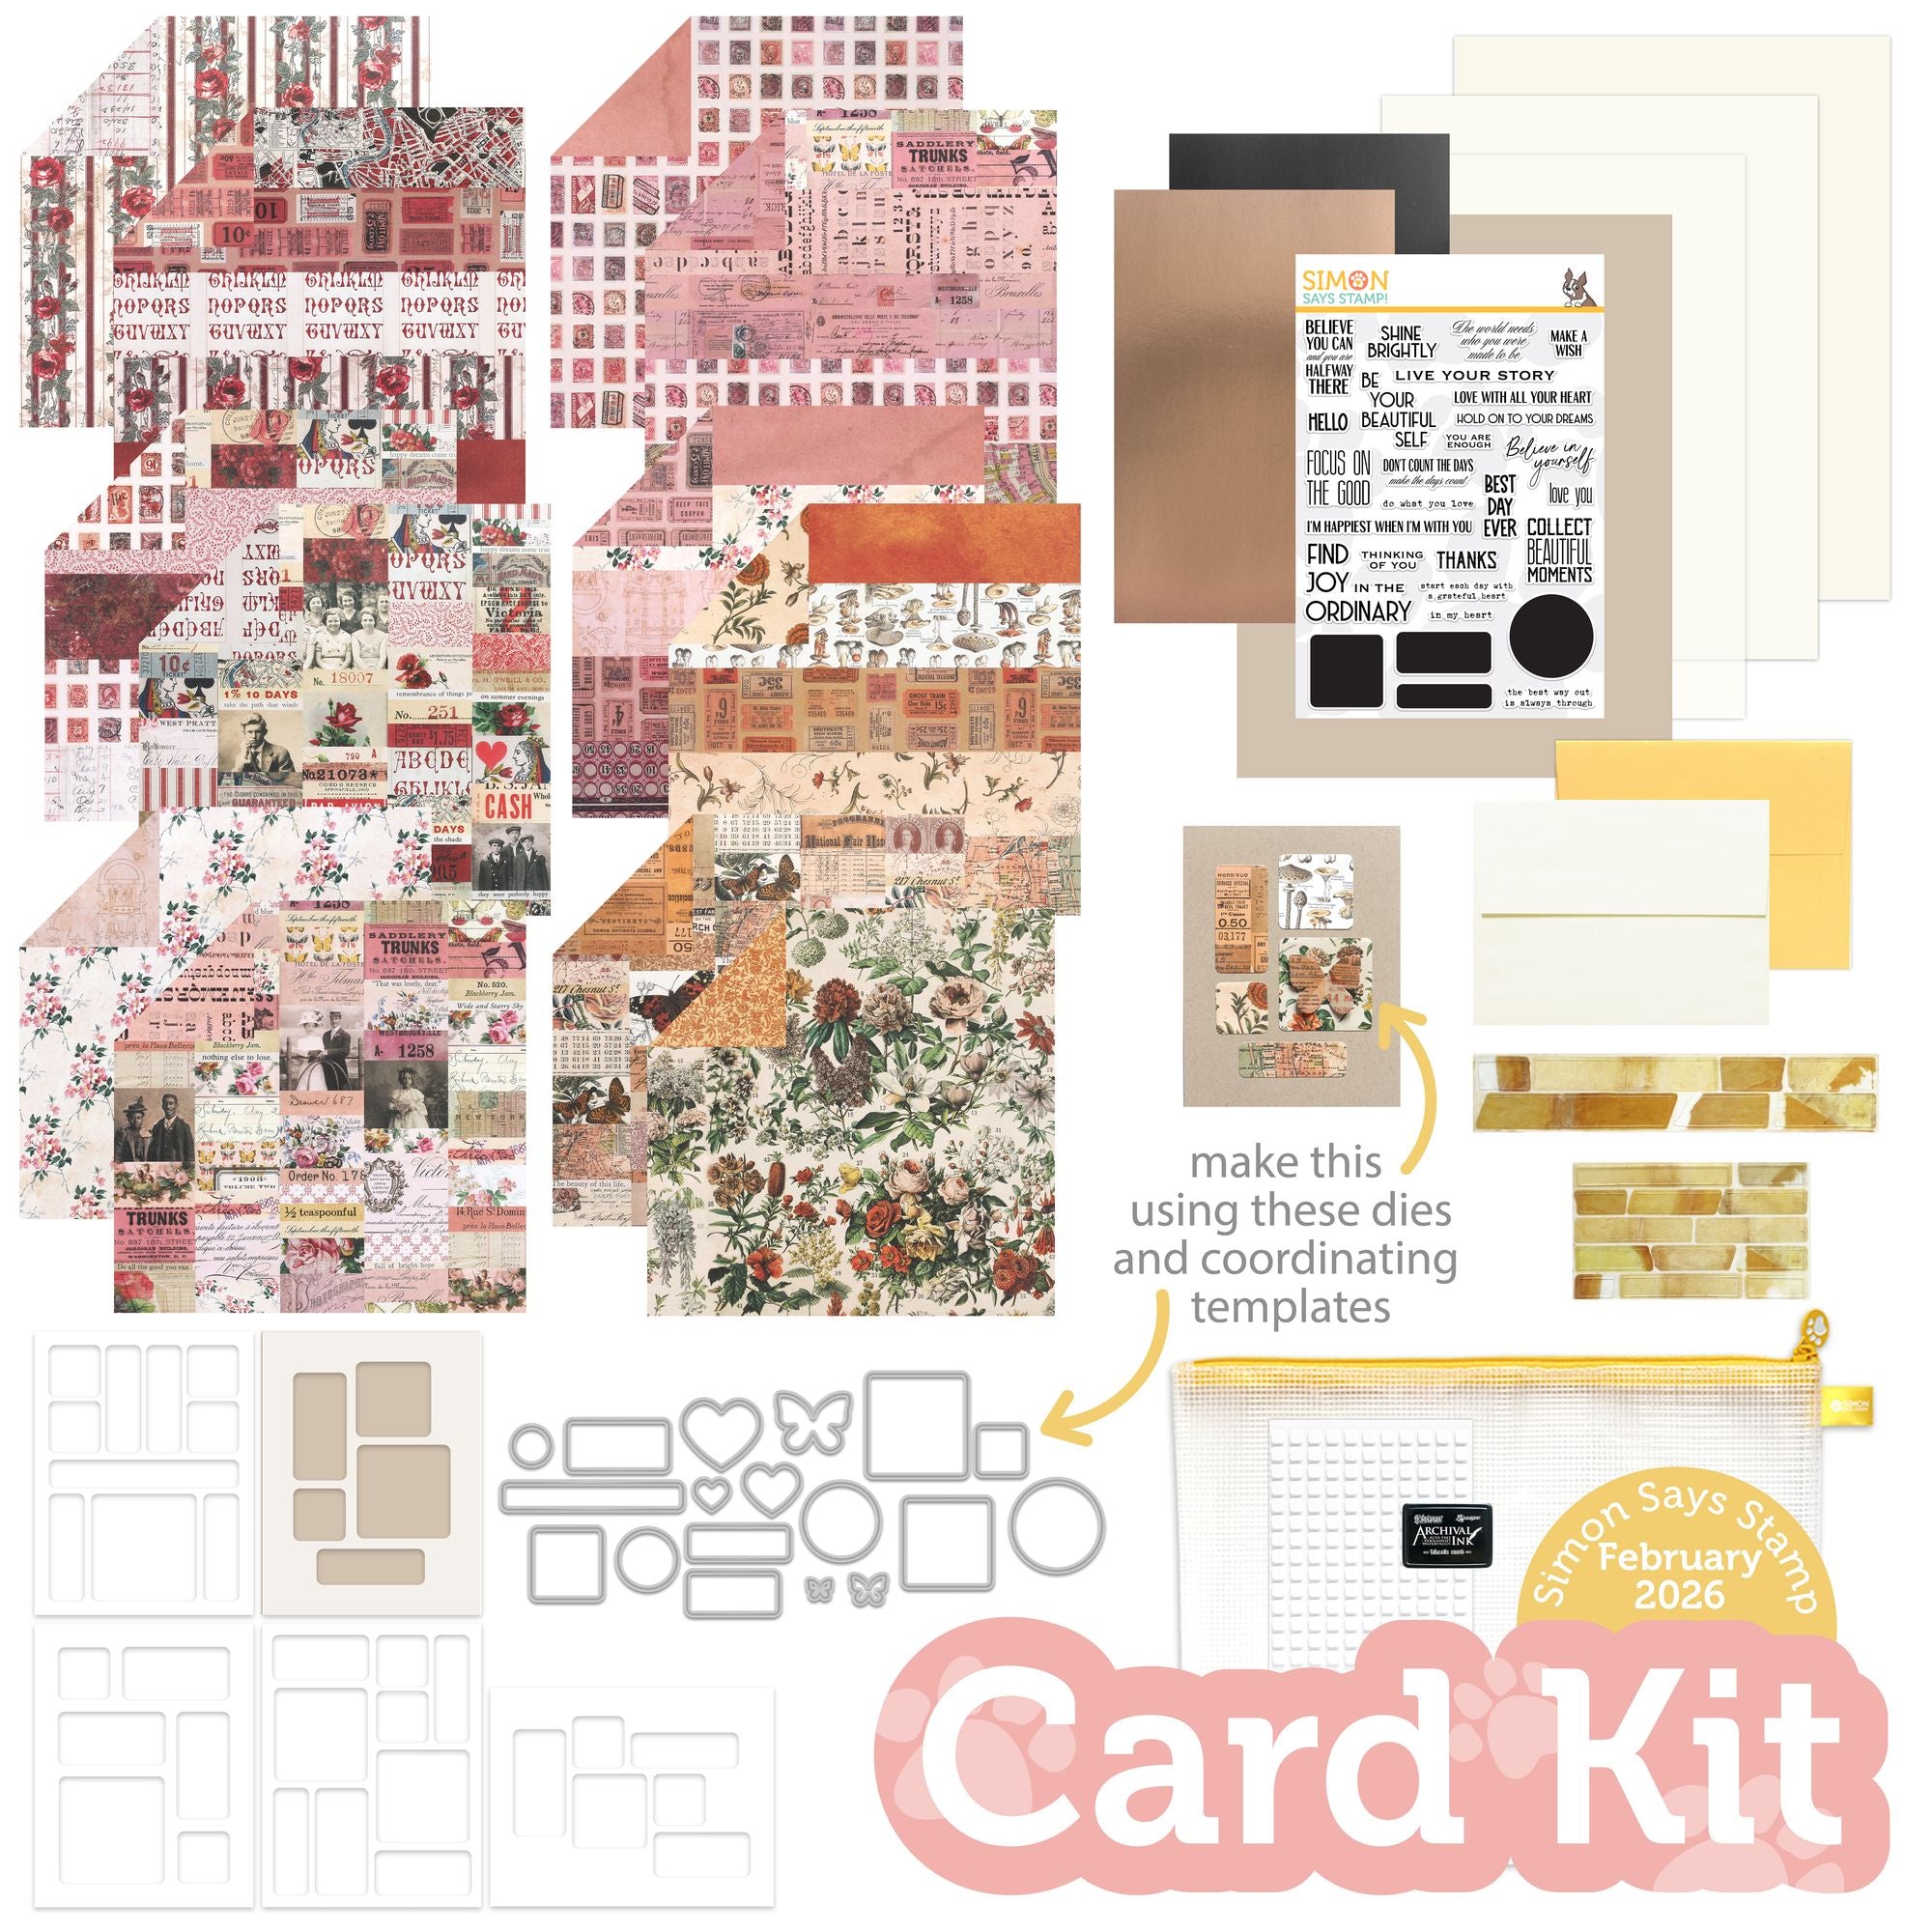
Hi friends! I have some belated inspiration to share with you using the February 2026 Simon Says Stamp Card Kit of the Month, which is now available for preorder! (Click HERE to see all of the details of the kit!) I love the opportunity to work with these carefully-curated kits, because the coordinating components work so beautifully together that some of the creative work is done for me! I simply have to come up with a layout and add the general details. Here’s a sneak peek at this month’s kit:

All of the individual components of this kit retail for over $90, but you can purchase this kit for $44.99! What a bargain, right? And save even more by becoming a monthly subscriber. Click HERE to start your monthly subscription!

My card today takes it’s cues from the beautiful rose gold metallic cardstock that comes in the kit; I adore pairing rose gold with blush and peach tones, and so used that as my inspiration for this bokeh card. Let’s get started with the details on my project!

*I have gathered links to all of the products used at the bottom of the post for your convenience, using affiliate links at no extra cost to you. Thank you for shopping with my links! I truly appreciate your support for my work!*

To begin, I used a stamping block to stamp the solid circle images from Be Your Beautiful Self onto an A2 panel of Ivory cardstock, included with the kit. Whenever I see solid circle stamps, my mind immediately goes to bokeh. Remember how bokeh was all the rage about ten years ago? Well, I have created this bokeh background in honor of those bygone stylistic days! I used the “stamping off” method to achieve these soft overlapping circles, stamping circles of Rhubarb, Salmon, and Paprika Pawsitively Saturated Inks once on scratch paper off to the side using a stamp block and the foam Craft Pad to ensure extra crisp stamping, then stamping the soft remnants on my A2 panel. I did leave the Shell inked circles at full strength to keep them visible. I made sure to overlap some circles and try to be as random as possible with the placement so that it looked soft and blurred, like bokeh in a photograph! Once I had completed the stamping, I blended more Shell ink around the edges and splattered the background with some beautiful rose gold metallic watercolors.

While the background was drying, I used the concentric circle dies from the included Artful Palette die set to cut three different sizes of solid rose gold metallic circles. I envisioned a collage of die cut shapes on my bokeh background, and also die cut the three different sized butterfly dies from the sheet of vellum cardstock included with the kit.

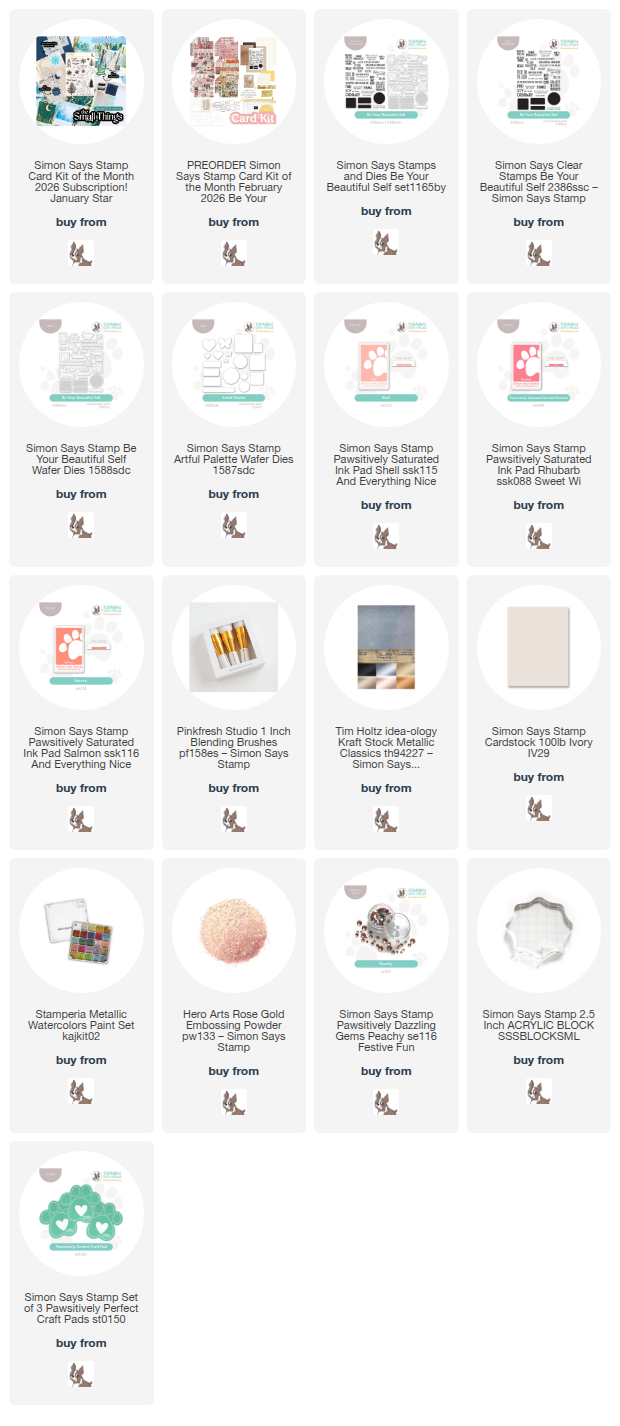
To complete my collage, I stamped three different greetings from the Be Your Beautiful Self onto some more Ivory cardstock using embossing ink, then added Rose Gold embossing powder to coordinate beautifully with the peachy blush tones of the rest of the card. I used the coordinating dies (sold separately from the kit and linked below) to die cut the sentiments, then began arranging the die cut elements on my bokeh card front. I used liquid adhesive as well as the thin foam adhesive squares included in the kit, doubling the foam adhesive up for a few of the elements so that they were a bit taller than the others, adding plenty of dimension and interest to the card. Finally, I added some sparkling Peachy Pawsitively Dazzling Gems to the bodies of the butterflies and around the die cut collage!

Well, that’s all for me today! I think this card is so pretty, and shows that even the simplest of shapes can become the prettiest cards.

The Simon Says Stamp Card Kits are such an incredible value; the value of the individual elements of each kit equals far more than the $44.99 price tag, so you’re getting incredible bang for your buck. If you are consistently interested in the Simon Says Stamp Card Kit of the Month, you can sign up HERE to become a subscriber for an even bigger discount on these carefully curated products. As always, Simon also makes each individual element of the kits available a la carte, so that you can pick and choose what you would like to purchase if buying the entire kit isn’t really your thing. Options galore! Who can say no to such incredible value though, right?

Thanks so much for stopping by today, and have a marvelous day!
Filed Under: simon says stamp Tagged With: artful palette, be your beautiful self, bokeh, card kit, die cutting, ink blending, simon says stamp card kit of the month, stamping

More Simon Says Stamp April 2025 Card Kit Inspiration!

March 16, 2025

This post was sponsored by Simon Says Stamp. Thanks, Simon!

Hi friends! I am back with another pair of projects using the gorgeous new Simon Says Stamp April 2025 Card Kit of the Month! I shared this fun box card and simple patterned paper project set HERE, and today I paired the stamp set with some more of the patterned paper and my colored pencils to create this pair of sunny yellow cards. Let’s get started with the details!

*I have gathered links to all of the products used at the bottom of the post for your convenience, using affiliate links. Thank you for shopping with my links! I truly appreciate your support for my work!*

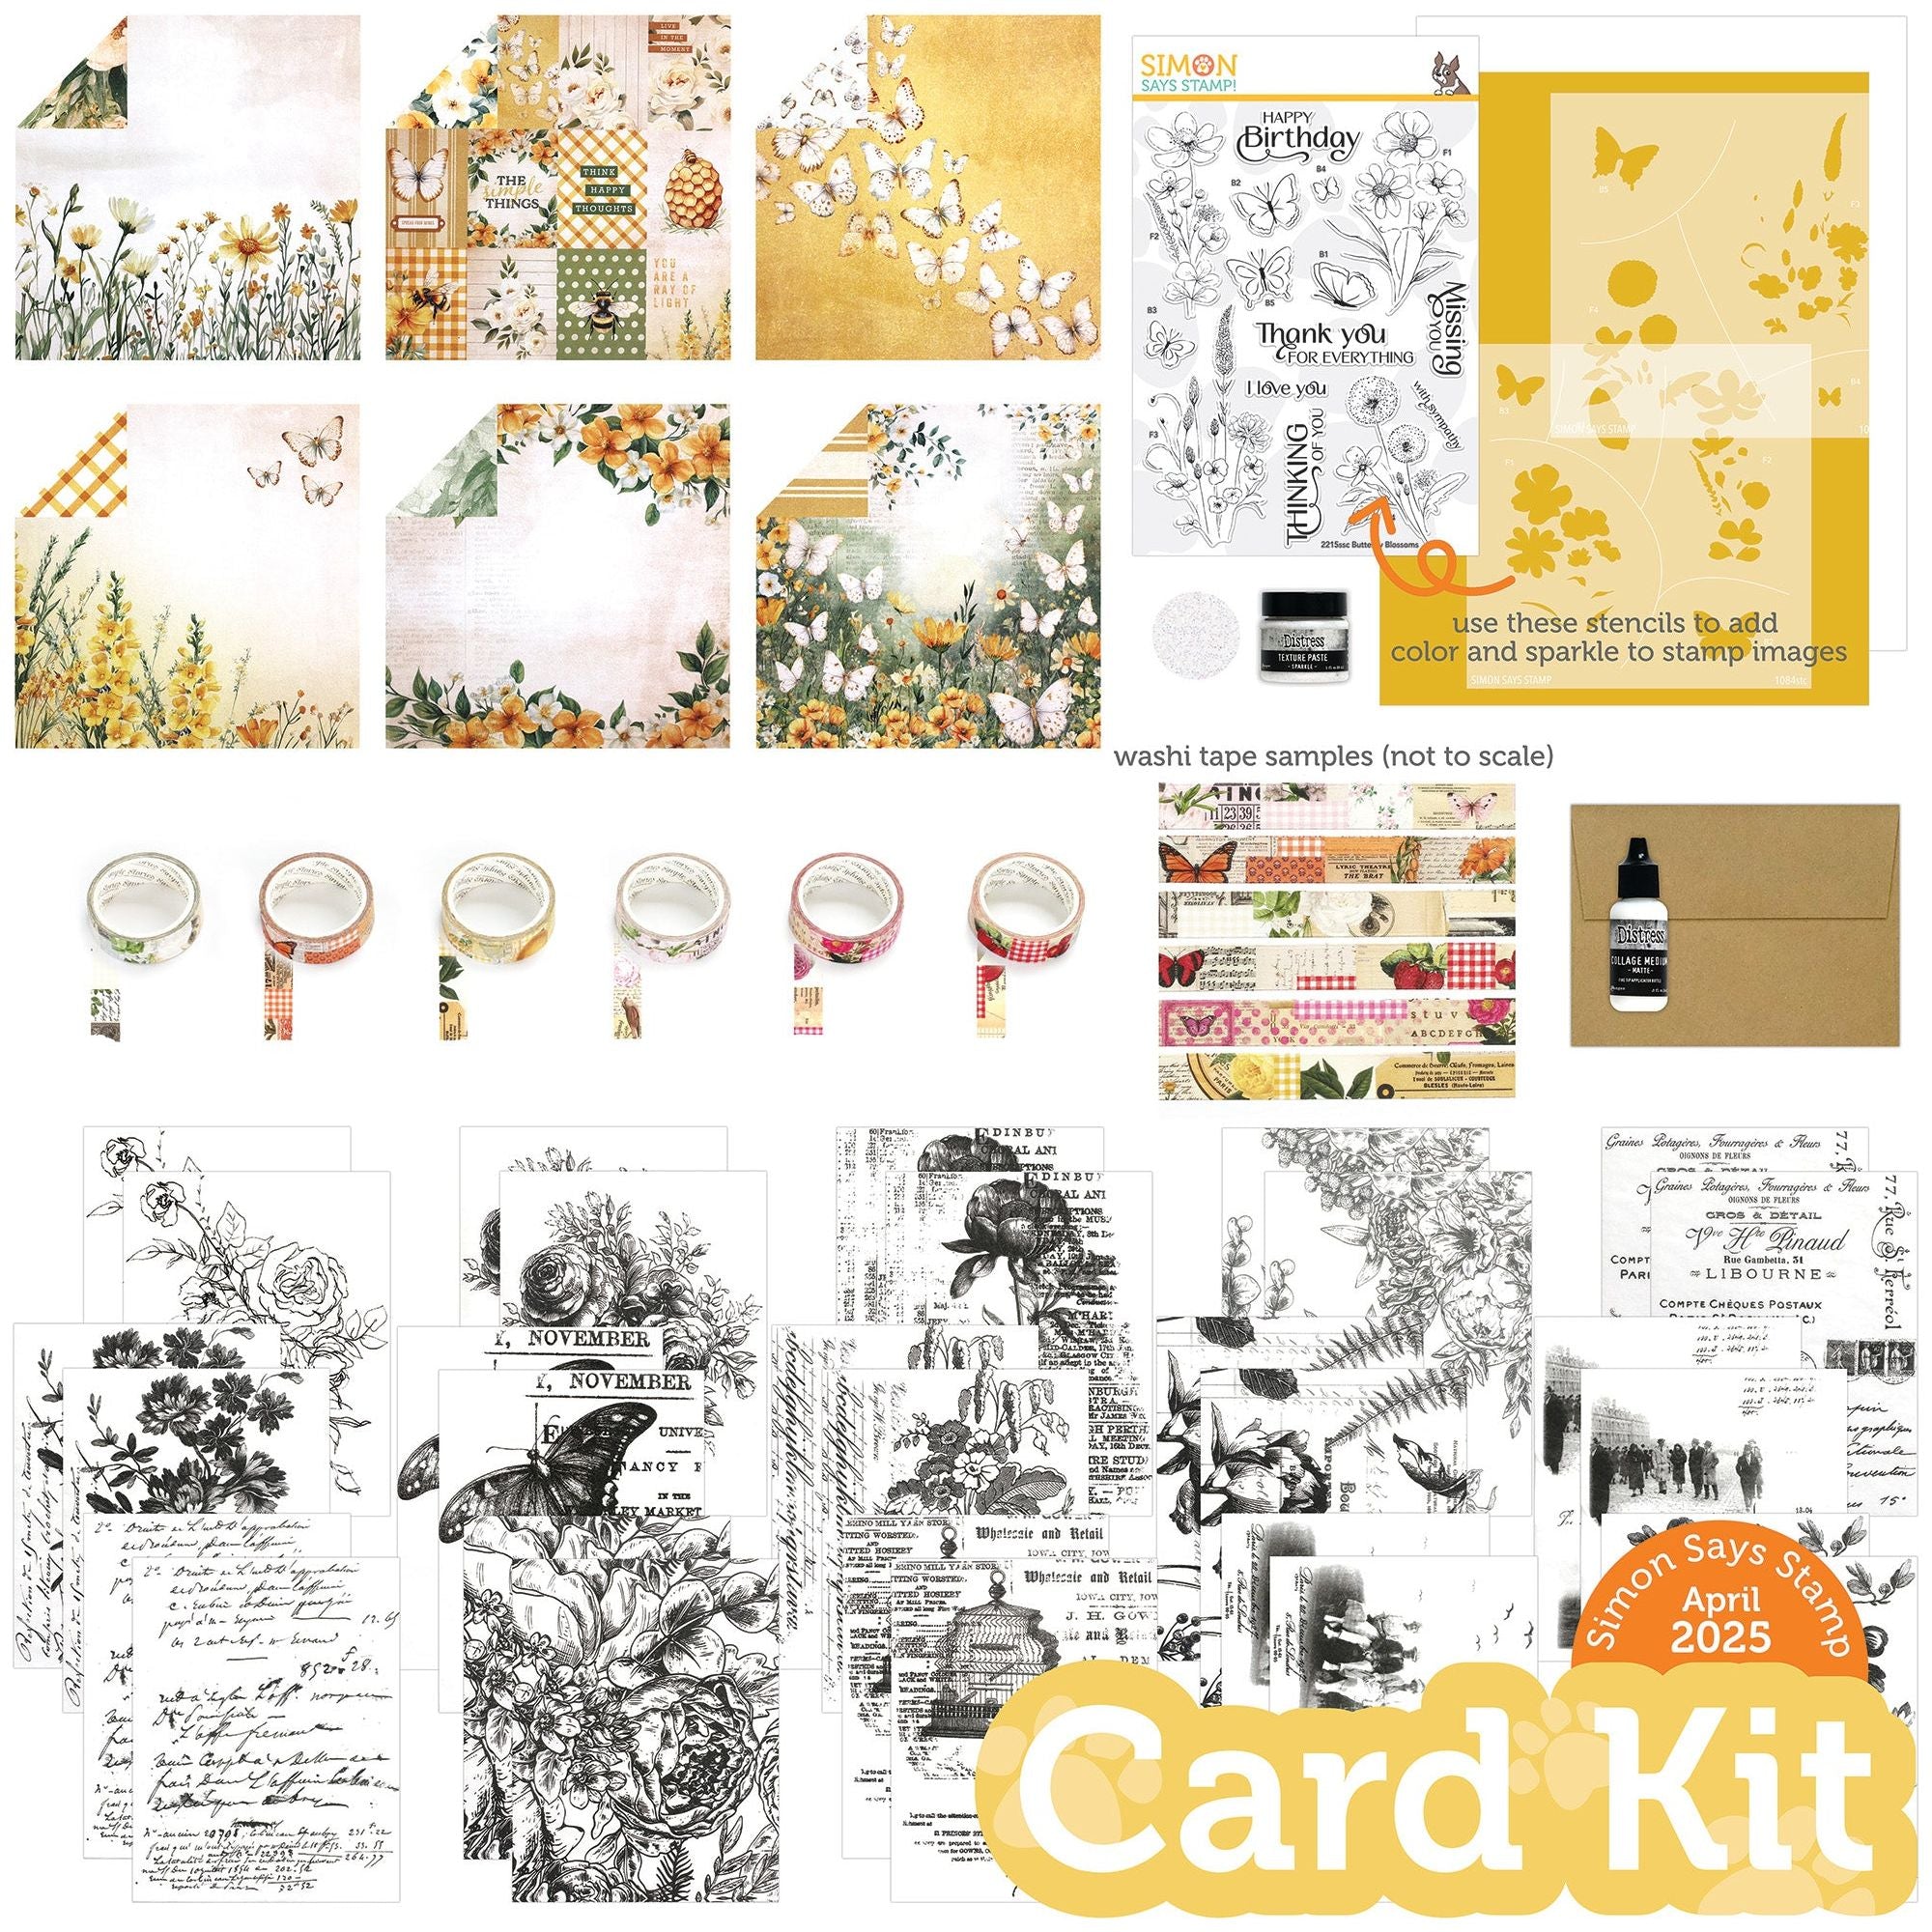
The April 2025 Card Kit features:

1 NEW and exclusive Simon Says Stamp Butterfly Blossoms 6×8 inch clear stamp set
1 NEW and exclusive Simon Says Stamp Butterfly Blossoms 6×6 inch stencil set
6 double-sided Paper Rose Bees & Butterflies  6×6 inch patterned paper sheets
1 Tim Holtz Idea-ology Serendipity collage paper pack 
1 Tim Holtz Ranger Sparkle Texture Paste 1 oz jar
1 Tim Holtz Ranger Matte Collage Medium .5 oz bottle
1 Simple Stories Color Palette Warm washi tape 6-pack
1 Simon Says Stamp Honey 100 lb 8.5x 11 cardstock sheet
1 Neenah Solar White 110 lb 8.5×11 cardstock sheet
1 Simon Says Stamp A2 Kraft envelope

The gorgeous floral patterned paper was so appealing, and I used it as the inspiration for my projects today, first as a fussy cut quick focal point and then used the stamp set to create a coordinating project with my pencils!

For the first project, I used my sharp scissors to fussy cut around the edges of one of the 6×6 panels of patterned papers. This particular sheet of patterned paper has the same floral border arrangement on both sides of the paper, so you can fussy cut both sides to create multiples of this card! I also trimmed down some of the Honey cardstock included with the April 2025 Card Kit, as well as a strip of the coordinating yellow gingham patterned paper. I arranged the colored and patterned cardstock pieces on an A2 card front, allowing the gingham to peek out from beneath the solid cardstock, which creates a barrier between the two different patterned panels.

After I had created the background, I used the included Butterfly Blossoms stamp set to heat emboss a greeting and some additional butterflies on vellum using white embossing powder. I used my sharp scissors to fussy cut the embossed images, but you could certainly use the coordinating dies to save time. (I have mine on order!) I used some dimensional adhesiveto adhere the embossed elements, then added an Iridescent White Cord bow and some Butter Pawsitively Dazzling Gems for added sparkle.

For my second project, I stamped the beautiful anemone flower arrangements from Butterfly Blossoms on the included Honey cardstock with Simon Says Stamp’s White Pigment Ink, turning and angling the same stamp to create a continuous pattern with just one stamp! I then used my colored pencils to do some tone-on-tone coloring, creating a sunny field of flowers. After I had finished coloring all of the images, I used a white gel pen to add some crisp white accents to the flowers, creating some delicate Queen Anne’s Lace as well. I love how this turned out; I was amazed at how much difference it made simply by angling the same stamp different directions! It doesn’t look repetitive at all!

After I had finished coloring the images, I used some white embossing powder to heat emboss a greeting from Butterfly Blossoms onto some coordinating avocado green cardstock, which I also used to mat the colored pencil panel. I fussy cut the sentiment with my sharp scissors, then used some foam adhesive to pop the greeting up and added another Iridescent White Cord bow tucked beneath the dimensional greeting. I mounted the matted panel on the front of a white A2 card front and finished the card off with some more Butter Pawsitively Dazzling Gems for added sparkle. I even created a coordinating envelope with the Paper Bag envelope included with the kit using the stamps and some more white pigment ink along the bottom of the front of the envelope!

Well, that’s all for my projects today. The Simon Says Stamp Card Kits are such an incredible value; the value of the individual elements of each kit equals far more than the $39.99 price tag, so you’re getting incredible bang for your buck. If you are consistently interested in the Simon Says Stamp Card Kit of the Month, you can sign up HERE to become a subscriber for an even bigger discount and more bang for your buck. As always, Simon also makes each individual element of the kits available a la carte, so that you can pick and choose what you would like to purchase if buying the entire kit isn’t really your thing. Who can say no to such incredible value though, right?

Thanks so much for stopping by today, and have a marvelous day!

Filed Under: simon says stamp Tagged With: butterfly blossoms, card kit, colored pencils, fussy cutting, no line coloring, simon says stamp card kit of the month

New Simon Says Stamp April 2025 Card Kit of the Month-Now Available for Preorder!

March 14, 2025

This post was sponsored by Simon Says Stamp. Thanks, Simon!

Hi friends! The new Simon Says Stamp April 2025 Card Kit of the Month Preorder is now live, and it’s *such* a gorgeous kit! I am a sucker for beautiful patterned papers and pretty floral stamps, and the new kit has both. And, bonus, they work absolutely beautifully both together and individually. I created several different projects with the goodies in the kit, and I have two to share with you today, so let’s get started with the details!

*I have gathered links to all of the products used at the bottom of the post for your convenience, using affiliate links. Thank you for shopping with my links! I truly appreciate your support for my work!*

The April 2025 Card Kit features:

1 NEW and exclusive Simon Says Stamp Butterfly Blossoms 6×8 inch clear stamp set
1 NEW and exclusive Simon Says Stamp Butterfly Blossoms 6×6 inch stencil set
6 double-sided Paper Rose Bees & Butterflies  6×6 inch patterned paper sheets
1 Tim Holtz Idea-ology Serendipity collage paper pack 
1 Tim Holtz Ranger Sparkle Texture Paste 1 oz jar
1 Tim Holtz Ranger Matte Collage Medium .5 oz bottle
1 Simple Stories Color Palette Warm washi tape 6-pack
1 Simon Says Stamp Honey 100 lb 8.5x 11 cardstock sheet
1 Neenah Solar White 110 lb 8.5×11 cardstock sheet
1 Simon Says Stamp A2 Kraft envelope

There are so many absolutely gorgeous items included in the kit, and with so many options it’s easy to create a wide variety of cards using just items from the kit!! I loved the sunny yellow and muted lime green color palette from the patterned papers so much that I used it for all of the cards that I created for this release. I kept the first one fairly simple, putting my scissors to use with that gorgeous floral patterned paper, and pulled out some other products from my stash to create the second, more intricate, project.

This first project is super simple and uses only products included with the April 2025 Card Kit. I began by using my sharp scissors to fussy cut the floral border from one of the (many) gorgeous patterned papers included in the kit. It looks intimidating, but fussy cutting this floral border only took me around 5 minutes. I have always loved the sweet simplicity of flowers paired with gingham plaid, so I trimmed another panel of the patterned paper down to fit A2 size and then turned my attention to the sentiment.

For the greeting, I used one of the beautiful sentiment stamps included in the new Butterfly Blossoms stamp set from the April 2025 Card Kit. The stamp set features several different and equally lovely sentiment stamps fit for many different occasions. I stamped the “thank you for everything” greeting on some of the included Honey cardstock using white pigment ink, then added white embossing powder to make it clean and crisp. I again used my sharp scissors to fussy cut the embossed sentiment, but thankfully there are also coordinating dies available to make life simpler!! I popped up the floral border on the gingham patterned background using foam adhesive, then popped up the greeting on the field of flowers with more foam adhesive to create lots of dimension between the layers. I added a strip of Honey cardstock beneath the floral border for added contrast, then nestled an Iridescent White Cord bow by the sentiment and added a few Sprout Pawsitively Dazzling Gems for added sparkle!

For my second project, I paired several of the elements from the new April 2025 Card Kit with the older-but-still-excellent Basic Box Card Die, which creates a fabulous three dimensional box card that folds neatly into an A2 envelope! I began by cutting the Basic Box Card Die from some more Honey cardstock, as well as a gorgeous floral panel from some of the included patterned paper to use as a backdrop for my embossed images. I heat embossed several elements from the Butterfly Blossoms stamp set usign gold embossing powder, then used the simple coloring stencils included with the kit to add some lovely yellow and green to the butterflies and flowers with blending brushes and Butter and Cabbage Pawsitively Dazzling Ink.

To assemble the Basic Box Card, I used Tear-rifically Tacky Tape to adhere the flaps on the box as well as a strip of cardstock in the center of the assembled card to hold my floral bouquet. I used some vellum to allow my tiny butterfly to float amongst the flowers, adhering the other butterflies and sentiment on the edges of the box card frame!

Look at how neatly the card fits into a standard A2 envelope! I think these box cards are just so much fun for both the creator and the recipient alike. Definitely a worthwhile investment!

Well, that’s all for my projects today. I have a couple more to share with you tomorrow using more elements from the kit. The Simon Says Stamp Card Kits are such an incredible value; the value of the individual elements of each kit equals far more than the $39.99 price tag, so you’re getting incredible bang for your buck. If you are consistently interested in the Simon Says Stamp Card Kit of the Month, you can sign up HERE to become a subscriber for an even bigger discount. As always, Simon also makes each individual element of the kits available a la carte, so that you can pick and choose what you would like to purchase if buying the entire kit isn’t really your thing. Who can say no to such incredible value though, right?

Thanks so much for stopping by today, and have a marvelous day!

Filed Under: simon says stamp Tagged With: basic box card, card kit of the month, die cutting, ink blending, patterned paper, simon says stamp card kit of the month, stencil

  • Page 1
  • Page 2
  • Go to Next Page »

Primary Sidebar

  • Facebook
  • Instagram
  • Pinterest
  • YouTube

Favorite Shops

Secondary Sidebar

Subscribe

Enter your email address to subscribe to this blog and receive notifications of new posts by email.

Instagram
Something is wrong.
Instagram token error.
Follow
Load More

Archives

Tags

3D embossing folder alcohol markers better press birthday birthday card blog hop card kit christmas christmas card christmas tag colored pencil copic copic coloring Daniel Smith die cutting embossing folder embroidery felt giveaway holiday holiday card hot foil ink blending karin brushmarker pro layered stencil masculine my monthly hero new release no line coloring no line watercolor OLO marker olo markers original illustration pawsitively saturated rainbow shaker card slimline stamping stamptember stencil thank you thinking of you valentine's day video watercolor

Popular Posts

Simon Says Stamp Sending Cheer Blog Hop- Day 2 + Freebie + Giveaway!
Joyful Snowman with New Simon Says Stamp Sending Cheer Release!
Simon Says Stamp Sending Cheer Release: Now Available!
Altenew October 2026 Release Blog Hop + Giveaway!
Special Release: Simon Says Stamp Limited Edition STAMPtember Christmas Card Kit!
February 2018 My Monthly Hero Blog Hop!
Altenew March 2020 Release Blog Hop+Giveaway!
Simon Says Stamp Cozy & Bright Inspiration, Part Two!
Essentials By Ellen September Blog Hop!
Waffleflower December Release Blog Hop!

Disclosure

Some affiliate links are used in my posts. This means that, should you click on one of my links and purchase something from that company, I will receive a small portion of the sale at no extra cost to you. I use the money earned from these sales to help maintain my blog. I so appreciate you visiting and, if you do choose to use one of my affiliate links, thank you so much for your support!
Copyright © 2026 ·Brunch Pro Theme · Genesis Framework by StudioPress · WordPress · Log in
Loading Comments...