• Skip to main content
  • Skip to primary sidebar
  • Skip to secondary sidebar

Sixth Street Sundries

Emily Midgett

  • Home
  • About Me
  • Contact
  • OLO Marker Color Swatch Chart
  • Shop

snowflake frame

Holiday Joy in Blue and White with New Simon Says Stamp!

October 22, 2025

This post was sponsored by Simon Says Stamp. Thanks, Simon!

Hi friends! I am back today with a unique blue holiday card filled with all kinds of gorgeous holiday imagery and lots of shimmer using new goodies from the Simon Says Stamp Sugar and Spice release (which you can check out HERE). I love a good blue and white moment, and I am thrilled to bits that blue and white is having a renaissance in the fashion and home decor trends, with gorgeous chintzy patterns, crisp royal blue florals on a bright white background, and all kinds of glorious textures in that timeless combination. I paired the new Twisted Branch die with some older snowflakes and lots of shimmer to create this beautiful winter scene. Let’s get started with the details!

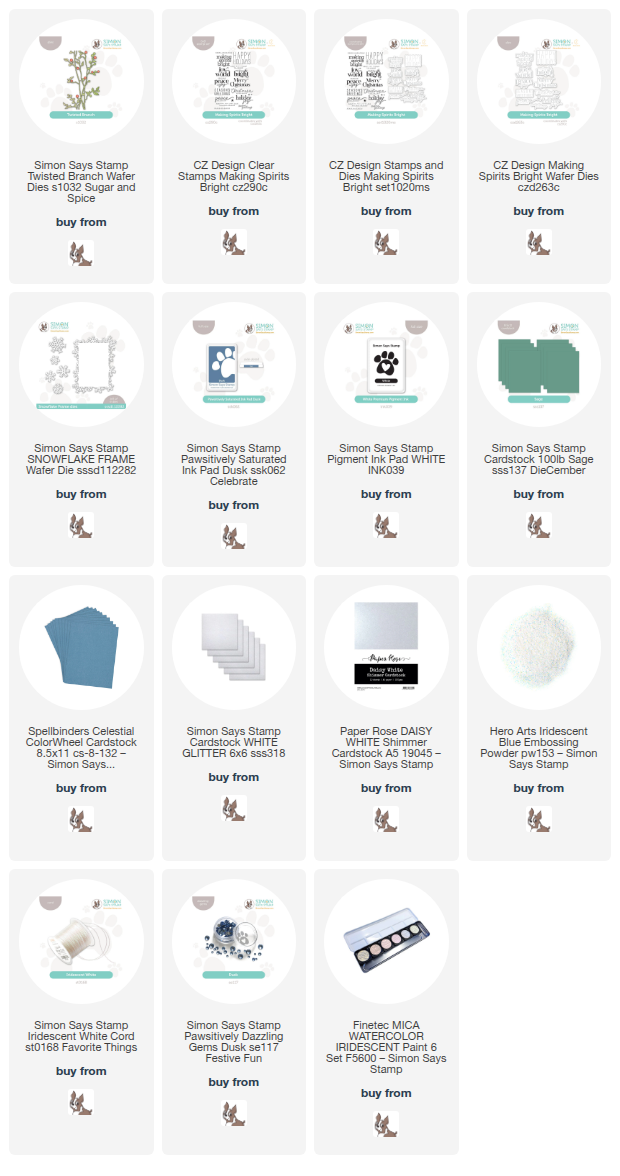
*I have gathered links to all of the products used at the bottom of the post for your convenience, using affiliate links. Thank you for shopping with my links! I truly appreciate your support for my work!*

To begin, I die cut the new Twisted Branch die set using Sage cardstock from Simon Says Stamp and cutting the berries from pearlescent white cardstock, adhering the berries to the foliage with liquid adhesive. I also die cut some beautifully sparkling snowflakes using the standalone snowflake dies from the older Snowflake Frame die set. The proportions and variety of sizes on these snowflakes work beautifully with the size of the berry branches!

For the background behind the berries, I wanted to create a subtle winter sky, choosing to blend Simon Says Stamp’s Dusk Pawsitively Saturated Ink on the left side of a cool, mid-blue A2 card front. I also used some iridescent glitter watercolors to add some added texture with splatters just along the edge of the blending. The splatters react beautifully with the ink blending on the colored cardstock, creating a unique background with ease!

After I had created my background, I stamped two different sentiments from the Making Spirits Bright stamp set, stamping both onto more of that mid-blue cardstock using Simon Says Stamp White Pigment Ink, then adding Hero Arts Iridescent Blue Embossing Powder over the top to set the pigment ink and create a luminous shimmer on my greeting. I die cut the larger finished sentiment with its coordinating die, then trimmed the smaller “sending” with my trimmer. I popped up the branch die cut with small pieces of thin foam adhesive, then tucked the die cut snowflakes behind the branch, adhering them with liquid adhesive. I popped up the greeting with a double layer of thin foam adhesive to allow it to stand out a bit from the busy background, then added an Iridescent White Cord bow and some Dusk Pawsitively Dazzling Gems for one last touch of sparkle and texture!

Well, that’s all for my project today. I feel like I should stop myself from using blue and white on every project, but it’s so pretty that I don’t want to stop! Thanks so much for stopping by today, and have a marvelous day!
Filed Under: simon says stamp Tagged With: christmas card, die cutting, ink blending, making spirits bright, snowflake, snowflake frame, twisted branch

Sending Love and Light with Simon Says Stamp!

December 26, 2024

This post was sponsored by Simon Says Stamp. Thanks, Simon!

Hi friends! I hope you all had a wonderful holiday yesterday; I am popping back in to my blog today to share this pretty Hanukkah card with you featuring some new products from Simon Says Stamp. My oldest son’s teacher this year is Jewish, and living in a small, predominantly Christian town in the Midwest, having a Jewish teacher is very unique! I encouraged him to ask about the different traditions that he practiced during Hanukkah, and I found them fascinating. I thought that since Hanukkah started on Christmas Day this year, I would share this card that I created using some newer products from the DieCember release in honor of those who celebrate the Festival of Lights. Let’s get started with the details!

*I have gathered links to all of the products used at the bottom of the post for your convenience, using affiliate links. Thank you for shopping with my links! I truly appreciate your support for my work!*

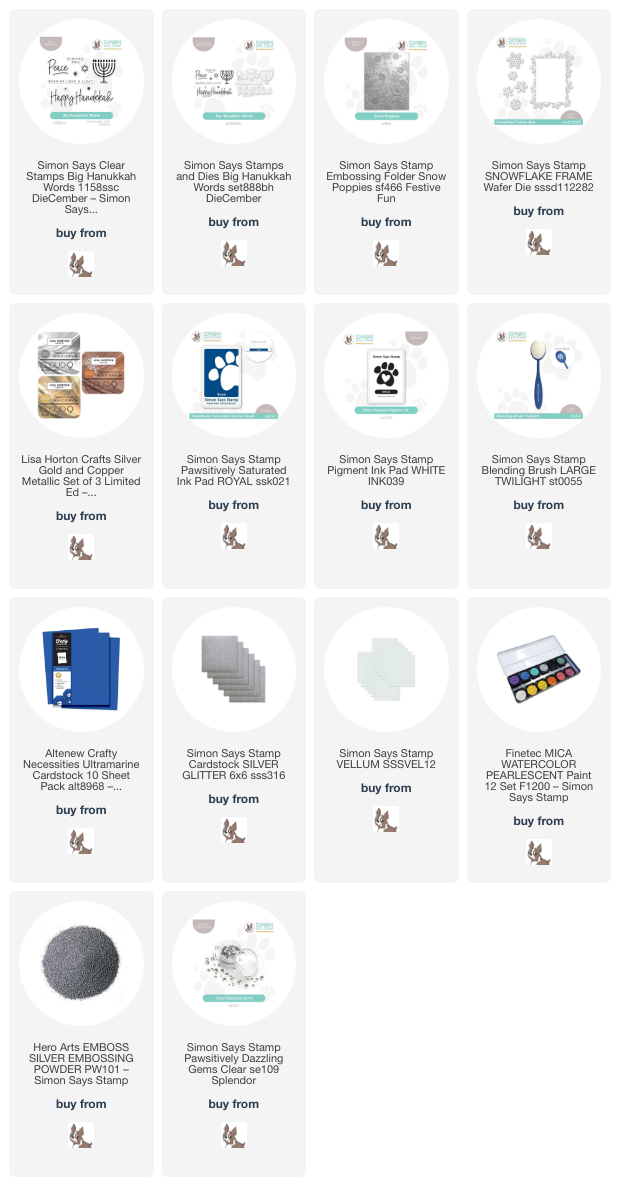
I was raised as a Catholic and have been attending church at the First United Methodist Church for the last several years with my family, so I have never really felt comfortable creating a Hanukkah card until last year. Looking at the imagery, I found that blue and silver are predominant color palettes, with lots of different options for themes. I decided to pair a wintry silver and blue theme with the beautiful new Big Hanukkah Words from DieCember. I started my project by running a panel of intense cobalt cardstock through my die cutting machine with the Snow Poppies Embossing Folder. I then used a blending brush to blend Royal Pawsitively Saturated Ink around the edges of the embossed panel and enhancing those embossed details with some additional ink swiping! I first swiped the raised areas with the Simon Says Stamp White Pigment Ink pad, then used the Lisa Horton Crafts silver metallic pigment ink pad to press silver ink directly atop the white pigment ink. The white pigment layer helps to make that silver ink really pop from the vibrant blue background! I also splattered some Silver Glitter Watercolors on the background for lots of different textures and shimmer.

For the greeting, I heat embossed two different sentiments from the Big Hanukkah Words onto some more of that beautiful cobalt cardstock using silver embossing powder. I die cut the finished sentiment pieces with their coordinating dies, then decided to help those sentiment pieces pop from the busy, textured background with a strip of vellum behind them. I adhered the sentiment die cuts to the vellum with some foam adhesive, then placed small dots of liquid adhesive on the back of the vellum, hiding them behind the solid die cuts.

To further enhance the wintry theme and add some additional sparkle, I die cut the standalone snowflake images from teh Snowflake Frame die set using silver glitter cardstock. I added them to the card front with liquid adhesive, then added a few Clear Pawsitively Dazzling Gems for even more sparkle!

Well, that’s all for my project today. If you celebrate the Festival of Lights, may the light of the menorah brighten your days and fill you with warmth. Thanks so much for stopping by today, and have a wonderful day!

Filed Under: simon says stamp Tagged With: big hanukkah words, die cutting, embossing folder, hanukkah, holiday card, ink blending, ink swiping, snowflake frame

Shaped Snowflake Card Two-fer with New Simon Says Stamp!

December 12, 2024

This post was sponsored by Simon Says Stamp. Thanks, Simon!

Hi friends! Do you save your scraps and die cut leftovers? I am so bad about saving so many scraps (or maybe so good…. depends on your perspective, I guess) but sometimes I find the perfect use for a leftover die cut. I created THIS card using the beautiful Starburst cover plate die from the new DieCember release to to create a patterned frame with the negative die cut for my shaker card, but I made sure to keep the die cut itself to use on a future project! Let’s get started on the details for part two of my two-fer project!

*I have gathered links to all of the products used at the bottom of the post for your convenience, using affiliate links. Thank you for shopping with my links! I truly appreciate your support for my work!*

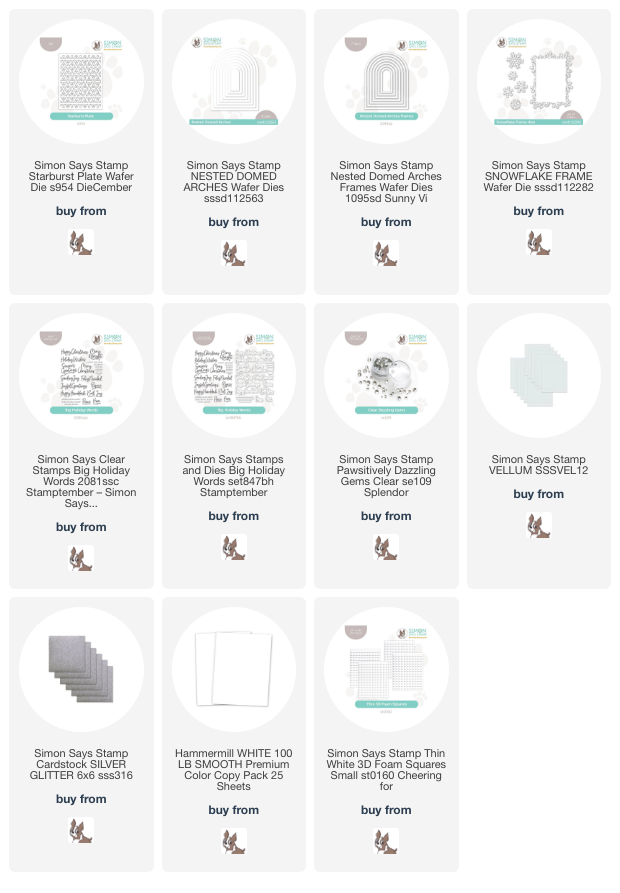
For the part one of my two-fer, I began by die cutting the new Starburst Plate from plain white cardtsock, then used a Nested Domed Arches die to cut a window from the center of the patterned die cut panel. I used that patterned negative frame to create a decorative window around my snowman for the post linked above, but I reserved the die cut itself for this shaped card! I used the same size Nested Domed Arches die to cut a piece of Simon Says Stamp Vellum, which I layered behind the patterned arch piece with some liquid adhesive. I also used Simon Says Stamp Silver Glitter Paper to die cut one of the Nested Domed Arches Frames dies, slightly smaller than my patterned background die cut. I layered that frame over the top of my patterned piece with some more liquid adhesive. The vellum helps to add a softness behind the patterned piece, as well as adding some additional stability to the intricately detailed die cut.

To create the shaped card, I simply placed the largest size of the Nested Domed Arches dies on a folded A2 card, making sure to placed the die over the edge of the fold so that the folded card would remain intact. The I think this is such a unique look for a holiday card; it reminds me of a stained glass window at church! I layered the snowflake, vellum, and glitter piece in the center of the shaped card base, adhering it with some thin foam adhesive squares for a touch of extra dimension.

After I had created my card base and background, I used the marvelous Big Holiday Words stamp and coordinating die set to create my greeting. I heat embossed the large “Merry Christmas” and “& Happy New Year” sentiments onto more white cardstock using silver embossing powder, then die cut the finished sentiments with their coordinating dies. I popped them up in the center of the die cut panel using some more thin foam adhesive squares, creating lots of different levels of height and keeping the monochromatic card interesting! To add a touch of wintry sparkle to the somewhat plain card, I die cut some individual snowflakes using the Snowflake Frame dies and more silver glitter cardstock. I arranged them around the top of my arch in a little snowflake swag, embellishing the center of each snowflake with some Clear Pawsitively Dazzling Gems for extra holiday glitz!

Well, that’s all for today’s project. I love when you can get multiple uses from one die cut; it makes me feel better about not wanting to throw away my scraps!! (I know I’m not the only one who does that!) Thanks so much for stopping by today, and Happy DieCember!

Filed Under: simon says stamp Tagged With: big holiday words, christmas card, die cutting, diecember, holiday card, nested domed arches, snowflake frame, starburst plate

Songs of the Season for March 2024: Marshmallow World!

March 25, 2024

This post was sponsored by Simon Says Stamp. Thanks, Simon!

Hi friends! I am back with this month’s installment of my Songs of the Season series, in which I use a holiday song as inspiration for a coordinating holiday card (or two!). This month, I used that classic “Marshmallow World” as my inspiration piece, drawing from the beautiful, somewhat whimsical, snowy imagery to create both a playful A2 card and a more elegant and serene slimline card using goodies from Simon Says Stamp’s vast collection of holiday stamps and dies. Let’s get started with the details!

This song has always immediately taken me back to my childhood, as this Johnny Mathis album was one that we would have on repeat while doing all of the Christmas activities, from wrapping presents to making cookies, and while listening to it for my projects today, I was struck by the difference in mood the two sections have. The song starts out playfully, with a cheerful walking bass line under the melody and discussing the whipped cream day, and then the overall feeling shifts to be a bit more dramatic as you move into the second “world is your snowball” section. I wanted to play on those two contrasting tonalities with my two projects today.

For both projects, I kept things as white as I could to conjure up the sparkling winter wonderland that the song conjures up for me, using lots of white cardstock and sparkling accents, with just a touch of color on the cute little critters to break up the monochromatic palette.

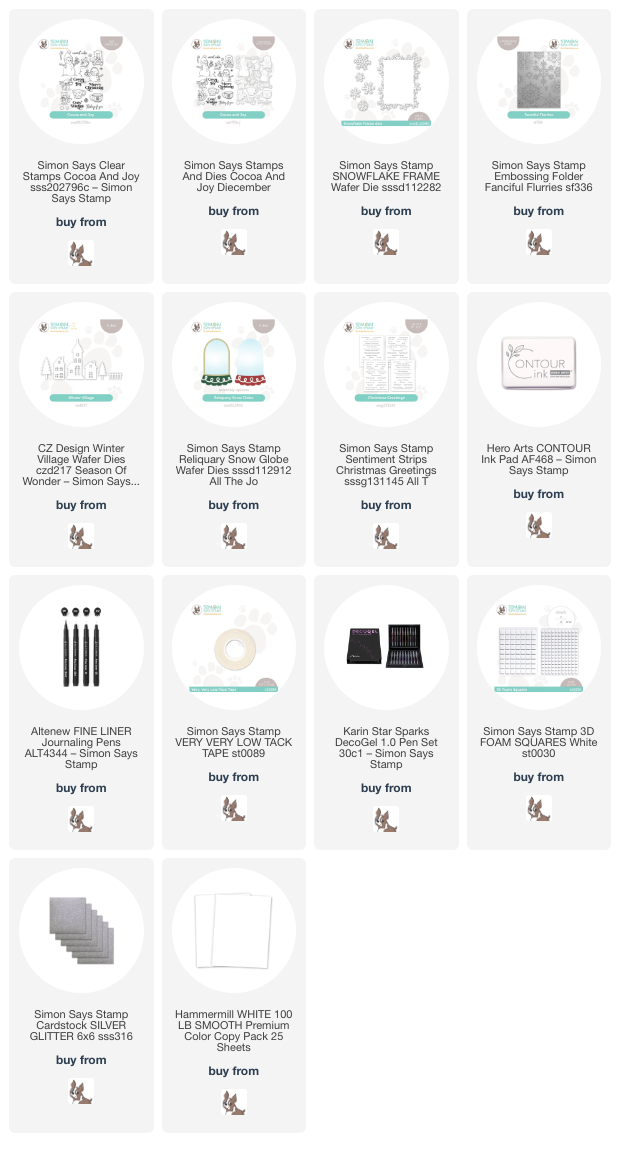
I started my first project by stamping a few of the images from the sweet Cocoa & Joy set, quite literally conjuring the “marshmallow” imagery with the cup of cocoa covered with whipped cream and marshmallows that the adorable little bear is holding! I stamped the images on Hammermill cardstock using Contour Ink, then used my Copic markers to do some no-line coloring with a warm gray, mint, and coral-red color palette, adding a few little details with a black fineline pen.

After I had colored and cut the images with their coordinating dies, I die cut the large Snowflake Frame die using white cardstock, then die cut the individual snowflakes from some sparkling silver glitter cardstock. I used some of Simon Says Stamp’s Very Very Low Tack Tape to mask the detailed snowflakes around the rectangular frame in the center so that I could splatter some “snowflakes” with silver glitter watercolors in the center of the die cut. I removed the mask, then added the silver glitter snowflakes with some liquid adhesive. I also used a silver sparkle pen to add some extra snowflakes on the background.

For the card base, I ran a panel of white cardstock through my die cut machine with the Fanciful Flakes Embossing Folder. I popped up the glittery snowflake die cut with foam squares, then added the sweet bear and mouse friends. A sentiment from Sentiment Strips Christmas Greetings finished the project off!

For my second project, I wanted to conjure that more somber shift in tonality from the second section of the song with a simple monochromatic shaker, adding some of the “evergreen trees” in the song with the Winter Village Dies. I started by trimming down a slimline card front, then trimming it even a little smaller by taking 1/8″ off of each side, making the final panel size 3 1/4″ x 8 1/4″. I centered the open shaped die from the Reliquary Snow Globe die set on this panel and die cut it, then eyeballed the center of each side, creating a line of snowglobe windows on my slimline card front. Before I backed the panels with acetate, I used a pencil to lightly mark the openings on my slimline card front so that I knew where to place my village elements. I backed the window panel with acetate and embellished the snowglobe bases with the bases and silver sparkle swirl die cuts.

I die cut the Winter Village Dies from some more white cardstock and arranged them on the areas that I marked with a pencil, adhering them with foam squares. Before adhering the frame windows, I added some snowflake sequins from my stash to create the shaker. For the greeting, I added a sentiment from the Sentiment Strips Christmas Greetings to create this sweet “marshmallow world” shaker card, made more special with a slimline size!

Well, that’s all for my projects today! I hope you are enjoying the Songs of the Season posts, even if it feels a little strange to see holiday projects this side of the Christmas season. I am enjoying stretching my creativity and putting products to use that I didn’t have a chance to play with during the Christmas season. Thanks so much for stopping by, and have a marvelous day!

Filed Under: simon says stamp Tagged With: christmas card, cocoa and joy, copic, copic coloring, fanciful flurries, holiday card, no line coloring, reliquary snow globe, shaker card, snowflake frame, songs of the season, winter village

Sweet Snowy Birds and Punny Sentiments!

January 22, 2024

This post was sponsored by Simon Says Stamp. Thanks, Simon!

Hi friends! We have another snow day for my kiddos today, so I am snatching a few moments while my kiddos are occupied to share a pair of cards with a completely appropriate theme for the current weather outside! I used to shy away from the more “cutesy” critter illustrations, but after seeing Debby Hughes’s masterful coloring on things I would previously have not considered to work well with my coloring style, I decided that I could still apply my own preferred coloring techniques and mediums no matter the illustrative style! I love these sweet birds from Simon Says Stamp’s Season’s Tweetings; we have a cardinal pair that live in the trees outside of my house, and it never fails to cheer me when I hear their precious little cheeps. I paired the Season’s Tweetings set with my colored pencils and some Kraft cardstock to create these unique winter projects. Let’s get started with the details!

I love the look of colored pencil on colored cardstock, and pencil images pop so magnificently on Kraft cardstock. I find that I forget about Kraft cardstock in favor of the rainbow of vivid colorful cardstock in my stash, but when I use it I am always astonished at how much I like the finished look! I recently found a wintry card that I made a long time ago using colored pencils on Kraft with crisp white snowflakes created with white pigment ink, and thought how darling it would be recreated with these sweet birds from Season’s Tweetings. I also wanted to show that these birds don’t have to just be used for Christmas cards, as well!

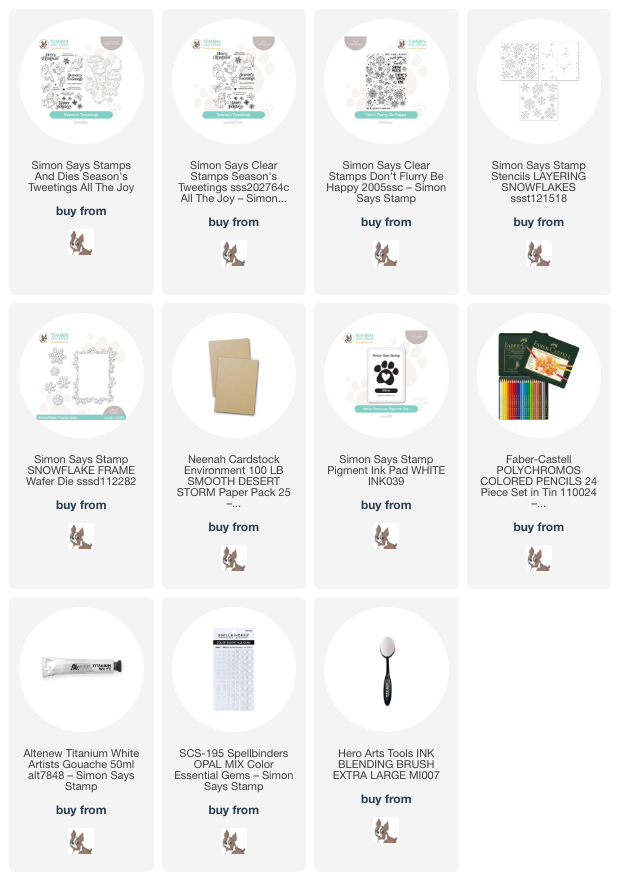
For my first card, I stamped the cardinal from Season’s Tweetings onto Kraft cardstock using white pigment ink and used colored pencils to color him in, creating the vibrant ruby red feathers that are such a welcome sight in the bleak winter landscape and adding a vivid turquoise scarf to protect him from the chill. I die cut the finished bird with the coordinating die and began work on my background.

White pigment ink shows up so beautifully on Kraft cardstock, so I created a wintry backdrop for my bright feathered friend using the Layering Snowflakes Stencil and white pigment ink. I have a blending brush dedicated just to white pigment ink, which is great to have in your toolbox for several different techniques. I blended the snowflakes, then used the blending brush to blend more white pigment ink around the edges of the card to create the feel of a frosted windowpane. To top it off, I splattered the background with some white gouache, as well, adding further texture.

After I had created the background, I heat embossed a couple of sentiments from Don’t Flurry Be Happy onto some vellum using white embossing powder. I used sharp scissors to fussy cut the greetings, then used foam squares to adhere the cardinal and clear dimensional adhesive to adhere the greetings on my snowy card front. To accent the die cuts, I cut the individual snowflakes from the Snowflake Frame die set from plain white cardstock and tucked them in around the cardinal and greeting. I love how the white cardstock pops on the Kraft background! Finally, I scattered a few white gems for one more addition of texture.

For my second card, I colored a sweet bluebird from Season’s Tweetings on more Kraft cardstock using colored pencils. I stamped him first using white pigment ink, then used the pencils to add vibrant jewel-bright colors to make him pop from the brown background. I find that white pigment ink is my favorite for use with colored pencils on colored cardstock; it doesn’t quite absorb fully into the cardstock, but becomes part of the pencil layer, allowing a super smooth image with crisp edges. After I’d finished coloring, I used the coordinating die to cut my little birdie out.

For the background, rather than create an all-over pattern, I decided to create a small highlighted area in the center of my Kraft card front, first by blending white pigment ink in the center of the card, then stamping snowflakes from Season’s Tweetings with white pigment ink. I also added a few snowy dots amongst the stamped snowflakes with a white gel pen. I find that adding different gradients of white can be a great way to add extra interest and texture to a snowy background. I popped up the bird and a white embossed sentiment strip, also from Don’t Flurry Be Happy, using foam squares, then tucked a few more white die cut snowflakes around the main focal point. Don’t you just love how that bright blue bird just pops off of the background??

Well, that’s all for my projects today! I hope this will inspire you to take a second look at stamp sets that you didn’t think would vibe with your personal style, because taking stamp sets and fitting them into my own vision and aesthetic is one of the best things about this hobby. Thanks so much for stopping by today, and have a marvelous day!

Filed Under: simon says stamp Tagged With: colored pencil, don't flurry be happy, layering snowflakes, polychromos, season's tweetings, snowflake frame, stencil, winter card

Primary Sidebar

  • Facebook
  • Instagram
  • Pinterest
  • YouTube

Favorite Shops

Secondary Sidebar

Subscribe

Enter your email address to subscribe to this blog and receive notifications of new posts by email.

Instagram
Something is wrong.
Instagram token error.
Follow
Load More

Archives

Tags

3D embossing folder alcohol markers better press birthday birthday card blog hop card kit christmas christmas card christmas tag colored pencil copic copic coloring Daniel Smith die cutting embossing folder embroidery felt giveaway holiday holiday card hot foil ink blending karin brushmarker pro layered stencil masculine my monthly hero new release no line coloring no line watercolor OLO marker olo markers original illustration pawsitively saturated rainbow shaker card slimline stamping stamptember stencil thank you thinking of you valentine's day video watercolor

Popular Posts

Simon Says Stamp Sending Cheer Release: Now Available!
Joyful Snowman with New Simon Says Stamp Sending Cheer Release!
Autumn Legs with Colorado Craft Company and Catherine Pooler!
February 2018 My Monthly Hero Blog Hop!
Altenew Paint A Flower: Carnation Blog Hop+Giveaway!
Altenew March 2020 Release Blog Hop+Giveaway!
Special Release: Simon Says Stamp Limited Edition STAMPtember Christmas Card Kit!
Pinkfresh Studio 5th Birthday!
Pinkfresh Studios June Washi and Stamp Release Blog Hop!
Advent Calendar Extravaganza with Taheerah Atchia

Disclosure

Some affiliate links are used in my posts. This means that, should you click on one of my links and purchase something from that company, I will receive a small portion of the sale at no extra cost to you. I use the money earned from these sales to help maintain my blog. I so appreciate you visiting and, if you do choose to use one of my affiliate links, thank you so much for your support!
Copyright © 2026 ·Brunch Pro Theme · Genesis Framework by StudioPress · WordPress · Log in
Loading Comments...