• Skip to main content
  • Skip to primary sidebar
  • Skip to secondary sidebar

Sixth Street Sundries

Emily Midgett

  • Home
  • About Me
  • Contact
  • OLO Marker Color Swatch Chart
  • Shop

snowman

Steel Cardstock Spotlight #3: Rose Gold and Mixing Neutrals!

January 30, 2025

This post was sponsored by Simon Says Stamp. Thanks, Simon!

Hi friends! I am back with one final project on my Steel Cardstock spotlight, this time pairing the neutral medium gray cardstock from Simon Says Stamp with another neutral cardstock with some metallic flair. I think this combination demonstrates the versatility of the Steel cardstock, for it pairs beautifully with so many different color palettes. I had several images released before Christmas that I didn’t get a chance to use for holiday cards, but I wanted to see if I could use them to create a wintry birthday card with some leftover rose gold snowflakes. Let’s get started with the details on my projects!

*I have gathered links to all of the products used at the bottom of the post for your convenience, using affiliate links. Thank you for shopping with my links! I truly appreciate your support for my work!*

When working with the DieCember products, I had created THESE projects using the beautiful Snowflake Sensation dies, focusing on the outline images created with the dies and SSS Rose Gold Metallic cardstock. I had several snowflakes leftover, and so for today’s project I decided to use these delicate snowflake die cuts to create a snowy background and had enough left to create a little tag, probably to save for next Christmas.

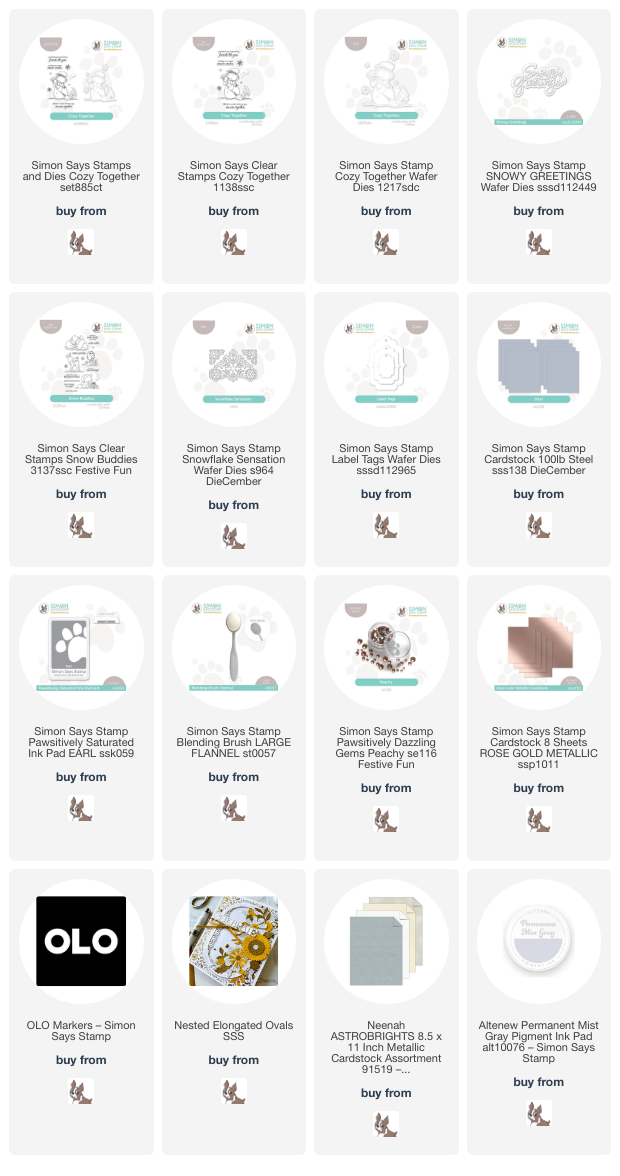
For my card, I began by stamping the sweet snowman from the Cozy Together stamp set using Altenew’s Permanent Mist Gray ink onto some white Hammermill cardstock, then used my OLO markers to add some subtle shadows to the snowman, ensuring a smooth transition from the pale gray alcohol marker to the white of the cardstock by softening the edge of the colored areas with the Zero marker, aka OLO’s colorless blender marker. I also added some metallic copper stripes to the snowman’s scarf and twirling dust using a metallic acrylic marker and some details to his face with a fine-tipped black pigment marker. I die cut the finished snowman with the coordinating die.

After I had finished the main focal point, I began to put the background together. I first blended some Earl Pawsitively Saturated Ink on one edge of the Steel A2 card front, then splattered it with some rose gold metallic glitter watercolor to add extra whimsy and texture to the background. Once the watercolor had dried, I used the leftover rose gold snowflake die cuts to create a pretty snowflake pattern on the blended and splattered areas, adhering them with liquid adhesive. For the greeting, I die cut the detail layer of the Snowy Greetings word die set from some more Metallic Rose Gold cardstock, then adhered it to a vellum shadow layer with liquid adhesive. I added a pearlescent silver die cut oval frame to the snowflake background with some foam adhesive, then enhanced the die cut sentiment with an embossed greeting from Snow Buddies, adhering all of the different die cuts with foam adhesive. Finally, I added a few Peachy Pawsitively Dazzling Gems for a bit of added sparkle!

I had a couple of rose gold snowflake die cuts leftover, so I decided to layer them to create a simple, pretty tag! I die cut two Label Tag dies from some more Steel cardstock, adhering the two pieces together with the scratched sides facing each other, which ensures that each side of the tag is clean and smooth. I adhered the two snowflake die cuts in the center of the tag die cut, rotating the top snowflake so that it created a beautifully full snowflake. Finally, I added a white silk ribbon loop to the top of the tag and a few more Peachy Pawsitively Dazzling Gems on the snowflakes for added sparkle!

Well, that’s all for my projects today! I hope you’ve enjoyed this spotlight on Simon Says Stamp’s Steel Cardstock. It is fun to direct my creative focus on one unsung hero and give it a little extra love. The shade of gray is a true neutral, and it makes it perfect for so many different applications. Thanks so much for stopping by today, and have a marvelous day!
Filed Under: simon says stamp Tagged With: birthday card, christmas tag, copic coloring, cozy together, ink blending, label tags, no line coloring, olo markers, snow buddies, snowflake sensation, snowman, snowy greetings, steel cardstock, winter birthday

Felt Snowman Ornament Tag with Simon Says Stamp DieCember!

December 29, 2024

This post was sponsored by Simon Says Stamp. Thanks, Simon!

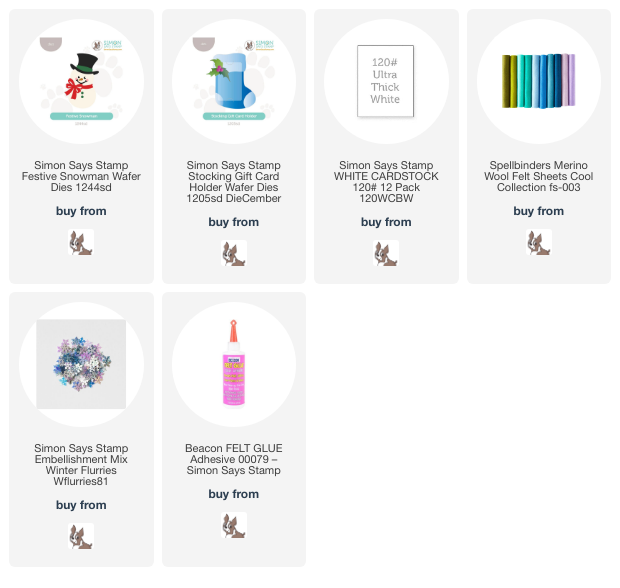
Hi friends! I have a sweet little winter project to share with you today using some new dies from Simon Says Stamp’s DieCember release, as well as my newest obsession: felt! I have been having such fun figuring out which standalone dies I can use to create sweet little felt tags, ornaments, and gifts. The absolutely adorable Festive Snowman die was towards the top of my list of products with which I wanted to play when I opened my DieCember package, because oh my gosh, how sweet is he with his fat little top hat and sweet smile?! Let’s get started with the details on my project!

*I have gathered links to all of the products used at the bottom of the post for your convenience, using affiliate links. Thank you for shopping with my links! I truly appreciate your support for my work!*

Now, the design of the Stocking Gift Card Holder is quite versatile. You can cut two different stocking pieces and adhere them together to create a pocket for a gift card, you can use the gift card slot dies to create a little spot to securely place your gift card, or you can use just the stocking imagery to create a focal point (or tag in this case) for your project! I began by die cutting the base of the stocking from blue felt, then die cut the top piece from white felt. I adhered the two pieces together with felt glue and placed a heavy glass paperweight over the top to keep things nice and flat while it dried.

I die cut the adorable little Festive Snowman die from some felt in the correct colors, adhering all of the pieces together alone using more felt glue before adhering it to the now-dry stocking. To embellish the stocking and to make it look like a cute little stocking from Pottery Barn, I decided to use needle and thread with some snowflake sequins and seed beads to add some sparkling snowflakes around the snowman. I have never really stitched before these last few weeks, and I am wondering why I didn’t jump on this bandwagon more quickly, because it’s super fun! After I had finished stitching the snowflakes, I added some pompom trim to the top of the stocking to help it look even more authentic. It would be so cute to stitch a name on the top to make it look truly authentic and personalized, but I am still working on the satin embroidery stitch, and so didn’t feel skilled enough to try it. Maybe next time!

To create the “tag” portion and add some extra stabilization to my gift tag/ornament, I die cut the stocking base one more time from some Simon Says Stamp Ultra Thick White Cardstock. Before adhering the stocking to the back of the felt, I used some more fabric glue to add a loop of white ribbon for a hanger. I adhered the sturdy cardstock backer with more felt glue and placed it again beneath the glass paperweight to dry nice and flat. I think this would make the perfect addition to a special Christmas gift, and then can be repurposed as a holiday ornament, as I have done in the photo above! So sweet, right?

Well, that’s all for my project today. We are in that weird time loop between Christmas and New Year’s around here, where nobody knows what day of the week it is and we are perpetually snacking on things that are not very healthy. I enjoy the fun and (mostly) relaxed atmosphere, but this momma is also craving some routine!! I am missing my craft room very much! Thanks so much for stopping by today, and happy holidays!

Filed Under: simon says stamp Tagged With: christmas card, christmas ornament, die cutting, felt, festive snowman, holiday card, ornament, snowman, stitching, tag

Sweet Snowman Hugs for 2024!

January 2, 2024

This post was sponsored by Simon Says Stamp. Thanks, Simon!

Hi friends! Happy New Year! I am flabbergasted that we are already at the dawn of a new year; I sometimes still feel like I haven’t finished processing 2020! Anyway, I have a project featuring some gorgeous newer products from Simon Says Stamp, perfect for those icy days that we’ve been experiencing after the warmth that we had on Christmas Day. We even woke up to a bit of snow on the ground last week…. as you can imagine, my kiddos were beside themselves with joy even if the snow only lasted until 10 am! For today’s project, I paired the utterly precious Cocoa and Joy stamps and dies with the new Cheery Snowflakes embossing folder. Let’s get started with the details!

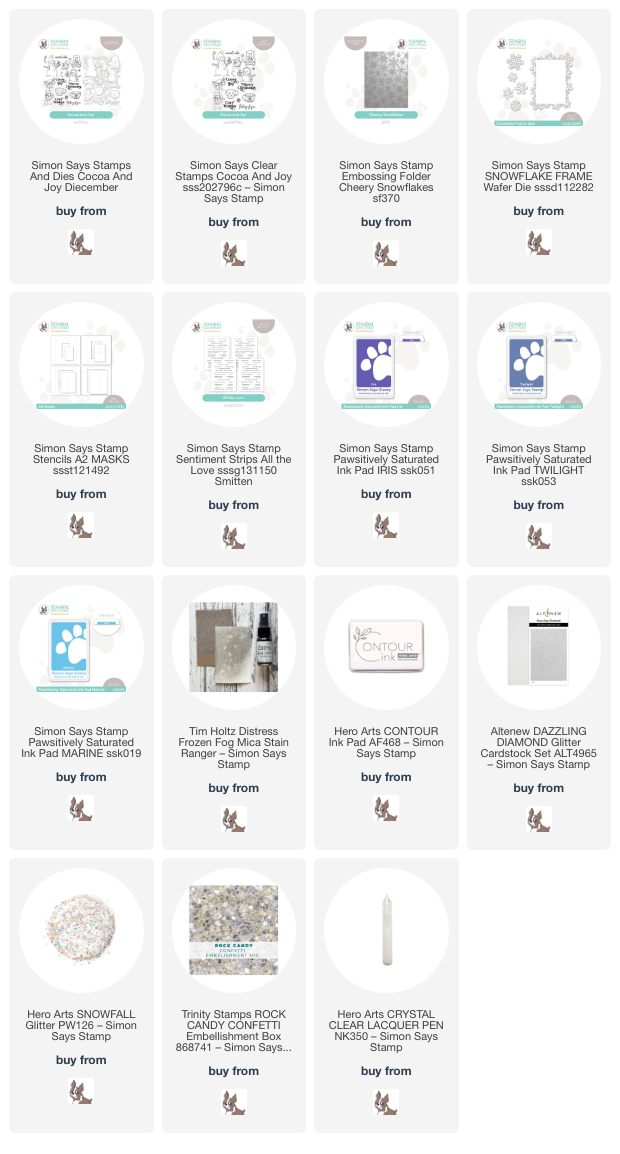
To start my project, I stamped the adorable snowman from Cocoa and Joy (which is back in stock- HOORAY!!! Right?) onto some Hammermill white cardstock using Contour Ink. I used my Copic markers to add some subtle shading on the “white” snowman, giving him a vivid blue hat and scrumptious-looking hot cocoa! I used a fine tip black pen to enhance some of the finer details on the snowman, like the steam from the hot chocolate, his smile, and his little poufs on his hat. I die cut the finished image with the coordinating die, as well as one of the sentiments. For a finishing touch, I also added some black gems for his “coal” buttons and eyes.

For the background, I began by masking off the center of a panel of white cardstock using a stencil from the A2 Stencils and Masks set. I then used blending brushes to blend Iris, Twilight, and Marine Pawsitively Saturated inks in the open area on the white cardstock. While the stencil was still in place, I spritzed the finished background with Frozen Fog Mica Spray to add some extra wintry-looking shimmer behind my snowman. Once my blended and shimmering background was dry, I removed the stencil and ran the entire panel through my die cutting machine using the Cheery Snowflakes embossing folder from the Smitten release!

After I had adhered my snowman to my embossed background using foam tape, I wanted to add some sparkling snowflakes to enhance the icy feeling of the card. I die cut the standalone snowflakes from the Snowflake Frame dies from some Dazzling Diamond glitter cardstock. I tucked the snowflakes behind snowman on the blended area, allowing the white frame to draw the eye to the snowman. I added some extra sparkly glitter “snow” using Clear Lacquer and Snowfall Glitter from Hero Arts. For the greeting, I added the stamped greeting die cut from Cocoa and Joy and a coordinating sentiment strip from the All the Love sentiment cards pack. I added a few shimmering confetti for one last addition of snowy texture and sparkle!

Well, that’s all for my project today! I hope your 2024 is off to an amazing start! Thanks so much for stopping by today, and have a marvelous day!

Filed Under: simon says stamp Tagged With: A2 masks, all the love sentiment strips, cheery snowflakes, cocoa and joy, copic, copic coloring, ink blending, mica stain, no line coloring, snowflake, snowman

Tonic Studios Snowmies Stamp Club Blog Hop + Giveaway!

October 29, 2021

Hi there! I’m super excited to be helping my friend Maria Wills and the folks at Tonic Studios to introduce the October Stamp Club release; this month’s theme is Snowmies! We’re giving you lots of inspiration with a blog hop. You should have arrived here from Mindy Eggen, and your next stop is Michelle Short. You can also start back at the beginning at Maria’s blog. Here’s a peek at this month’s stamp, die, and stencil set:

The Snowmies kit is so cute, and the huge variety of dies (both coordinating and standalone) included with the kit make this super versatile, with so many options! I’ve used the stencil and standalone snowman dies as the main focal point for my project today, so let’s get started with the details.

I began by doing some ink blending on a white A2 card base using some pale blue and light lilac ink and some blending brushes. Then, I used some Moonstone Glimmer Paste from Tonic to add some shimmery, glittery snowflakes using the stencil included in the club kit to the lightly blended background. I’m in love with the subtle shimmer and texture that it adds to the background.

Next, I used the standalone individual dies to create a cheerful, cozily-dressed snowman. I die cut some sparkling snowflakes and the dressing for the holiday gifts from some glitter paper, as well. I adhered all of the pieces together and used some foam tape to add the die cuts to the card front.

For the greeting, I used one of the sweet sentiments included in the Snowmies kit, white embossed on some bright purple cardstock and adhered to the card front using more foam tape. Because snowflakes come in all shapes and sizes, I like to vary the sizes and textures when doing a snowy background, so in addition to the stenciled glittery snowflakes and the glitter snowflake die cuts, I added some iridescent white pearls on the card front to help complete the effect of snowfall and add just that extra touch of sparkle and shine.

Well, that’s all for my project today! To help celebrate the Snowmies release, Tonic is sponsoring a fun giveaway!

One lucky winner will win a £50/$50 Giftcard to Tonic Studios and the Snowmies bundle! To enter, comment on every blog in the hop by 11:59pm PST on November 3, 2021/ 7:59am GST on November 4, 2021. Winner will be announced on November 5, 2021 on IG and FB so make sure you’re following all of the Tonic Studios social media accounts!

Your next stop on the hop is Michelle Short. Thanks so much for stopping by today, and happy hopping!

Filed Under: tonic Tagged With: glimmer paste, snowflakes, snowman, snowmies, stencil

Colorado Craft Company September Anita Jeram Release Blog Hop + Giveaway!

September 3, 2021

Hi there! I’m so excited to be hopping along with my friends at Colorado Craft Company to celebrate their latest Anita Jeram release! You should have arrived here from Daniel West, and your next stop is Mansi Bhatia. The Anita Jeram line is just so wonderfully sweet. If you’ve read the “Guess How Much I Love You” books, you’ll have seen the delightful illustrations. It’s so much fun to be able to create my own little storybook cards with these darling stamp sets in the Anita Jeram line! I particularly enjoy no-line watercoloring these beautiful images… the whimsical storybook feel is right in my comfort zone! Let’s get started with the details.

I have been itching to get more practice in with my Holbein gouache paints. I have a bad habit of collecting various mediums and brands and not getting the opportunity to really dig in and play with them, so I thought this was the perfect opportunity to get some practice in! From what I understand, illustrators frequently use gouache for their paintings because it is opaque and completely flat, and therefore won’t have any reflections when they go to scan their paintings. I wanted to be super authentic (ha) so I thought these sweet bunnies from Flurries of Fun were a perfect match for some gouache practice!

I began by stamping the sweet little bunnies, bird, and snowbunny from Flurries of Fun onto some Fabriano Artistico hot press paper using Ink On 3’s Fadeout Ink. Next, I used Holbein gouache to do some watercoloring on the image, allowing the blue sky to help create plenty of contrast to keep the snowbunny looking white. Gouache is a bit more intense and opaque than traditional watercolors; you can treat it like acrylic paints and keep things thick and completely opaque, layering your colors to achieve shadows and depth, or you can use it more like traditional watercolors and allow the wet paintbrush and water to move the pigment for you. I treated the gouache more like traditional watercolors, but the opacity helps to keep the colors super vibrant. I also found glazing (glazing=adding more color over the top of a dried section to intensify the color or add more depth/shadows) to be much more intense with the gouache. Such a fun medium!

The blue sky was particularly receptive to the glazing technique; I was able to achieve a really fun, artsy background with layers of blue and lavender gouache and lots of water. I splattered the background with some white gouache to create snowflakes, but it kind of sank in to the blue and wasn’t very visible. I think I had diluted it with water a bit too much. (Practice makes progress!) I ended up dotting the background with my white gel pen to create more visible flurries.

After I’d finished my painting, I used some black pigment ink to add a simple sentiment from Flurries of Fun to the card front. This would be a perfect thank you note for a Christmas gift or winter birthday or something! Plus, totally flat, so very easy to mail.

Now, to celebrate this release, Colorado Craft Company will be choosing one winner from the comments on each stop on the blog hop! Winners will receive one stamp set of their choice from the new release. The cutoff for entries is September 6th at midnight mountain time. 3C will pick and announce the winners on the Colorado Craft Company blog September 8th. The more comments you leave, the more chances you have to win!

Your next stop is the über-talented Mansi Bhatia. Thanks so much for stopping by today, and happy hopping!

Filed Under: colorado craft company Tagged With: anita jeram, flurries of fun, gouache, snowman, thank you, watercolor

Primary Sidebar

  • Facebook
  • Instagram
  • Pinterest
  • YouTube

Favorite Shops

Secondary Sidebar

Subscribe

Enter your email address to subscribe to this blog and receive notifications of new posts by email.

Instagram
Something is wrong.
Instagram token error.
Follow
Load More

Archives

Tags

3D embossing folder alcohol markers better press birthday birthday card blog hop card kit christmas christmas card christmas tag colored pencil copic copic coloring Daniel Smith die cutting embossing folder embroidery felt giveaway holiday holiday card hot foil ink blending karin brushmarker pro layered stencil masculine my monthly hero new release no line coloring no line watercolor OLO marker olo markers original illustration pawsitively saturated rainbow shaker card slimline stamping stamptember stencil thank you thinking of you valentine's day video watercolor

Popular Posts

Watercolor Poinsettia Card and Tag with Tim Holtz and Simon Says Stamp!
Cottagecore Christmas Framed Artwork with New Simon Says Stamp!
Simon Says Stamp Joy For You Blog Hop- Day 1!
Warmth and Love at Christmastime with New Simon Says Stamp!
Honey Bee Stamps 4th Anniversary Celebration!
Altenew Build A Flower Sweet Violet+Giveaway!
Simon Says Stamp Glory to the Newborn King Holiday Kit-Part II!
Altenew July Stamp and Die Blog Hop+Giveaway!
Altenew Watercolor Coloring Book Release Blog Hop + Giveaway!
Cottagecore Canvas with New Simon Says Stamp Shine On Release!

Disclosure

Some affiliate links are used in my posts. This means that, should you click on one of my links and purchase something from that company, I will receive a small portion of the sale at no extra cost to you. I use the money earned from these sales to help maintain my blog. I so appreciate you visiting and, if you do choose to use one of my affiliate links, thank you so much for your support!
Copyright © 2026 ·Brunch Pro Theme · Genesis Framework by StudioPress · WordPress · Log in
Loading Comments...