• Skip to main content
  • Skip to primary sidebar
  • Skip to secondary sidebar

Sixth Street Sundries

Emily Midgett

  • Home
  • About Me
  • Contact
  • OLO Marker Color Swatch Chart
  • Shop

songs of the season

Songs of the Season for March 2024: Marshmallow World!

March 25, 2024

This post was sponsored by Simon Says Stamp. Thanks, Simon!

Hi friends! I am back with this month’s installment of my Songs of the Season series, in which I use a holiday song as inspiration for a coordinating holiday card (or two!). This month, I used that classic “Marshmallow World” as my inspiration piece, drawing from the beautiful, somewhat whimsical, snowy imagery to create both a playful A2 card and a more elegant and serene slimline card using goodies from Simon Says Stamp’s vast collection of holiday stamps and dies. Let’s get started with the details!

This song has always immediately taken me back to my childhood, as this Johnny Mathis album was one that we would have on repeat while doing all of the Christmas activities, from wrapping presents to making cookies, and while listening to it for my projects today, I was struck by the difference in mood the two sections have. The song starts out playfully, with a cheerful walking bass line under the melody and discussing the whipped cream day, and then the overall feeling shifts to be a bit more dramatic as you move into the second “world is your snowball” section. I wanted to play on those two contrasting tonalities with my two projects today.

For both projects, I kept things as white as I could to conjure up the sparkling winter wonderland that the song conjures up for me, using lots of white cardstock and sparkling accents, with just a touch of color on the cute little critters to break up the monochromatic palette.

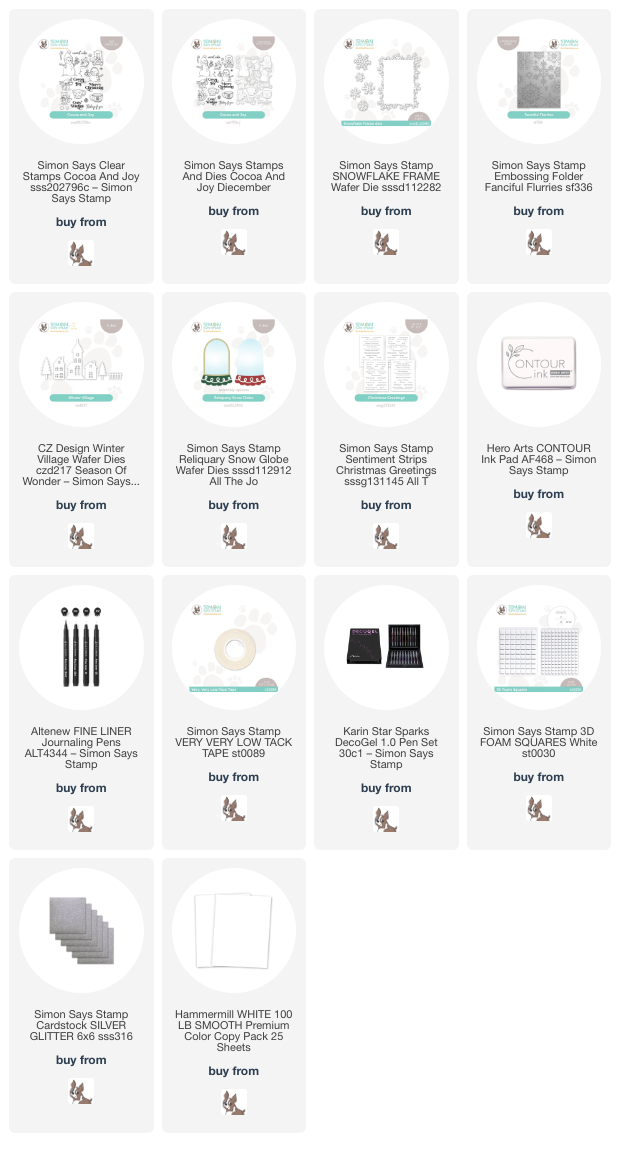
I started my first project by stamping a few of the images from the sweet Cocoa & Joy set, quite literally conjuring the “marshmallow” imagery with the cup of cocoa covered with whipped cream and marshmallows that the adorable little bear is holding! I stamped the images on Hammermill cardstock using Contour Ink, then used my Copic markers to do some no-line coloring with a warm gray, mint, and coral-red color palette, adding a few little details with a black fineline pen.

After I had colored and cut the images with their coordinating dies, I die cut the large Snowflake Frame die using white cardstock, then die cut the individual snowflakes from some sparkling silver glitter cardstock. I used some of Simon Says Stamp’s Very Very Low Tack Tape to mask the detailed snowflakes around the rectangular frame in the center so that I could splatter some “snowflakes” with silver glitter watercolors in the center of the die cut. I removed the mask, then added the silver glitter snowflakes with some liquid adhesive. I also used a silver sparkle pen to add some extra snowflakes on the background.

For the card base, I ran a panel of white cardstock through my die cut machine with the Fanciful Flakes Embossing Folder. I popped up the glittery snowflake die cut with foam squares, then added the sweet bear and mouse friends. A sentiment from Sentiment Strips Christmas Greetings finished the project off!

For my second project, I wanted to conjure that more somber shift in tonality from the second section of the song with a simple monochromatic shaker, adding some of the “evergreen trees” in the song with the Winter Village Dies. I started by trimming down a slimline card front, then trimming it even a little smaller by taking 1/8″ off of each side, making the final panel size 3 1/4″ x 8 1/4″. I centered the open shaped die from the Reliquary Snow Globe die set on this panel and die cut it, then eyeballed the center of each side, creating a line of snowglobe windows on my slimline card front. Before I backed the panels with acetate, I used a pencil to lightly mark the openings on my slimline card front so that I knew where to place my village elements. I backed the window panel with acetate and embellished the snowglobe bases with the bases and silver sparkle swirl die cuts.

I die cut the Winter Village Dies from some more white cardstock and arranged them on the areas that I marked with a pencil, adhering them with foam squares. Before adhering the frame windows, I added some snowflake sequins from my stash to create the shaker. For the greeting, I added a sentiment from the Sentiment Strips Christmas Greetings to create this sweet “marshmallow world” shaker card, made more special with a slimline size!

Well, that’s all for my projects today! I hope you are enjoying the Songs of the Season posts, even if it feels a little strange to see holiday projects this side of the Christmas season. I am enjoying stretching my creativity and putting products to use that I didn’t have a chance to play with during the Christmas season. Thanks so much for stopping by, and have a marvelous day!
Filed Under: simon says stamp Tagged With: christmas card, cocoa and joy, copic, copic coloring, fanciful flurries, holiday card, no line coloring, reliquary snow globe, shaker card, snowflake frame, songs of the season, winter village

Songs of the Season: February 2024- The Nutcracker!

February 25, 2024

This post was sponsored by Simon Says Stamp. Thanks, Simon!

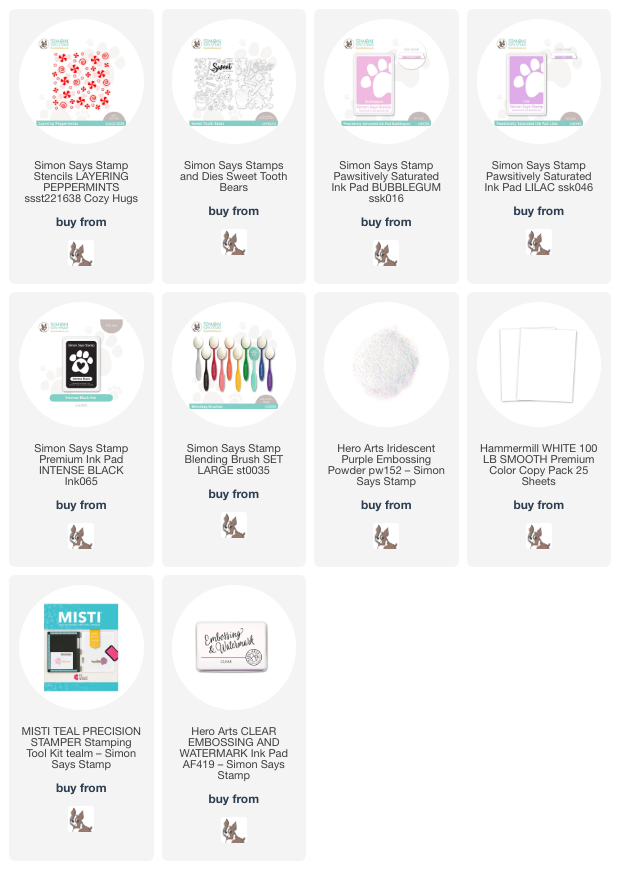
Hi friends! I am back today with February’s installment of my Songs of the Season series: holiday cheer throughout the year inspired by the songs of the Christmas! I took my big kids to see a production of Tchaikovsky’s Nutcracker this past December, and as always, the music and the sumptuous costumes were incredibly inspiring. For this month’s project, I wanted to channel some of the imagery that we commonly associate with The Nutcracker outside of the ballerinas! My mind always conjures lots of pinks and purples and sweets when I think of The Nutcracker, especially thinking of the exotic costumes made to look like desserts and Dance of the Sugar Plum Fairies. I tried to capture some of that imagery in my card with some pretty inks, Layering Peppermints Stencils, and the Sweet Tooth Bears stamps. Let’s get started with the details!

To start my card, I used the Layering Peppermints, pairing it with Bubblegum and Lilac Pawsitively Saturated Inks, all from Simon Says Stamp. I blended the larger solid layer using the Bubblegum ink, keeping the blending quite light to create a very subtle background. The Simon Says Stamp blending brushes are super fine and perfect for creating the soft, subtle blending I was after! After I’d blended the pattern on the entirety of the A2 card front, I blended more Bubblegum ink around the edges, lightly blending some Lilac ink on the very edges. After I’d finished blending, I splattered the entire panel with some super sparkly watercolors. I love the softly blended stencil background… it makes me think of bokeh, which I think is magical on it’s own!

While my background was drying, I stamped lots of the images from the Sweet Tooth Bears set using Intense Black ink, which is compatible with alcohol markers. The striped peppermint candies definitely put me in mind of the different candies represented visually in The Kingdom of Sweets during Act II, and so I wanted to pair them with a “sugarplum” color combination. I pulled out some Copic markers in different shades of pink and lavender, keeping all of the elements cohesive by sticking to these two different color ways for each stamped image. To keep my whipped cream looking “white” on my cup of hot chocolate, I added some pale gray shadows in the folds of the whipped cream and blended out the edges with my colorless blender marker, allowing the white of the Hammermill cardstock to be the main color while still adding shape and shadow to the otherwise-flat image.

After I had colored and die cut my images from the Sweet Tooth Bears set, I needed to create my greeting. I stamped the oversize “sweet” and coordinating sentiment strips using my MISTI, first stamping them with more Lilac ink, then while keeping the stamps in place, stamped the sentiments again over the top using embossing ink and sprinkled Hero Arts’s Iridescent Purple embossing powder over the top. The semi-sheer embossing powder adds the prettiest lavender sheen to the sentiments and really helps them to pop from the colorful background due to the textural interest! I arranged all of the different die cuts in a cluster on my stenciled background, adhering them with liquid and foam tape, adding some of the die cuts with a double layer of foam tape to help them pop even more and add extra depth. Finally, I added a few lavender gems for even more shimmer and shine. I always feel like you can’t add too much sparkle to a Christmas card!!

Well, that’s all for this month’s Songs of the Season post. The Nutcracker is a veritable gold mine of inspiration, so I am sure I will be plucking some inspiration from this classic for another card during this year’s series. Thanks so much for stopping by today, and have a marvelous day!

Filed Under: simon says stamp Tagged With: alcohol marker, copic, layering peppermints, layering stencil, pawsitively saturated, songs of the season

Songs of the Season, January 2024: There’s No Place Like Home for the Holidays!

January 25, 2024

This post was sponsored by Simon Says Stamp. Thanks, Simon!

Hi friends! I’m back with this month’s installment of Songs of the Season- holiday cheer throughout the year, inspired by the songs of Christmas! Music was such a huge part of my life for so long that it seems appropriate for me to combine my past with my present. I am not ashamed to say that I have my Christmas decorations still up; we will be taking them down this weekend, but I couldn’t resist leaving the glow and festiveness of the lights up for just a couple more weeks after Christmas. This month’s song is a classic: There’s No Place like Home for the Holidays by Perry Como. Listen to it below:

The song reminds me of Christmas at my Grammy and Papa’s house as a child; my uncles and their families all lived in different parts of the country, but each Christmas, they would pack up and descend on our hometown to spend the Christmas holidays with us. It never truly felt like Christmas until they arrived, and as an adult, I still yearn for that kind of gathering, though we are all scattered all over the globe.

“Oh, there’s no place like home for the holidays,
’cause no matter how far away you roam,
if you want to be happy in a million ways
For the holidays, you can’t beat home sweet home.”

I suppose it is now my husband’s and my job to create that sense of family for our little ones, and I strive to create those kinds of precious memories for our kiddos!

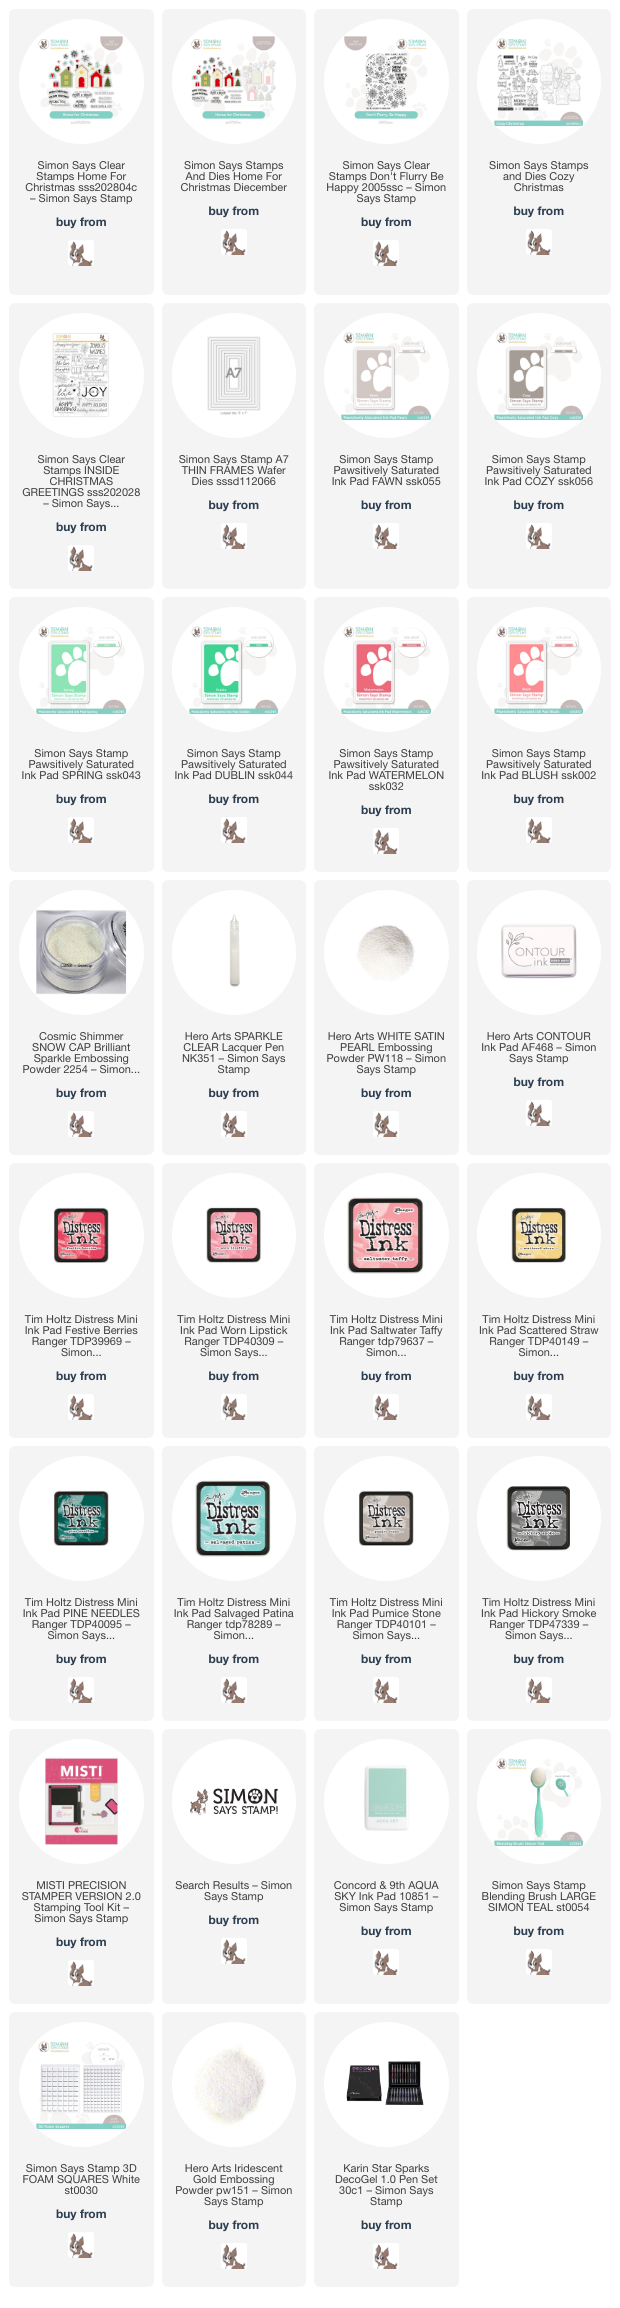
“Tiny houses” are more than just a building trend; they are everywhere in the stamping world, too! Simon Says Stamp has a few different sets that feature some adorable houses, and today I created snowy little villages using different techniques to create t both a simple A2 card and a more involved A7 card. Today’s projects feature two different holiday house sets from Simon Says Stamp: Home For Christmas and Cozy Christmas. The Home For Christmas set features simple layered stamps that would be great for mass production, while the Cozy Christmas Set features outline images that are perfect for coloring both as simple images with black lines as well as the no-line watercoloring that I’ve chosen to do today. I kept both projects to a simple, festive, modern color scheme with cherry red, mint, and coral, with plenty of sparkle and shine added in for festive measure.

For my first, somewhat simpler card, I used the Home For Christmas set with bunches of Pawsitively Saturated Inks: Fawn, Cozy, Spring, Dublin, Watermelon, and Blush, stamping each layer in just the right spot by using my MISTI. I also stamped a couple of greetings from the set using the dark gray ink to keep things a bit lighter than if I’d chosen to use stark black ink. I die cut each image using the coordinating dies, fussy cutting the curved sentiment with my sharp scissors.

For the background, I wanted to create a bit of a snowglobe illusion, so I stamped the circular snowflake image from Don’t Flurry Be Happy onto my white card front using embossing ink and white satin pearl embossing powder. The shine from the pearlescent embossing powder helps the embossed image stand out just enough from the white background so as to add some subtle texture and pattern behind my little neighborhood. I arranged my cluster of houses and holiday decor on my card front, popping them up with foam adhesive. For some snowy sparkle, I used white glitter with the Hero Arts Sparkle Lacquer pen. I love the shimmering texture this adds to the card without adding tons of bulk!

For my second card, I wanted to create a vintage feel with some no-line watercolored images, so I stamped several of the images from the beautiful Cozy Christmas Set onto watercolor paper using Contour Ink. I then pulled lots of different Distress Ink cubes to finalize my color palette: Festive Berries, Worn Lipstick, Saltwater Taffy, Scattered Straw, Pine Needles, Salvaged Patina, Pumice Stone, Hickory Smoke. Watercoloring with Distress Inks is such fun; the incredible vibrance and super easy blending make them really easy to use for both beginning watercolorists and experienced watercolorists alike. I simply tap my ink pads on a ceramic palette or plastic plate (your glass craft mat would work, as well!) and pick up the color with my damp paintbrush as I would from pan paints! The color moves beautifully on the paper and reacts so well with water, making it ideal for no-line coloring.

(Also, just FYI-Simon Says Stamp is celebrating 20 Years of Distress with a contest over on Instagram. You can check out all of the details HERE. There is a $500 gift card giveaway *every month*!!! Don’t miss out!)

After I had finished watercoloring my images, I turned my attention to the card base. I wanted to keep things super simple so that my vibrant neighborhood was the star of the show, so I selected a gold foil frame cut using the A7 Thin Frames, making the canvas for my scene a bit smaller and less intimidating. Before I adhered the frame, I masked off the edges on three of the sides of my A7 card front and blended some Concord and 9th Aqua Sky ink using a blending brush. I removed the masking tape around the edges, adhered my gold frame, and popped up the houses in a row using foam squares.

I popped up a greeting from the Inside Christmas Greetings which I embossed using Iridescent Gold embossing powder from Hero Arts, tucking it neatly behind the little car with it’s Christmas tree. To add a little extra sparkle, I added some white glitter to the watercolored snow using a Hero Arts Sparkle Lacquer pen and embellished the ornaments and gifts with some Star Sparks Decogel pen.

I absolutely adore how this card turned out!! The A7 canvas helps to keep the houses from feeling too crowded, and the intricate watercoloring makes such an impact.

Well, that’s all for my projects for this month’s installment of Songs of the Season. If you want some more holiday inspiration, check out my friend Jenn’s Get Cracking on Christmas challenge! I love having any excuse to keep my Christmas craft supplies out all year long! Thanks so much for stopping by today, and have a marvelous day!

Filed Under: simon says stamp Tagged With: A7 thin frames, christmas card, cozy christmas, distress ink, distress watercolor, don't flurry be happy, holiday card, home for christmas, songs of the season, watercolor

Songs of the Season: Silver and Gold!

October 25, 2023

This post is sponsored by Simon Says Stamp. Thanks, Simon!

Hi friends. I know that we are in full-blown holiday mode around here, so I don’t really need to do a Songs of the Season post for October (it’s my excuse for playing with my holiday supplies all year round, ha!)… but I really love the inspiration that the Songs of the Season series brings to my creative process, so I couldn’t let the month pass without a new installment to the series! This month, we’re focusing on a beautiful song from Rudolph the Red-Nosed Reindeer: Silver and Gold, sung by Burl Ives. Listen to it below:

Christmas always conjures plenty nostalgia for me (I would imagine that to be true for most people), as my childhood Christmas memories are some of my most cherished. We had a VHS tape of Rudolph the Red-Nosed Reindeer, as well as Frosty, Mickey’s Christmas, Garfield’s Christmas, and a few other child-friendly holiday videos that were on repeat for most of December. As an adult and a parent, I now find some of the themes in the Rudolph story to be a bit sad and not necessarily ideals to which I want my children to subscribe, but the music is still something that I cherish, including the song Silver and Gold. Both of my cards today were inspired by that piece, so let’s get started with the details!

Both of my projects feature the beautifully detailed Snowflake Season stamp set from Simon Says Stamp. This is an older set, but the elegance and detail of these snowflake stamps is absolute perfection. I wanted to showcase these beautiful details with some sparkling metallic embossing powder to create gorgeous, festive holiday cards!

I began my first project by heat embossing nearly all of the snowflakes from the Snowflake Season set onto some heavyweight vellum using gold glitter embossing powder and silver glitter embossing powder, then die cutting them with the coordinating dies. The vellum allows the snowflakes to “float” on the card front so gracefully!

I wanted to create a larger A7 card, so I die cut the A7 Thin Frames dies from some brushed gold foil cardstock. (I keep my Thin Frames dies connected so that I can get tons of frame die cuts in various sizes and thicknesses with just one pass through my die cut machine! I save the extras for a rainy day, which makes it super easy to add one to my projects!) I blended some Gravel ink around the edges of my white A7 card front, then splattered the blended areas with some shimmering metallic gold watercolor, keeping the center of the card front nice and clean. I adhered one of the shiny gold frames to the card front using liquid adhesive.

With the conflict and violence currently happening in the Middle East, I have had the phrase “peace on earth, goodwill to men” stuck in my head, and wanted to use it on a project to try to send some peaceful energy into the world. This large A7 card was the perfect size for the generously-sized Peace on Earth Script die, which I die cut from some glittery gold cardstock and backed with a vellum background layer to soften it and add stability to the delicate sentiment die cut. I adhered it to the center of my framed, blended panel using clear foam adhesive, then bracketed the greeting with the glittery vellum snowflake die cuts. I added a few glittering Sparkle and Shine Ombré Glitter Drops from Pinkfresh Studio to fill in the gaps and add one last touch of “silver and gold”!

My second card was borne out of an idea that came to me while working with the vellum for my first card… I love the look of embossed vellum and thought it would be a beautiful background for one of the intricate snowflakes in the Snowflake Season set. What luck that the snowflakes on the Filigree Snowflakes Embossing Folder match the Snowflake Season images so perfectly! But, to allow the embossed vellum to be as much the star of the card as the glittering embossed snowflake image, I used it as a window for my background, so that the details of the embossed image would not be lost and, when standing up, would allow the vellum to create a soft glow! I embossed a panel of vellum using the Filigree Snowflakes Embossing Folder and used my Fiskars trimmer to cut a window from the front of my A2 card base. (A rectangle die would also have done the job, but my cutting plates are pretty beaten up, and I didn’t want to ruin the inside of my card!)

I adhered the embossed vellum panel to the back of the window using super strong double-sided tape, creating a beautiful lacy window to enhance my card front. I heat embossed the largest individual snowflake from Snowflake Season using gold glitter embossing powder and die cut it with the coordinating die. I popped up the snowflake with foam adhesive to give it extra height on my embossed background. For the greeting, I selected a simple sentiment from the Typed Christmas Sentiment Strips pack. Because these sentiment strip panels are printed with toner, they can be foiled using a Minc machine and rolls of heat-reactive foil! I used some gold foil to create a coordinating gold sentiment strip, again with that theme of “peace” that feels so apropos right now. I popped it up using a double layer of foam tape to help it pop even more from the intricate snowflake background, then added some more Sparkle and Shine Ombré Glitter Drops to the tips of the snowflake for one last fun textural element!

Well, that’s all for the October 2023 installment of Songs of the Season. I hope you will join me in praying for and wishing for peace throughout our world. This year has seen so much violence and destruction in so many places that my heart hurts with it. It is such a comfort to have a creative outlet, and I’m so grateful. The world can use all of the love and peaceful energy it can get, I think! Thanks so much for stopping by, and have a marvelous day!

Filed Under: simon says stamp Tagged With: A7 card, A7 thin frames, christmas card, embossing folder, filigree snowflakes, holiday card, peace on earth, snowflake season, songs of the season

Songs of the Season- September 2023: Feliz Navidad!

September 25, 2023

This post was sponsored by Simon Says Stamp. Thanks, Simon!

Hi friends! It’s the 25th of the month, which means that today I am sharing inspiration for my Songs of the Season series, where I share a project inspired by the music of the holiday season. Last month, I shared some vivid, majestic snowflake inspiration inspired by the Christmas classic Silent Night (check it out HERE). This month, I was inspired by a song that reminds me so much of my adolescent years. My had mom found a Christmas ornament that played “Feliz Navidad” by José Feliciano, and it became sort of a silly refrain at our house, not just during the holiday season, but throughout the year. Any time we needed a little giggle or to lighten the mood, the “Feliz Navidad” refrain would inevitably spring to mind and we would start playfully singing it, sometimes dancing along. My mom went through phases with her Christmas decor, sometimes using elegant, color-coordinated baubles, carefully collecting ornaments throughout the year for our Christmas tree, but during my teenage years, I remember a brightly colored Christmas tree with lots of electic, vibrant ornaments, so that’s what my project embodies today. Let’s get started with the details!

My project started with the “Feliz Navidad” sentiment from the Elegantly Modern Christmas Hot Foil Plate set. I hot foiled the sentiment using Spellbinders’s Rainbow Confetti Glimmer Hot Foil, then die cut the greeting using the coordinating die (the stamps and dies that match this hot foil plate set are currently out of stock, but be sure to sign up for the email notifications for when they come back!). I used the colors in the foil as the color palette for the rest of my project.

Try as they might, the modern Christmas lights just cannot compare to that incandescent glow of the Christmas lights of my youth! In order to recreate that eclectic, colorful Christmas tree that I remember so vividly from my adolescent years, I die cut a bunch of the Christmas Bulbs dies from Hammermill white cardstock. I could have used alcohol markers to add color and make them super detailed, but I decided to keep things simple so that if someone wanted to mass-produce this project, they would have a good idea of which colors to use. I pulled out Rose, Cherry, Dandelion, Fairway, Cadette, and Amethyst inks from Simon Says Stamp, then used small blending brushes to blend them on the Christmas bulb die cuts. Tip: in order to keep your connectors with the appropriately-sized bulb, use a small piece of washi tape to keep them together before adhering them to the solid backer for your light bulb die cuts.

To create the tree branch for my strand of Christmas lights, I die cut several pine boughs from white cardstock using the Pine Needle Trio die set. To quickly and easily adhere them to my white A2 card front, I used the Micro Dot Adhesive Sheets from Simon Says Stamp. These sheets make adhering super delicate, intricate die cuts like these pine boughs a breeze! I simply sandwiched them between the two sheets of release paper, rubbed my bone folder on the back of the sheet with the adhesive on it, and then pulled the die cuts off, adhering them to my card front with ease! I popped up the hot foiled sentiment die cut with some foam squares (another excellent time saver so that you don’t have to worry about cutting up foam tape!), then arranged my string of lights along the “branch,” popping them up with foam squares as well. After I had adhered all of my holiday lights, I used the residual ink left on my blending brushes to add a colorful glow to each of the bulbs. I love the effect!! Finally, I added a few shimmering iridescent gems for some sparkle!!

Well, that’s all for this month’s edition of Songs of the Season. Prepare yourselves, because starting in October, I’m going into full Christmas mode, and I am so excited about it! I have been working with holiday product since last spring, but now I can really let my Christmas-loving flag fly high! Thanks so much for stopping by today, and have a marvelous day!
Filed Under: simon says stamp Tagged With: christmas bulbs, christmas card, elegantly modern christmas, feliz navidad, holiday card, hot foil, ink blending, pine needle trio, songs of the season

  • Page 1
  • Page 2
  • Go to Next Page »

Primary Sidebar

  • Facebook
  • Instagram
  • Pinterest
  • YouTube

Favorite Shops

Secondary Sidebar

Subscribe

Enter your email address to subscribe to this blog and receive notifications of new posts by email.

Instagram
Something is wrong.
Instagram token error.
Follow
Load More

Archives

Tags

3D embossing folder alcohol markers better press birthday birthday card blog hop card kit christmas christmas card christmas tag colored pencil copic copic coloring Daniel Smith die cutting embossing folder embroidery felt giveaway holiday holiday card hot foil ink blending karin brushmarker pro layered stencil masculine my monthly hero new release no line coloring no line watercolor OLO marker olo markers original illustration pawsitively saturated rainbow shaker card slimline stamping stamptember stencil thank you thinking of you valentine's day video watercolor

Popular Posts

Simon Says Stamp Sending Cheer Blog Hop- Day 2 + Freebie + Giveaway!
Altenew October 2026 Release Blog Hop + Giveaway!
Simon Says Stamp Sending Cheer Release: Now Available!
Simon Says Stamp October 2026 Card Kit of the Month: Homespun Gratitude!
A Double Leftovers Card Set with New Simon Says Stamp Stencils and Dies!
Simon Says Stamp November 2025 Card Kit: Give Thanks!
Joyful Snowman with New Simon Says Stamp Sending Cheer Release!
Hero Arts Partners Blog Hop: Lawn Fawn!
Altenew February 2020 Stamp+Die+Watercolor Blog Hop+Giveaway!
Altenew Standalone Die Blog Hop+Giveaway!

Disclosure

Some affiliate links are used in my posts. This means that, should you click on one of my links and purchase something from that company, I will receive a small portion of the sale at no extra cost to you. I use the money earned from these sales to help maintain my blog. I so appreciate you visiting and, if you do choose to use one of my affiliate links, thank you so much for your support!
Copyright © 2026 ·Brunch Pro Theme · Genesis Framework by StudioPress · WordPress · Log in
Loading Comments...