• Skip to main content
  • Skip to primary sidebar
  • Skip to secondary sidebar

Sixth Street Sundries

Emily Midgett

  • Home
  • About Me
  • Contact
  • OLO Marker Color Swatch Chart
  • Shop

splendid snowflakes

DieCember Has Arrived with Simon Says Stamp!

December 3, 2025

This post was sponsored by Simon Says Stamp. Thanks, Simon!

Hi friends! DieCember is here, and we are celebrating all things die cutting! Each December, Simon Says Stamp releases incredible new dies, perfect for a variety of techniques and media. Die cutting is one of my most favorite crafting techniques; you can do so much with it! I will make a confession: when I first began stamping about 15 years ago, I couldn’t see the need for die cutting. I had a Cricut, so what could I possibly need a die cutting machine for? Well, once I began to see the magic of embossing folders and the smooth crispness of die cut edges, I was completely hooked. The magic that die cutting holds for me hasn’t dissipated in all of this time, either! I have a bunch of different projects to share with you this month featuring new goodies from the DieCember release (check out the full release HERE), so let’s get started on my first project!

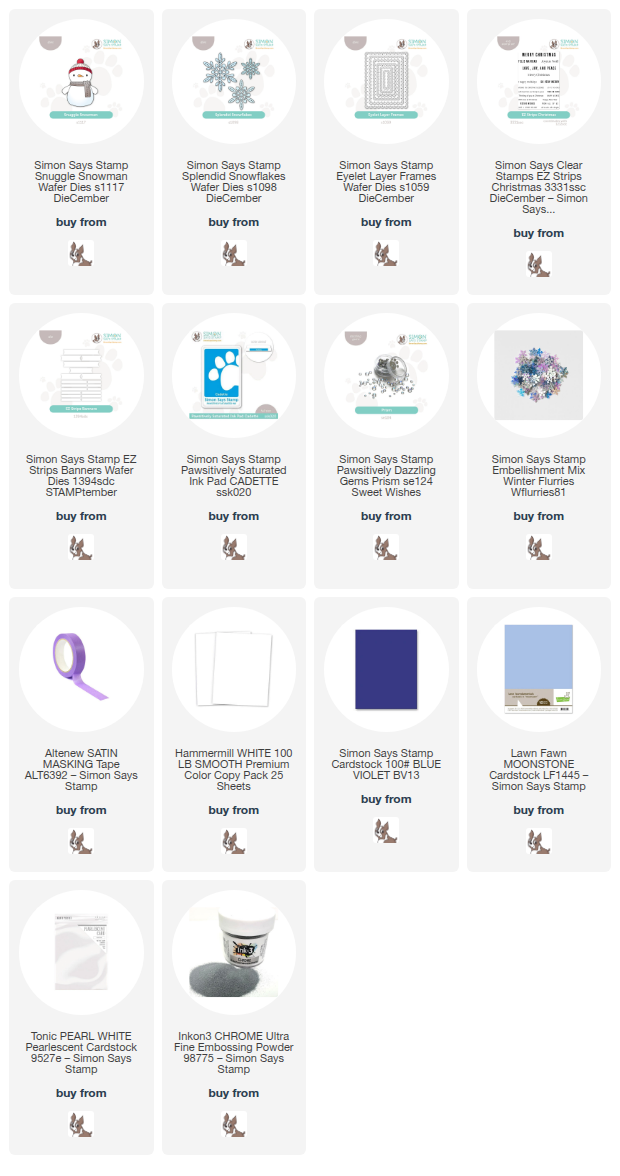
*I have gathered links to all of the products used at the bottom of the post for your convenience, using affiliate links at no extra cost to you. Thank you for shopping with my links! I truly appreciate your support for my work!*

To begin, I die cut the darling, rotund little Snuggle Snowman die set, cutting the main body and arms of the snowman from pearlescent white cardstock and giving him a deep purple hat. I cheated a bit on the eyes and nose; placing a scrap of white cardstock behind the openings for the eyes and nose in the die cut, I used a very faint pencil mark within each hole, then removed the die cut snowman and colored the spots with the appropriate alcohol marker-orange for the nose and black for the coal eyes! I then adhered this piece to the back of the snowman’s die cut head, then added the hat and scarf to the front and tucked the arms behind, adhering each piece with liquid glue.

I wanted something a little feminine and sweet behind my sweet snowman, so I die cut one of the new Eyelet Layer Frames dies, which features a darling scalloped edge with eyelet pattern along the scallops, as well as a stitched debossed detail! To help add interest to this pretty scalloped rectangle and ensure that it was truly an integrated part of my snowman scene, I used painter’s tape around the edges of the eyelet frame, keeping the scallops and stitched details safe from my ink blending. I blended Cadette Pawsitively Saturated Ink around the top three edges, creating a bright, wintry sky backdrop for my snowman! I arranged a few of the new Splendid Snowflakes, cut from pearlescent white cardstock, around the edges of the blended area.

For the greeting, I heat embossed the new EZ Strips Christmas stamp set (love that you get such a wide variety of sentiments with one step!) using silver embossing powder on white cardstock. Once the embossing had cooled, I die cut all of the embossed sentiments using the EZ Strips Banners die set. I arranged the sentiment strip and snowman on the scalloped rectangle, adhering them with foam adhesive squares. I added some gorgeous Winter Flurries sequins between the larger Splendid Snowflakes die cuts, finally adding some Prism Pawsitively Dazzling Gems for extra snowy sparkle!

Well, that’s all for my project today! I used plain old cardstock today, but I have so many fun projects to still share with you using non-paper materials! Don’t forget to come back later this week for the DieCember blog hop, too! Thanks so much for stopping by today, and happy DieCember!
Filed Under: simon says stamp Tagged With: christmas card, die cutting, diecember, eyelet layer frames, ez strips christmas, holiday card, snuggle snowman, splendid snowflakes

New Pastel Inks from Simon Says Stamp!

November 26, 2024

This post was sponsored by Simon Says Stamp. Thanks, Simon!

Hi friends! I am back with some more inspiration using several different items from the beautiful new Festive Fun release from Simon Says Stamp. The new release included lots of beautiful goodies, including gorgeous new Pastel Pigment Inks that create the softest, most beautifully blended pastel colors. I have a quartet of projects to share with you today using the inks and their coordinating Pawsitively Dazzling Gems along with some other goodies from the Festive Fun release, so let’s get started with the details!

*I have gathered links to all of the products used at the bottom of the post for your convenience, using affiliate links. Thank you for shopping with my links! I truly appreciate your support for my work!*

I love creating coordinating card sets that work together as a group but also are each just a little unique, and these gorgeous new Pastel Pigment Inks were perfect for some light mass production! I don’t normally think of pastels for holiday cards, but combining these lovely inks with their coordinating Pastel Pawsitively Dazzling Gems and some wintry imagery made for beautifully unique and festive cards!

*Note: I do have dedicated blending brushes specifically for these pigment inks. I would not recommend mixing the dye and pigment inks on the same brush, as the different formulations for the opaque pigment inks and translucent dye inks don’t play nicely together on the brushes*

When mass producing, I like to keep the basic layout very similar, but switch up some of the products used. I paired the Pastel Blue ink and Pastel Pink ink with the new Shimmer Lattice Embossing Folder, first blending the panels of 3.75″ x 5″ white cardstock with Pastel Blue and Pastel Pink inks, then running those blended panels through my die cutting machine with the Shimmer Lattice Embossing Folder. Doing the ink blending first keep the details from the embossing consistent throughout, whereas ink blending after embossing would enhance the details in the blended areas.

After I had finished ink blending and embossing each panel, I splattered some glittering handmade watercolors on each panel to add extra festiveness and sparkle. I mounted each panel on an A2 card base, then added a white glitter Heartfelt Snowflake die cut to the center of each card with some tiny pieces of foam adhesive. I also used my Minc machine to addsilver toner foil to the Holiday Greetings Sentiment Cards. After I had added the sentiment strips over the center of each glittering snowflake, I used the coordinating Bubblegum and Dusk Pawsitively Dazzling Gems at the tips of each snowflake spire. So sparkly and wintry, even with the somewhat springy colors!

For my second set, I paired the same technique with the new Pastel Yellow and Pastel Green inks and the Splendid Snowflakes Embossing Folder, blending first and then running the panels through my die cutting machine with the embossing folder and splattering each panel with more shimmering iridescent glitter watercolors.

I again centered the white glitter Heartfelt Snowflake die cut, layering the silver foiled Holiday Greetings Sentiment Card sentiment strip over the center of each snowflake. Finally, I added even more shimmer with the coordinating Butter Pawsitively Dazzling Gems and Sprout Pawsitively Dazzling Gems. My color-coordinated-loving-heart goes wild for these matching gems and inks!!

Well, that’s all for my projects today! These new inks blend like a dream and will work for so many different seasons and subjects… I can’t wait to play with them even more. Thanks so much for stopping by today, and have a marvelous day!

Filed Under: simon says stamp Tagged With: 3D embossing folder, card set, christmas card, die cutting, heartfelt snowflake, holiday card, holiday greetings, hot foil, ink blending, mass produce, minc, pastel ink pads, pawsitively dazzling gems, pigment ink, sentiment strips, shimmer lattice, splendid snowflakes, toner foil

Primary Sidebar

  • Facebook
  • Instagram
  • Pinterest
  • YouTube

Favorite Shops

Secondary Sidebar

Subscribe

Enter your email address to subscribe to this blog and receive notifications of new posts by email.

Instagram
Something is wrong.
Instagram token error.
Follow
Load More

Archives

Tags

3D embossing folder alcohol markers better press birthday birthday card blog hop card kit christmas christmas card christmas tag colored pencil copic copic coloring Daniel Smith die cutting embossing folder embroidery felt giveaway holiday holiday card hot foil ink blending karin brushmarker pro layered stencil masculine my monthly hero new release no line coloring no line watercolor OLO marker olo markers original illustration pawsitively saturated rainbow shaker card slimline stamping stamptember stencil thank you thinking of you valentine's day video watercolor

Popular Posts

Simon Says Stamp Joy For You Blog Hop- Day 1!
Simon Says Stamp Joy For You Release-Now Available!
Frozen Fractals All Around with New Simon Says Stamp Joy For You Release!
Shaped Holiday Shaker Card with New Simon Says Stamp Jolly Season Card Kit of the Month!
Holiday Postage with New Simon Says Stamp!
Simon Says Stamp Glory to the Newborn King Holiday Kit-Part II!
Pinkfresh Studio 5th Birthday!
Studio Katia 2nd Anniversary Blog Hop!
Altenew Build A Flower: Fuchsia Blog Hop+Giveway!
Holiday Joy in Pink and Green with New Simon Says Stamp DieCember!

Disclosure

Some affiliate links are used in my posts. This means that, should you click on one of my links and purchase something from that company, I will receive a small portion of the sale at no extra cost to you. I use the money earned from these sales to help maintain my blog. I so appreciate you visiting and, if you do choose to use one of my affiliate links, thank you so much for your support!
Copyright © 2026 ·Brunch Pro Theme · Genesis Framework by StudioPress · WordPress · Log in
Loading Comments...