Hi there! I am so excited to be a stop on Day 1 of the Altenew 9th Anniversary Blog Hop! You should have arrived here from the Simon Says Stamp blog, and your next stop is Mindy Eggen. You can also start at the beginning at the Altenew Card Blog. One of the best parts about the anniversary festivities each year, aside from the fabulous blog hop filled with wonderful prizes, is the special large scale Anniversary stamp set. These enormous stamp sets (seriously-enormous. 8.5″x10″!!!) are so unique and beautiful. This year’s set, called Billowing Peonies, is extra special because the large scale of the images works beautifully with the new Stampwheel! And, bonus, Tasnim has designed a set of coordinating layering stencils that are absolutely phenomenal and totally massive. So if coloring isn’t your jam, you have incredible options at your disposal with these spectacular stencils! I have two projects to share with you today using the stunning peony arrangement in Billowing Peonies, so let’s get started with the details.

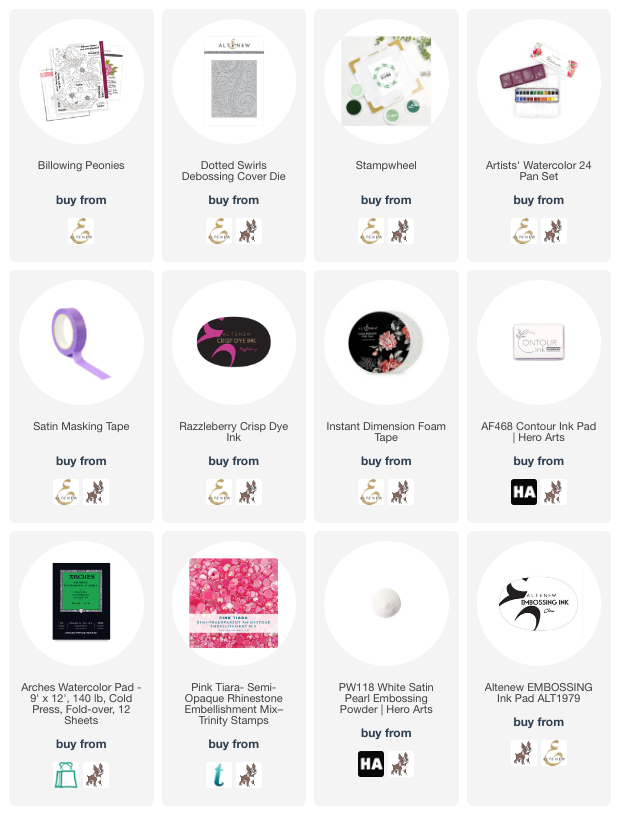
The Billowing Peonies stamp set features a pair of spectacular floral stamps that are so big and sooooo much fun to color. I find that large-scale stamps are the most fun to color, because they give you the room to really work on enhancing those details that might be too small to notice on a smaller set. I created a pair of peony projects (say that three times fast!!) using the new Billowing Peonies stamps: a slimline card and a piece of wall art, both watercolored using my favorite Artists’ Watercolor 24 Pan Set, which is hands down my favorite coloring medium in the Altenew catalog. I’ve had my set for several years and use it more than any other Altenew coloring medium. I’ve barely made a dent in the pans, so it’s a fantastic, long-lasting investment! If you are looking for an economical and good quality watercolor set, I cannot recommend the Artists’ Watercolor 24 Pan Set highly enough.

I began my slimline card by heat embossing the large peony duo from Billowing Peonies on a piece of watercolor paper that I’d trimmed down to slimline size. Even though I knew that I wanted to die cut the finished watercolored image, I started with the card size so that I could better visualize the final layout of the card. (Tip: if you don’t have the Stampwheel or are still waiting for your Stampwheel to arrive, you can use the back of your MISTI for this huge stamp. Tape the base of your MISTI to your work surface, then tape your paper next to your MISTI on your work surface. Place your large stamp on your paper, then close the *back* of your lid for your stamp positioner over your stamp. This hack gives you a bit of extra room to use those really large scale stamps, at least until you can get your hands on a Stampwheel!) I heat embossed the beautiful peony image using pearlescent white embossing powder, which I find creates a lighter, less severe aesthetic than using black stamped/embossed lines.

After I had heat embossed my image, I taped the panel down to my watercolor board with Satin Masking Tape and covered the entire panel with clean water. I then dropped in some diluted pink, green, coral, and yellow watercolors from the Artists’ Watercolor 24 Pan Set, which bloomed together beautifully on the damp watercolor paper. The wet watercolor will work with the wet watercolor paper to allow the colors to meld together beautifully and create some extra colorful interest to your floral images.
After speeding up the drying time with my heat tool, I went back in with more concentrated color to watercolor the beautiful peony images, adding depth and dimension to the flowers. The base layer of mottled color helps to create some color variation, mimicking the color variation found in nature. No real-life peony is only one color, so don’t be afraid to add touches of extra color! After it was completely dry, I went in with the coordinating dies and cut the image out. Because I had started on a slimline card base, the finished die cut image will fit perfectly on another slimline card base without needing to do any trimming.

To create the textured card base, I trimmed down a white slimline card front from some white cardstock, then used the Dotted Swirls Debossing Cover Plate Die at the top and bottom of the card front. Because the Dotted Swirls plate only pierces the cardstock and doesn’t actually cut anything, you can use it easily with a large scale card front like this! Simply line up where your plate ends with the previously-cut image to create a continuous pattern. I popped up the die cut watercolored image with Instant Dimension Foam Tape.
For the greeting, I stamped one of the chunky sentiments from the Billowing Peonies stamp set using Razzleberry ink onto some white cardstock, then while the stamp was still in place, stamped directly over the top with embossing ink. I sprinkled more pearlescent white embossing powder over the stamped greeting and heated it up, creating a pearlescent pink sentiment. I backed it with some Dazzling Diamond glitter paper so that the sparkle peeked out from the top and bottom of the sentiment panel, then layered that over the center of my watercolored peony and added a few shimmering pink gems for sparkle!

My second project using the new Billowing Peonies stamps is more of a home decor piece. I initially planned on watercoloring the entirety of the peony image, then chopping it up to create multiple card fronts, but after I had finished it… I decided I didn’t want to chop up those hours of meticulous watercoloring into something that would probably be thrown in the garbage.
I started by stamping the entirety of the image onto a 7″x7″ panel of watercolor paper using no-line coloring ink. You can see just how massive this image is; it’s even hanging over the edge of the 7″x7″ watercolor paper! I wanted to create a very pale lavender, almost white, peony (which I don’t think exist in real life, but it’s my garden so who cares, right?) so I mixed up some bright blue and purple watercolor from the Artists’ Watercolor 24 Pan Set, diluting the color with quite a bit of clean water to make it very subtle, and began adding that pale lavender to the shadowed areas of the first peony. I worked my way around the peony, keeping the wet sections separate from each other to ensure that those edges stayed nice and crisp, using the sharp point of my paintbrush to clean up any rough edges.

I used the same technique with the pink peony, this time mixing up some of my favorite bright pink with some of the purple to create a lovely shade of vibrant mauve. After I had completed the main watercolor on my peonies, I pulled out some yellows, pinks, and greens from my paint pans and diluted them on my palette so that they were the subtlest of washes. I used these subtle washes to “glaze” the edges of my petals, which is basically adding a watercolor wash over the top of an area of completely dry watercoloring. It helps to add some interest and color variation to your flowers. This technique is especially noticeable on the lavender/white peony; the white highlights on this super pale peony are picking up reflections of color from the neighboring flower as well as the foliage. I encourage you to try this technique on your next watercolor project!

Once I had finished watercoloring the flowers, I mixed some deep green and lime green watercolor to add pigment to the foliage. I like to think of each half of each leaf as it’s own unique petal, which allows me to visualize giving it the shape and shadows in the same way that I would on flower petals clustered together. After my initial painting, I mixed some black paint into the hunter/lime mixture, then enhanced the shadows on the leaves tucked behind the top layer of foliage. I matted the finished watercolored piece with some plain black cardstock, then mounted it on a panel of 8″x8″ white cardstock. It will fit perfectly in an 8″x8″ frame! Something like this would make a lovely Mother’s Day gift. 🙂
Well, that’s all for my projects today. To celebrate their 9th Anniversary, Altenew is offering some wonderful special gifts with purchase!

- 4/5/2023-4/6/2023: Enjoy FREE U.S. shipping with code HAPPY9TH or $9 OFF shipping on international orders over $29 with code ANNIV23 at checkout and receive a FREE brand-new Playful Wildflower 3D Embossing Folder ($8.99 value) on orders over $69.
- 4/3/2023-4/10/2023: FREE Mini Blending Brush Set(worth $26.99) with every order of the brand-new Billowing Peonies Complete Bundle.
- Altenew: 10 x $50 Altenew Gift Certificates
- Altenew Academy: 15 x Online Card Classes
- Artistry by Altenew: 5 x $25 Gift Certificate
- Jennifer McGuire Ink: 1 Share Handmade Kindness goodies bag ($100+ value)
- Online Card Classes: 5 x Online Card Classes
- Gina K. Designs: $100 Gift Certificate
- Hero Arts: $100 Gift Certificate
- Michelle’s Cards & Stamps: $100 AUD Gift Certificate
- Spellbinders Paper Arts: Wax Seal Starter Kit ($50 value)
- Pinkfresh Studio: $50 Gift Certificate
- Lawn Fawn: $50 Gift Certificate
- Pink & Main: $50 Gift Certificate
- Studio Katia: $50 Gift Certificate
- Simon Says Stamp: $50 Gift Certificate
- Krafters Cart: $50 Gift Certificate
- Auzz Trinklets N Krafts: $50 Gift Certificate
- A Cherry On Top: $50 Gift Certificate
- ScrapbookPal: $50 Gift Certificate
- MarkerPOP: $50 Gift Certificate
- CiLi in Papers: $50 Gift Certificate
- Scrapbook.com: $50 Gift Certificate
- Seven Hills Crafts: £25 Gift Certificate
- Bumbleberry Papercrafts: £25 Gift Certificate
- Frantic Stamper: $25 Gift Certificate
Here’s the full hop list:
It’s such an honor to be part of the Altenew Design Team. Working with beautiful flower stamps is the closest I will ever come to having a garden, and Altenew’s floral designs are truly unique and such a pleasure to color. Thank you so much for stopping by today, and happy 9th Anniversary to Altenew!