• Skip to main content
  • Skip to primary sidebar
  • Skip to secondary sidebar

Sixth Street Sundries

Emily Midgett

  • Home
  • About Me
  • Contact
  • OLO Marker Color Swatch Chart
  • Shop

stencils

Simon Says Stamp STAMPtember Grateful Moments Collection Release + Flash SALE!

September 29, 2026

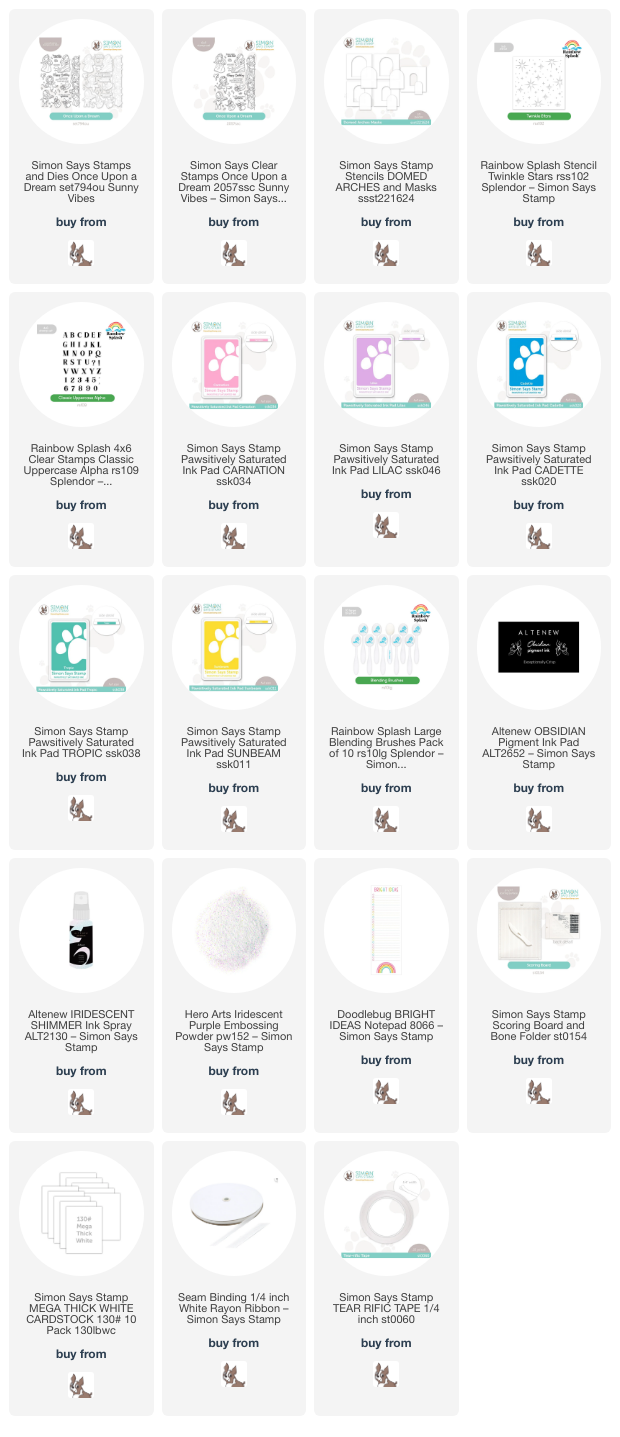
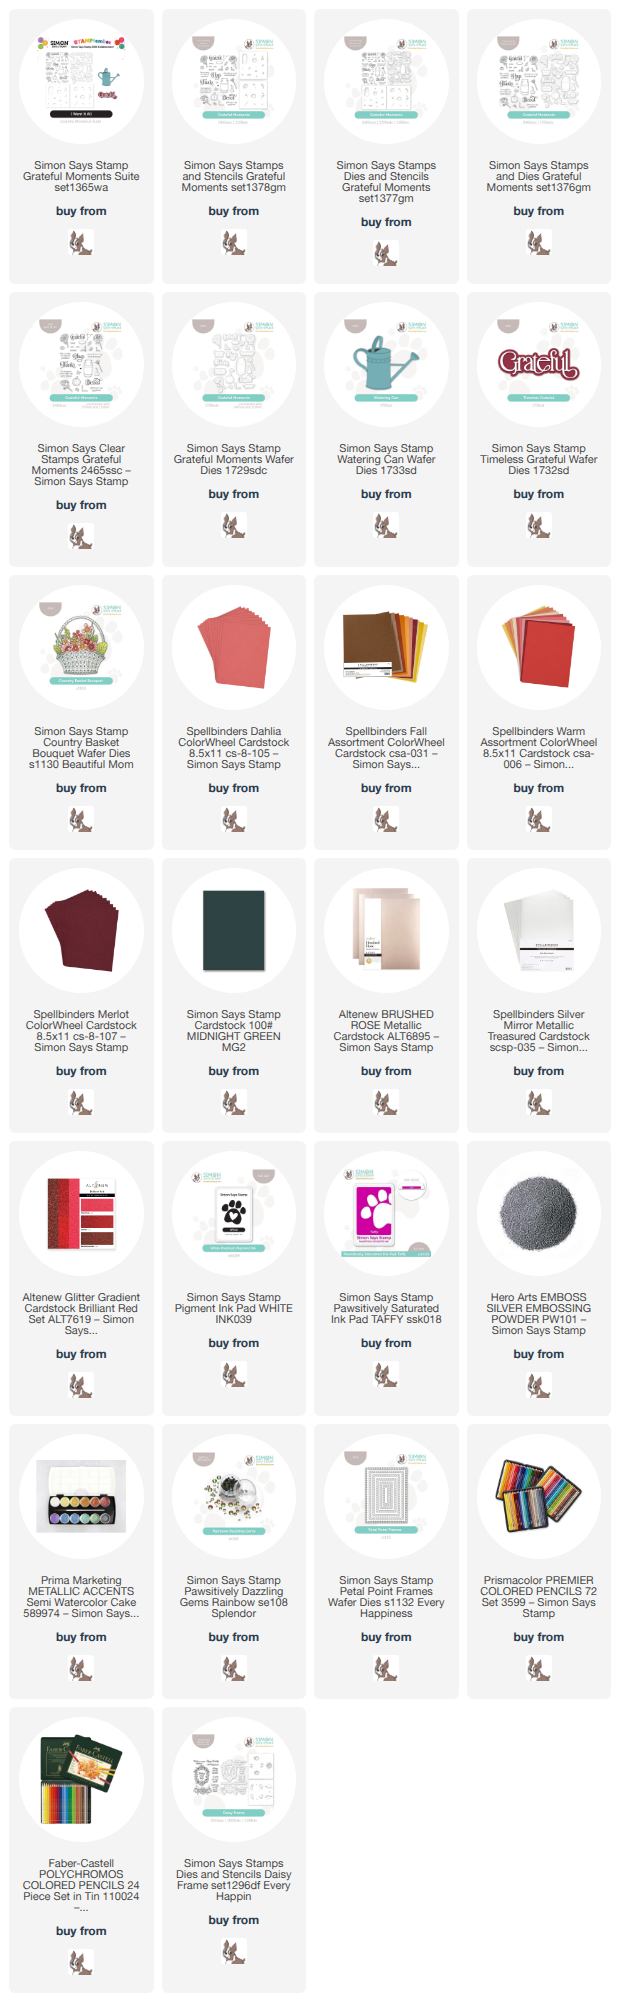
This post was sponsored by Simon Says Stamp. Thanks, Simon! *I have gathered links to all of the products used at the bottom of the post for your convenience, using affiliate links at no extra cost to you. Thank you for shopping with my links! I truly appreciate your support for my work!*

Hi friends! As we wind down on a fabulous STAMPtember celebration, Simon Says Stamp still has a few surprises up their sleeves to share with you! Today, they have released a special collection called Grateful Moments, which is a specially-curated product suite consisting of stamps, coordinating dies and stencils, and couple of extra dies that work beautifully with the Grateful Moments product suite! Click HERE to see the entire collection! These stamps, dies, and stencils will also be restocked if/when they sell out- hooray! I have created two projects today filled with pretty flowers, saturated colors, and gratitude, so let’s get started on the details!

For both of my projects, I wanted to select a color palette that worked beautifully with the autumnal feel of these products from the Grateful Moments product suite, but also had a touch of vivid summertime color. I started with a gorgeous pinky-coral for the card fronts, but then added in burgundy, a rich burnt orange, multiple shades of pink, and some metallics! I think these colors are so striking together!

While these stamps and dies work beautifully with their coordinating stencils, I wanted to take advantage of these absolutely beautiful images by really getting into the weeds with some detailed pencil coloring. I stamped many of the gorgeous images from the Grateful Moments stamp set onto some of that pinky-coral cardstock using Simon Says Stamp’s White Pigment Ink, then used my colored pencils to add lots of vibrant color to the milk jug, flowers, gourd, and pumpkins. I think the effect of the opaque pencils on the colored cardstock is so striking! I cut the finished images out with their coordinating dies.

To ground my cluster of images, I die cut one of the Petal Point Frames from the same pinky-coral cardstock. I also stamped one of the poignant greetings from Grateful Moments onto the colored cardstock using White Pigment Ink, adding white embossing powder over the top to make it really crisp and clean. I also die cut a Timeless Grateful, cutting the detail layer three times-once from rose gold metallic cardsock and twice more from white scrap cardstock, which I layered to create a dimensional greeting, then adhered that onto a burgundy glittery shadow layer. Before I arranged all of the die cuts onto the A2 pinky-coral card front, I blended Taffy Pawsitively Saturated Ink to coordinate with the beautiful pinks of the bouquet and splattered some coppery metallic watercolors on the blended background. I arranged all of the die cuts, adhering them with a variety of heights of foam adhesive, then added a few Rainbow Pawsitively Dazzling Gems to the card. The Rainbow gems really pick up the variety of colors included with all of the images! So much color saturation on this card!

My second card keeps the color palette in the same family, but switches the rose gold for a shining silver! I die cut the new Watering Can standalone die from some shining silver foil cardstock, cutting the accent lines from plain black cardstock. After assembling all of the pieces, I used scraps of cardstock in the same color palette (rich burnt orange, magenta, autumn rose, and hibiscus) along with some jewel green foliage to create a gorgeous floral arrangement in the watering can using the flowers from the previously-released Country Basket Bouquet die set. The size of these blooms worked beautifully with the proportions of the watering can!!

For the greeting, I stamped a sentiment from Grateful Moments onto some deep burgundy cardstock and embossed it with silver embossing powder to tie into the silver watering can. I die cut the sentiments with their coordinating dies. To adorn the pinky-coral A2 card front, I trimmed down some thin strips of cardstock with my guillotine trimmer and adhered them across the bottom with liquid adhesive, creating a ground for my bouquet and greeting so that they were not floating on the card! I arranged all of the die cuts on the card front, adhering them with different heights of foam adhesive, then finally finishing the card with some sparkling Clear Pawsitively Dazzling Gems.

I am just obsessed with this semi-analogous color palette! It’s a bit of a refreshed autumn palette, adding in those cool pinks and coral, but it still definitely has a fall aesthetic!

The folks at Simon Says Stamp are offering a fabulous FLASH SALE to celebrate this newest Grateful Moments release:
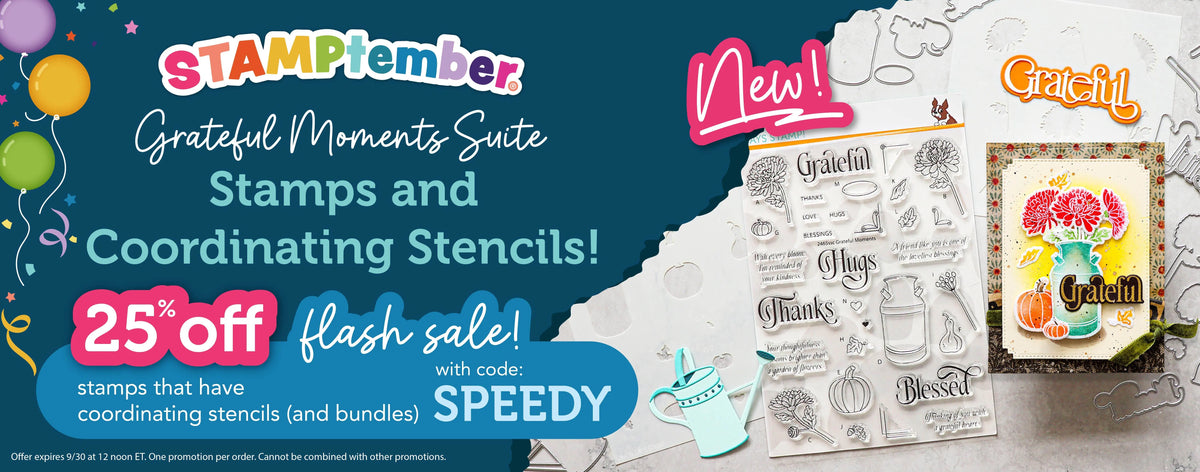
All Simon Says Stamp-branded stamps and coordinating stencils are 25% off using code SPEEDY at checkout! (Click HERE to see everything included with the sale!) The offer expires tomorrow at noon Eastern time, so don’t wait! While I didn’t use the stencils on my projects today, I absolutely adore the ease and speed with which you can create a unique and detailed project without having to dig out your coloring mediums. If coloring isn’t your thing, you definitely will want to take advantage of this sale. I even have one of my own illustrations and it’s coordinating stencils included with this sale! Click HERE to check out the Daisy Frame collection!

Well, that’s all for me today. Thanks so much for stopping by today, and Happy STAMPtember!
Filed Under: simon says stamp Tagged With: colored pencil, country basket, die cutting, grateful, grateful moments, ink blending, no line coloring, petal point frame, stencils, timeless grateful, watering can

Once Upon A Dream with Simon Says Stamp!

August 30, 2024

This post was sponsored by Simon Says Stamp. Thanks, Simon!

Hi friends! I am back with a pair of projects today featuring a new stamp set illustrated by my incredibly talented friend Alberto Gava for Simon Says Stamp: Once Upon A Dream. I definitely had to keep this set under lock and key from my 10 year old daughter… she immediately started squealing when it arrived in the mail! I thought I would make some customized projects for today’s post using this adorable set, including a custom notebook just for her. Let’s get started with the details!

I wanted to use as many of the images in the sweet Once Upon A Dream set, so I stamped lots of them on some white cardstock using black pigment ink and embossed them with clear embossing powder. While it’s not recommended to use alcohol markers with embossed images, I occasionally will use my Copic or OLO markers with clear embossed black outline images, because the clear embossing powder seems to make those black lines so much crisper and more visible. When using cute images like these, I want to have those crisp black lines to help the images stand out even more!

For my first project, I used the Princess Aurora image with the fairies, coloring her dress with some pretty pink and adding some violet down at the bottom of her skirt, channeling the final scene in the movie when her dress is changing from pink to blue over and over! I stamped the images from Once Upon A Dream using black pigment ink and clear embossed them, then used Copic markers to add color to the images in the classic Sleeping Beauty color palette.

To create the background for my die cut images, I placed one of the Nested Domed Arches Masks + Stencils in the center of a white A2 card front, then used blending brushes to blend Pawsitively Saturated Ink in shades of Carnation, Lilac, Cadette, and Tropic inks in an ombré. With the arch stencil still in place, I added the Rainbow Splash Twinkle Stars stencil over the top of the open area and spritzed the twinkling star pattern with iridescent shimmer spray. I love this technique; it adds just the right amount of magical sparkle, which works perfectly with the sweet sentiment from Once Upon A Dream! Just for extra shimmer, I splattered some iridescent glitter watercolors on the stenciled dome, too. I trimmed down the sides (I hadn’t gotten the arch stencil centered 100% perfectly, and so needed to do some maneuvering) and added strips of holographic foil cardstock on either side. I popped up the images and greeting die cuts with foam adhesive, then added a few shimmering gems for added sparkle!

As a bonus project, I decided to create this sweet little notebook for my daughter. I have been trying to organize some of my older craft supplies, and I found a stash of skinny notepads perfect for customizing with inspirational sentiments and colorful images! (I’m not sure where exactly I purchased the notepads that I used, but these notepads from Doodlebug are similar!) The princesses from Once Upon A Dream peeking around the corner was the perfect size to adorn the front of my notebook cover, which I created using the Simon Says Stamp Score Board and some of the heavyweight 130 lb Mega Thick Cardstock from Simon, customizing the cover to the measurements of the notepad. (I will have a video on how I created this project very soon!) I closed the cover for the notebook by adding some 1/4″ white ribbon and adhering it with some Tear-rific Tape.

To decorate the cover of the notebook, I used Pawsitively Saturated Ink in shades of Carnation, Lilac, Cadette, Tropic, and Sunbeam to blend a vibrant rainbow down a panel of white cardstock that fit perfectly over the front of my notebook cover. I also splattered it with some more iridescent glitter watercolors for added shimmer and magic!

After I’d created my notebook cover, I decided to personalize it for my daughter. She’s like me and loves a pretty notebook and a good pen, and she is always on the lookout for things with her initials, so I knew that she would flip out over a completely personalized notebook with rainbows and princesses! I used the Rainbow Splash Classic Uppercase Alpha to personalize it, stamping the letters in black pigment ink and covering them with Iridescent Purple embossing powder. The combination of the black letters with the shimmery, semi-translucent purple embossing powder creates such a unique look! I added all of the die cut elements to the front of the notebook cover with some foam adhesive, finally finishing the project off with some sparkling gems! And yes, I gave it to my daughter, and yes, she did love it. 🙂

Well, that’s all for my projects today! It’s so fun to step outside of my comfort zone with cute and sweet images like these from Once Upon A Dream. Thanks so much for stopping by today, and don’t forget that Simon Says Stamp’s month-long STAMPtember celebration begins on September 1! There are so many amazing surprises in store for you… I can’t wait! Have a marvelous day, friends!

Filed Under: simon says stamp Tagged With: classic uppercase alpha, copic coloring, ink blending, nested domed arches, notebook, notepad, ombre, personalized, princess, rainbow, stencils, twinkle stars stencil

Pinkfresh Studio June 2023 Monthly Challenge-Sunshine On My Mind!

June 4, 2023

Hi there! The new theme for Pinkfresh Studio’s June 2023 Challenge is live, and this month we’re focusing on all things summertime with “Sunshine On My Mind!” (You can read all of the details of the challenge HERE) My kiddos just started their summer vacation, and what could be more appropriate for the start of summer than a party with rosettes and rainbows? I pulled out the Rosettes Stencils and Coordinating Dies, a bunch of pretty ink colors, a hot foil “cheers” sentiment, and created this super festive summer celebration card!

The colors for this month’s challenge are: Coral Reef, Sparkling Rose, Sunshine, Storm, & Meadow. I pulled out all five colors to create this festive rainbow card. Though there are two layers in the Rosettes Stencil set, I used only one shade of ink on each, blending one layer a bit softer and the second layer a bit harder and more intense. The contrast between the two intensities helped to create that 3D effect with the layered stencils!

After I’d finished blending my party rosettes, I die cut them with the Coordinating Dies, which adds stitching details and small die cut holes to make them look extra realistic. I also die cut a slimline card front from some white cardstock using the Essentials Blanket Stitched Slimline Die. I arranged the stenciled rosette die cuts down the front in ROYGBIV fashion, popping some up with foam adhesive, adhering others with liquid adhesive, to create lots of dimension and interest.

To emphasize the rainbow feel of the card, I pulled out my hot foiled sentiments that I’d previously foiled using Aura hot foil from Spellbinders. This foil has a lovely iridescent rainbow sheen to it, which perfectly coordinates with the rainbow theme on my card! I thought the Cheers sentiment from the Modern Script Sentiments Hot Foil Plate set worked perfectly to complete the festive theme of the card. I popped it up with some more foam tape to help it stand out from the busy background, then added some gems down the card front in coordinating colors to complete my summery, cheerful rainbow!

Well, that’s all for my project today! To enter a project of your own, check out all of the details on the Sunshine On My Mind challenge over at Pinkfresh Studio. You could be selected to win a $50 shopping spree to the Pinkfresh Store! Thanks so much for stopping by today, and have a marvelous day!

Filed Under: pinkfresh studio Tagged With: birthday card, celebration, challenge, ink blending, layered stencils, pinkfresh studio challenge, rosettes, slimline, stencils

City Sidewalks, Busy Sidewalks…

December 9, 2022

Hi there! Did you know that Pinkfresh Studio has a monthly challenge? At the start of each month, the folks at Pinkfresh Studio provide a great graphic with a challenge topic and color scheme to jumpstart your creativity. You can enter your projects for a chance to win a $50 shopping spree to the Pinkfresh Studio store! You can check out all of the details HERE. This month’s challenge prompt is the appropriately-timed Happy Holidays! I pulled out a bunch of the beautiful new holiday products from the October 2022 release along with Candy Apple, Sparkling Rose, Meadow, Evergreen, and Sky Blue inks to create this festive and colorful shaker card. Let’s get started with the details!

To start, I heat embossed the Holiday City View stamp on a panel of white cardsock using white pearl embossing powder. I used the coordinating stencils, blending brushes, and the Candy Apple, Sparkling Rose, Meadow, Evergreen, and Sky Blue inks to add lots of vivid color to the background. I love how graphic and versatile this background stamp is! It can absolutely be used outside of the holidays, maybe for a “congratulations on your new home” card or “welcome to the neighborhood”!

To add to the holiday feel of the color scheme, I used the Festive Leaves layering stencils with the Candy Apple, Sparkling Rose, and Meadow inks. I then cut the finished blended images out with the coordinating dies. I love these die cuts of simple holiday greenery! The simplicity of the images works beautifully with the equally-simple stenciled, color-blocked background.

To create my shaker card front, I die cut the Ornate Oval Frame from the center of a white A2 card front, reserving both the positive and negative pieces. I like to try to keep the cellophane packaging when I receive new stamp sets, and some old stamp packaging was the perfect backer for this flat shaker! I backed the full size negative-space A2 panel with this recycled cellophane, then nestled the die cut itself inside and adhered it with some strong tape. I added lots of fun sequins and snowflakes to the inside of the shaker and adhered it using more strong tape, not foam tape. The flat sequins still shake beautifully and it is so much easier to mail!

Once I had completed my shaker card front, I added a couple of hot foiled Brushed Sentiments: Holiday greeting die cuts, hot foiled with Champagne hot foil and die cut with the coordinating dies. I popped the greeting up with some thicker foam tape, then arranged the holiday greenery in a little swag around the sentiment and adhered them with a combination of thin foam tape and liquid adhesive to add lots of different layers of height. The final touch was to add a few Magenta Glitter Drops for one last touch of sparkle!

Well, that’s all for this project today! I hope you’ll take a peek at the Pinkfresh Studio Challenge. I have always found that challenges are such a great way to jumpstart your creativity, and can often open the floodgates for even more creative inspiration. I can’t believe we are only a couple of weeks away from Christmas… I’m not ready for the festive holiday fun to be over yet! Thanks so much for stopping by today, and have a marvelous day!

Filed Under: pinkfresh studio Tagged With: brushed sentiments holiday, festive leaves, holiday card, holiday city view, layering stencil, ornate oval frame, pinkfresh challenge, shaker card, stencils

Pinkfresh Studio August 2022 Stamp, Die, Hot Foil, and Stencil Release Blog Hop + Giveaway!

August 15, 2022

Hi there! Today is the day-beautiful new stamps, dies, hot foil plates, and stencils are being released over at Pinkfresh Studio! We have been sharing sneak peeks over on the Pinkfresh Instagram page, and now all of the new goodies are available for purchase HERE. We are sharing lots of inspiration during today’s blog hop (you can find the full list at the bottom), and I have a project with, gasp, *no* watercoloring on it at all, just lots of beautiful ink blending! Let’s get started with the details!

I love keeping my color palette on my cards as consistent as possible throughout each and every die cut, so I began by ink blending two white card panels with Warm Buff, Peach Fuzz, Coral Reef, and Passion Fruit inks to create a sunrise ombré. On one of the panels, I heat embossed the bouquet from the new Happy Dance stamp set using gold embossing powder. I then used the same ink shades to blend the coordinating Happy Dance layering stencils. This double layer of ink blending helps to keep the color palette the same throughout the project. I cut out the finished blended images using the coordinating dies.

On the second blended panel, I used the bottom portion of the new Leafy Background Stencils to create some monochromatic interest behind my blended flowers. I simply used the darkest ink shades (Coral Reef, and Passion Fruit), applying a little extra pressure and more concentrated ink to allow the stenciled images to stand out.

I die cut one of the new Fancy Circles dies from some matte gold cardstock and layered it on my blended and stenciled card base with some foam tape. I tucked the Happy Dance die cut in the golden circle with some more foam adhesive, allowing some of the flowers to peek over the top and on the sides. For the greeting, I used the Sentiment Suite Thank You dies (for which there are now coordinating Hot Foil plates!) with vellum for the background and gold glitter paper for the sentiment itself. The final touch was a few Peach Fuzz gems for one last touch of sparkle!

Now for some fun giveaway information!

Pinkfresh Studio will be giving away the full release on the Pinkfresh blog & YouTube channel. They are also giving away a total of TEN $25  gift cards along the hop. The winners will be selected from the comments, so the more comments you leave, the better your chance to win!Pinkfresh Studio will pull the winners & post them on August 23, 2022 on their GIVEAWAY PAGE. Winners must check that page & claim your prize within 2 weeks.

Here’s the full hop list:

You are invited to the Inlinkz link party!

Click here to enter

Filed Under: pinkfresh studio Tagged With: fancy circles, happy dance, leafy background, new release, sentiment suite, stencil, stencils

  • Page 1
  • Page 2
  • Go to Next Page »

Primary Sidebar

  • Facebook
  • Instagram
  • Pinterest
  • YouTube

Favorite Shops

Secondary Sidebar

Subscribe

Enter your email address to subscribe to this blog and receive notifications of new posts by email.

Instagram
Something is wrong.
Instagram token error.
Follow
Load More

Archives

Tags

3D embossing folder alcohol markers better press birthday birthday card blog hop card kit christmas christmas card christmas tag colored pencil copic copic coloring Daniel Smith die cutting embossing folder embroidery felt giveaway holiday holiday card hot foil ink blending karin brushmarker pro layered stencil masculine my monthly hero new release no line coloring no line watercolor OLO marker olo markers original illustration pawsitively saturated rainbow shaker card slimline stamping stamptember stencil thank you thinking of you valentine's day video watercolor

Popular Posts

Simon Says Stamp Sending Cheer Blog Hop- Day 2 + Freebie + Giveaway!
Altenew October 2026 Release Blog Hop + Giveaway!
Rustic Monochromatic Stars for Christmas with Rainbow Splash!
Waffleflower July Release Blog Hop!
Hero Arts Partners Blog Hop: Lawn Fawn!
March 2020 Essentials By Ellen Blog Hop+Giveaway!
December 2018 My Monthly Hero Blog Hop + Giveaway!
The Ton Stamps Summer Release: Day 1
The Ton Anniversary Release: Day 1!
Altenew Paint A Flower: Carnation Blog Hop+Giveaway!

Disclosure

Some affiliate links are used in my posts. This means that, should you click on one of my links and purchase something from that company, I will receive a small portion of the sale at no extra cost to you. I use the money earned from these sales to help maintain my blog. I so appreciate you visiting and, if you do choose to use one of my affiliate links, thank you so much for your support!
Copyright © 2026 ·Brunch Pro Theme · Genesis Framework by StudioPress · WordPress · Log in
Loading Comments...