• Skip to main content
  • Skip to primary sidebar
  • Skip to secondary sidebar

Sixth Street Sundries

Emily Midgett

  • Home
  • About Me
  • Contact
  • OLO Marker Color Swatch Chart
  • Shop

sunshine and smiles

Blended Hydrangeas with Simon Says Stamp!

August 27, 2026

This post was sponsored by Simon Says Stamp. Thanks, Simon! *I have gathered links to all of the products used at the bottom of the post for your convenience, using affiliate links at no extra cost to you. Thank you for shopping with my links! I truly appreciate your support for my work!*

Hi friends! I have another hydrangea project for you today, this time without the stencils! The details that stencils can provide on embossed images is incredible, but sometimes I don’t want the details to be quite so crisp and clean, preferring instead to have the details a bit more fluid and ethereal. The Gorgeous Hydrangea embossing folder and die set allows you to create those exquisite details with or without stencils, depending on your method of coloring. In THIS post, I used the embossing folder alone with the stencils, but for today’s project, I thought I would showcase the beauty in the detailed die cut alone. Let’s get started with the details on my project!

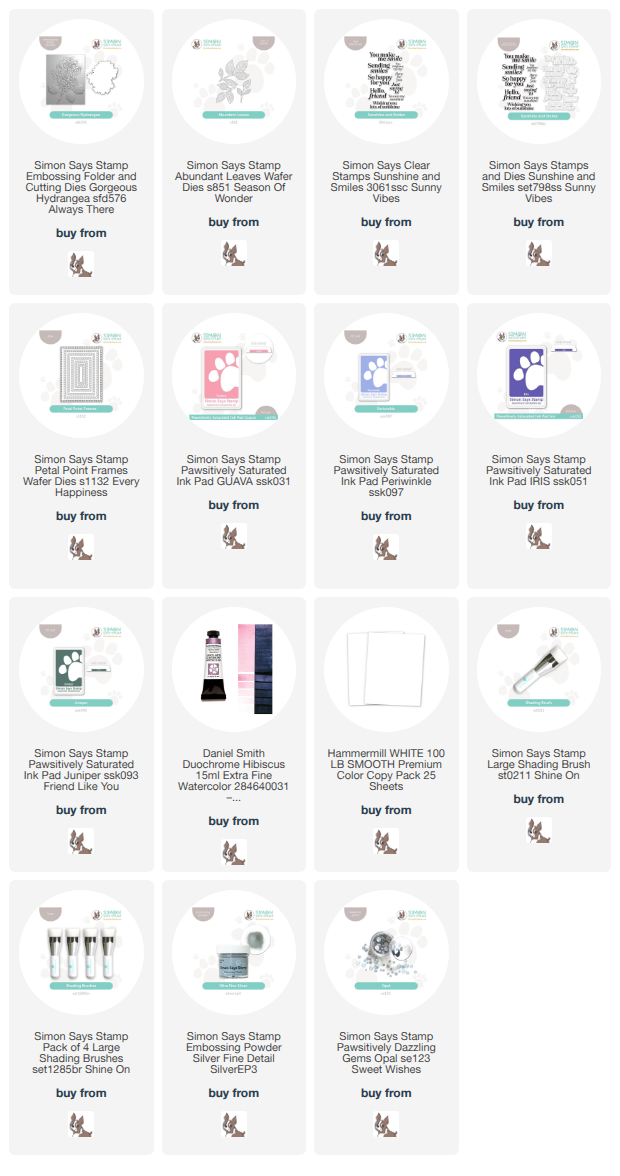
To begin, I die cut the large floral image from the Gorgeous Hydrangea folder/die set using white cardstock, then placed the die cut in the appropriate spot inside the embossing folder and ran it through my die cutting machine. Once I had the blossoms ready for color, I blended Pawsitively Saturated Inks in shades of Guava, Periwinkle, and Iris on the die cut using Shading Brushes, making sure to spread the colors out throughout the bloom as an homage to the gorgeous hydrangeas from my trip to the East Coast as a child. The color palette reminds me of cotton candy or a Bubbleberry Sno-Cone! Once I had completed the blending, I added some pink shimmery watercolor to each bloom for a touch of sparkle.

Once I had completed the large hydrangea bloom, I knew I needed to add some greenery. I die cut one of my favorite foliage die sets, called Abundant Leaves, from white cardstock, then used a Shading Brush to add Juniper ink to the leaves, tapering the color off at the edges of each leaf. I also knew that I wanted a frame upon which I could build my bouquet and frame my sentiment, so I die cut the medium Petal Point Frames from some more white cardstock. I adhered the frame on a white A2 card front using foam adhesive, allowing the frame’s edge to spill off of the left side and trimming it with my sharp scissors. I arranged the blended hydrangea over the top and tucked the foliage behind it, adhering everything with foam adhesive.

After I had completed the bouquet, I embossed a greeting from the Sunshine & Smiles stamp set, using silver embossing powder and die cutting it with it’s coordinating die. I tucked the sentiment in the bouquet with some more foam adhesive, finishing everything off with some Opal Pawsitively Dazzling Gems at the center of each blossom!

Well, that’s all for me today! I think that detail that is captured with the embossed die cut is absolutely scrumptious. It’s so fun to watch it come to life with some gorgeous ink colors and sparkles! Thanks so much for stopping by today, and have a marvelous day!
Filed Under: simon says stamp Tagged With: abundant leaves, die cutting, embossing folder, gorgeous hydrangea, hydrangea, petal point frames, sunshine and smiles

Pinkfresh Studio “Sunshine & Smiles” Release Blog Hop + Giveaway!

May 20, 2025

Hi friends! I am hopping along with Pinkfresh Studio today to share inspiration using their gorgeous new Sunshine and Smiles release that just went live! You can see the full hop list at the bottom of this post. I have a pair of lovely and soft springtime cards using several of the new press plates and dies. Let’s get started with the details on my projects!

*I have gathered links to all of the products used at the bottom of the post for your convenience, using affiliate links. Thank you for shopping with my links! I truly appreciate your support for my work!*

For both of my projects, I kept the color palette light and airy, pulling Ballet Slipper, Sparkling Rose, Soft Lilac, Mint, Meadow, Emerald City, and Slumber Pinkfresh Studio inks. These colors work so beautifully together, and I am so pleased with the results of this pairing with these new press plates, stencils, and dies!

For my first project, I thought I would take advantage of the generous size on the new Timeless Tulips Press Plate, Stamps, and Dies product suite to create an A7 birthday card! I used Meadow Ink to press the Timeless Tulips image once into a panel of A7 Porcelain Better Press cardstock and again on a separate panel of cardstock, then used the 1″ Blending Brushes and the coordinating stencils with Ballet Slipper, Sparkling Rose, Soft Lilac, Mint, Meadow, and Emerald City inks. I think this image is so beautiful and graceful! After I had stenciled both images, I used the coordinating Timeless Tulips die to cut one of the images out. I also used Lilac and Slumber inks to create a lovely and soft blended background behind my pastel tulips, splattering the entire blended panel with some shimmering handmade watercolors.

Once I had finished blending the images, I used those same shimmering watercolors to add some sparkling highlights to the edges of the tulips and the center of each leaf. It’s such a pretty effect, but so difficult to capture in a photo!

For the greeting, I used a sweet sentiment from the new Sunshine and Smiles stamps and die product suite, stamping it on white cardstock using Emerald City ink, then again with embossing ink and adding Iridescent Lavender Embossing Powder over the top to add extra gorgeous shimmer to the sentiment. I die cut the greeting with it’s coordinating die, then used the Fancy Edgers dies to die cut a lacy strip of Pinkfresh Studio Glacier glitter cardstock. I adhered this lacy edge to a strip of Simon Says Stamp Vellum, which reminds me of a lovely handkerchief, and mounted the sentiment die cut in the center of the “hankie” with some foam adhesive squares. I adhered the die cuts to the card front with more dimensional foam adhesive squares. The vellum behind the sentiment helps soften the images on the card front so that the sentiment can pop a bit better, while also not adding any additional visual weight to the card front! I finished the card off with some Iridescent Bubble Drops and a delicate white silk bow for added texture.

For my second project, I kept the color palette similarly soft and feminine, pairing the soft Blush cardstock from Spellbinders with Simon Says Stamp Mint cardstock to create a vintage jadeite effect. I began by ink blending the bottles from the Keepsakes of the Heart product suite onto the Mint cardstock using Mint and Meadow inks. I also stamped the blooms and foliage sprigs from the coordinating stamp set onto some more Mint cardstock using Meadow ink, then used the coordinating stencils to blend Ballet Slipper, Sparkling Rose, Mint, Meadow on the images. The tone-on-tone blending on the minty cardstock reminds me so much of my vintage jadeite pieces! I used the coordinating dies to die cut the finished stenciled images.

For the background, I used the trick that I demonstrate in THIS video to impress the new Garden Medley press plate into Spellbinders Blush cardstock with Ballet Slipper ink. I love the spectacularly detailed texture that this adds to my card front! I die cut one of the new Stitched Rectangle Dies from some Simon Says Stamp Vellum and used that piece to ground my floral vase arrangement on the textured background. I die cut “love” from the now-discontinued Julieta Alpha dies from some Pinkfresh Studio Glacier glitter cardstock (I have linked some alphabet dies that would work well in place of the older Julieta set!) and arranged them in the corner, tucking them amongst the foliage and flowers with liquid and foam adhesive. I added a greeting from the Keepsakes of the Heart stamp set, stamping it on some deep emerald green cardstock using white pigment ink, then adding more iridescent lavender embossing powder to add some extra shimmer. I adhered the sentiment on the card front with a double layer of foam adhesive, then added a few Blossom Glitter Drops for added shimmer and sparkle!

Well, that’s all for my projects today! Now for some fun giveaway information:

To celebrate this release, Pinkfresh Studio will be giving away the full release on the Pinkfresh blog and YouTube channel. They will also give away TEN $50 gift cards along the hop. The winners will be selected from the comments, at random. The more comments you leave along the hop, the more chances you have to win! Winners will be selected and posted on May 28, 2025, on our GIVEAWAY PAGE. Winners must check that page and claim their prize within two weeks

Here’s the full hop list:

You are invited to the Inlinkz link party!

Click here to enter

Thanks so much for stopping by today, and happy hopping!

Products used:

Filed Under: pinkfresh studio Tagged With: better press, betterpress, essentials single stitch rectangles, fancy edgers dies, garden medley, ink blending, keepsakes of the heart, layered stencils, press plates, sunshine and smiles, timeless tulips

One Die, Two Cards with Simon Says Stamp!

July 31, 2024

This post was sponsored by Simon Says Stamp. Thanks, Simon!

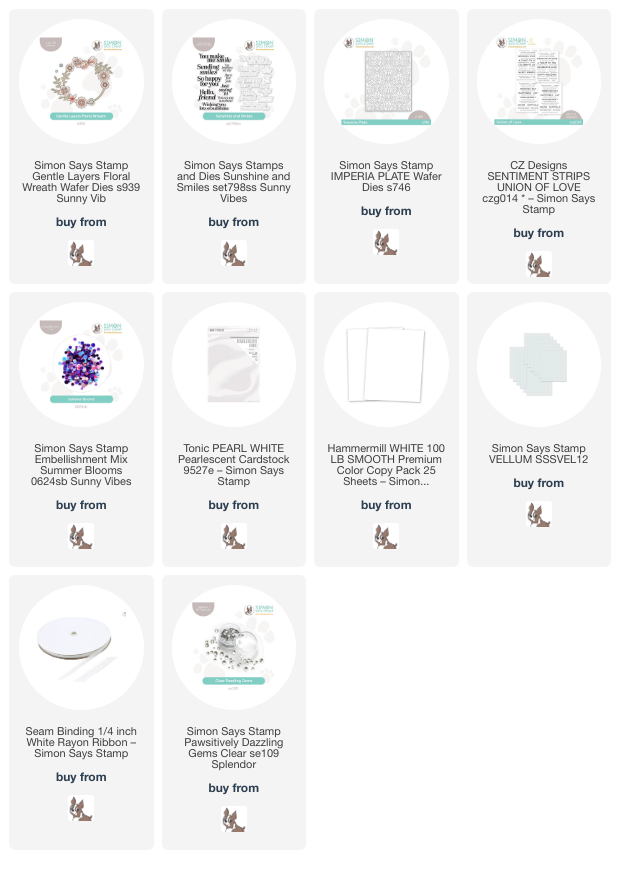
Hi friends! I have a pair of crisp projects to share with you today using the same die in two different ways! When working with monochromatic or tone-on-tone color palettes, I like to use lots of different textures of cardstock in the same color palette to keep the contrast and visual interest high. For today’s projects, I die cut the newer Gentle Layers Floral Wreath dies from both plain Hammermill white cardstock as well as pearlescent white cardstock, then added some coloring and textural details with other die cuts to create these crisp and clean cards. Let’s get started with the details!

For both of my projects, I used the delicate blooms from the Gentle Layers Floral Wreath dies to create some decorative floral focal points, using my alcohol markers to add vibrant pinks to one set of the floral die cuts and keeping the others plain. Using alcohol markers to add vibrant color to specialty cardstocks is a fun way to get extra uses out of your fun coated cardstock!

For my first project, I created a fun shaker card, taking advantage of the open window behind the Gentle Layers Floral Wreath die set for my shaker background. I die cut the floral wreath and coordinating flower dies from both plain white cardstock and white pearl cardstock, then used alcohol markers to add vibrant pinks to only the flower die cuts, layering the finished flowers on their correct spot on the Gentle Layers Floral Wreath die cut. I didn’t go too crazy with the shading on the flowers, simply using one color per flower, then using the different layers to add interest and contrast to the images.

To create my shaker window, I used a circle die that was slightly smaller than the opening for my circular wreath die cut, cut on the bottom right of my A2 card front and backed with some clear acetate. I filled my shaker with some Summer Blooms embellishment mix, then adhered the finished wreath around the circular window using liquid adhesive. I trimmed down a wedding sentiment strip (which I think is from a discontinued set, but THIS set is similar!) and added a delicate bow, dyed a coordinating shade of pink using one of the same alcohol markers and some white ribbon. Finally, I added a few Clear Pawsitively Dazzling Gems for added sparkle!

For my second project, I wanted to take advantage of the leftovers from my first card. Because I had die cut the wreath components from both Hammermill white cardstock and pearlescent white cardstock and used only the pearlescent flowers for the wreath arrangement, I had a pearlescent wreath base and plain white flowers leftover. I changed up the layout a bit, preferring instead to arrange parts of the wreath and flowers around the edge of a vellum die cut circle.

For the background, I die cut a panel of white cardstock using the Imperia cover plate die, which adds beautiful pierced texture to your panel of cardstock without actually cutting any shapes from it. I added the embellished vellum circle die cut to the textured card front, hiding the foam adhesive behind the solid die cuts. I embossed a sentiment from Sunshine and Smiles stamps and dies using silver embossing powder and added it to the center of the vellum circle. Finally, I added a few sparkling Clear Pawsitively Dazzling Gems to fill the arrangement out a bit more and cover more of the card front.

Well, that’s all for my projects today! I cannot believe that we are already approaching back to school time… the summer has flown by so quickly! I can’t wait to get my fill of holiday cardmaking very soon. Thanks so much for stopping by today, and have a marvelous day!

Filed Under: simon says stamp Tagged With: alcohol markers, engagement card, gentle layers floral wreath, imperia plate, sentiment strips, shaker card, sunshine and smiles, wedding card

NEW Simon Says Stamp Sunny Vibes Release!

June 19, 2024

This post was sponsored by Simon Says Stamp. Thanks, Simon!

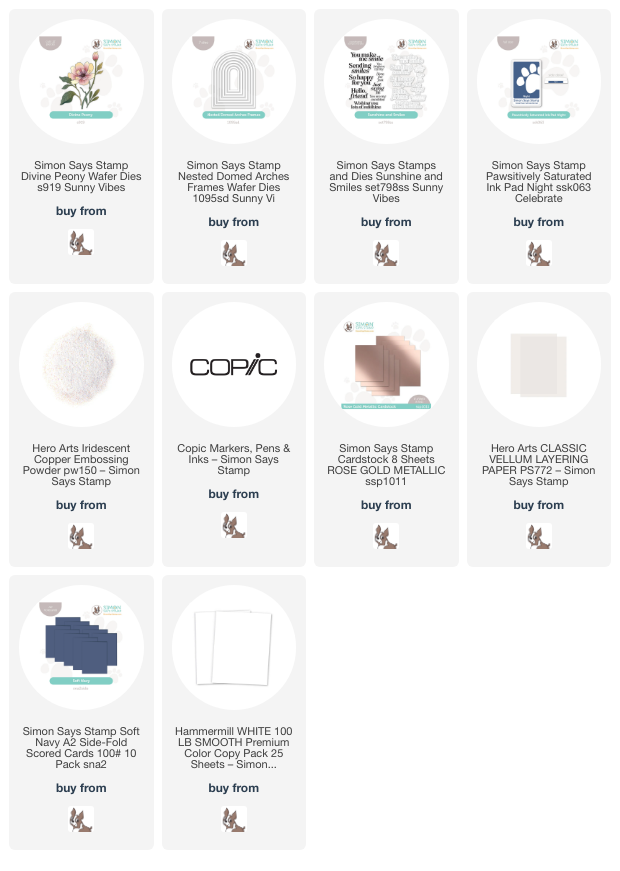
Hi friends! The new Simon Says Stamp Sunny Vibes release is now available, and it’s filled with absolutely stunning new goodies, from summery beach images to beautiful sentiments to gorgeous flower stamps and dies. I, of course, was particularly drawn to the beautiful new floral images, especially the new Divine Peony die. I am perpetually a sucker for peonies, and the beautiful layers and details on this new Divine Peony die set are so graceful and elegant that I just couldn’t resist customizing them with some alcohol marker coloring. Let’s get started with the details!

I began my project by die cutting the new Divine Peony die from Hammermill white cardstock. I then used various shades of Copic markers to color the peony bloom in a lovely warm peach tones, intensifying the vibrancy for the layers in the very back of the peony and following the debossed lines as guides for where to put extra shading and shadows. I used some warm sage greens for the foliage, keeping all of the colors very muted and delicate.

After I had finished assembling the colored peony die cuts, I blended some Night Pawsitively Saturated Ink onto one of the new Soft Navy ready made card bases. Having card bases already cut and scored makes the process super quick and easy! After I had blended a deeper navy “spotlight” on my background, I splattered some sparkly rose gold watercolors on the blended area. To continue my rose gold accents, I die cut a frame using the new Nested Domed Arches Frames from some of Simon Says Stamp’s gorgeous Metallic Rose Gold cardstock. This blush foil cardstock is so gorgeous and a very unique color amongst the shades of rose gold cardstock in my stash; truly, it’s a must-have, in my book anyway! I adhered the frame to my splattered and blended background using some liquid adhesive.

After I had adhered my shiny arch frame on to the card front, I heat embossed a greeting from the new Sunshine and Smiles sentiment set onto some vellum using Iridescent Copper embossing powder. The warm peachy tones in the embossed sentiment accent the rose gold frame and splatter beautifully and pick up the warm coppery tones in the colored peony flower! I popped up the peony with some foam squares, then tucked the greeting amongst the foliage with some thin strips of foam adhesive. Finally, I added a smattering of coordinating peachy gems for added sparkle!

Well, that’s all for my project today! The new Sunny Vibes release has so many exceptional new products; I can’t wait to share all that I’ve created with you! Be sure to stop back here later this week, as well, for the fabulous blog hop and its wealth of inspiration. Thanks so much for stopping by today, and have a marvelous day!

Filed Under: simon says stamp Tagged With: copic coloring, die cutting, divine peony, nested domed arches frames, sunny vibes, sunshine and smiles

Primary Sidebar

  • Facebook
  • Instagram
  • Pinterest
  • YouTube

Favorite Shops

Secondary Sidebar

Subscribe

Enter your email address to subscribe to this blog and receive notifications of new posts by email.

Instagram
Something is wrong.
Instagram token error.
Follow
Load More

Archives

Tags

3D embossing folder alcohol markers better press birthday birthday card blog hop card kit christmas christmas card christmas tag colored pencil copic copic coloring Daniel Smith die cutting embossing folder embroidery felt giveaway holiday holiday card hot foil ink blending karin brushmarker pro layered stencil masculine my monthly hero new release no line coloring no line watercolor OLO marker olo markers original illustration pawsitively saturated rainbow shaker card slimline stamping stamptember stencil thank you thinking of you valentine's day video watercolor

Popular Posts

Simon Says Stamp December 2026 Card Kit of the Month: Frosted Botanical!
Simon Says Stamp Joy For You Blog Hop- Day 1!
More Frozen Fractals with Simon Says Stamp!
Frozen Fractals All Around with New Simon Says Stamp Joy For You Release!
Two Simon Says Stamp Holiday Exclusive Projects with Tim Holtz and Art Impressions!
Shaped Holiday Shaker Card with New Simon Says Stamp Jolly Season Card Kit of the Month!
Simon Says Stamp Card Kit November 2026: Jolly Season!
Simon Says Stamp Glory to the Newborn King Holiday Kit-Part II!
Songs of the Season: I Heard the Bells on Christmas Day...
Fluted Frames and Tags with New Simon Says Stamp!

Disclosure

Some affiliate links are used in my posts. This means that, should you click on one of my links and purchase something from that company, I will receive a small portion of the sale at no extra cost to you. I use the money earned from these sales to help maintain my blog. I so appreciate you visiting and, if you do choose to use one of my affiliate links, thank you so much for your support!
Copyright © 2026 ·Brunch Pro Theme · Genesis Framework by StudioPress · WordPress · Log in
Loading Comments...