• Skip to main content
  • Skip to primary sidebar
  • Skip to secondary sidebar

Sixth Street Sundries

Emily Midgett

  • Home
  • About Me
  • Contact
  • OLO Marker Color Swatch Chart
  • Shop

swoopy love you

Textured Hearts with New Simon Says Stamp!

January 29, 2026


This post was sponsored by Simon Says Stamp. Thanks, Simon! *I have gathered links to all of the products used at the bottom of the post for your convenience, using affiliate links at no extra cost to you. Thank you for shopping with my links! I truly appreciate your support for my work!*

Hi friends! I have some new inspiration for you today featuring some beautiful new heart dies from the Heart to Heart Release  from Simon Says Stamp (click HERE to check out the entire release!). The release featured lots of beautiful stamps and dies to use to create your valentines, and I just couldn’t resist pairing some of them to create these pretty valentines in a lovely blush/pink/magenta color palette, with just a touch of rich plummy pink thrown in! I had enough die cuts to create two different cards, which makes it even better… so let’s get started with the details!

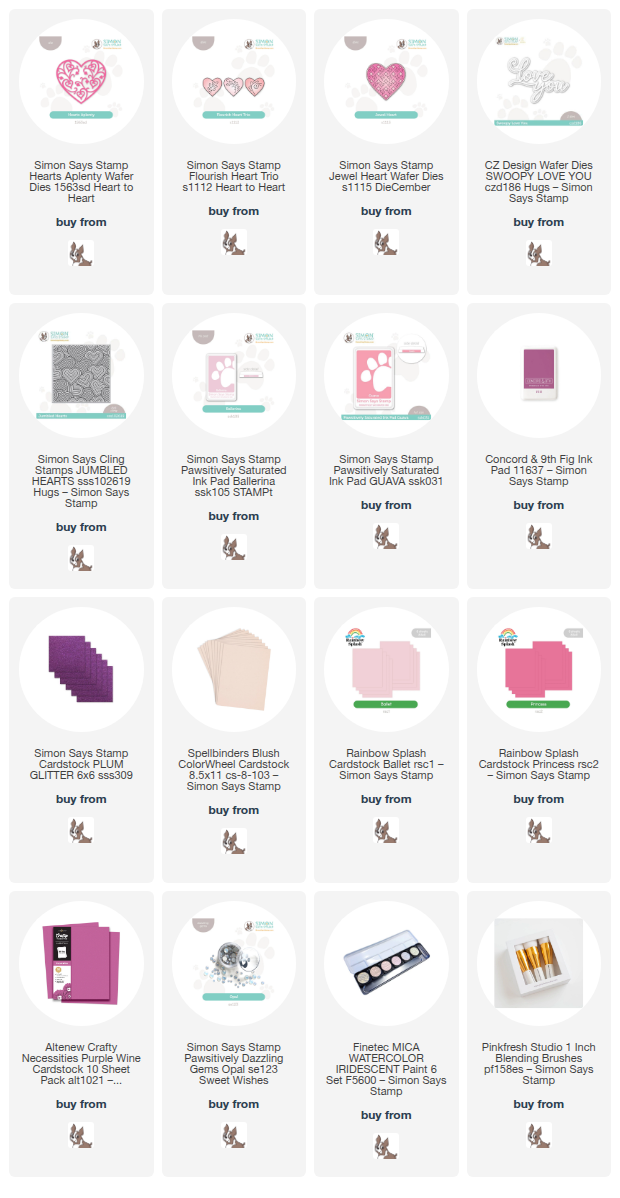
I loved the color palette that I used for THIS card, so I pulled several different scraps of coordinating colored cardstock to use for my standalone die cuts. The details on the new heart dies from the Heart to Heart release are so exquisite and definitely deserve to be center stage!! I used the scraps of cardstock to die cut Hearts Aplenty, Flourish Heart Trio, and Jewel Heart as many times as I could from each color, so that I would have plenty of die cuts to use to create my cards.

Before arranging the die cuts on my card front, I used blending brushes to very lightly blend Concord and 9th Fig ink and Pawsitively Saturated Ink in shades of Ballerina + Guava on my white A2 card front. I kept the blending very subtle to keep the background from overpowering the heart die cuts, just a suggestion of coordinating color. I also splattered the blended background with some iridescent glitter watercolors for added shimmer!

Once my background had dried, I used a mixture of liquid adhesive and foam adhesive squares to add the hearts in a random pattern, making sure to get a good mixture of sizes and colors throughout the card front. For any hearts hanging over the edge, I simply used some sharp scissors to snip off any excesses. I added a glitter die cut Swoopy Love You to the solid pink heart, selecting a lighter shade of pink for that heart and then creating a contrasting deep purple glitter die cut sentiment. Making this sentiment the darkest color on the card front ensures that the greeting pops off of the card. Finally, I added a few Opal Pawsitively Dazzling Gems for additional sparkle!

My second card primarily uses the “leftovers” from the first project. Because the Flourish Heart Trio is a single die that cuts three individual shapes, I had several left and decided to use them all on their own! I created a couple of strips of glitter cardstock, then decided to use those to create a barrier for a patterned strip on the exterior edge. I stamped the Jumbled Hearts background with Ballerina Pawsitively Saturated Ink just on the edge of my A2 card front. I adhered the glitter cardstock strips over the seam between the white cardstock side and the patterned side with liquid adhesive, then popped up the hearts in a neat line on top of the strips using foam adhesive squares. No sentiment required for this clean and simple notecard!!

Well, that’s all for my project today! Do you make lots of valentines for those special people in your life? I am going to try to have a handmade valentine for each of my kiddos and my husband this year! Thanks so much for stopping by today, and have a marvelous day!
Filed Under: simon says stamp Tagged With: die cutting, flourish heart trio, hearts aplenty, ink blending, jewel heart, jumbled hearts, love you, pawsitively saturated ink, swoopy love you, valentine, valentine's day

Love You Shake-Shake-Shaker Card with New Simon Says Stamp!

January 6, 2025

This post was sponsored by Simon Says Stamp. Thanks, Simon!

Hi friends! Happy New Year to you! While I still have my Christmas decorations up (a combination of not having time to take them down and not really wanting to be without the glow of the Christmas lights just yet!), the cardmaking world is moving on from the holidays to all things Valentine’s Day and even some spring! Simon Says Stamp had a new release go live on December 19, called the To Love release, which celebrates all things love and romance! I took a break from my holiday crafting to work with pinks, reds, and hearts, and I can’t wait to share all of the projects that I created with you. I am starting things off with this in-your-face-magenta shaker card, so let’s get started with the details!

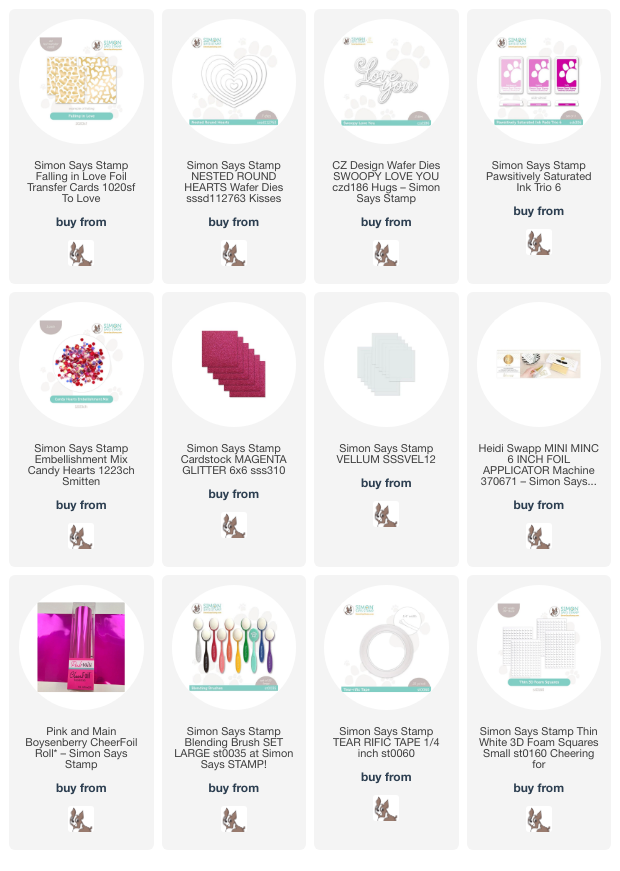
*I have gathered links to all of the products used at the bottom of the post for your convenience, using affiliate links. Thank you for shopping with my links! I truly appreciate your support for my work!*

I absolutely love the foil transfer cards from Simon Says Stamp. They create the quickest, most fabulous backgrounds lickety split, and the new Falling In Love Foil Transfer Cards feature the loveliest whimsical heart designs! I used my Minc machine with some gorgeous magenta toner transfer foil to foil this whimsical heart background, then used blending brushes to blend Pawsitively Saturated Ink Trio 6-Bubblegum, Sweets, Taffy inks in a dark-to-light ombré. I trimmed down the finished panel slightly, then used some leftover stamp packaging to create a flat shaker pocket, adding strips of super sticky Tear-rific Tape to the back to create my flat shaker pocket. I filled the pocket with Candy Hearts Sequins and mounted it in the center of a full sized A2 panel of coordinating magenta cardstock, creating a thin hot pink frame around the edges of my shaker card front.

For the greeting, I die cut the detail layer of the Swoopy Love You sentiment die set from some coordinating hot pink glitter cardstock, then die cut the shadow layer from some Simon Says Stamp vellum. I used tiny dots of liquid adhesive behind the solid die cuts to the adhere the layered sentiment die cut at an angle to the bottom of my shaker card front.

After adhering the sentiment, I decided to embellish the card front with a visual cascade of hearts, so I die cut a couple of sizes of Nested Round Hearts from some more of the same magenta cardstock used for the card base. I used a blending brush to blend some more hot pink ink around the edges of the hearts, then popped them up on the card front using some thin foam adhesive squares!

Well, that’s all for today’s project. Those foil transfer cards really make quick work of your card, creating such beautiful and detailed backgrounds and focal points for you with minimal effort. Some sequins and a glittery sentiment to finish everything off made this card come together super quickly. Thanks so much for stopping by today, and have a marvelous day!

Filed Under: simon says stamp Tagged With: die cutting, falling in love foil transfer cards, foil transfer card, hot foil, ink blending, minc, nested round hearts, shaker card, swoopy love you, toner foil, valentine's day

Team Alcohol Marker or Team Glitter? Floral Die Cuts Two Ways with Simon Says Stamp!

April 10, 2024

This post was sponsored by Simon Says Stamp. Thanks, Simon!

Hi friends! My oldest son recently asked me what my favorite color is, and do you know… I couldn’t answer. I love too many to have one particular favorite! Case in point, my infatuation with Concord and 9th’s Fig. It’s the most luscious shade of purple- not quite fuchsia, not quite plum…. so unique and gorgeous. I found some glitter paper in my stash that matches it absolutely perfectly, and thought to myself that I needed to make a project with some detailed tone-on-tone die cutting. I couldn’t stop at just one, so I created two of course! I used the new Meadow Swag dies from the Simon Says Stamp Be Bold release, working with them in two completely different “mediums” (if you can truly call glitter cardstock a medium, ha!). Let’s get started with the details!

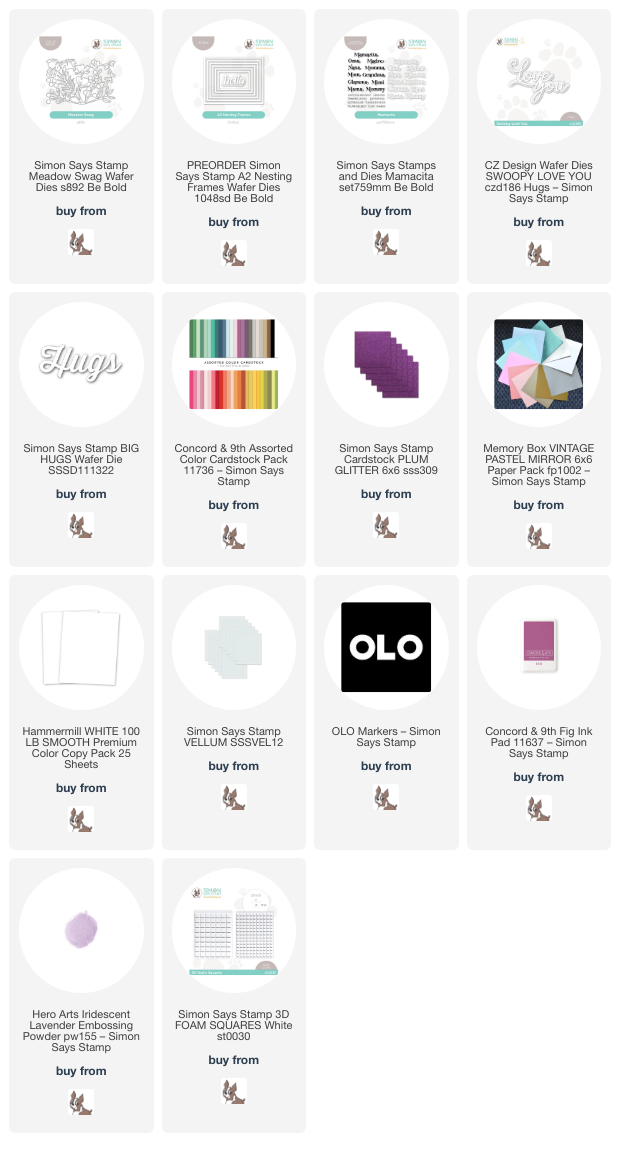
For my projects, I pulled out some Fig cardstock from the Concord and 9th cardstock sampler pack, matching it with Plum Glitter cardstock from Simon Says Stamp. I always say that it pays to have specialty card stock in lots of different shades in your stash, because you never know when something will match perfectly! I also pulled out the coordinating Concord and 9th Fig ink and a plethora of dies, new and old, to create my pair of purplicious cards.

For my first card, I die cut the Meadow Swag dies twice from white cardstock, then used my OLO Markers to add lots of vibrant color. The purple markers from OLO are truly special and are such unique shades amongst the alcohol marker brands. I love that with some simple white cardstock and your alcohol markers, you can create completely customized die cuts even if you don’t care to keep an abundant stash of colorful cardstock like, ahem, some people do! (Not that I would know anything about that…..) Before adhering my colorful floral arrangement to my A2 sized Fig card front, I added an iridescent white frame cut using the new A2 Nesting Frames dies, centering it on my card front. I popped up the vibrant flowers using lots of foam squares. It’s a bit tedious to add these foam squares to such an intricate arrangement, but I think the dimension it adds is totally worth it!

For the greeting, I heat embossed the “madre” sentiment from the new Mamacita stamp and die set. I took four years of Spanish in high school and have called my mom “madre” for (yikes) twenty years, so I was so excited to see this stamp included in the Mamacita set. I heat embossed the sentiment on some Fig cardstock using Hero Arts Iridescent Lavender embossing powder. This translucent and iridescent embossing powder looks incredible on both white and colored cardstock. Definitely a must-have, in my opinion! I also die cut the detail layer of the Swoopy Love You Dies from some Plum Glitter cardstock and backed it with a vellum shadow layer, which helps the tone-on-tone glitter sentiment stand out a bit better from the colorful floral background. I added the greeting die cuts in the center of the floral arrangement with some more foam adhesive, then added a few shimmering gems for one last touch of sparkle. Such an intricate, eye-catching card, I think! That purple just grabs your attention!

My second card is a bit simpler in concept, allowing the intricacy of the Meadow Swag dies and the vibrant plum hues in the Fig cardstock and the Plum Glitter cardstock to do most of the work for me. I die cut the Meadow Swag from the Plum Glitter cardstock a couple of times, then trimmed down some Fig cardstock to both an A2 panel and a piece to 3.75″ x 5″. I blended the coordinating Concord and 9th Fig ink around the edge of the smaller panel and splattered it with some iridescent lavender glitter watercolors from my stash to add extra interest to the background. I arranged the glittering floral die cuts around the edge of the blended panel, creating almost a sunset silhouette effect against the blended cardstock.

After I had adhered all of the intricate floral die cuts on the blended panel using liquid adhesive, I placed the entire patterned panel in the center of a full size A2 Fig card front. For the greeting, I die cut one of my favorite sentiment dies from Simon Says Stamp: the Big Hugs die. To get lots of contrast and allow the sentiment to stand out from the monochromatic patterned background, I cut this bold sentiment from some more iridescent white mirror cardstock, then popped it up in the blank area of the patterned glittery panel using foam adhesive. Finally, I added a few more shiny gems for more contrast and sparkle!

Well, that’s all for my projects today! Which do you like better: the alcohol marker die cuts or the monochromatic glitter die cuts? If I have the time, I will always love coloring my standalone die cuts, but you can’t beat the dramatic effect of the glittery die cuts, especially when you’re short on time! Thanks so much for stopping by today, and have a marvelous day!

Filed Under: simon says stamp Tagged With: A2 Nesting Frames dies, Be Bold release, big hugs die, concord and 9th cardstock, mamacita, meadow swag, monochromatic, OLO marker, swoopy love you

Primary Sidebar

  • Facebook
  • Instagram
  • Pinterest
  • YouTube

Favorite Shops

Secondary Sidebar

Subscribe

Enter your email address to subscribe to this blog and receive notifications of new posts by email.

Instagram
Something is wrong.
Instagram token error.
Follow
Load More

Archives

Tags

3D embossing folder alcohol markers better press birthday birthday card blog hop card kit christmas christmas card christmas tag colored pencil copic copic coloring Daniel Smith die cutting embossing folder embroidery felt giveaway holiday holiday card hot foil ink blending karin brushmarker pro layered stencil masculine my monthly hero new release no line coloring no line watercolor OLO marker olo markers original illustration pawsitively saturated rainbow shaker card slimline stamping stamptember stencil thank you thinking of you valentine's day video watercolor

Popular Posts

Simon Says Stamp Sending Cheer Blog Hop- Day 2 + Freebie + Giveaway!
Joyful Snowman with New Simon Says Stamp Sending Cheer Release!
Simon Says Stamp Sending Cheer Release: Now Available!
Altenew October 2026 Release Blog Hop + Giveaway!
Special Release: Simon Says Stamp Limited Edition STAMPtember Christmas Card Kit!
February 2018 My Monthly Hero Blog Hop!
Altenew March 2020 Release Blog Hop+Giveaway!
Simon Says Stamp Cozy & Bright Inspiration, Part Two!
Essentials By Ellen September Blog Hop!
Waffleflower December Release Blog Hop!

Disclosure

Some affiliate links are used in my posts. This means that, should you click on one of my links and purchase something from that company, I will receive a small portion of the sale at no extra cost to you. I use the money earned from these sales to help maintain my blog. I so appreciate you visiting and, if you do choose to use one of my affiliate links, thank you so much for your support!
Copyright © 2026 ·Brunch Pro Theme · Genesis Framework by StudioPress · WordPress · Log in
Loading Comments...