• Skip to main content
  • Skip to primary sidebar
  • Skip to secondary sidebar

Sixth Street Sundries

Emily Midgett

  • Home
  • About Me
  • Contact
  • OLO Marker Color Swatch Chart
  • Shop

talavera vine

Fun with Felt-Gift Bag and Tag!

February 7, 2025

This post was sponsored by Simon Says Stamp. Thanks, Simon!

Hi friends! I am starting a new series here on my blog: Fun with Felt! Once a month, I am planning to share projects created using all of the gorgeous felt that I’ve acquired over the last few months. I have been practicing embroidery after long contemplation (the struggle is real on picking up new hobbies, friends. I seem to enjoy the supply-purchasing portion of the new hobby, but not actually implementing them!), and now my goal is to incorporate these new techniques and supplies into my stamping! I started out my crafting journey a long time ago as a general non-discriminatory crafter, creating everything from jewelry to home decor, then eventually found my way into cards, but after 11~ years of focusing on cardmaking, I am starting to get, well, bored. So to keep things interesting and fun, I am going to try new ways to integrate all of my hobbies and interests and hope that you won’t mind my sharing them here!

For Christmas, I received a large set of acrylic paint markers, and I’ve been itching to try them out. I have also been collecting small fabric items that I could customize with my stamping and felt supplies, including this canvas bag that I found while shopping, perfect for filling with treats or gifts. To customize the bag, I pulled some stamps and dies from my Simon Says Stamp bins that would work to create this little gift set, so let’s get started with the details!

*I have gathered links to all of the products used at the bottom of the post for your convenience, using affiliate links. Thank you for shopping with my links! I truly appreciate your support for my work!*

I love to take solid stamped images and customize them, typically using white pigment ink or no-line coloring ink to stamp them, then using either watercolors or colored pencils to add lots of details and definition to these solid images. The Talvera Vine cling stamp is a lovely neutral pattern, excellent for use as a backdrop for detailed floral images or as a focal point, as I’ve done here.

To create the pretty pattern on the canvas bag, I stamped the Talvera Vine cling stamp onto the inexpensive canvas bag, keeping everything in place with my MISTI. As you can see in the photo, perfect stamping was not necessary for this project and not very attainable due to the texture on the canvas bag; the end goal was to make sure that there was more of a “guide” for my paint markers to create the pattern! The magnets on the MISTI were very helpful in holding the bag in place and to ensure that my pattern was straight.

After stamping the image on the bag, I used a single deep green acrylic paint marker (the Altenew Acrylic Paint Markers are excellent and I have hopes that they will release more colors to the collection soon!) to color over the stamped images. This deep green had excellent coverage over the Charcoal Pawsitively Saturated Ink image. After I had colored all of the leaves and outlined the vines themselves, I added a few swipes of a champagne paint marker to create the vines on the leaves, adding a touch more definition and shape to the images. I also dotted some berries on the bare spots, creating a pretty, simple patterned bag that is neutral enough to work with lots of different floral additions!

I’ve really been enjoying creating projects that have a bit more “longevity” to them than typical cards; I have fears that the cards on which I work for hours will simply get tossed in the trash without a care as to how meticulously they were crafted, so I have been enjoying adding felt to my repertoire of mediums over the last few months. I created this decorative “tag” to add to my painted gift bag that can be repurposed as a tag on a backpack, purse, or even as a bookmark if one left off the gems! Because the Talvera Vine stamp is such a neutral botanical background, I thought it would look lovely with some vibrant flowers. I die cut the Large Rounded Tag die from some ivory felt, then created a few mauve and maroon blooms using the Aurora Blooms dies. I arranged the blooms and some foliage on the felt tag die cut, adhering everything with felt glue, then added some champagne glitter felt centers and Lilac Pawsitively Dazzling Gems for sparkle!

Well, that’s all for my projects today. I am so enjoying stepping outside of my papercrafting zone and creating projects that are a bit more long-lasting. Thanks so much for stopping by today, and have a marvelous day!
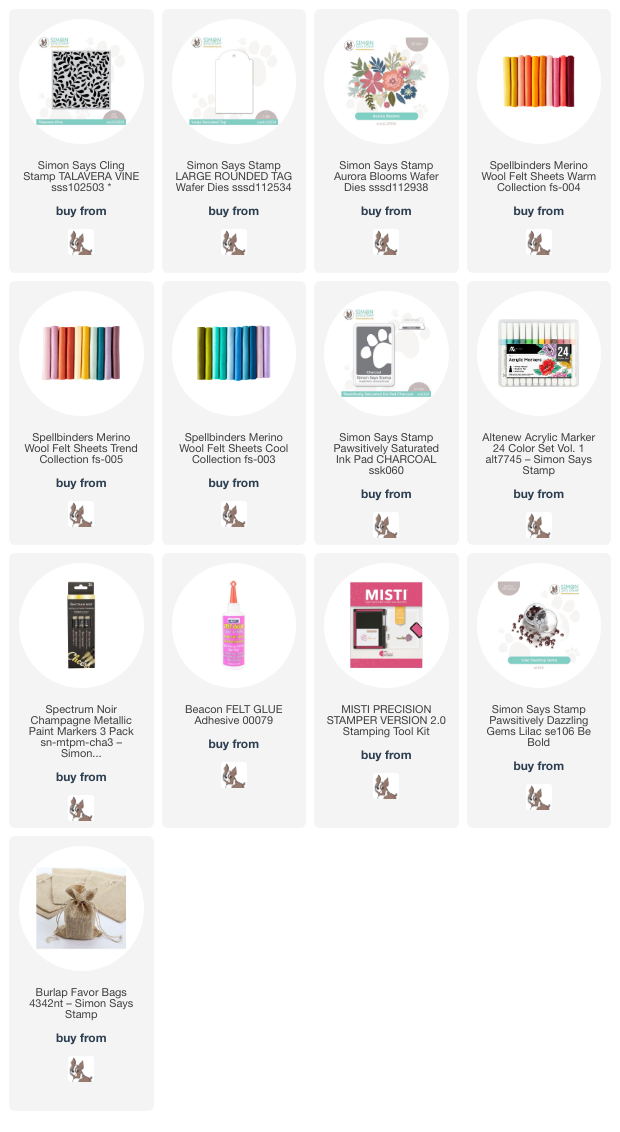
Filed Under: simon says stamp Tagged With: altenew acrylic markers, aurora blooms, canvas bag, embroidery, felt, fun with felt, gift bag, large rounded tag, merino felt, painting, sewing, talavera vine

The Festival of Lights with Simon Says Stamp!

October 19, 2023

This post was sponsored by Simon Says Stamp. Thanks, Simon!

Hi friends! I was recently asked to create some Hanukkah cards using the Light the Menorah set from Simon Says Stamp’s Season of Wonder release, and I’ll be honest… I was a little nervous. I don’t really have much, if any, experience with Hanukkah, so I was afraid of being disrespectful of the imagery and general feeling behind the holiday. But I received some inspiration photos from a friend and used those as my starting point for my cards today, focusing on pale blue and shimmering gold. Let’s get started with the details!

For my first project, I started by heat embossing the beautiful Talavera Vine cling stamp from Simon Says Stamp onto some Harbor cardstock from Concord and 9th using Hero Arts Iridescent Gold embossing powder. The shining gold embossing powder contrasts beautifully with the pale blue cardstock. I trimmed the panel down and placed it on full sized A2 panel of a slightly darker blue cardstock, separating the two pieces with a thin strip of gold foil cardstock.

Next, I heat embossed a greeting and the menorah image from Simon Says Stamp’s Light the Menorah set, again on Harbor cardstock from Concord and 9th using Hero Arts Iridescent Gold embossing powder. I added some light blue Copic marker to the candles and some gold sparkle pen to the flames of the candles. I die cut the finished images using the coordinating dies, then popped them up using foam adhesive. To accent the color scheme and add some additional texture to my card front, I added some sparkly gold twine and iridescent aquamarine gems.

For my second card, I created a custom background panel by stamping several sizes of the 6 point star included in the Light the Menorah set using Harbor Ink on Harbor cardstock to create a subtle tone-on-tone patterned paper. I also blended the Harbor Ink lightly around the edges using a blending brush and splattered some metallic gold watercolor on the background for extra texture and sparkle. I die cut the A2 Thin Frames dies from a pale gold shimmer cardstock that I found in my stash and added a thicker and thinner frame to my card front. (I leave my frame dies intact, rather than snipping them apart, so that I can get multiple sizes and thicknesses of frame with one pass through my die cut machine!)

For the greeting, I stamped two of the sentiments and the flame from the Light the Menorah set on Harbor cardstock and embossed them using Iridescent Gold embossing powder. I die cut the images with the coordinating dies, adding some more gold sparkle pen to the flame of the candle. I popped the images up on my card front using foam adhesive, then added some gold foil Star of David die cuts from the 5 Stars dies set. Finally, I added a few more aquamarine gems for more sparkle!

Well, that’s all for my projects today. I hope that I was able to create these cards in a respectful way of both the Jewish culture and the Hanukkah celebration. If you are Jewish and you see something that I should have/could have done differently, please feel free to email me and educate me! I am always willing to learn! Thank you so much for stopping by today, and have a marvelous day!

Filed Under: simon says stamp Tagged With: A2 thin frames, festival of lights, hanukkah, light the menorah, talavera vine

Serene Blue with Spellbinders!

July 31, 2023

Hi friends! It’s the last day of July… where has the summer gone? My kiddos will be starting school in a few weeks, (even my little guys will be going to preschool for a couple of hours a day) and I am simultaneously longing for it and dreading it. School brings with it a special brand of chaos to temper the peace of when the house is quiet. I am trying to mentally plan the days so that I can still get my work done without my big kids offering their wonderful assistance with their little brothers in the mornings (they get rewarded with an increased allowance and lots of trips to the pool)…. but I won’t lie; I’m a bit worried. It will all fall into place somehow, but those first few weeks will surely be a challenge! In an effort to calm my anxious mental state, I have been using lots of serene blues and greens in my color palette, and I have a card to share today that embodies the calm that I’m trying to keep in my head. Let’s get started with the details!

Spellbinders generously sent me the gorgeous Hello Blooms layering stencil and die set (SB | SSS), which creates a large cluster of blooms that remind me so much of Rifle Paper Co designs! I love the wide variety of unique color palettes used within the Rifle Paper Co aesthetic, so I pulled out the Silver Sage ink from Altenew and Aspen, Sage, Morning, Twilight, and Galaxy Pawsitively Saturated Inks from Simon Says Stamp. I used blending brushes to blend these soft and serene ink colors over the Hello Blooms layering stencil. The stencils are super easy to use and line up like a dream! I used the coordinating die from the Hello Blooms layering stencil and die set (SB | SSS) to die cut the large bouquet and set it aside.

Because the general aesthetic of the floral bouquet is fairly simple and graphic, I wanted to continue that feel onto the background of the card. I stamped the Talavera Vine background stamp from Simon Says Stamp using Silver Sage ink to create a lovely, subtly patterned background. The shape of the leaves match the shape of the stenciled leaves almost exactly! I trimmed down the panel on one side, then mounted it to a sheet of coordinating pale blue Sea Glass cardstock. I also added a strip of white glitter paper between the patterned background paper and the blue cardstock to add another level of texture and shimmer.

I popped up the floral bouquet in the center of the card front using foam adhesive, then turned my attention to the greeting. I used the “hello” die included in the Hello Blooms layering stencil and die set (SB | SSS). I die cut the detail layer from white iridescent cardstock and the background layer from heavyweight vellum cardstock and layered them together. The vellum helps to soften the area around the white sentiment die cut to help it stand out a bit from the patterned background. I also stamped a sentiment strip from the Well Wishes stamp set from Simon Says Stamp. I popped both of the sentiment pieces up on the card front directly on top of the stenciled floral die cut to help them both stand out from the background. Finally, I tucked a few Milk Glass gems amongst the floral die cut for a bit of added sparkle and texture!

Well, that’s all for my project today. See you back here tomorrow for my first post for August! Thanks so much for stopping by today, and have a marvelous day!

Filed Under: simon says stamp, spellbinders Tagged With: hello blooms, talavera vine, thinking of you, well wishes, with sympathy

Primary Sidebar

  • Facebook
  • Instagram
  • Pinterest
  • YouTube

Favorite Shops

Secondary Sidebar

Subscribe

Enter your email address to subscribe to this blog and receive notifications of new posts by email.

Instagram
Something is wrong.
Instagram token error.
Follow
Load More

Archives

Tags

3D embossing folder alcohol markers better press birthday birthday card blog hop card kit christmas christmas card christmas tag colored pencil copic copic coloring Daniel Smith die cutting embossing folder embroidery felt giveaway holiday holiday card hot foil ink blending karin brushmarker pro layered stencil masculine my monthly hero new release no line coloring no line watercolor OLO marker olo markers original illustration pawsitively saturated rainbow shaker card slimline stamping stamptember stencil thank you thinking of you valentine's day video watercolor

Popular Posts

Simon Says Stamp Joy For You Blog Hop- Day 1!
Simon Says Stamp Joy For You Release-Now Available!
Frozen Fractals All Around with New Simon Says Stamp Joy For You Release!
Shaped Holiday Shaker Card with New Simon Says Stamp Jolly Season Card Kit of the Month!
Holiday Postage with New Simon Says Stamp!
Simon Says Stamp Glory to the Newborn King Holiday Kit-Part II!
Pinkfresh Studio 5th Birthday!
Altenew Build A Flower: Fuchsia Blog Hop+Giveway!
Holiday Joy in Pink and Green with New Simon Says Stamp DieCember!
Honey Bee Stamps September Release Blog Hop!

Disclosure

Some affiliate links are used in my posts. This means that, should you click on one of my links and purchase something from that company, I will receive a small portion of the sale at no extra cost to you. I use the money earned from these sales to help maintain my blog. I so appreciate you visiting and, if you do choose to use one of my affiliate links, thank you so much for your support!
Copyright © 2026 ·Brunch Pro Theme · Genesis Framework by StudioPress · WordPress · Log in
Loading Comments...