• Skip to main content
  • Skip to primary sidebar
  • Skip to secondary sidebar

Sixth Street Sundries

Emily Midgett

  • Home
  • About Me
  • Contact
  • OLO Marker Color Swatch Chart
  • Shop

thank you card

Brilliant Budding Florals in Aqua with New Simon Says Stamp!

April 7, 2025

This post was sponsored by Simon Says Stamp. Thanks, Simon!

Hi friends! I have some soothing inspiration using some of the newest products from the Rain or Shine Release from Simon Says Stamp. I love gorgeous floral embossing folders; they make it so simple to create an elegant card very quickly, something that looks very intricate and involved but really comes together lickety split. I used the new Brilliant Budding Florals Embossing Folder to create this card with a super thankful sentiment. Let’s get started with the details!

*I have gathered links to all of the products used at the bottom of the post for your convenience, using affiliate links. Thank you for shopping with my links! I truly appreciate your support for my work!*

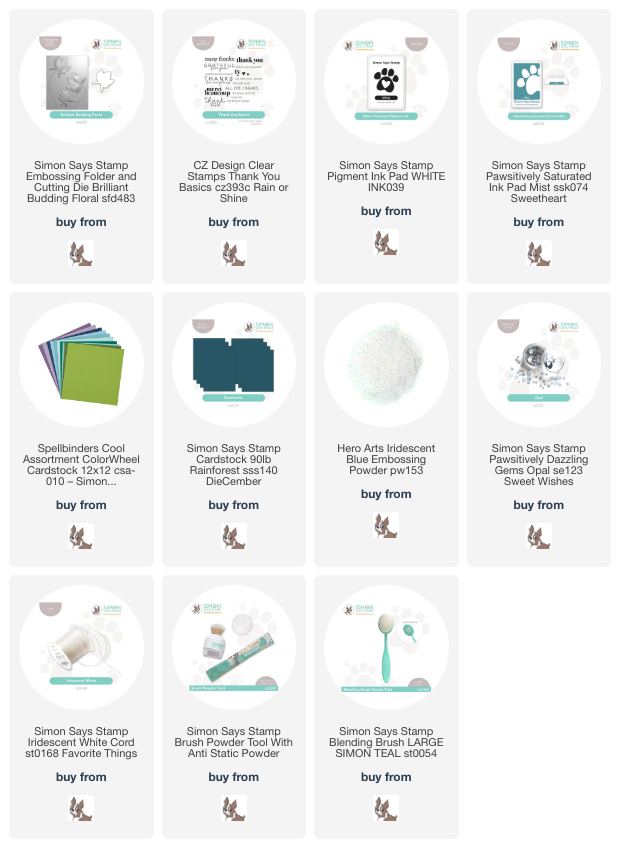
To begin, I used the new Brilliant Budding Florals Embossing Folder with my die cutting machine and some Seaside cardstock from Spellbinders to create this detailed, textured background. To help enhance the intricate embossed details, I used a blending brush to blend Mist Pawsitively Saturated Ink around the edges of the card front, then swiped Simon Says Stamp’s White Pigment Ink over the raised areas, helping to add some bright white highlights. I also used some shimmering handmade glitter watercolors to add some splatters around the edges and to “gild” the edges of each petal for added dimension and some shimmer.

After I had created the background, I turned my attention to the greeting. I used White Pigment Ink to stamp some sentiments from the new Thank You Basics stamp set with Simon Says Stamp’s Rainforest cardstock, then added some Iridescent Blue embossing powder from Hero Arts to enhance the sentiment and add even more shimmer. The combination of the white pigment ink with the shimmering embossing powder on the deep teal cardstock is magical! I used my trimmer and sharp scissors to cut out the embossed sentiments and popped them up on the card front with foam adhesive squares.

To add a bit more texture and sparkle to the card, I added a smattering of the Opal Pawsitively Dazzling Gems, which add the perfect, muted shimmer without adding any additional color to the color palette. Before adding my card front to my card base, I tied some Iridescent White Cord around the card front, offsetting the bow and tucking it beneath the sentiment to create a visual cascade down the card front.

Well, that’s all for my project today! This card came together super quickly, but all of the different coordinating elements work beautifully together to create lots of intricate texture and detail. Embossing folders definitely give you plenty of bang for your buck! Thanks so much for stopping by today, and have a marvelous day!
Filed Under: simon says stamp Tagged With: brilliant budding floral, cz design thank you basics, thank you card, white pigment ink

VIDEO: Green Monochromatic Botanicals with Pinkfresh Studio!

February 27, 2025

Hi friends! I am up on the Pinkfresh Studio YouTube channel today with a new video featuring a fun letterpress technique using white ink on colored cardstock (yes, letterpress on colored cardstock!) as well as some beautiful monochromatic images that I’ve created using some selective stenciling. You can watch the video below or HERE on YouTube:

https://youtu.be/6ms5uWg7vJA

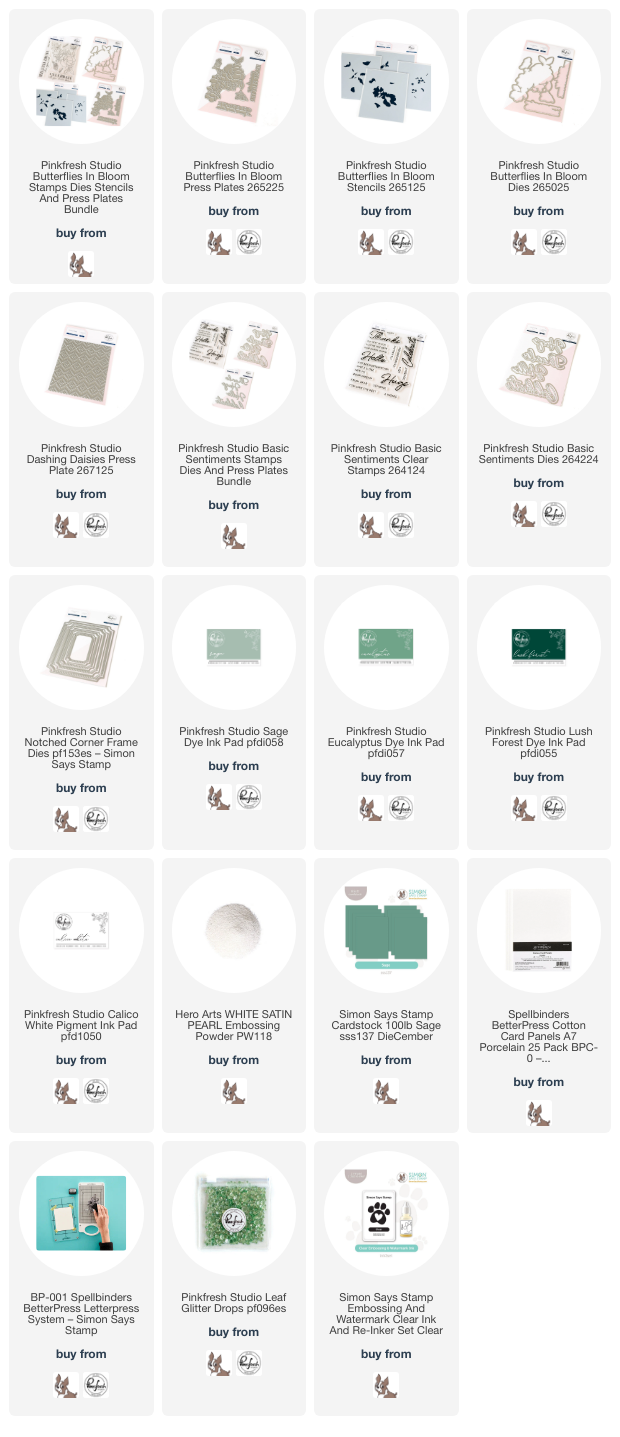
In case you can’t watch the video, I will give a quick explanation of my process. To start, I used Eucalyptus Ink from Pinkfresh Studio to impress the Butterflies in Bloom Press Plate onto some white letterpress paper. This letterpress suite impresses a gorgeous floral bouquet and some standalone butterflies that you can use to create a charming visual triangle on your card front! I used Sage, Eucalyptus, and Lush Forest ink with the Butterflies in Bloom Stencils. These stencils create a very graphic overall feel when used in their entirety, but for this card, I wanted to add some very subtle color, creating almost “white” blooms surrounded by dense, dramatic green foliage and no other colors accenting the main images, so I made sure to avoid the butterfly stencils and used a light hand with the Sage and Eucalyptus inks on the main flowers. After I had finished stenciling, I used the coordinating one-go die to die cut all of the images with one pass through my die cut machine!

For the background, I die cut a plain notched rectangle from Simon Says Stamp Sage Green cardstock using the Notched Corner Frames die set. Because colored cardstock is not quite thick enough to use with press plates on its own, I used a trick that I learned from the talented Carissa Wiley: use light-tack tape to adhere a piece of thick watercolor or letterpress cardstock behind your colored cardstock, then letterpress as you would normally. For this card, I wanted to keep the area behind the light flowers a consistent sage green, so I used the Dashing Daisies press plate with Calico White ink. The inks from Pinkfresh Studio work beautifully with the press plates; because the Calico White ink has a very soft foam pad, it is important to use a very light hand when adding ink to your plate so that you don’t get ink where you don’t want it. I inked up the plate with the white ink, then ran it through my Better Press system on the green Notched Corner Frame die cut.

For the greeting, I stamped two different images from the Basic Sentiments stamp set onto some more of the Sage cardstock using White Calico ink, then stamped again directly over the top with embossing ink and added some White Satin Pearl embossing powder. The embossing powder adds a lovely shimmer and enhances the white stamped image. I trimmed the “you’re the best” with a trimmer, die cut the large “thanks” with the coordinating die, then began arranging the die cuts on my card front. I adhered everything with different heights of foam adhesive squares to keep things interesting visually, then added a few sparkling Glitter Drops: Leaf on the card front for one last touch of shine!

Well, that’s all for my project today! If you’ve never tried doing letterpress on colored cardstock, I highly encourage you to give it a try. It’s so simple, and it opens up a whole new world of possibilities! Thanks so much for stopping by today, and have a marvelous day!

Filed Under: pinkfresh studio Tagged With: basic sentiments, betterpress, butterflies in bloom, colored cardstock, dashing daisies, die cutting, letterpress, notched corner frame, stencil, thank you card, thanks

Floral Flashback Week: Dogwood Bleeding Heart with Simon Says Stamp!

February 20, 2025

This post was sponsored by Simon Says Stamp. Thanks, Simon!

Hi friends! I am back with another installment of my Floral Flashback Week, in which I play with some of the older flower sets that I have illustrated for Simon Says Stamp. There’s always a chance that these sets won’t be around for much longer, so I wanted to take another opportunity to share some inspiration. As my style has evolved over the last several years, I always enjoy revisiting old favorites with fresh eyes to see if I can come up with something interesting. Let’s get started with the details on my project for today featuring the Dogwood Bleeding Heart Background stamp!

*I have gathered links to all of the products used at the bottom of the post for your convenience, using affiliate links. Thank you for shopping with my links! I truly appreciate your support for my work!*

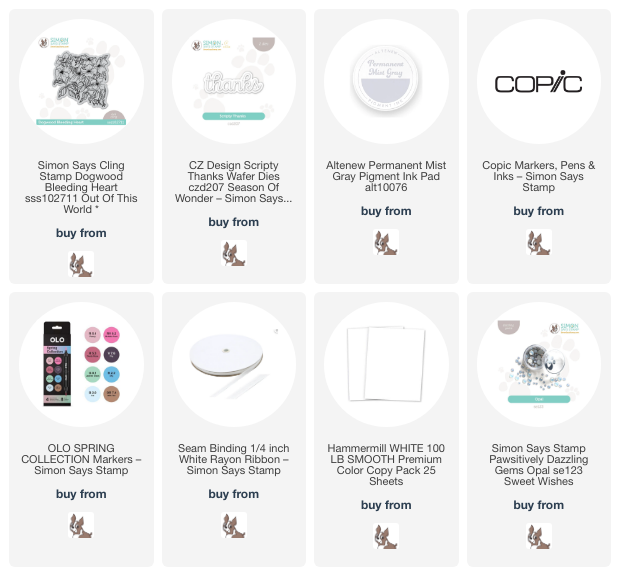
To begin my project, I stamped the Dogwood Bleeding Heart cling stamp on some white cardstock using Altenew’s Permanent Gray Mist Ink, which is a great ink to use with no-line alcohol ink coloring. Pulling colors from my Copic and OLO marker collections, I colored these blooms and foliage in vibrant shades of fuchsia, lime, and “white” for the dogwood flowers. To achieve these “white” blooms, the trick is to use a little “reverse psychology” by surrounding the white blooms with vibrant colors, as well as using very pale colors on only the shadowed areas, blending them out with the colorless blender marker. As with all no-line coloring, keeping the edges crisp and maintaining the contrast on the images on top versus the images beneath them is the key to achieving shape and dimension on those white images.

After I had finished coloring the images themselves, I used a pale aqua OLO marker to color the background, creating a soft, yet vibrant, full-color panel. I think it looks almost screen-printed! I am in love with the color palette, as well; the pale aqua with fuchsia and white reminds me of something from Lilly Pulitzer.

For the greeting, I used a simple white Scripty Thanks die cut adhered at the open space on the bottom of the card using liquid adhesive. I tied a thin white silk ribbon around the top of the card front before adhering it to my card base, then added a few Opal Pawsitively Dazzling Gems near the greeting for a touch of extra sparkle and texture!

Well, that’s all for my project today. I hope you’re enjoying this walk down memory lane with me! I am having so much fun! I hope it encourages you to look at your older products with fresh eyes to see what new life you can breathe into them. Thanks so much for stopping by today, and have a marvelous day!

Filed Under: simon says stamp Tagged With: copic markers, dogwood bleeding heart, no line coloring, olo markers, original illustration, thank you card

Getting my peony fix. 

October 13, 2017

Good morning! My crafty destash sales have allowed me to purchase a few new sets that have been calling to me, case in point: Altenew’s Just Because. I haven’t played with peonies much lately, so I needed to get my peony fix…. and this absolutely stunning new set was just what the doctor ordered.

I started by heat embossing the larger of the two bouquets from Just Because using Altenew’s Golden Peach embossing powder onto some Canson Montval watercolor paper. I added a few sprigs of foliage from the smaller bouquet in the stamp set to fill out the corner.

After I had embossed the bouquet, I colored the blooms with my Zig markers and damp Silverwhite paintbrush. I added a pale gray halo around the edge of the bouquet. (If you’d like to watch my Zig technique in action, click here or here to watch my videos!) I die cut Altenew’s Script Words once from rose gold glitz paper and three times from white card stock, then glued them all together to create a dimensional die cut. I heat embossed the greeting from the Just Because stamp set onto a thin strip of raspberry colored card stock using the Golden Peach embossing powder.


I added a few sequins from my stash just to add some sparkle.

That’s all for me today! I volunteered to be a helper for my kiddos’ pumpkin patch field trip… 20 three year olds and a muddy pumpkin patch. What could be more fun? (haha) Have a marvelous weekend, friends!

Filed Under: altenew, watercolor, Zig Clean Color Tagged With: floral card, heat embossing, just because, peonies, thank you card, zig watercoloring

  • « Go to Previous Page
  • Page 1
  • Page 2
  • Page 3

Primary Sidebar

  • Facebook
  • Instagram
  • Pinterest
  • YouTube

Favorite Shops

Secondary Sidebar

Subscribe

Enter your email address to subscribe to this blog and receive notifications of new posts by email.

Instagram
Something is wrong.
Instagram token error.
Follow
Load More

Archives

Tags

3D embossing folder alcohol markers better press birthday birthday card blog hop card kit christmas christmas card christmas tag colored pencil copic copic coloring Daniel Smith die cutting embossing folder embroidery felt giveaway holiday holiday card hot foil ink blending karin brushmarker pro layered stencil masculine my monthly hero new release no line coloring no line watercolor OLO marker olo markers original illustration pawsitively saturated rainbow shaker card slimline stamping stamptember stencil thank you thinking of you valentine's day video watercolor

Popular Posts

Simon Says Stamp Joy For You Blog Hop- Day 1!
Vibrant Poinsettia Holiday Wishes with Simon Says Stamp!
March 2020 My Monthly Hero Blog Hop+Giveaway!
Simon Says Stamp Glory to the Newborn King Holiday Kit-Now Available!
Simon Says Stamp November 2025 Card Kit: Give Thanks!
Pinkfresh Studio September Stamp and Die Release!
Charity Blog Hop!
Vintage Peach Ornament with New Simon Says Stamp Joy For You Release!
2018 Autism Awareness Hop!
April 2018 My Monthly Hero Blog Hop+Giveaway!

Disclosure

Some affiliate links are used in my posts. This means that, should you click on one of my links and purchase something from that company, I will receive a small portion of the sale at no extra cost to you. I use the money earned from these sales to help maintain my blog. I so appreciate you visiting and, if you do choose to use one of my affiliate links, thank you so much for your support!
Copyright © 2026 ·Brunch Pro Theme · Genesis Framework by StudioPress · WordPress · Log in
Loading Comments...