• Skip to main content
  • Skip to primary sidebar
  • Skip to secondary sidebar

Sixth Street Sundries

Emily Midgett

  • Home
  • About Me
  • Contact
  • OLO Marker Color Swatch Chart
  • Shop

thank you

Peachy Sunflowers for After-Christmas Reset!

January 6, 2026

This post was sponsored by Simon Says Stamp. Thanks, Simon!

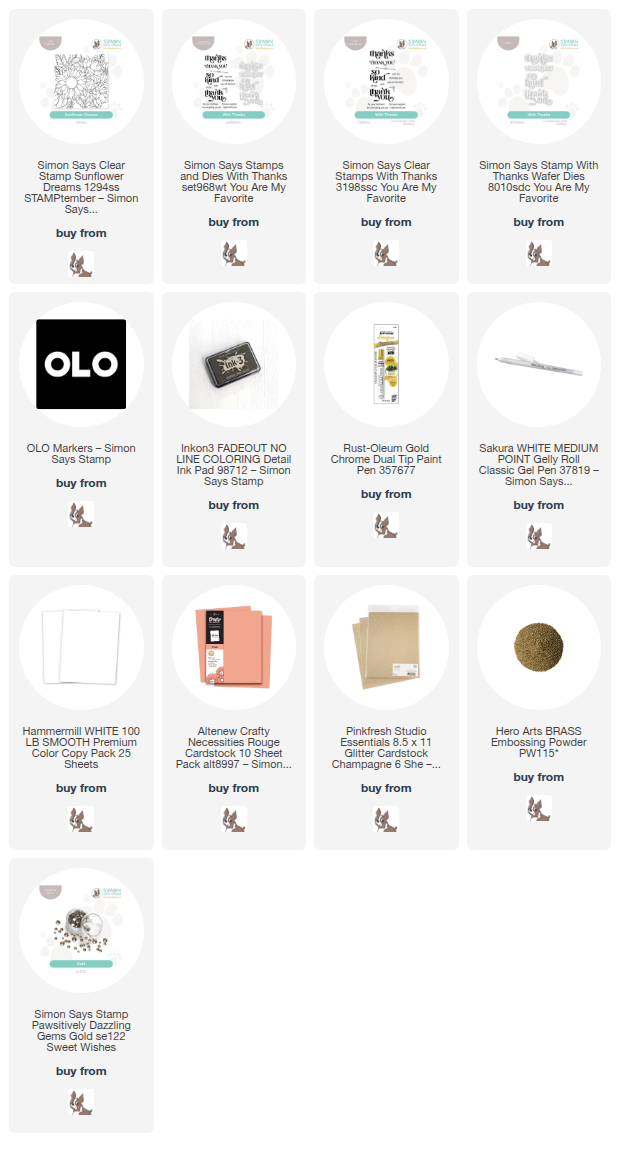
Hi friends! It’s officially a new year, and with it comes a sense of renewal and freshness. I have been slowly putting the holiday crafting goodies away (amidst sighs of sadness, because I could craft with Christmas product all. year. long.) and trying to refresh my brain into something outside of holiday imagery and dramatic glitz. I thought a good holiday “palate cleanser” would be some fresh florals in a more muted color palette than the vibrant jewel tones and icy metallics that inspire me so much during the holiday crafting season. I haven’t used any of the floral stamps that I’ve illustrated for Simon Says Stamp in a few months, so I thought I would pull out the pretty Sunflower Dreams background stamp and settle in to do some detailed coloring. Let’s get started with the details!

*I have gathered links to all of the products used at the bottom of the post for your convenience, using affiliate links at no extra cost to you. Thank you for shopping with my links! I truly appreciate your support for my work!*

I began my project by stamping the large Sunflower Dreams background stamp on the top 3/4 of an A2 card front using no-line coloring ink. I kept the bottom 1/4 of the panel clean so that I could add a sentiment without interference from the bold pattern on the background. I then gave myself time to do some detailed coloring with my OLO Markers. I wanted to do something besides a typical yellow sunflower, and so reached for some pretty peachy shades, trying to invoke those lovely pastels of springtime. I used the alcohol markers first, then selected some deeper shades from my colored pencils to do some light shading, deepening the contrast between the petals towards the back of the sunflower and adding highlights to those petals on the top layer. I added a smattering of dots using a gold paint pen and a white gel pen to indicate the “seeds” in the center of the flowers. I love how those little extra details after the initial layer of alcohol marker makes the images pop so beautifully!

For the greeting, I stamped a gorgeous “thanks” sentiment and sentiment strip from With Thanks onto some white cardstock with embossing ink, then melted some Brass embossing powder to create a subtly luxe metallic greeting. I think the warmth of the Brass embossing powder works beautifully with the warmth of the peach sunflowers! I used the detailed coordinating die to die cut the larger sentiment and cut the smaller strip with my trimmer.

Before I adhered the sentiment pieces to the card front, I used my trimmer to cut some strips of champagne glitter and peach colored cardstocks upon which I could ground the sentiment pieces. I adhered the strips with liquid adhesive, then popped up the greeting with Thin Foam Squares. The strips help to draw the eye towards the sentiment amongst the vibrant and busy floral background! Finally, I accented the sentiment with some sparkling Gold Pawsitively Dazzling Gems. These gems are a bit more neutral than just plain gold; they work well with gold, champagne, and bronze metallic accents.

Well, that’s all for my project today! Are you ready for a springtime palate cleanse? I’m not sure if I am, but the world seems to be moving on from Christmas whether we’re ready or not! I can’t promise that there will not be the odd snowy project here and there, but bright colors, dainty springtime florals, and bold patterns are definitely up on the docket! Thanks so much for stopping by today, and cheers to a lovely 2026!
Filed Under: simon says stamp Tagged With: alcohol markers, die cutting, no line coloring, olo markers, original illustration, sunflower dreams, thank you, thanks, with thanks

Holiday Thank You Notes with Simon Says Stamp + SALE!

December 30, 2025

This post was sponsored by Simon Says Stamp. Thanks, Simon!

Hi friends! I am back today with a trio of holiday thank you notes featuring some beautiful snowflake embossing folders from Simon Says Stamp. These beautiful snowflake embossing folders are such a great, cost-effective addition to your craft room; you can use them in so many different ways, letting them be backup to the main focal point or allowing them to be one of the main focal points as I’ve done today! I kept these quick and simple to show you that a simple thank you note can be just as special as a more involved one, as long as you are intentional with the little extra details and textures. Let’s get started with the details on my projects!

*I have gathered links to all of the products used at the bottom of the post for your convenience, using affiliate links at no extra cost to you. Thank you for shopping with my links! I truly appreciate your support for my work!*

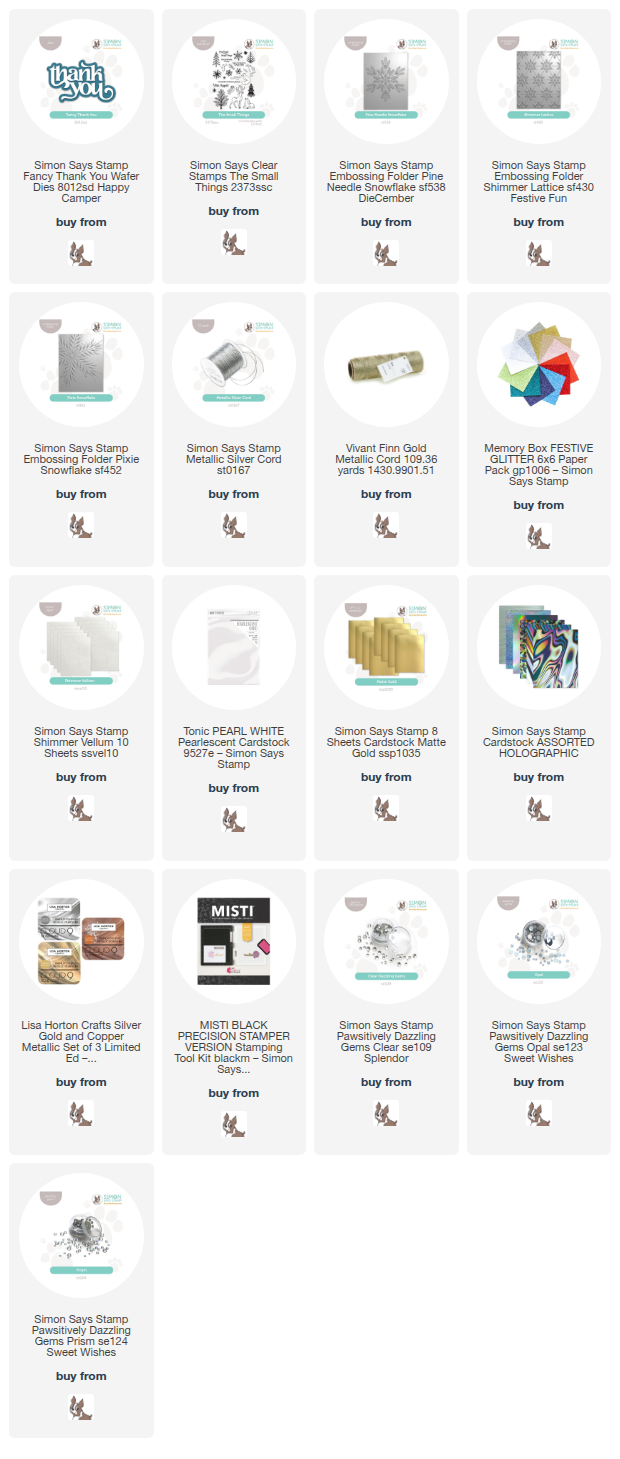
For all three cards, I used the Fancy Thank You die set, which comes with a detailed top layer and a shadow layer. The generous size makes it easy to create a focal point with the sentiment, allowing you to add simple accents to create a cohesive project! These work perfectly with the detailed embossing folders and metallic cardstock, which enhances the details of the 3D embossing folders amazingly.

For the first card, I ran a panel of pearlescent white cardstock through my die cutting machine using the newer Pine Needle Snowflake Embossing Folder. The coating on this pearlescent cardstock picks up those embossed details beautifully. I also die cut the Fancy Thank You detail layer from white glitter cardstock and adhered it to the shadow layer, cut from shimmering vellum, using thin foam adhesive squares cut to fit.

To enhance the die cut greeting, I stamped the “grateful for you in every season” sentiment from The Small Things on a strip of white cardstock using metallic silver ink. I adhered the thank you die cut to the embossed panel with more foam adhesive and tucked the sentiment strip beneath it. I added some Clear Pawsitively Dazzling Gems and a bow tied using Simon Says Stamp Silver Cord for additional sparkle! Those winter whites look perfect for a holiday thank you with the different textures and touches of metallic shine!

My second project switches to a different metallic cardstock: Simon Says Stamp’s Gold Matte Metallic cardstock, which is another lovely coated cardstock that instantly makes those gorgeous details from the embossing even more visible. I paired this A2 panel of Gold Matte Metallic cardstock with the older-but-still-lovely Shimmer Lattice embossing folder, and I think those details look magnificent on this gorgeous gold cardstock!

I again used the Fancy Thank You and The Small Things sentiment combination, with a glittery white detail die cut layer, shimmery vellum shadow layer, and gold stamped sentiment strip, this time orienting the card in a vertical format. I added a glittery gold twine bow and some Opal Pawsitively Dazzling Gems to the card front for additional texture and sparkle!

For my final project, I used the new Pixie Snowflake embossing folder that was released earlier this month as part of the Card Kit of the Month. The kit itself is sold out, but Simon Says Stamp allows you to buy most of the components of the kit a la carte, so you can mix and match which pieces you like if the kit sells out! I embossed the Pixie Snowflake on an A2 panel of the Simon Says Stamp Holographic foil cardstock, keeping the metallic theme going through this final project. I think those embossed details on the metallic cardstock really do so much of the work for you on these somewhat simple cards, making it even easier to get an assembly line going for those holiday thank you notes!

I arranged the Fancy Thank You and The Small Things sentiment pieces in the center of the embossed snowflake, allowing those pretty snowflake details to kind of “explode” behind my sentiment focal point. I added a few Prism Pawsitively Dazzling Gems and another silver bow created with Simon Says Stamp Silver Cord.

Well, that’s all for my projects today! If you’re in need of a lot of thank you notes quickly, I highly encourage you to check out your embossing folder stash; those gorgeous details will do much of the work for you and allow you to get back to eating Christmas leftovers and watching your favorite comfort shows quickly!

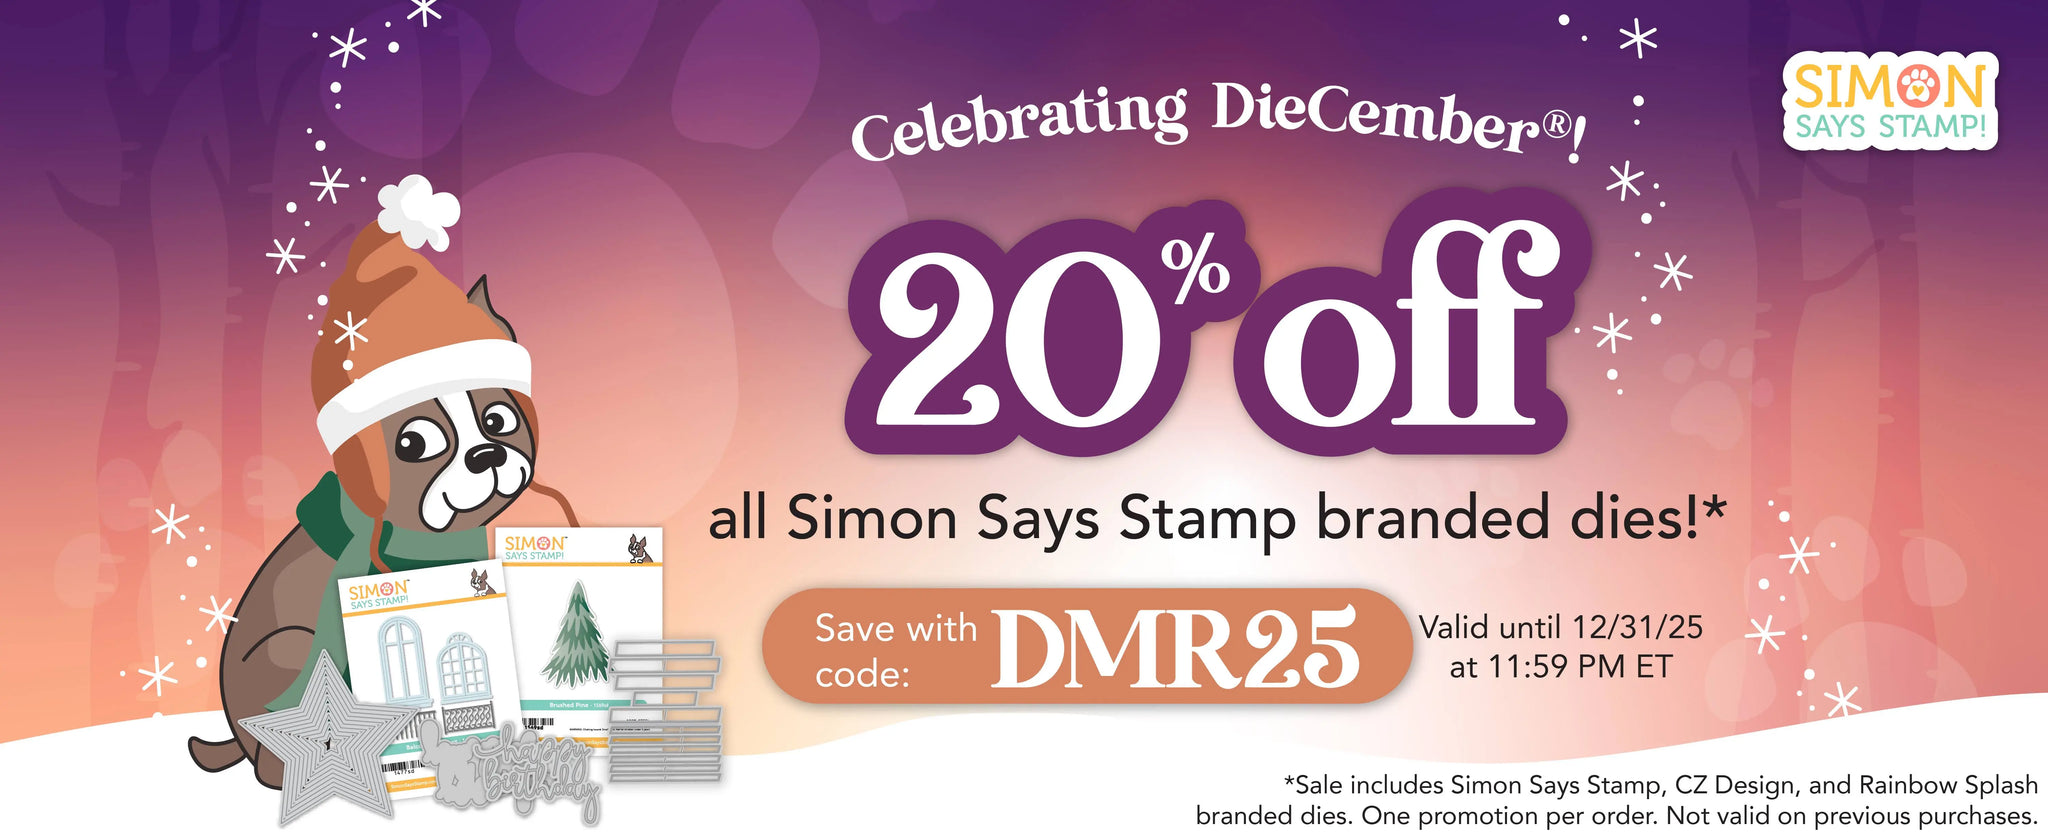
Reminder: The fabulous DieCember Sale is still happening!! Through 11:59 on 12/31, you can take 20% off your entire Simon-branded die purchase by adding code DMR25 at checkout! Click HERE to see all of the dies eligible for the sale!

Thanks so much for stopping by today, and happy week-between-Christmas-and-New Year’s!

Filed Under: simon says stamp Tagged With: christmas card, die cutting, embossing folder, fancy thank you, holiday card, pine needle snowflake, shimmer lattice, thank you, the small things

Simon Says Stamp October 2025 Card Kit of the Month!

September 14, 2025

This post was sponsored by Simon Says Stamp. Thanks, Simon!

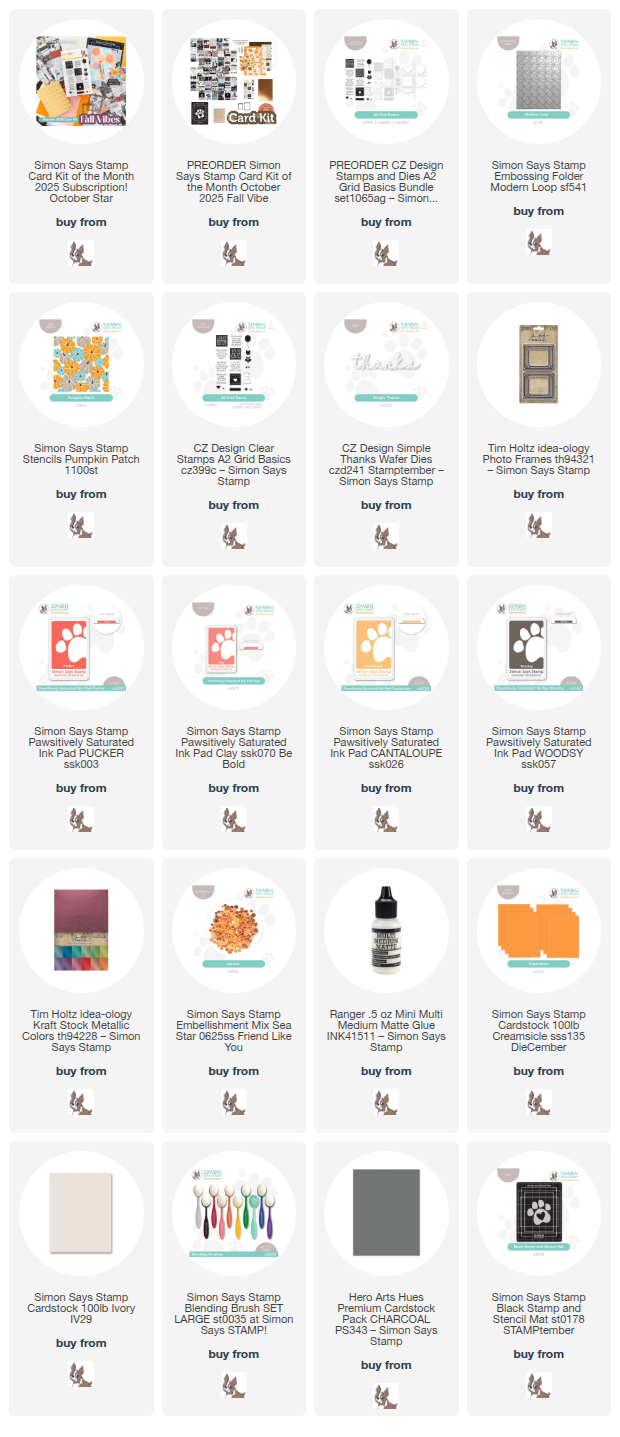
Hi friends! I have some inspiration to share with you today using the new Simon Says Stamp October 2025 Card Kit of the Month: Fall Vibes! This month’s kit is so unique and full of fun products that you can use to create a ton of different cards using just the contents of the kit! Here’s a sneak peek at the kit’s contents:

Such a unique kit, right? Each different element is so unique, but they work so nicely together! I have two projects to share with you created using the contents of the kit, so let’s get started with the details!

*I have gathered links to all of the products used at the bottom of the post for your convenience, using affiliate links. Thank you for shopping with my links! I truly appreciate your support for my work!*

The “Fall Vibes” theme stuck in my head when brainstorming ideas for these projects, so I decided to keep things decidedly “fall” and stick with a color that doesn’t get a lot of love in my craft room: orange! I have a friend who has the most marvelous pumpkin patch, growing over 75 varieties of pumpkin (more power to her and her green thumb!), so I was inspired by the shades of the round gourds gracing her fields to create a stenciled shaker, as well as take advantage of the gorgeous metallic kraft cardstock from Tim Holtz that was included in the kit.

For my first project, I ran an A2 panel of the gorgeous pumpkin-colored Tim Holtz Metallic Kraft Stock through my die cutting machine using the Modern Loop Embossing Folder included in the kit. Metallic and foil cardstocks work so beautifully with detailed embossing folders like this one; the shining surface of the cardstock seems to enhance the texture of the embossed images to perfection! Next, I heat embossed a greeting from the new A2 Grid Basics stamp set included with the kit onto some Creamsicle cardstock from the kit. I trimmed the embossed image out with my trimmer, but you could use the coordinating dies (which are sold separately). I trimmed the embossed panel down slightly and placed it in the center of a full-sized A2 Creamsicle card front. To frame the sentiment, I used Multi-Medium Matte adhesive to adhere one of the Tim Holtz Photo Frames on the textured foil panel, then added the greeting with some foam adhesive squares. Finally, I added a few Gold Pawsitively Dazzling Gems for a bit of extra sparkle!

For my second card, I used Pucker, Clay, Cantaloupe, and Woodsy Pawsitively Saturated Ink to blend the fabulous Pumpkin Patch stencil on a panel of Ivory A2 cardstock from the kit. The generously-sized pumpkins make it easy to add some additional shading details, creating shape and dimension on these pumpkins! The Black Stamp and Stencil Mat included with the kit made super quick work of those layering stencils, as well. Such a useful tool! I used some leftover stamp packaging to create a pocket around the entire panel, then filled it with Sea Star Embellishments, keeping with my overall orange theme. Once I had my flat shaker sealed off, I die cut the detail layer of the previously-released Simple Thanks die from the orange metallic kraft cardstock included with the kit and backed it with a coordinating shade of deep, warm gray cardstock to allow the shiny orange die cut to pop from the colorful background. I popped up the greeting with some foam adhesive, then added a shiny metallic orange twine bow to the card front for a bit of added texture!

Well, that’s all for my projects today!

The Simon Says Stamp Card Kits are such an incredible value; the value of the individual elements of each kit equals far more than the $44.99 price tag, so you’re getting incredible bang for your buck. If you are consistently interested in the Simon Says Stamp Card Kit of the Month, you can sign up HERE to become a subscriber for an even bigger discount on these carefully curated products. As always, Simon also makes each individual element of the kits available a la carte, so that you can pick and choose what you would like to purchase if buying the entire kit isn’t really your thing. Who can say no to such incredible value though, right?

Thanks so much for stopping by today, and have a marvelous day!

Filed Under: simon says stamp, Uncategorized Tagged With: card kit of the month, die cutting, embossing folder, fall vibes, flat shaker, idea-ology, ink blending, layering stencils, modern loop, pumpkin patch, pumpkins, shaker card, simple thanks, thank you

Magenta and Lime for Summertime!

June 22, 2025

This post was sponsored by Simon Says Stamp. Thanks, Simon!

Hi friends! I have a super vibrant and sparkling project to share with you today using some new and some old goodies from Simon Says Stamp. I love mixing older releases with new, hopefully showing you that so many of the new items will work beautifully with the older items. With the official start of summer (and an obnoxiously strong heat wave to “celebrate”… ugh), I thought I would use some summer-bright colors for this elegant design. Let’s get started with the details!

*I have gathered links to all of the products used at the bottom of the post for your convenience, using affiliate links. Thank you for shopping with my links! I truly appreciate your support for my work!*

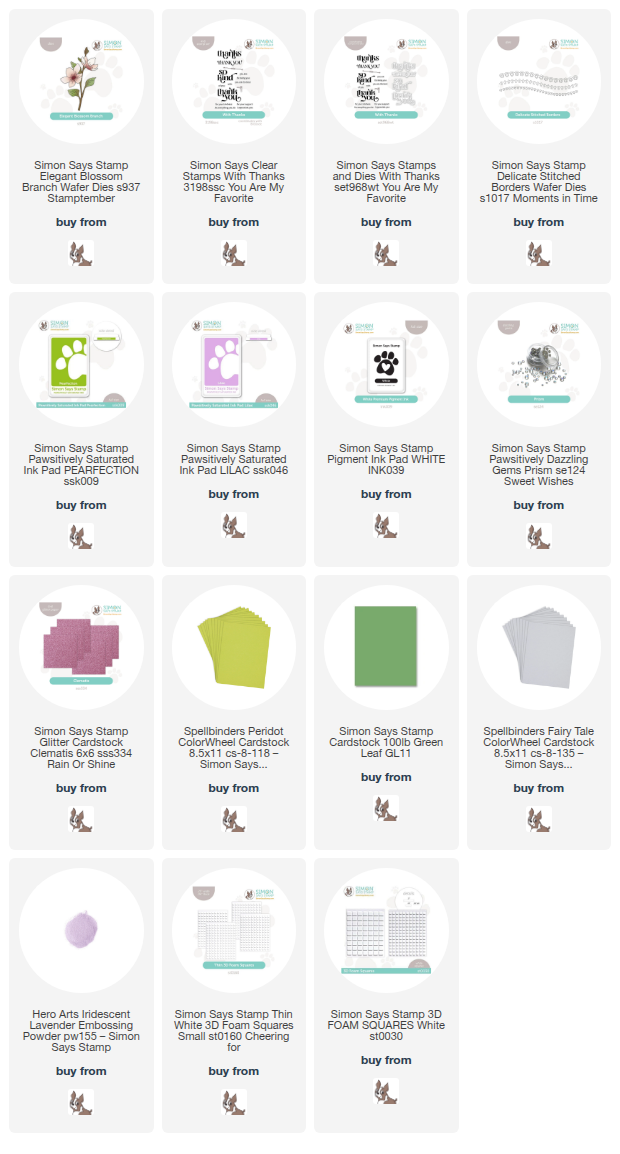
To begin, I die cut the components of the Elegant Blossom Branch from two different shades of lime-y green cardstock and some very pale purple cardstock for the bloom. I used a small blending brush to blend some Lilac Pawsitively Saturated Ink in the center of the flowers, adding some dimension and interest to the die cut blooms. I adhered the blooms to one of the green die cuts, then snipped the leaves off of the other to add to the bouquet!

For the card base, I trimmed a thick strip of Simon Says Stamp Clematis Glitter Cardstock and then die cut it with the eyelet die in the Delicate Stitched Borders die set. I then used a blending brush to blend some Pearfection Pawsitively Saturated Ink on the edge of a super bright lime green card base, tapering it off towards the center of the card front. I adhered the glitter piece with thin foam adhesive to add some extra dimension. The ink blending behind the eyelet pattern helps add some contrast and make the pattern more visible!

For the greeting, I stamped two of the sentiments from the With Thanks product suite (I just love this sentiment set-the greetings are lovely and the font is so pretty!) on some green cardstock using Simon Says Stamp White Pigment Ink, then added some Iridescent Lavender embossing powder over the top to add some extra shimmer and to set the white pigment ink. I used the coordinating die to cut the large sentiment and my Gina K. trimmer to trim the sentiment strip. I adhered the sentiment to the card front using thick foam adhesive squares, then tucked the flower behind the greeting die cut, adhering with thin foam adhesive and liquid adhesive. Finally, I added some Prism Pawsitively Dazzling Gems to add one last touch of sparkle to the card!

Well, that’s all for my project today! It’s the perfect week to stay inside and get crafty, and that’s just what I have planned. Stay cool, friends! Thanks so much for stopping by!

Filed Under: simon says stamp Tagged With: clematis, colorwheel, delicate stitched borders, die cutting, elegant blossom, ink blending, thank you

Thanks Two-fer with Simon Says Stamp!

May 12, 2025

This post was sponsored by Simon Says Stamp. Thanks, Simon!

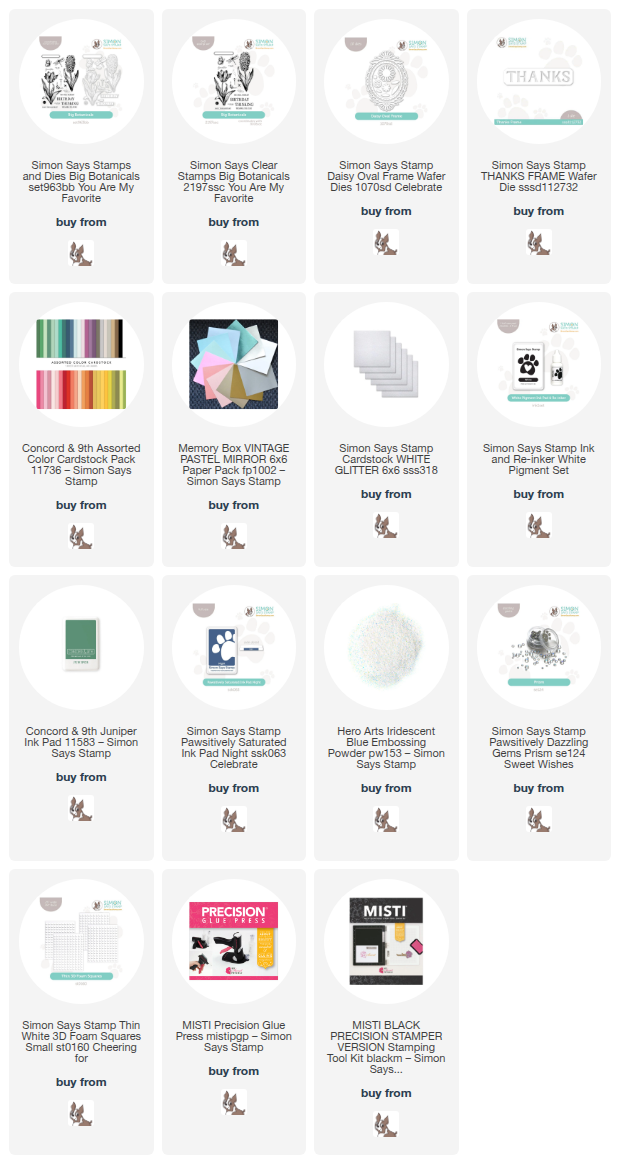
Hi friends! It’s a new week, so we have some new inspiration to talk about here on my blog. I love, love, love the detailed images in the new Big Botanicals stamp set from the You Are My Favorite Release from Simon Says Stamp. Sets like this are wonderful for people who maybe don’t love coloring; the size and the level of detail in the images means that you don’t have to color the images to make a huge impact on your card! I used some specialty embossing powder to create this pair of semi-simple “thanks” cards, so let’s get started with the details on my projects!

*I have gathered links to all of the products used at the bottom of the post for your convenience, using affiliate links. Thank you for shopping with my links! I truly appreciate your support for my work!*

To begin, I stamped the large tulip and hyacinth images from the new Big Botanicals using Simon Says Stamp White Pigment Ink on Concord and 9th’s Blueberry and Juniper cardstock, then added Hero Arts’s Iridescent Blue embossing powder over the top. The iridescent shine on the embossing powder adds incredible shimmer, while the semi-translucence still allows the colorful cardstock background to shine through, creating a somewhat monochromatic effect! I die cut the images with their coordinating dies to create large focal points for my A2 card set.

For both cards, I die cut the gorgeous Daisy Oval Frame from some iridescent white mirror cardstock. The coated cardstock cuts like a dream with these super intricate dies! I adhered each frame in the center of my coordinating A2 colored cardstock card front using liquid adhesive, then popped up the heat embossed flower die cut in the center of each frame using foam adhesive squares. To add a little extra interest to the card front, I used the little bracket stamp from Big Botanicals with Juniper ink from Concord and 9th and Night ink from Simon Says Stamp in each corner.

After I had finished the overall card design, it was time to add a sentiment. I used some white glitter cardstock to die cut the older Thanks Frame die cut, which is super elegant and such a generous size; it’s proportions work perfectly with the large botanical embossed images! I backed the glittery die cut sentiment frames with a darker shade of the card front so that it would stand out from the color-saturated background. I popped the greeting die cuts up over the stems of the blooms with a double layer of foam adhesive to give them even more prominence, then added some Prism Pawsitively Dazzling Gems to adorn each bracket in the corners of the card front. These cards each have so many elements of shimmer and shine that are difficult to pick up in a still photo, but they practically glow in real life!

Well, that’s all for my projects today! I love being able to create a pair of coordinating projects that still each have their own unique aesthetic and color palette. The Big Botanicals stamp set adds incredible imagery to your stash, great for colorists and non-colorists alike! Thanks so much for stopping by today, and have a marvelous day!

Filed Under: simon says stamp Tagged With: big botanicals, card set, daisy oval frame, die cutting, iridescent embossing, thank you, thanks frame

  • « Go to Previous Page
  • Page 1
  • Page 2
  • Page 3
  • Page 4
  • Interim pages omitted …
  • Page 6
  • Go to Next Page »

Primary Sidebar

  • Facebook
  • Instagram
  • Pinterest
  • YouTube

Favorite Shops

Secondary Sidebar

Subscribe

Enter your email address to subscribe to this blog and receive notifications of new posts by email.

Instagram
Something is wrong.
Instagram token error.
Follow
Load More

Archives

Tags

3D embossing folder alcohol markers better press birthday birthday card blog hop card kit christmas christmas card christmas tag colored pencil copic copic coloring Daniel Smith die cutting embossing folder embroidery felt giveaway holiday holiday card hot foil ink blending karin brushmarker pro layered stencil masculine my monthly hero new release no line coloring no line watercolor OLO marker olo markers original illustration pawsitively saturated rainbow shaker card slimline stamping stamptember stencil thank you thinking of you valentine's day video watercolor

Popular Posts

Simon Says Stamp Sending Cheer Blog Hop- Day 2 + Freebie + Giveaway!
Altenew October 2026 Release Blog Hop + Giveaway!
Rustic Monochromatic Stars for Christmas with Rainbow Splash!
March 2020 Essentials By Ellen Blog Hop+Giveaway!
December 2018 My Monthly Hero Blog Hop + Giveaway!
The Ton Stamps Summer Release: Day 1
Waffleflower July Release Blog Hop!
Hero Arts Partners Blog Hop: Lawn Fawn!
Simon Says Stamp STAMPtember Tim Holtz Collaboration: Festive Holidays!
Simon Says Stamp August 2026 Card Kit of the Month: Made to Flourish!

Disclosure

Some affiliate links are used in my posts. This means that, should you click on one of my links and purchase something from that company, I will receive a small portion of the sale at no extra cost to you. I use the money earned from these sales to help maintain my blog. I so appreciate you visiting and, if you do choose to use one of my affiliate links, thank you so much for your support!
Copyright © 2026 ·Brunch Pro Theme · Genesis Framework by StudioPress · WordPress · Log in
Loading Comments...