• Skip to main content
  • Skip to primary sidebar
  • Skip to secondary sidebar

Sixth Street Sundries

Emily Midgett

  • Home
  • About Me
  • Contact
  • OLO Marker Color Swatch Chart
  • Shop

timeless thanks

Glowing Hydrangeas with New Simon Says Stamp!

August 19, 2026

This post was sponsored by Simon Says Stamp. Thanks, Simon! *I have gathered links to all of the products used at the bottom of the post for your convenience, using affiliate links at no extra cost to you. Thank you for shopping with my links! I truly appreciate your support for my work!*

Hi friends! Do you love hydrangeas as much as I do? I first saw them when my Grammy and Papa took my mom, my sister, and me on a trip from the land of corn to the Outer Banks, traveling off the beaten path to check out the scenery. We have white “snowballs” here, but the lush, vibrant colors and enormous balls of blooms that are the East Coast hydrangeas are something for which my eyeballs were unprepared. I fell so in love with them that we primarily used deep blue hydrangeas for our wedding floral arrangements 15+ years later, and now have (unsuccessfully) tried to grow them in our front yard. The new Gorgeous Hydrangea embossing folder, die, and stencil suite from the Simon Says Stamp Every Happiness release (click HERE to check out the entire release!) immediately was calling my name! I created not one, but two different projects with this plethora of crafty options, and today’s project features the embossing folder and layering stencils. Let’s get started with the details!

To begin, I ran an A2 panel of white cardstock through my die cutting machine using the marvelous new Gorgeous Hydrangea folder. The details on this massive bloom are exquisite, but the coordinating Gorgeous Hydrangea Stencils help those details jump off of your project so beautifully! I used Shading Brushes to blend Pawsitively Saturated Inks in shades of Guava, Periwinkle, Iris, Juniper, overlapping some of the colors multiple times to create that ethereal multicolored hydrangea “glow” that so enchanted me as a child.

After I had finished blending the stenciled images, I used the same shades of ink to blend around the outside of my card front, allowing those colors to illuminate not only the flower, but the scenery around it. Once I had finished blending the entirety of the card front, I dotted a silver paint pen in the individual flower centers and added some beautifully sparkling watercolor splatters around the edges.

For the greeting, I kept things simple using the Timeless Thanks die set, cutting the detail layer from some dazzling iridescent pink cardstock and backing it with a vellum die cut shadow layer. I popped those layers up with thin foam adhesive, floating the sentiment over the flower but still allowing those lovely details to shine through. I added a pale blue velvet bow around the stem and some Opal Pawsitively Dazzling Gems for a bit more sparkle!

Well, that’s all for my project today! I am just so in love with how this turned out…. it reminds me of a gorgeous OBX sunset. A little ink blending and some gorgeous floral texture does some marvelous work, don’t you think? Thank so much for stopping by today, and have a marvelous day!

Filed Under: simon says stamp Tagged With: 3D embossing folder, die cutting, gorgeous hydrangea, hydrangea, ink blending, thanks, timeless thanks

Starry Thanks with New Simon Says Stamp!

July 10, 2026

This post was sponsored by Simon Says Stamp. Thanks, Simon! *I have gathered links to all of the products used at the bottom of the post for your convenience, using affiliate links at no extra cost to you. Thank you for shopping with my links! I truly appreciate your support for my work!*

Hi friends! I haven’t been feeling 100% this week, so my time at my desk has been a bit limited. However, sometimes you don’t need to spend tons of time working to create a lovely handmade card if you have the right tools. A cover plate die like the Falling Stars die from the Simon Says Stamp Always There release (click HERE to see the entire collection) and a large scale sentiment die cut really does a lot of the heavy lifting for you! Let’s get started with the details on this simple and elegant thank you card.

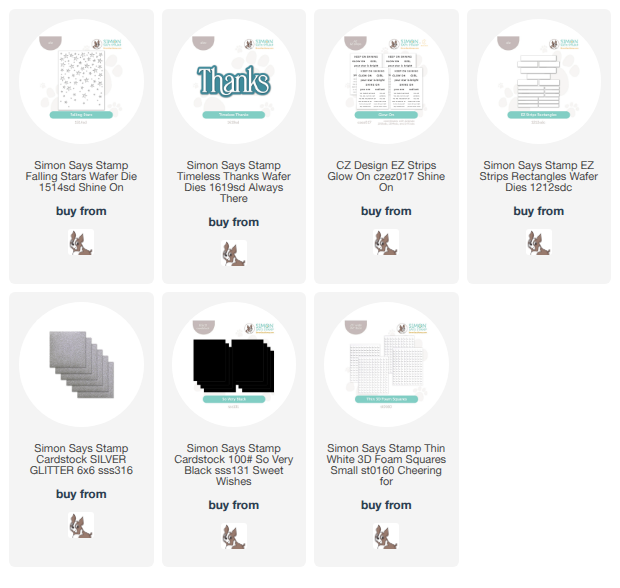
To begin, I die cut the new Falling Stars cover plate die from some sparkling silver glitter cardstock, making sure to reserve the small die cut stars for another project (remember THIS card?). I backed the starry die cut with a panel of plain black cardstock, creating maximum contrast between the star windows and the background.

To keep things super simple, I decided to add a large-scale sentiment die cut. I die cut the newer Timeless Thanks, cutting the detail layer from white cardstock and backing it with a shadow die cut, cut from more So Very Black cardstock. I layered the two die cuts together with liquid adhesive, then popped it up on my starry backdrop with thin foam adhesive squares.

Whenever I have a large, simple sentiment, I like to add a smaller sentiment strip to personalize the message a bit more. I die cut the new Glow On EZ Strips using the EZ Strips Rectangles cover plate die, which cuts all of the sentiments from the EZ Strips card in one fell swoop! I selected one that worked nicely with the starry theme of the card front, then adhered it with more foam adhesive, tucking it beneath the large sentiment die cut. The super sparkly card front didn’t need any extra embellishment, though I did think of adding some shimmering gems.

Well, that’s all for my project today! I love when a few die cuts, some sparkly paper, and a little dimensional adhesive can come together to create a quick and unique card. Thanks so much for stopping by today, and have a marvelous day!

Filed Under: simon says stamp, Uncategorized Tagged With: die cutting, EZ strips, ez strips glow on, falling stars, thank you card, thanks, timeless thanks

Primary Sidebar

  • Facebook
  • Instagram
  • Pinterest
  • YouTube

Favorite Shops

Secondary Sidebar

Subscribe

Enter your email address to subscribe to this blog and receive notifications of new posts by email.

Instagram
Something is wrong.
Instagram token error.
Follow
Load More

Archives

Tags

3D embossing folder alcohol markers better press birthday birthday card blog hop card kit christmas christmas card christmas tag colored pencil copic copic coloring Daniel Smith die cutting embossing folder embroidery felt giveaway holiday holiday card hot foil ink blending karin brushmarker pro layered stencil masculine my monthly hero new release no line coloring no line watercolor OLO marker olo markers original illustration pawsitively saturated rainbow shaker card slimline stamping stamptember stencil thank you thinking of you valentine's day video watercolor

Popular Posts

Watercolor Poinsettia Card and Tag with Tim Holtz and Simon Says Stamp!
Cottagecore Christmas Framed Artwork with New Simon Says Stamp!
Simon Says Stamp Joy For You Blog Hop- Day 1!
Warmth and Love at Christmastime with New Simon Says Stamp!
Honey Bee Stamps 4th Anniversary Celebration!
Altenew Build A Flower Sweet Violet+Giveaway!
Simon Says Stamp Glory to the Newborn King Holiday Kit-Part II!
Altenew July Stamp and Die Blog Hop+Giveaway!
Altenew Watercolor Coloring Book Release Blog Hop + Giveaway!
Cottagecore Canvas with New Simon Says Stamp Shine On Release!

Disclosure

Some affiliate links are used in my posts. This means that, should you click on one of my links and purchase something from that company, I will receive a small portion of the sale at no extra cost to you. I use the money earned from these sales to help maintain my blog. I so appreciate you visiting and, if you do choose to use one of my affiliate links, thank you so much for your support!
Copyright © 2026 ·Brunch Pro Theme · Genesis Framework by StudioPress · WordPress · Log in
Loading Comments...