• Skip to main content
  • Skip to primary sidebar
  • Skip to secondary sidebar

Sixth Street Sundries

Emily Midgett

  • Home
  • About Me
  • Contact
  • OLO Marker Color Swatch Chart
  • Shop

toner foil

Away to the Window with New Simon Says Stamp + Free Gift Cards!!

November 22, 2025

This post was sponsored by Simon Says Stamp. Thanks, Simon!

Hi friends! I have a super crisp, bold, and graphic holiday card to share with you today using goodies from the new And Everything Nice release from Simon Says Stamp! (click HERE to see the entire release!) Festive decorated window imagery is everywhere right now, and the beautifully intricate Balcony Window dies from Simon Says Stamp are perfect for dressing up to fit the holiday mood! I created this card with one of my favorite holiday color palettes: bright, crisp white with pops of vibrant red and verdant greenery, accompanied by a little sparkle. Let’s get started with the details!

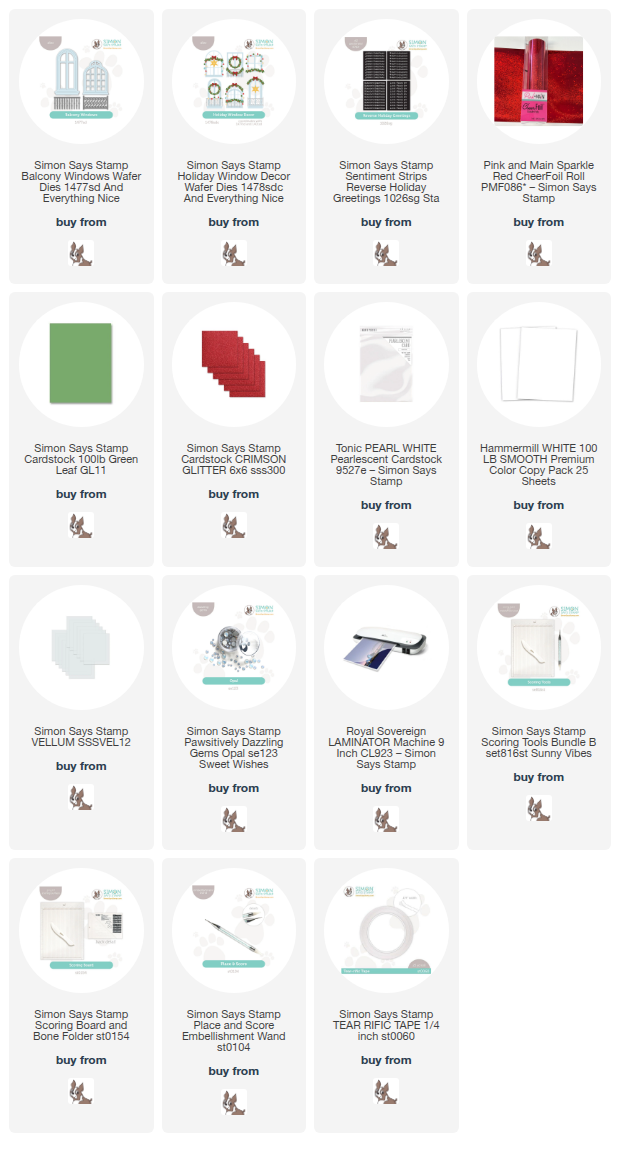
*I have gathered links to all of the products used at the bottom of the post for your convenience, using affiliate links at no extra cost to you. Thank you for shopping with my links! I truly appreciate your support for my work!*

To begin, I die cut the arched window from the new Balcony Windows set three times from plain white cardstock, adhering all of the die cuts together with liquid adhesive to create a dimensional die cut. I backed the window with vellum, though it is difficult to see in the photo, trimming off the edges with my sharp scissors. The Balcony Windows set comes with two intricately detailed window images, as well as two different options for fencing that you can use to create beautiful architectural scenes!

To embellish my window, I used solid green cardstock to die cut the foliage from the new Holiday Window Decor, then die cut some festive details with red glitter and white pearl cardstocks. I adhered these details to the wreath and garland with liquid adhesive, then used my trimmer to trim down a sentiment from the Reverse Holiday Greetings sentiment panels that I’d embellished with some glittery red toner foil and my laminator.

To create this card base, I wanted to add a little extra fun detail with a slightly offset card front, so I used the Simon Says Stamp Scoring Board to score a fold 3/4″ from the edge of my A2 card front, then used some Tear-rifically Tacky Tape to add the thin folded edge to the back of another panel of white A2 cardstock, creating a quick, moderately fun fold card! (I’m no engineer to be able to do those crazy-but-amazing fun fold cards like some of my friends!) I added my window die cut so that it was just lightly hanging over the edge of the card front, adding plenty of liquid adhesive so that it was sturdy while still hanging over the edge. I added the festive greenery and the sentiment strip with som foam adhesive, then added a few Opal Pawsitively Dazzling Gems for a touch of extra sparkle!

Well, that’s all for my project today. Now for some fun sale news: Simon Says Stamp is running their B1G1 gift card deal!!

$20 in free gift card?! Awesome! Click HERE to go right to the gift card page!

Thanks so much for stopping by today, and have a marvelous day!
Filed Under: simon says stamp Tagged With: balcony windows, christmas card, die cutting, holiday card, holiday window decor, laminator, reverse holiday greetings, toner foil

Using Leftovers: Nordic Christmas on a Line with Simon Says Stamp!

October 29, 2025

This post was sponsored by Simon Says Stamp. Thanks, Simon!

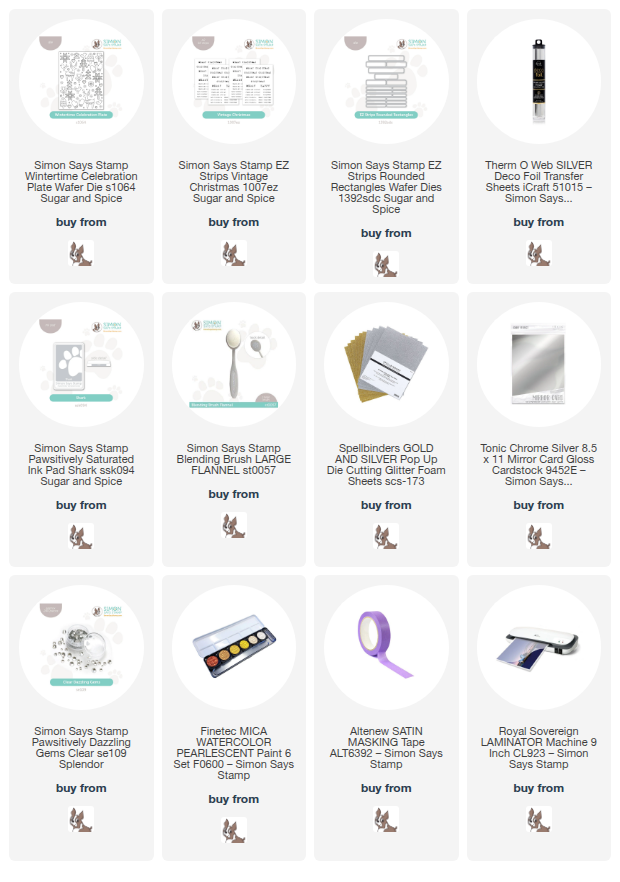
Hi friends! I have a project to share with you today using silvery glitter foam die cuts leftover from THIS project using goodies from the  Simon Says Stamp Sugar and Spice release (which you can check out HERE). I love it when a single die has enough of an impact to create multiple projects!! Versatility is key. The Wintertime Celebration Plate negative die cut definitely has a Nordic feel to it, with its collage of simplistic holiday imagery, but the positive die cuts that are created with the same single die cut work beautifully to create visually simplistic, elegant projects like this one. Let’s get started with the details on my project!

*I have gathered links to all of the products used at the bottom of the post for your convenience, using affiliate links. Thank you for shopping with my links! I truly appreciate your support for my work!*

To begin, I selected the standalone trees and a sweet little deer from the leftover silver glitter foam positive die cuts that were created using the Wintertime Celebration Plate. Using the glitter foam allows you to add dimension to your die cut projects without the fuss of additional foam adhesive and those little bits of release paper floating all over your desk! I wanted to create a clean horizon line upon which my images could stand, so I used some masking tape and some computer paper to mask off the bottom portion of my white A2 card front, then used a blending brush to blend Shark Pawsitively Saturated Ink. While the mask was still in place, I splattered some silvery glitter watercolors over the blended area to create some snowy imagery.

Once my splatters had dried, I arranged the glitter foam die cuts on the line in a symmetrical pattern with the deer in the center surrounded by a glittering forest of trees. I adhered the images with liquid adhesive easily, quickly adding dimension to my project with very minimal effort!

For the greeting, I die cut the new EZ Strips Vintage Christmas sentiment cards using the new EZ Strips Rounded Rectangles, creating many sentiment strips with one quick run through my die cutting machine. I wanted to maintain the icy silver and white color palette, so used some silver toner foil and my laminator to add shining silver foil to the sentiment strip. I popped the strip up beneath the silver glitter images with some thin foam adhesive, then added a couple of Clear Pawsitively Dazzling Gems on either side, maintaining the clean symmetry of the glitter die cuts throughout the rest of the card. Finally, I added two strips of silver foil cardstock beneath the sentiment, filling in the white gap beneath the main focal point and adding another final element of silvery shine!

Well, that’s all for my project today! Isn’t it great when you can create two completely unique cards with one set of die cuts? I never tire of the versatility of standalone die cuts!! Thanks so much for stopping by today, and have a marvelous day!

Filed Under: simon says stamp Tagged With: christmas card, die cutting, ez strips rounded rectangles, glitter foam, holiday card, laminator, toner foil, wintertime celebration

Love You Shake-Shake-Shaker Card with New Simon Says Stamp!

January 6, 2025

This post was sponsored by Simon Says Stamp. Thanks, Simon!

Hi friends! Happy New Year to you! While I still have my Christmas decorations up (a combination of not having time to take them down and not really wanting to be without the glow of the Christmas lights just yet!), the cardmaking world is moving on from the holidays to all things Valentine’s Day and even some spring! Simon Says Stamp had a new release go live on December 19, called the To Love release, which celebrates all things love and romance! I took a break from my holiday crafting to work with pinks, reds, and hearts, and I can’t wait to share all of the projects that I created with you. I am starting things off with this in-your-face-magenta shaker card, so let’s get started with the details!

*I have gathered links to all of the products used at the bottom of the post for your convenience, using affiliate links. Thank you for shopping with my links! I truly appreciate your support for my work!*

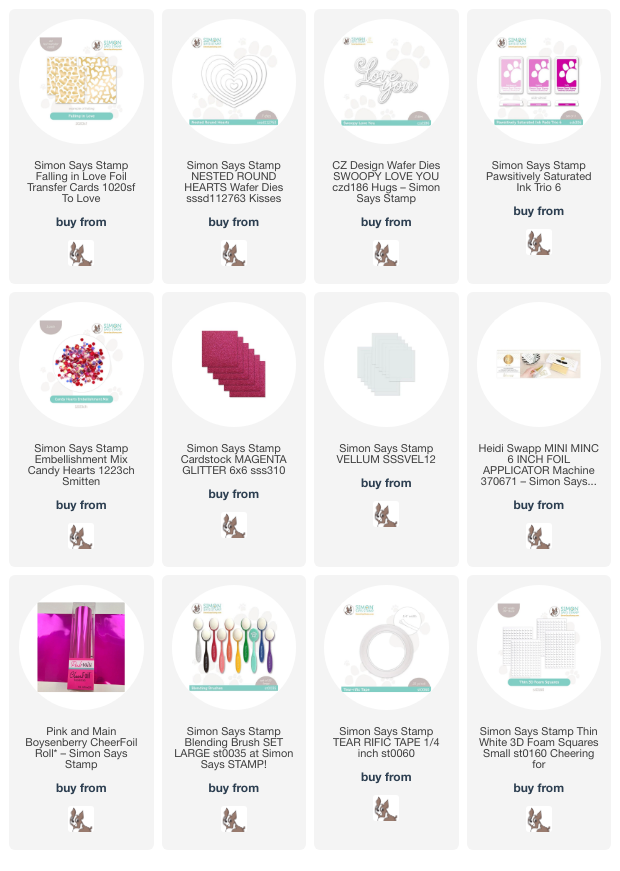
I absolutely love the foil transfer cards from Simon Says Stamp. They create the quickest, most fabulous backgrounds lickety split, and the new Falling In Love Foil Transfer Cards feature the loveliest whimsical heart designs! I used my Minc machine with some gorgeous magenta toner transfer foil to foil this whimsical heart background, then used blending brushes to blend Pawsitively Saturated Ink Trio 6-Bubblegum, Sweets, Taffy inks in a dark-to-light ombré. I trimmed down the finished panel slightly, then used some leftover stamp packaging to create a flat shaker pocket, adding strips of super sticky Tear-rific Tape to the back to create my flat shaker pocket. I filled the pocket with Candy Hearts Sequins and mounted it in the center of a full sized A2 panel of coordinating magenta cardstock, creating a thin hot pink frame around the edges of my shaker card front.

For the greeting, I die cut the detail layer of the Swoopy Love You sentiment die set from some coordinating hot pink glitter cardstock, then die cut the shadow layer from some Simon Says Stamp vellum. I used tiny dots of liquid adhesive behind the solid die cuts to the adhere the layered sentiment die cut at an angle to the bottom of my shaker card front.

After adhering the sentiment, I decided to embellish the card front with a visual cascade of hearts, so I die cut a couple of sizes of Nested Round Hearts from some more of the same magenta cardstock used for the card base. I used a blending brush to blend some more hot pink ink around the edges of the hearts, then popped them up on the card front using some thin foam adhesive squares!

Well, that’s all for today’s project. Those foil transfer cards really make quick work of your card, creating such beautiful and detailed backgrounds and focal points for you with minimal effort. Some sequins and a glittery sentiment to finish everything off made this card come together super quickly. Thanks so much for stopping by today, and have a marvelous day!

Filed Under: simon says stamp Tagged With: die cutting, falling in love foil transfer cards, foil transfer card, hot foil, ink blending, minc, nested round hearts, shaker card, swoopy love you, toner foil, valentine's day

Snowflake Shaker Card with New Simon Says Stamp DieCember Goodies + FREE Gift With Purchase!

December 2, 2024

This post was sponsored by Simon Says Stamp. Thanks, Simon!

Hi friends! I am back with another project featuring some of the fabulous goodies from the new Simon Says Stamp DieCember release. I love a good shaker card; there’s something so festive and just plain fun about receiving a card that is filled with fantastic shaker bits and sequins. A shaker card always puts a smile on the recipient’s face, right? So it only makes sense to send Christmas Cheer with a super fun shaker card created with some creative die cutting and sparkling sequins. Let’s get started with the details!

*I have gathered links to all of the products used at the bottom of the post for your convenience, using affiliate links. Thank you for shopping with my links! I truly appreciate your support for my work!*

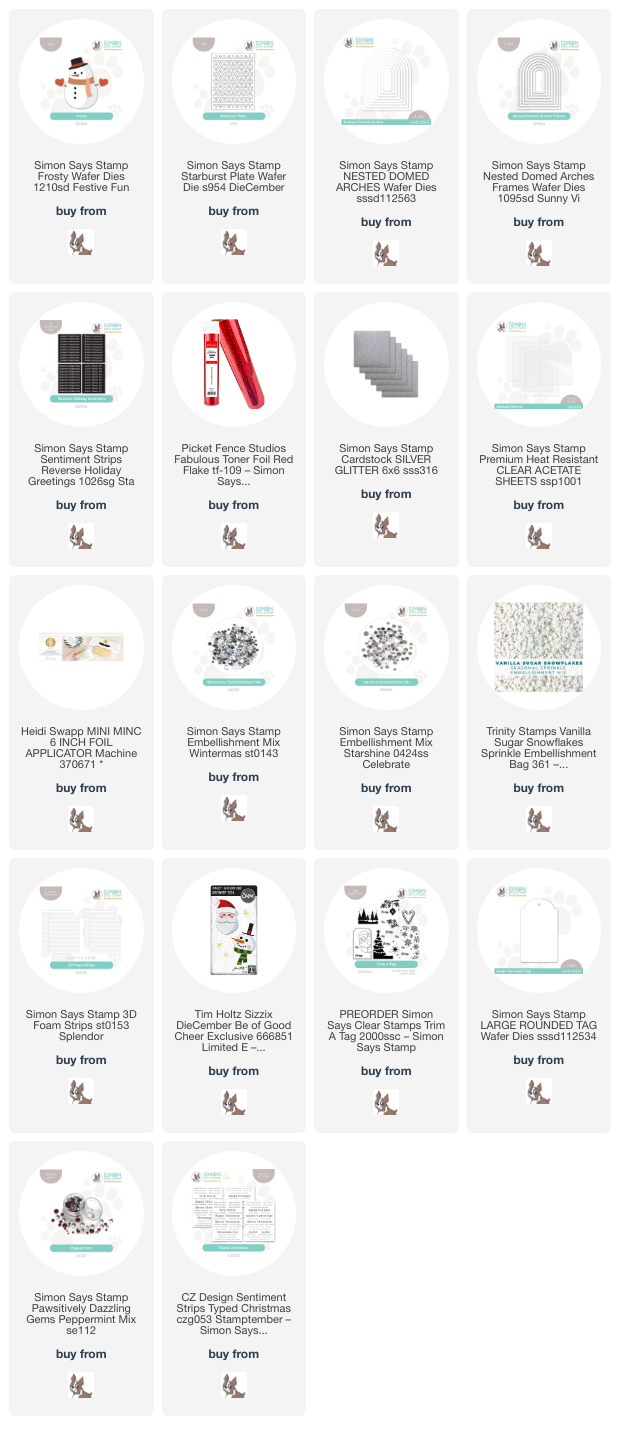
I absolutely adore cover plates; they create such an enormous impact with one piece of cardstock and one pass through your die cutting machine. The new Starburst Plate is so beautifully intricate that I wanted to stretch that easily-created die cut even further by creating a die cut window with the negative space and a second card with the positive space! (More about that in a future post.) I began my project today by die cutting an A2 panel of white cardstock using the Starburst Plate, then placing the one of the Nested Domed Arches in the center of the die cut and running it through my die cutting machine again. I made sure to reserve the patterned, arched die cut for a future project, and backed the remaining negative piece with an A2 piece of acetate, creating a large, plain window to start my shaker card! I added an appropriately-sized Nested Domed Arches Frame die cut, cut from some Simon Says Stamp Silver Glitter Cardstock, creating a border around my window opening.

After creating my background, I used the previously-released Frosty snowman die with some colored cardstock to create the focal point for my project. The finished Frosty fits perfectly inside my arched window! I used the Simon Says Stamp 3D Foam Adhesive Strips around the edges of the back of my shaker front, then filled the entire shaker with some gorgeous and fun wintry sequins, adding a few plain red sequins to coordinate with the cheerful red scarf, mittens, and hat on my Frosty. I sealed up the shaker with a panel of plain white cardstock. I love how the sparkling sequins peek through the snowflake windows from the Starburst Plate die cut!!

For the greeting, I used my Minc Machine with Picket Fence Studios Red Flake foil to make the Reverse Holiday Greetings set look super shiny and festive. I trimmed the strip down and tucked it beneath my snowman with some more thin foam adhesive. Tucking the sentiment right beneath Frosty helps to ground him a bit so that he’s not floating in midair in my window!

Well, that’s all for my project today. Simon Says Stamp DieCember celebration is in full swing, and to make things even more special and fun, Simon Says Stamp is offering an exclusive freebie: Be of Good Cheer die set

You can receive this adorable Be of Good Cheer die set set from Tim Holtz with any $25 Tim Holtz purchase! Click HERE to check out all of the goodies eligible for the promotion!

I created a fairly quick tag using the sweet Santa die from Be of Good Cheer:

Some white embossed snowflakes on a cheerful red tag created the perfect backdrop for my happy Santa!

I added a few Peppermint Pawsitively Dazzling Gems, a cherry red bow, and a jingle bell to make things extra special.

Well, that’s all for me today. This fantastic freebie (valued at $16.99!) is only available while supplies last, so don’t wait! Thanks so much for stopping by today, and Happy DieCember!

Filed Under: simon says stamp Tagged With: christmas card, christmas tag, diecember, freebie, frosty, holiday card, hot foil, minc, nested domed arches, nested domed arches frames, pawsitively dazzling, reverse holiday greetings, santa, shaker card, starburst, tag, tim holtz, toner foil

New Pastel Inks from Simon Says Stamp!

November 26, 2024

This post was sponsored by Simon Says Stamp. Thanks, Simon!

Hi friends! I am back with some more inspiration using several different items from the beautiful new Festive Fun release from Simon Says Stamp. The new release included lots of beautiful goodies, including gorgeous new Pastel Pigment Inks that create the softest, most beautifully blended pastel colors. I have a quartet of projects to share with you today using the inks and their coordinating Pawsitively Dazzling Gems along with some other goodies from the Festive Fun release, so let’s get started with the details!

*I have gathered links to all of the products used at the bottom of the post for your convenience, using affiliate links. Thank you for shopping with my links! I truly appreciate your support for my work!*

I love creating coordinating card sets that work together as a group but also are each just a little unique, and these gorgeous new Pastel Pigment Inks were perfect for some light mass production! I don’t normally think of pastels for holiday cards, but combining these lovely inks with their coordinating Pastel Pawsitively Dazzling Gems and some wintry imagery made for beautifully unique and festive cards!

*Note: I do have dedicated blending brushes specifically for these pigment inks. I would not recommend mixing the dye and pigment inks on the same brush, as the different formulations for the opaque pigment inks and translucent dye inks don’t play nicely together on the brushes*

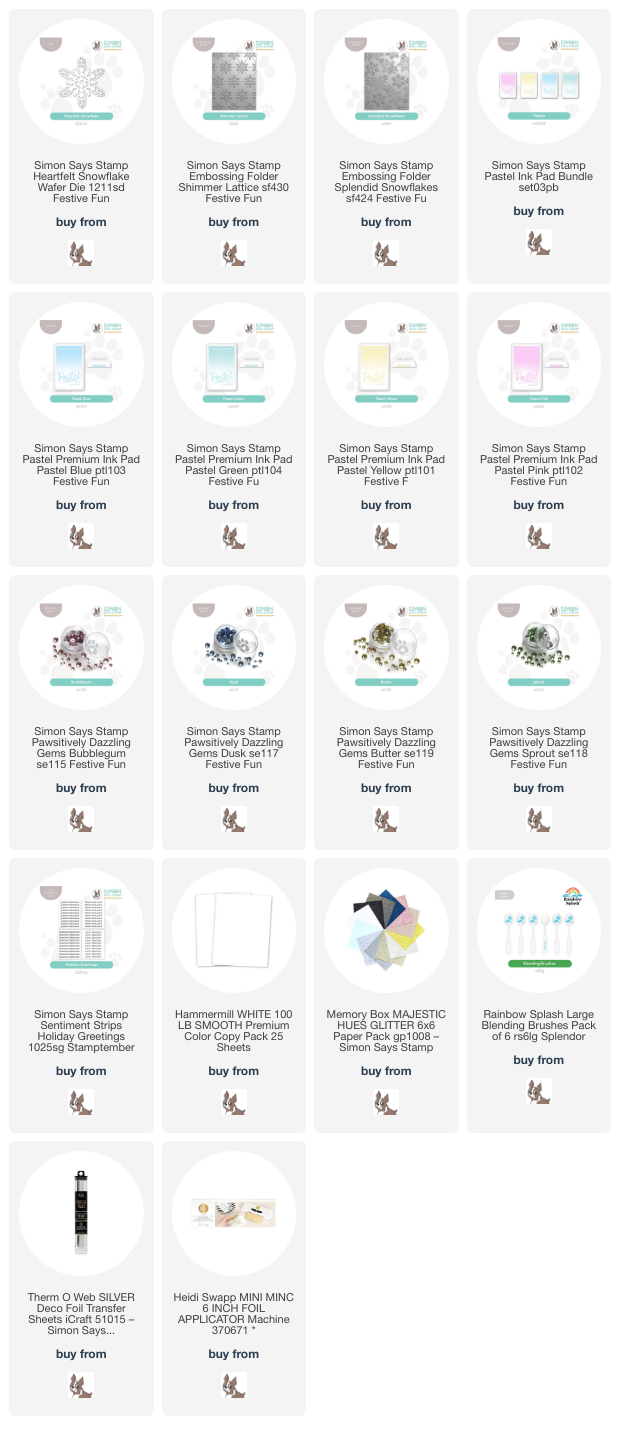
When mass producing, I like to keep the basic layout very similar, but switch up some of the products used. I paired the Pastel Blue ink and Pastel Pink ink with the new Shimmer Lattice Embossing Folder, first blending the panels of 3.75″ x 5″ white cardstock with Pastel Blue and Pastel Pink inks, then running those blended panels through my die cutting machine with the Shimmer Lattice Embossing Folder. Doing the ink blending first keep the details from the embossing consistent throughout, whereas ink blending after embossing would enhance the details in the blended areas.

After I had finished ink blending and embossing each panel, I splattered some glittering handmade watercolors on each panel to add extra festiveness and sparkle. I mounted each panel on an A2 card base, then added a white glitter Heartfelt Snowflake die cut to the center of each card with some tiny pieces of foam adhesive. I also used my Minc machine to addsilver toner foil to the Holiday Greetings Sentiment Cards. After I had added the sentiment strips over the center of each glittering snowflake, I used the coordinating Bubblegum and Dusk Pawsitively Dazzling Gems at the tips of each snowflake spire. So sparkly and wintry, even with the somewhat springy colors!

For my second set, I paired the same technique with the new Pastel Yellow and Pastel Green inks and the Splendid Snowflakes Embossing Folder, blending first and then running the panels through my die cutting machine with the embossing folder and splattering each panel with more shimmering iridescent glitter watercolors.

I again centered the white glitter Heartfelt Snowflake die cut, layering the silver foiled Holiday Greetings Sentiment Card sentiment strip over the center of each snowflake. Finally, I added even more shimmer with the coordinating Butter Pawsitively Dazzling Gems and Sprout Pawsitively Dazzling Gems. My color-coordinated-loving-heart goes wild for these matching gems and inks!!

Well, that’s all for my projects today! These new inks blend like a dream and will work for so many different seasons and subjects… I can’t wait to play with them even more. Thanks so much for stopping by today, and have a marvelous day!

Filed Under: simon says stamp Tagged With: 3D embossing folder, card set, christmas card, die cutting, heartfelt snowflake, holiday card, holiday greetings, hot foil, ink blending, mass produce, minc, pastel ink pads, pawsitively dazzling gems, pigment ink, sentiment strips, shimmer lattice, splendid snowflakes, toner foil

  • Page 1
  • Page 2
  • Page 3
  • Page 4
  • Go to Next Page »

Primary Sidebar

  • Facebook
  • Instagram
  • Pinterest
  • YouTube

Favorite Shops

Secondary Sidebar

Subscribe

Enter your email address to subscribe to this blog and receive notifications of new posts by email.

Instagram
Something is wrong.
Instagram token error.
Follow
Load More

Archives

Tags

3D embossing folder alcohol markers better press birthday birthday card blog hop card kit christmas christmas card christmas tag colored pencil copic copic coloring Daniel Smith die cutting embossing folder embroidery felt giveaway holiday holiday card hot foil ink blending karin brushmarker pro layered stencil masculine my monthly hero new release no line coloring no line watercolor OLO marker olo markers original illustration pawsitively saturated rainbow shaker card slimline stamping stamptember stencil thank you thinking of you valentine's day video watercolor

Popular Posts

Simon Says Stamp Sending Cheer Blog Hop- Day 2 + Freebie + Giveaway!
Altenew October 2026 Release Blog Hop + Giveaway!
Rustic Monochromatic Stars for Christmas with Rainbow Splash!
Waffleflower July Release Blog Hop!
Hero Arts Partners Blog Hop: Lawn Fawn!
March 2020 Essentials By Ellen Blog Hop+Giveaway!
December 2018 My Monthly Hero Blog Hop + Giveaway!
The Ton Stamps Summer Release: Day 1
The Ton Anniversary Release: Day 1!
Altenew Paint A Flower: Carnation Blog Hop+Giveaway!

Disclosure

Some affiliate links are used in my posts. This means that, should you click on one of my links and purchase something from that company, I will receive a small portion of the sale at no extra cost to you. I use the money earned from these sales to help maintain my blog. I so appreciate you visiting and, if you do choose to use one of my affiliate links, thank you so much for your support!
Copyright © 2026 ·Brunch Pro Theme · Genesis Framework by StudioPress · WordPress · Log in
Loading Comments...