• Skip to main content
  • Skip to primary sidebar
  • Skip to secondary sidebar

Sixth Street Sundries

Emily Midgett

  • Home
  • About Me
  • Contact
  • OLO Marker Color Swatch Chart
  • Shop

tweet friend

Fun with Felt: Bunny Edition with Simon Says Stamp!

March 7, 2025

This post was sponsored by Simon Says Stamp. Thanks, Simon!

Hi friends! I’m back today with another Fun with Felt project, this time using some of the sweet springtime products from the new Simon Says StampĀ Favorite Things release. I am enjoying creating projects that last a bit longer than a card, and felt is a great way to make a project feel more substantial and meaningful. Let’s get started with the details!

*I have gathered links to all of the products used at the bottom of the post for your convenience, using affiliate links. Thank you for shopping with my links! I truly appreciate your support for my work!*

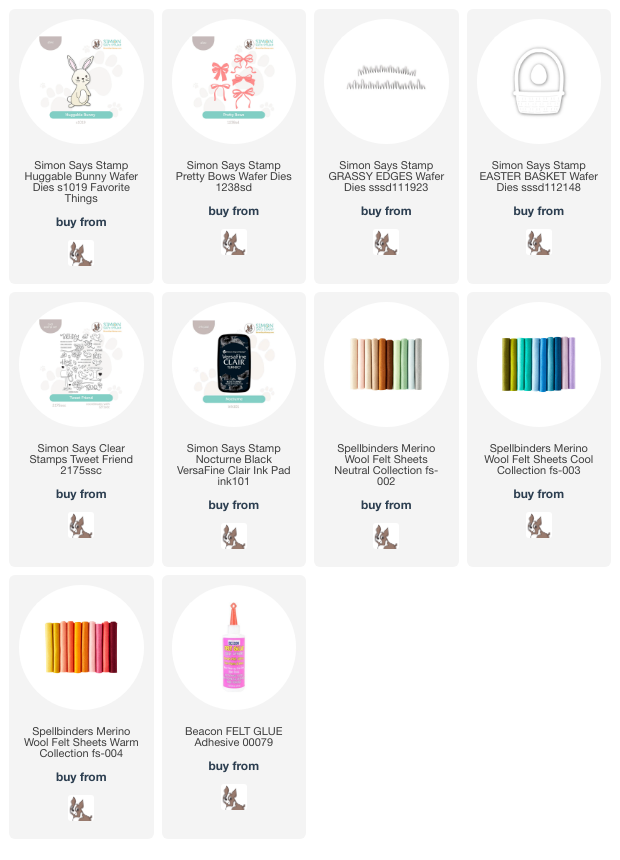
To start, I placed a piece of finely knit white cotton fabric, sized to fit within a 5″ embroidery hoop, in my MISTI, then stamped some of the floral branches from the beautiful Tweet Friend stamp set along the top of the fabric using Simon Says Stamp’s Nocturne Ink. This pigment ink works beautifully with lots of different surfaces, making it an ideal ink to use with fabric! After it had dried completely, I used some alcohol markers to add delicate blue and emerald green to the branches, using a light hand to keep the ink from bleeding outside the stamped edges, and placed the fabric in the 5″ embroidery hoop.

After creating my background, I die cut the new Huggable Bunny, Pretty Bows, Grassy Edges, and Easter Basket die from some lovely springtime felt colors. I adhered the different pieces of the bunny together using felt glue and allowed it to dry completely under a heavy paperweight to keep things nice and flat. I began arranging the different die cut felt pieces on my floral embroidery hoop background, adhering them each with felt glue and placing another heavy glass paperweight on top to keep things flat while drying.

Once I had finished arranging and adhering all of my felt die cuts, I used needle and thread to sew on some seed bead flowers, grass, and some stamens to the centers of the stamped floral branches. The seed beads add just a hint of shimmer to the project, and the added texture makes it feel even more polished! I just love how this one turned out!

Well, that’s all for my project today. I have been working with textiles and different fabrics and mediums so much lately… it’s so fun to add some variety into my crafting time! I hope it inspires you to look outside of your paper stash to see what you can embellish and make even more special. Thanks so much for stopping by today, and have a marvelous day!
Filed Under: simon says stamp Tagged With: copic coloring, die cutting, easter, easter basket, embroidery hoop, fabric, felt, fun with felt, grassy edges, huggable bunny, OLO marker, pretty bows, tweet friend

Springtime Shaker Jar with New Simon Says Stamp Favorite Things + SALE!

March 5, 2025

This post was sponsored by Simon Says Stamp. Thanks, Simon!

Hi friends! I have a fun little project using some new goodies from the new Simon Says Stamp Favorite Things release and an upcycle with an old jar that I saved from my trashcan. I have been enjoying creating non-card items, stretching my creativity to show how versatile these fun products can be! For today’s project, I wanted to use the gorgeous new Pastel Ice Embellishment Mix sequins to create a springtime shaker. I loved the sweet little birds in the new Tweet Friend stamp set and thought they’d be adorable for this project. Let’s get started with the details!

*I have gathered links to all of the products used at the bottom of the post for your convenience, using affiliate links. Thank you for shopping with my links! I truly appreciate your support for my work!*

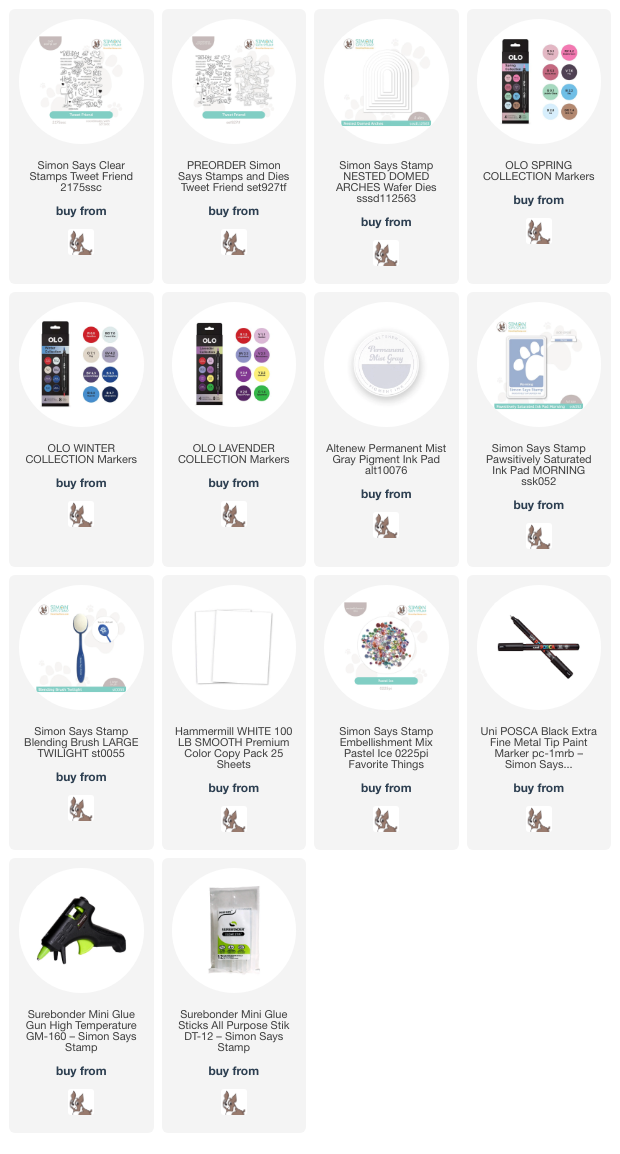
To start my project, I stamped several images from the new Tweet Friend stamp set, including some of the songbirds, flowering branches, and the bird bath, using Altenew Permanent Gray Mist ink onto white cardstock. I then used OLO Markers to do some no-line coloring, adding a few black accents with a black fine-tipped pen. After I had finished coloring all of the images, I used the coordinating dies to cut each one, and I just love how detailed the images are, especially the flowering branches!

After I had finished coloring and cutting all of the images, I die cut two white Nested Domed Arches die cuts and used a blending brush to blend Morning Pawsitively Saturated Ink on the rounded top of each die cut, creating a smooth blue springtime sky! I adhered both arch die cuts together using liquid adhesive, then used my hot glue gun to adhere the die cuts, standing straight up, to a green glitter die cut circle. I added the colored die cuts to each side of my vignette, creating a little springtime scene for each bird and adhering them with foam adhesive squares.

Once I had created the vignette scenes, I used my hot glue gun to adhere the pieces to the bottom of my clean glass jam jar. I poured in plenty of the new Pastel Ice Embellishment Mix to create a cute little springtime snow globe, then added the lid. For a final touch, I added a fluffy coordinating peach bow, adhering it with my hot glue gun!

Well, that’s all for my project today.

Simon Says Stamp is celebrating 23 fabulous years, and as a special treat, they are offering an equally fabulous gift with purchase: buy any gift card valued at $100 or more and get a FREE $23 gift card!! Isn’t that incredible? Click HERE to purchase a gift card!

You have until 11:59 ET on 3/6/25 to purchase your gift card, so don’t wait. Who can say no to free crafty goodies, right?

Thanks so much for stopping by today, and have a marvelous day!

Filed Under: OLO markers, simon says stamp Tagged With: die cutting, home decor, jar, no line coloring, olo markers, springtime, tweet friend

More Simon Says Stamp March 2025 Card Kit Inspiration!

February 16, 2025

This post was sponsored by Simon Says Stamp. Thanks, Simon!

Hi friends! I am back with another project featuring several of the goodies from the new Tweet Friend March 2025 Card Kit from Simon Says Stamp. This kit is the embodiment of spring imagery: sweet little birdies, garden-inspired patterned papers, and this gorgeous floral embossing folder that is super detailed and creates an ethereal botanical backdrop for your focal point! I kept things pink, pink, and more pink for my project today, pairing the beautifully sparkly Bubblegum Glitter Cardstock included in the kit with lots of pink inks and solid cardstock. Let’s get started with the details!

*I have gathered links to all of the products used at the bottom of the post for your convenience, using affiliate links. Thank you for shopping with my links! I truly appreciate your support for my work!*

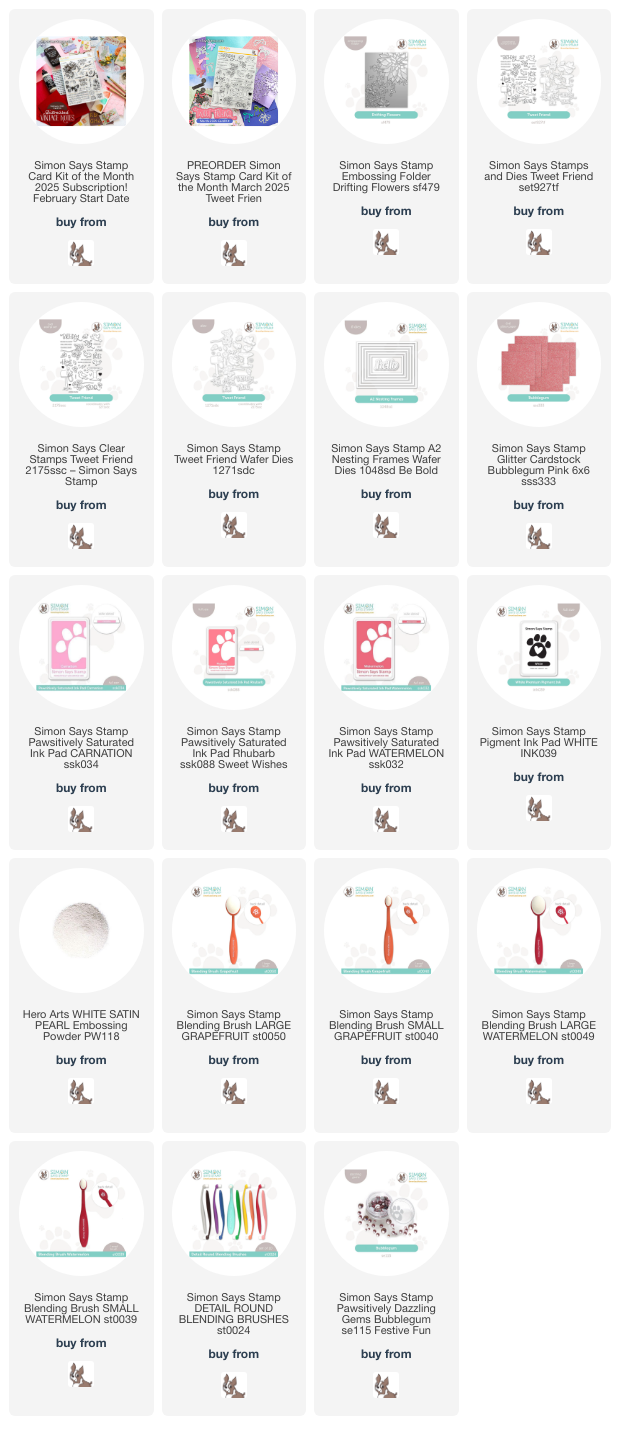
To start, I ran a panel of super pale pink cardstock through my die cutting machine using the new Drifting Flowers Embossing Folder. I then used tiny detail blending brushes to add some blended details using Carnation, Rhubarb, and Watermelon Pawsitively Saturated Ink on the individual flowers. Once I had added all of the blending, I swiped the Simon Says Stamp White Pigment Ink Pad directly on the raised areas, accenting them even further. I wanted to add some sparkling accents as well, so I used my metallic glitter watercolors to add sparkling dots to the centers of the flowers, as well as some “gilding” to the edges of the large flowers and some shimmering splatters to the whole project!

After I had finished my pretty-in-pink background, I turned my attention to the focal point and greeting. I heat embossed three of the sentiment stamps in the Tweet Friend stamp set onto some cooridinating bright pink cardstock, stamping first with White Pigment Ink and sprinkling White Satin Pearl embossing powder over the top to help set the ink and add a touch of shimmer. I used the same combination to stamp some of the individual floral stamps from Tweet Friend on some coordinating pale pink cardstock, then die cut all of the stamped and embossed images with their coordinating dies. To help draw the recipient’s eye to the greeting, I framed it with two concentric A2 Nesting Frames die cuts, cut from the Bubblegum Glitter Cardstock included with the Tweet Friend March 2025 Card Kit. After popping up all of the die cut elements on the embossed background using foam adhesive squares, I added a few Bubblegum Pawsitively Dazzling Gems for a touch of additional texture and sparkle!

Well, that’s all for my project today! One of the best things about the Simon Says Stamp Card Kit releases is the ability to customize to your heart’s content. You can purchase eachĀ Card KitĀ a la carte, meaning that you choose to preorder the kit at a great value on release day of each month if you like the kit’s contents; you can select theĀ Card Kit Subscription, which gives you a discount and evenĀ betterĀ bang for your buck automatically each month without you having to do a thing; or you can simply purchase the individual items that you want, albeit at full price. The kits themselves are limited edition, so once they’re sold out, that incredible value is no longer available, but the individual components are available for a long time to purchase!

Thanks so much for stopping by today, and have a marvelous day!

Filed Under: simon says stamp Tagged With: 3D embossing folder, card kit, die cutting, drifting flowers, embossing folder, gilding, ink blending, ink swiping, simon says stamp card kit of the month, tweet friend

Simon Says Stamp March 2025 Card Kit Release!

February 14, 2025

This post was sponsored by Simon Says Stamp. Thanks, Simon!

Hi friends! The new Simon Says Stamp March 2025 Card Kit is now available for preorder, and let me just say, it features some absolutely darling components that get your springtime mojo going!! The new Tweet Friend stamp set included with the kit is truly precious, featuring lots of beautiful little singing birdies and several components with which you can build scenes on your card fronts. The March 2025 Card Kit also features scrumptious patterned papers that work beautifully with the other elements of the kit. I’ve paired some of the patterned paper with the stamp set and some other goodies to create this coordinated gift set. Let’s get started with the details!

*I have gathered links to all of the products used at the bottom of the post for your convenience, using affiliate links. Thank you for shopping with my links! I truly appreciate your support for my work!*

I was so entranced by the beautiful patterned papers included with this month’s Card Kit that I decided to use them as a focal point for my projects today. The beautiful floral garden scene worked perfectly as a backdrop for my birds, and the floral wreath was exquisite as a focal point for a framed decor piece! The Card Kit is a great value, with the individual components being worth far more than the very economical kit price, and bonus, the elements all work beautifully together as well as separately!

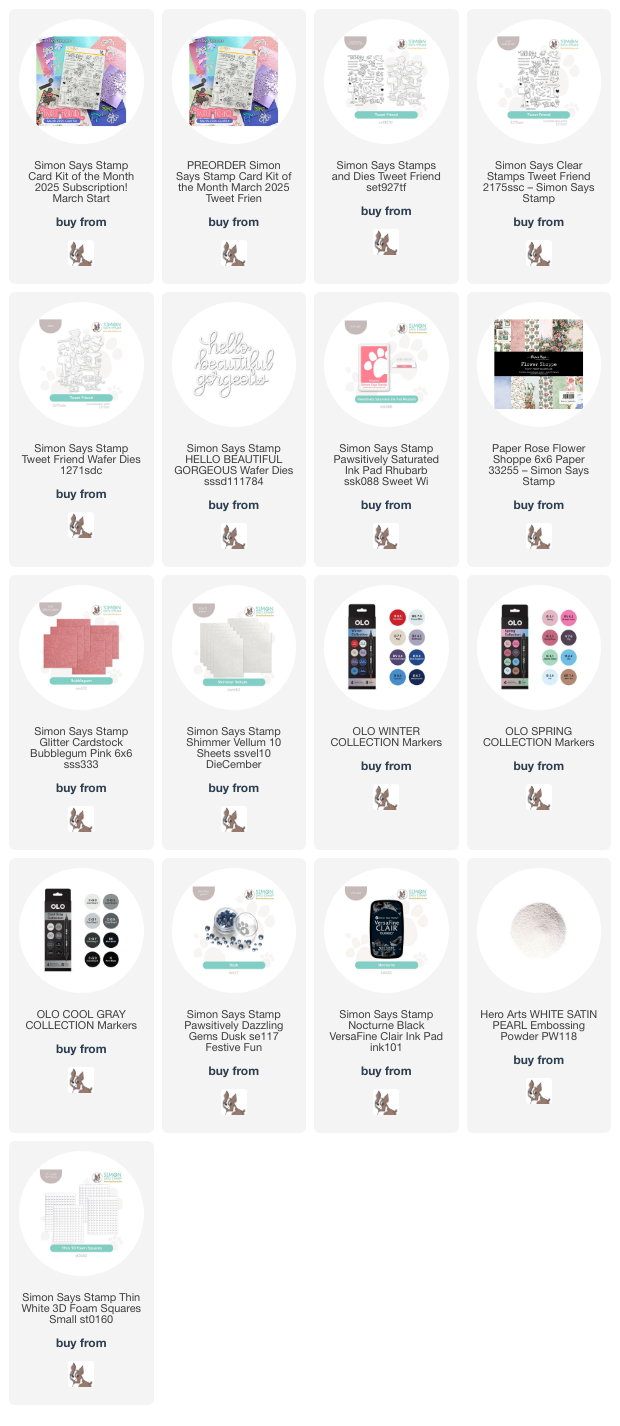
For my first project, I began by using my sharp scissors to fussy cut the flower garden scene from the patterned paper included with the Card Kit so that I could layer it on my colored cardstock, creating a lovely backdrop for my singing birds. I blended Rhubarb ink at the top of a very pale blush A2 card front, creating a blushing haze upon which I could layer the garden scene. I adhered the fussy cut patterned paper with liquid adhesive, then popped up a strip of the mint green foil cardstock included in the Card Kit to create some “grass” beneath my stamped images.

After I had created the background for my scene, I stamped several of the images from the Tweet Friends stamp set included with the Card Kit using Simon Says Stamp’s Nocturne Ink, which I softened by adding White Satin Pearl Embossing Powder over the top to create a pearlescent charcoal. I colored the images using my OLO markers, creating some sweet bluebirds and pretty pink blooms, then used the coordinating dies to cut all of the pieces out. I popped them up with thin foam adhesive squares, tucking the individual blooms amongst the other pieces to create an ethereal garden. I love the sentiment, too, with the beautiful font and uplifting greetings! Finally, I added some Dusk Pawsitively Dazzling Gems for a bit of added sparkle, as well as adding another element of blue to tie into the bluebirds and beautiful blue blooms!

I also created this piece of decor using the beautiful wreath patterned paper included with the kit. It covers most of the 6×6 panel, and I couldn’t bear to cut it up to fit on a card front, so I decided to keep it intact and frame it! I used an inexpensive frame that I purchased at the local dollar store, covering the glass front with a 6×6 panel of the minty green foil cardstock and popping up the fussy cut wreath in the center with foam adhesive. With the decor that I’ve been creating over the last few months, I have been scouring my word die stash for sentiments that would outside of a card greeting, and the Hello Beautiful Gorgeous work really well for both cards and for this piece of inspirational home decor! I am going to give this to my daughter to put in her redecorated bedroom later this year. I think it’s perfect for a tween, and this color palette fits perfectly with what she’s chosen for her room. I die cut the detailed sentiment dies from the Bubblegum glitter cardstock included in the card kit, then adhered it to a panel of the Simon Says Stamp Shimmer Vellum and used sharp scissors to fussy cut around the edges. The vellum shadow allows the pink glitter sentiment to stand out a bit from the colorful floral background. Finally, I added a pretty pink bow and some more Dusk gems for added texture and sparkle!

Well, that’s all for my projects today. One of the best things about the Simon Says Stamp Card Kit releases is the ability to customize to your heart’s content. You can purchase each Card Kit a la carte, meaning that you choose to preorder the kit at a great value on release day of each month if you like the kit’s contents; you can select the Card Kit Subscription, which gives you a discount and even better bang for your buck; or you can simply purchase the individual items that you want, albeit at full price. The kits themselves are limited edition, so once they’re sold out, that incredible value is no longer available, but the individual components are available for a long time to purchase!

Thanks so much for stopping by today, and have a marvelous day!

Filed Under: simon says stamp Tagged With: card kit of the month, flower shoppe, hello beautiful gorgeous, home decor, ink blending, OLO marker, paper rose, patterned paper, tweet friend

Primary Sidebar

  • Facebook
  • Instagram
  • Pinterest
  • YouTube

Favorite Shops

Secondary Sidebar

Subscribe

Enter your email address to subscribe to this blog and receive notifications of new posts by email.

Instagram
Something is wrong.
Instagram token error.
Follow
Load More

Archives

Tags

3D embossing folder alcohol markers better press birthday birthday card blog hop card kit christmas christmas card christmas tag colored pencil copic copic coloring Daniel Smith die cutting embossing folder embroidery felt giveaway holiday holiday card hot foil ink blending karin brushmarker pro layered stencil masculine my monthly hero new release no line coloring no line watercolor OLO marker olo markers original illustration pawsitively saturated rainbow shaker card slimline stamping stamptember stencil thank you thinking of you valentine's day video watercolor

Popular Posts

Simon Says Stamp October 2026 Card Kit of the Month: Homespun Gratitude!
February 2018 My Monthly Hero Blog Hop!
Altenew Craft A Flower: Poppy Blog Hop+Giveaway!
Felted Gourd Wall Hanging with Simon Says Stamp!
Sunflower Home Decor with Simon Says Stamp!
Craft Your Life Project Kit: Feathered Lilies Blog Hop+Giveaway!
Simon Says Stamp October 2025 Card Kit of the Month!
Altenew Standalone Die Blog Hop+Giveaway!
The Ton Anniversary Release- Day 2
Honey Bee Stamps Cheerful Love Blog Hop!

Disclosure

Some affiliate links are used in my posts. This means that, should you click on one of my links and purchase something from that company, I will receive a small portion of the sale at no extra cost to you. I use the money earned from these sales to help maintain my blog. I so appreciate you visiting and, if you do choose to use one of my affiliate links, thank you so much for your support!
Copyright © 2026 ·Brunch Pro Theme · Genesis Framework by StudioPress · WordPress · Log in
Loading Comments...