• Skip to main content
  • Skip to primary sidebar
  • Skip to secondary sidebar

Sixth Street Sundries

Emily Midgett

  • Home
  • About Me
  • Contact
  • OLO Marker Color Swatch Chart
  • Shop

valentine's day

Happy Love Day!

February 14, 2023

Good morning, friends! It’s Valentine’s Day, which as I age has meant finding the cutest pink or red shirts for my kiddos, sweet treats, heart shaped pizza, and Baby Yoda valentines and juice boxes for school parties, maybe some good Dove chocolate (thanks to my redhead for the yummy tin of chocolates!), and less about flowers, fancy meals, and expensive (sparkly?) gifts. I’m fine with it! Love is something that should be celebrated every day, but I will happily take the nudge to celebrate today. I have a project featuring some of the beautiful Valentine’s Day products from the January Hero Arts release. I was over on the blog a couple of weeks ago with this pair of cards:

While I was creating these cards using the beautiful Love and Florals Fancy Dies, I was on a pink-and-white kick. The two cards on the Hero Arts blog used lots of white space with pops of pink, but while I was on a roll, I created a third card using the same colors in reverse!

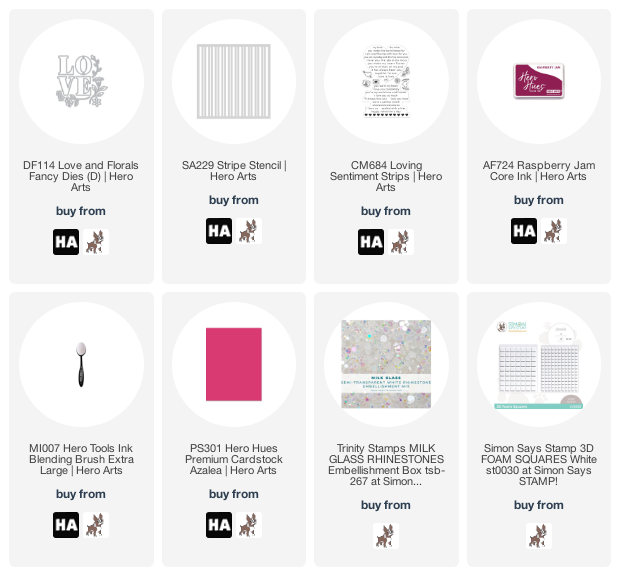
I started with an A2 panel of Azalea cardstock, upon which I blended some Raspberry Jam ink around the edges and over the top of the Stripe Stencil using a Blending Brush. The tone-on-tone ink blending is super subtle, but I love the texture and interest that it provides to the super bright background!

To contrast with the intensely vibrant background, I die cut the Love and Florals Fancy Dies from crisp white cardstock. I love the juxtaposition of the bright white die cuts with the saturated Azalea card front. I popped up the LOVE letters in a straight line (rather than stacked as the original die cut indicates-no reason you can’t customize your die cuts to fit your own style!) with some foam adhesive, then arranged the different die cut flowers around the sentiment die cuts.

My initial instinct was to do some super detailed coloring on the flowers, but I love the simplicity of the bright white! I popped a few of the flowers up with foam tape for extra dimension, then added a stamped sentiment strip from the Loving Sentiment Strips stamp set, stamped using more Raspberry Jam ink and popped up with a double layer of foam tape. I added a few milk glass gems for some more sparkle!

Well, that’s all for my project today! I hope you’re feeling loved, and if not, I’m sending you a giant hug and lots of love. Thanks so much for reading, and have a marvelous day!
Filed Under: Hero Arts Tagged With: ink blending, love and florals die, stencil, stripes stencil, valentine's day

Simon Says Stamp Kisses New Release!

January 18, 2023

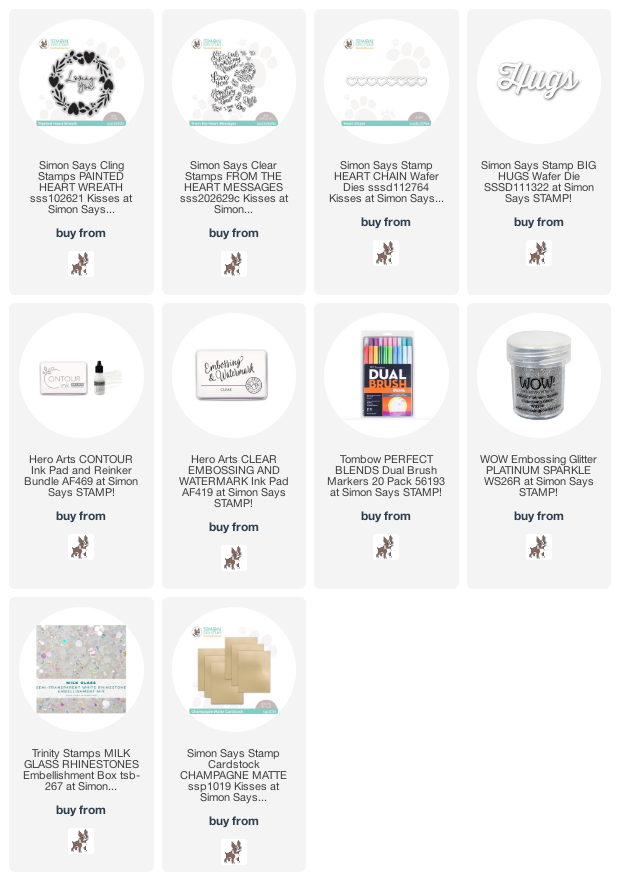
Hi there! Tonight, Simon Says Stamp is releasing their latest product collection: Kisses! This new collection is full of fun products to create cards filled with love for the recipient. I used the new Painted Heart Wreath stamp to create two super-shiny, watercolored projects today, so let’s get started with the details!

Both of my projects today feature the Painted Heart Wreath. I began by stamping this beautiful new cling stamp using Contour Ink from Hero Arts onto a 6×6 panel of watercolor paper. This solid stamp stamps as one complete image, so in order to create a multicolored finished product, I did some watercoloring on the individual elements. The Contour Ink stamps in a very light gray, and it does not interfere with the colors of the watercoloring itself! Score! I used my Tombow Dual Brush markers to add lots of vibrant color to these individual images, scribbling color onto my glass work surface and picking it up with my damp paintbrush, then moving the color around on the solid images of the stamped panel. Once those had dried, I got out my handmade, super shiny, metallic watercolors from IUILE and added some sparkles over the top. I love the finished effect!

For my first card, I trimmed the Painted Heart Wreath panel that I watercolored down to mini-slimline size. The 6×6 panel was the perfect size for this mini-slimline card, and I even had leftovers!

I stamped one of the greetings from the From the Heart Messages stamp set using Platinum Sparkle embossing powder from WOW! Embossing. This glittery not-quite-silver-but-not-quite-gold worked beautifully with the sparkly watercolored elements. To add a touch of extra texture and sparkle to this relatively-simple card front, I added a few Milk Glass gems.

My second card uses some of the leftover pieces from my Painted Heart Wreath panel. There wasn’t quite enough left of the stamped pattern to use the full panel for a card, so I trimmed out a few of the elements using my sharp scissors to use them as sparkly accents!

Using the same shades of Tombow Dual Brush markers, I watercolored a vibrant-but-still-soft lilac ombré on some more watercolor paper. I die cut it out using the Big Hugs die from Simon Says Stamp, then, keeping the die cut within the negative space, I added some super sparkly watercolor over the top. The sparkles are very subtle, but they catch the light so beautifully, as you can see in the photo above. I die cut the same Big Hugs die twice more from some plain white cardstock scraps and layered all three die cuts together to create a dimensional die cut greeting.

Using the new Matte Champagne Foil cardstock from the Kisses release, I die cut the new Heart Chain die, reserving the full size negative hearts from the centers of the die cut. I adhered the Heart Chain with some liquid adhesive to the white A2 card base, then began arranging the sentiment die cut and watercolored, sparkling Painted Heart Wreath leftovers with foam adhesive. I added the heart die cuts from the Heart Chain die cut using foam adhesive, as well, which remind me of bubbles floating from the focal point. The final touch was to add a few more Milk Glass gems for a bit more texture and sparkle!

Well, that’s all for these projects! I hope you’ll check out the new Kisses release over at Simon Says Stamp. So many unique and fun new products that are full of beautiful images, poignant and clever sentiments, and creative dies. And be sure to come back later this week for the blog hop! Thanks so much for stopping by today, and have a marvelous day!

Filed Under: simon says stamp Tagged With: big hugs, foil cardstock, from the heart messages, heart chain, mini slimline, painted heart wreath, valentine, valentine's day, watercolor

Hero Arts My Monthly Hero January 2023 Release Blog Hop + Giveaway!

January 9, 2023

Hi there! It’s time for the first Hero Arts My Monthly Hero release for 2023, and we are sending you all lots of love with these gorgeous new Valentine’s- and love-themed products! You should have arrived here from Channin, and your next stop is Ilina. This month’s kit is full of a unique collection of images, dies, and other goodies to make your love cards even more fun to create and to give! Here’s a peek at the kit:

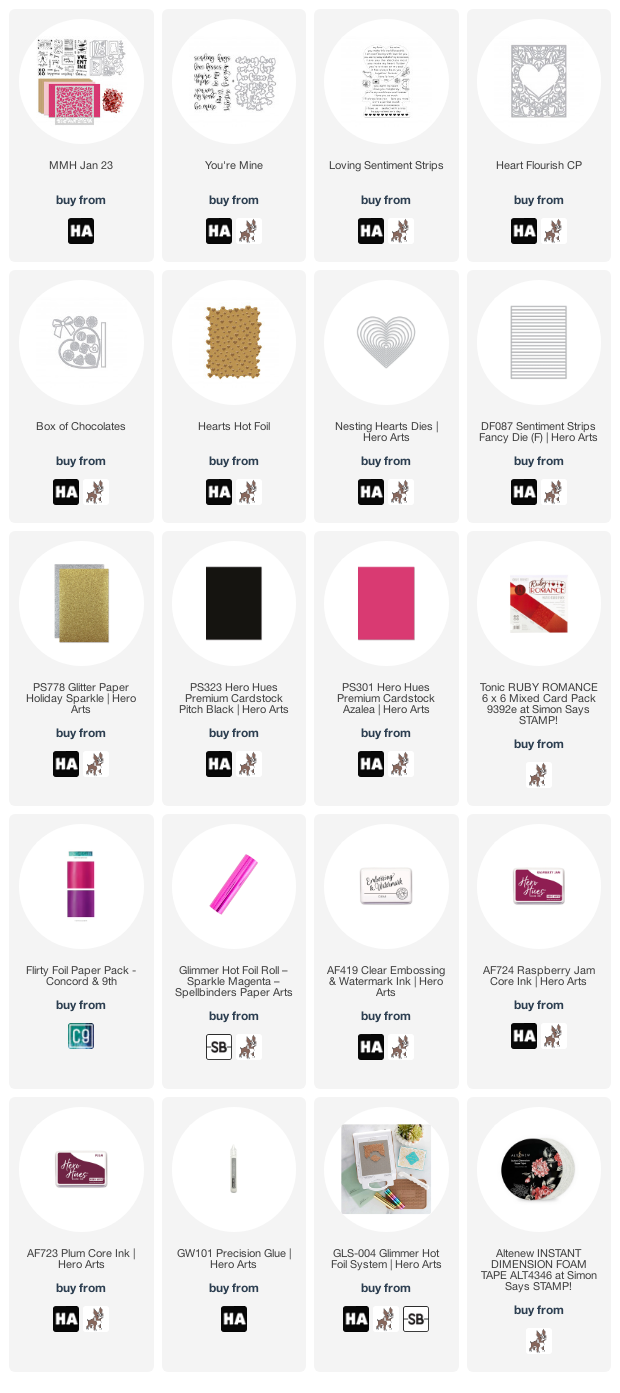
The January My Monthly Hero kit comes with Clear Stamp Set, 6″ x 8″, 18 Fancy Dies, 2 Frame Cuts, Heart-Shaped Daisies Stencil, 6″ x 6″, 3 Sheets of Kraft Cardstock, 5.5″ x 8.5″, 1 Sheet each of Azalea and Peony Cardstock, 5.5″ x 8.5″, Love Mix Sequins. The contents of the kit are valued individually at $77, but you can purchase this kit for only $34.99! These kits frequently sell out quickly, so you can also subscribe to make sure that you are guaranteed your own kit each month. Click HERE to see the subscription details! I have two cards for you today that I created using primarily the fancy dies with the kit, so let’s get started with the details!

The large stamp set included in this month’s My Monthly Hero kit contains some super unique images and beautiful sentiments, but I fell in love with the cute chocolate kiss and heart fancy dies included in the kit. My little boys have had to take medicine that tastes kinda grody recently, and I have been (shamelessly) bribing them with a chocolate kiss in exchange for being good boys and taking their medicine. I decided to pull out some pink and red foil cardstock and cut a bunch of hearts and kissy lips to go with my sparkly silver kisses!

I had one card idea in mind and so die cut a ton of different sizes of matte red foil hearts, shiny hot pink lips, and sparkly kisses (cut using Hero Arts’s Holiday Sparkle silver glitter paper). The original arrangement that I had in my head didn’t quite work, but I had die cut enough hearts, kisses, and lips to create two separate card fronts! Both cards feature Pitch Black card bases. The colorful foil and sparkle cardstocks absolutely glow on the black background!

This first card features an arrangement with a trio of kisses towards the bottom of the card, with some hearts and lips floating up like bubbles! I made liberal use of my foam tape roll with both of these projects, adhering nearly all of the die cuts with foam tape to add lots of interest and dimension to these projects. The card above combines the LOVE die cut with silver embossed sentiment strips, trimmed to fit and adhered with liquid and foam tape.

This second card features the “leftovers” from my first card using die cuts from the My Monthly Hero kit. I began by adhering my two glittery silver kisses towards the center of the card, then arranging the remaining foil die cuts around the silver kisses in a fairly random pattern. I adhered nearly everything with more foam tape, which I think adds so much fun texture and height to this card! I added some metallic black gems for some extra shine and to fill in some of the blank spots.

My next two cards are somewhat the polar opposite of my previous two cards. They feature bright, crisp white, with pops of bright magenta foil! (Side note-colored foil is ridiculously difficult to photograph without it looking black. I promise the foil I’ve used today is all deep pink!) When I began crafting for this release, I had one idea in my head, but it didn’t work as well in execution as it did in my mind’s eye, so I ended up with enough pieces to create two different cards yet again! I’m not upset about it!

My first card features the fabulous new Hearts Hot Foil Plate. I used some sparkly pink hot foil to create an almost-polka-dotted background featuring these bitty, shiny hearts. I used the Heart Infinity Dies ti die cut some foiled hearts in various sizes from the hot foiled panel, from large all the way down to tiny. I wanted to create a cluster of hearts on my white card front. I also die cut a few hearts from the hot pink foil that I used earlier, as well as a couple of Azalea hearts, all in a variety of sizes.

For the greeting, I heat embossed a greeting from the new You’re Mine stamp and die bundle using some super glittery hot pink embossing powder. I wanted to keep the minimal color scheme true without adding a bunch of extra components, so I searched my stash and found this shocking pink with aqua sparkles. I thought this embossing powder worked beautifully with the iridescent sparkles in the hot foil! I embossed the greeting on white cardstock using Hero Arts Embossing Ink, then die cut the embossed greeting as well as another of the same die from some more Azalea cardstock. I offset the pink die cut slightly to create a pink shadow and help the sentiment pop from the background.

I arranged the heart cluster on a plain white A2 card front, adhering them all with foam tape for lots of dimension. I added the greeting using a double layer of foam tape to give it extra height!

My second card uses the beautiful new Heart Flourish Cover Plate die as a subtly textured background for the Box of Chocolates Fancy Die. I began by die cutting the box from the Box of Chocolates die from some Azalea cardstock, then did some ink blending with Raspberry Jam and Plum inks around the edge, adding some tiny white dots with a white gel pen to coordinate with the other white accents on the card. I also die cut the beautiful bow from some more hot pink foil to make a pretty, gift-worthy box of chocolates!

I stamped some little tags to go on my chocolate box using the new Loving Sentiment Strips stamp set. It coordinates with the Sentiment Strips Fancy Die to make it super simple to create a bunch of sentiment strips all at once! I also stamped and die cut another greeting from You’re Mine stamp and die bundle. I stamped the greetings with Ultra Pink ink to pair nicely with the pink chocolate box.

I die cut the Heart Flourish Cover Plate from some white cardstock and adhered it using Precision Glue to a white A2 card base. The detail in this cover plate is simply gorgeous. Even though it’s a very detailed and busy pattern, the white-on-white creates a subtly textured botanical background that serves to create some interest behind the bright pink chocolate box, rather than overwhelming it. I adhered the chocolate box with some foam adhesive, then added the sentiment strips as tags on the chocolate box, then used a double layer of foam tape to add the “be mine” greeting. The little white dots on the chocolate box tie all of the different elements together!

Well, that’s all for my projects today. That was a long post! Now for some fun giveaway information:

Hero Arts is giving away a $50 gift card, drawn from the comments left across the hop. Enter by Sunday, January 15th at 11:59pm Pacific, and the winner will be announced on the Hero Arts blog the following week.

Your next stop on the hop is Ilina. You can also start back at the beginning at the Hero Arts Blog. Thanks so much for stopping by today, and happy hopping!

Filed Under: Hero Arts Tagged With: box of chocolates, heart flourish, hearts hot foil, hot foil, my monthly hero, nesting hearts dies, sentiment strips, valentine's day, you're mine

More Simon Says Stamps Hugs Release!

December 17, 2022

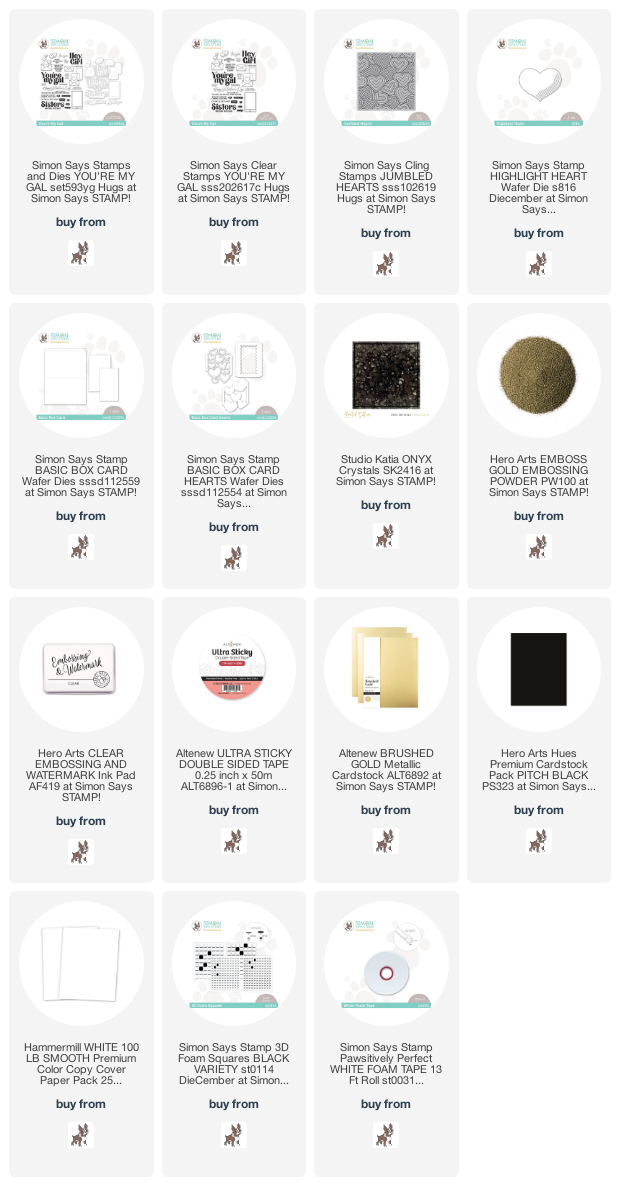
Hi there! I’m still not 100%, but I wanted to share these projects that I made using new goodies from the Simon Says Stamp Hugs release while my brain was a little lucid. (Kids, man, they bring home some wicked germs!! I can’t remember the last time I felt this bad. Even hubby, my redheaded man of steel who never gets sick, has been knocked down for days.) I have a pair of cards using the fabulous new You’re My Gal and the Jumbled Hearts background stamp along with some old and new goodies, so let’s get started with the details!

Both of my cards feature backgrounds created by watercoloring the new Jumbled Hearts background stamp and my Holbein watercolors. I began by heat embossing the entire 6×6 background stamp on a panel of watercolor paper using gold embossing powder. I used my Holbein watercolors to add lots of fun, Valentine-y colors to the heat embossed hearts.

For my first card, I trimmed down the watercolored Jumbled Hearts panel so that it covered most of my card front. I wanted to add black accents, so I used a black Karin marker to complete the “background” that behind all of the hearts. I added a strip of matte gold cardstock along the edge, then completed the rest of the A2 card front by tucking a strip of black cardstock beneath it.

After I’d finished my card base, I used the same brushed gold cardstock to die cut the Highlight Heart die from the DieCember release. The lines on the heart die cut match the graphic feel of the hearts on the embossed, watercolored background!

For the greeting, I heat embossed a few of the sentiments from the You’re My Gal stamp set onto some more black cardstock and trimmed them down to sentiment strips. I popped up the gold heart with some black foam tape, then added the sentiment strips using a double layer of the black foam tape. The final touch was to add some black gems for one more accent of shiny black!

My second card features the “leftover” strip of my watercolored Jumbled Hearts panel as the background on a Basic Box Card project. I die cut the main portion of the box card from some watermelon cardstock, coordinating with the watercolored hearts on my embossed panel.

Before assembling the Basic Box Card, I also die cut a few of the elements from the Basic Box Card Hearts add-on dies, cutting the scalloped panel from some white glitter cardstock, then cutting the super detailed heart outline layer once from gold glitter and once from plain white cardstock. I reserved the interior die cuts from the gold glitter die cut, then used Paws-itively Saturated Peony, Cheeky, and Taffy inks with the  Simon Says Stamp Blending Brushes to carefully blend a pretty ombre on the detailed die cut. I adhered the blended die cut and the white glitter die cut to the interior of the Basic Box Card according to the instructions, then turned my attention to the card front.

I gold heat embossed a couple of greetings from the You’re My Gal onto some white cardstock and die cut them. I adhered the sentiment pieces to the front of the box card using some of Altenew’s Ultra Sticky Tape, then added a trio of glittery gold hearts that we’d reserved earlier. Such a pretty card to give to your favorite gal pal, and I love how the card folds up so nicely to fit flat in an envelope! Such a unique look.

Well, that’s all for my projects today! I hope you’ll take a peek at the Hugs release, because it’s filled with all kinds of beautiful products perfect for your Valentine’s Day projects! Thanks so much for stopping by today, and have a marvelous day!

Filed Under: simon says stamp Tagged With: basic box card die, basic box card hearts die, highlight heart die, holbein watercolor, jumbled hearts, valentine's day, watercolor, you're my gal

Simon Says Stamp Hugs Release!

December 15, 2022

Hi there! My entire family has been accosted by some unpleasant germs, so this will be a fairly quick post, but I wanted to pop in and share one of the projects that I made for the Simon Says Stamp Hugs release! The month of December already has the distinction of being DieCember, so this release is almost like a little extra Christmas present. 😉 Let’s get started on my project!!

I wanted to let the beautiful Heart Panes Cover Plate Die be the star of the show, so I created a simple, super vibrant ink blended background using some vivid Valentine’s Day colors! I used Simon Says Stamp Paws-itively Saturated Peony, Cheeky, and Taffy inks with Simon Says Stamp Blending Brushes to blend this pretty background. After I’d finished blending the background, I spritzed it with some gold Mica Stain from Tim Holtz to add some shimmer to the background. It’s subtle in the photos (why is it so difficult to take photos of sparkle?), but it’s so lovely in real life!

To create my edge-to-edge shaker portion, I used some leftover cellophane packaging that I had from some product that I’d received. I trimmed the clear plastic to be slightly larger than my A2 card panel, notching it at the corners so that I could adhere it cleanly. I ran Altenew’s Ultra Sticky Tape along the edges on the back of the blended panel, then wrapped the cellophane around the card front and adhered 3/4 sides. I filled the resulting pocket with different kinds of flat sequins and confetti that coordinated nicely with my color scheme, then removed the release paper on the last segment of the shaker front and closed it up!

Over the top of my shaker front, I adhered the Heart Panes Cover Plate Die cut from some matte gold cardstock using Simon Says Stamp tape runner. (Using tape runner helps to keep glue from squishing out the sides!) I also placed the leftover solid heart die cut on the center of the Flowerful Medallion die to add some delicate, lacy details, then replaced it in the center of the heart die cut. I added a dimensional die cut “hugs” greeting, cut three times using the Basic Trio die and adhered together, as well as some foiled sentiment strips created using my Minc machine, gold foil, and the Sassy Love sentiment strips preprinted sentiments. It’s so difficult to photograph the shine from these foiled sentiments, but isn’t that so fun that you can foil these sentiment cards? One more way to keep things interesting!!

Well, that’s all for my project today. I have a couple more projects to share with you, but I am not feeling so great, so they will have to wait for another day! The new Hugs release is available even if my brain is not functioning the greatest (thanks germs!), so I hope you’ll take a peek. Thanks so much for stopping by today, and have a marvelous day!

Filed Under: simon says stamp Tagged With: flat shaker, hugs release, ink blending, paws-itively saturated, shaker card, valentine's day

  • Page 1
  • Page 2
  • Go to Next Page »

Primary Sidebar

  • Facebook
  • Instagram
  • Pinterest
  • YouTube

Favorite Shops

Secondary Sidebar

Subscribe

Enter your email address to subscribe to this blog and receive notifications of new posts by email.

Instagram
Something is wrong.
Instagram token error.
Follow
Load More

Archives

Tags

3D embossing folder alcohol markers better press birthday birthday card blog hop card kit christmas christmas card christmas tag colored pencil copic copic coloring Daniel Smith die cutting embossing folder embroidery felt giveaway holiday holiday card hot foil ink blending karin brushmarker pro layered stencil masculine my monthly hero new release no line coloring no line watercolor OLO marker olo markers original illustration pawsitively saturated rainbow shaker card slimline stamping stamptember stencil thank you thinking of you valentine's day video watercolor

Popular Posts

Simon Says Stamp Sending Cheer Blog Hop- Day 2 + Freebie + Giveaway!
Joyful Snowman with New Simon Says Stamp Sending Cheer Release!
Simon Says Stamp Sending Cheer Release: Now Available!
Special Release: Simon Says Stamp Limited Edition STAMPtember Christmas Card Kit!
February 2018 My Monthly Hero Blog Hop!
Altenew March 2020 Release Blog Hop+Giveaway!
Simon Says Stamp Cozy & Bright Inspiration, Part Two!
Essentials By Ellen September Blog Hop!
Waffleflower December Release Blog Hop!
Altenew Build A Flower Japanese Mum Blog Hop!

Disclosure

Some affiliate links are used in my posts. This means that, should you click on one of my links and purchase something from that company, I will receive a small portion of the sale at no extra cost to you. I use the money earned from these sales to help maintain my blog. I so appreciate you visiting and, if you do choose to use one of my affiliate links, thank you so much for your support!
Copyright © 2026 ·Brunch Pro Theme · Genesis Framework by StudioPress · WordPress · Log in
Loading Comments...