• Skip to main content
  • Skip to primary sidebar
  • Skip to secondary sidebar

Sixth Street Sundries

Emily Midgett

  • Home
  • About Me
  • Contact
  • OLO Marker Color Swatch Chart
  • Shop

valentine's day

Sparkling Red Valentine’s Day with New Simon Says Stamp!

January 15, 2026

This post was sponsored by Simon Says Stamp. Thanks, Simon!

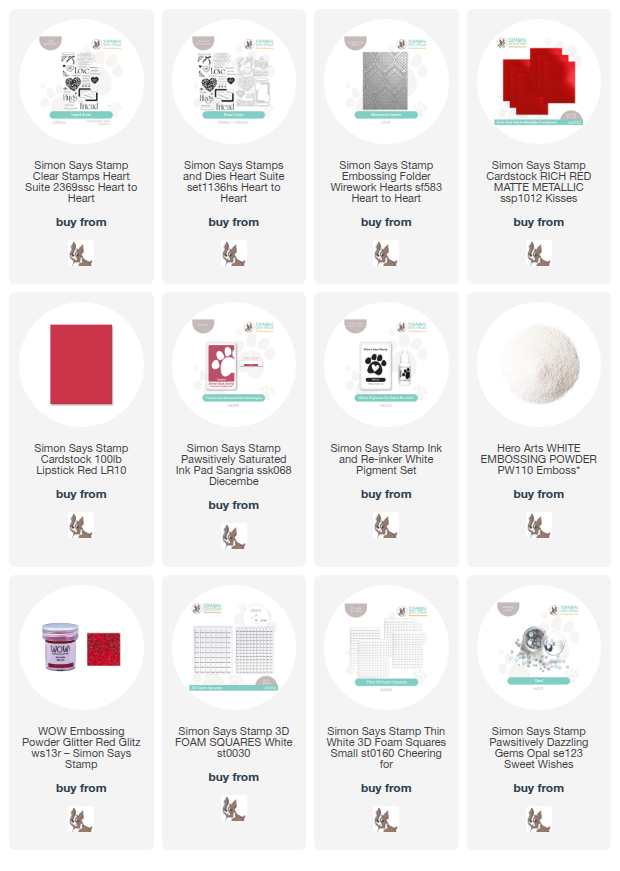
Hi friends! I am back with more inspiration using the new Heart to Heart Release  from Simon Says Stamp (click HERE to check out the entire release!), this time to create a color saturated red card filled with exquisite scrolling details and lots of sparkle. I don’t really use red much throughout the rest of the year, but Christmas and Valentine’s Day projects are just not the same without a pop of red, right? Well, I took that “pop” and raised it to every. single. part. of this card. I love a good monochromatic moment, and this one definitely fits that bill! Let’s get started with the details!

*I have gathered links to all of the products used at the bottom of the post for your convenience, using affiliate links at no extra cost to you. Thank you for shopping with my links! I truly appreciate your support for my work!*

The new Heart Suite stamp set that was released during the Heart to Heart release is filled with so many different Valentine’s Day images, including these beautiful scrolled hearts. The detail on these heart images (which are meant to be used to create the playing cards in the stamp set, but work beautifully on their own!) is spectacular; they work so well as focal points or as accents. I paired them with some gorgeous red glitter embossing powder, embossing them on Lipstick Red cardstock, then die cutting the hearts with their coordinating dies. Aren’t they beautiful? I wish you could see the sparkle in real life, because it’s stunning!

Behind the glittering hearts, I used the new Wirework Hearts Embossing Folder to emboss another panel of the Lipstick Red cardstock. This folder is so delicately detailed, and to enhance that detail, I swiped the Sangria Pawsitively Saturated Ink pad over the raised areas, darkening the raised details! I also splattered some red glitter watercolors on the background to add extra shimmer and texture. Once it was dried, I trimmed the edges 1/4″ on each side, then mounted it in the center of a panel of Rich Red Metallic cardstock so that the textured background was framed with red foil, adding to the luxurious feel of the card.

For the greeting, I heat embossed two sentiment strips and the large “love” from Heart Suite, stamping with white pigment ink and embossing with white embossing powder on Lipstick Red cardstock. I trimmed the strips with my trimmer, then die cut the sentiment with the coordinating die. I popped up the sentiment pieces with thick foam adhesive squares, then used thin foam adhesive squares to tuck the hearts around the sentiment, creating a visual cascade down the card front and adding lots of varied heights and textures! Finally, I added a few Opal Pawsitively Dazzling Gems to coordinate with the white sentiment strips and for one more touch of sparkle!

Well, that’s all for my project today! Valentine’s Day is a mere month away, so it’s definitely time to get cracking. We could all use a little more love in the world, don’t you think? Thanks so much for stopping by, and have a marvelous day!
Filed Under: simon says stamp Tagged With: 3D embossing folder, die cutting, embossing folder, heart suite, valentine, valentine's day, wirework hearts

So Much Love and So Many Hearts with New Simon Says Stamp!

January 13, 2026

This post was sponsored by Simon Says Stamp. Thanks, Simon!

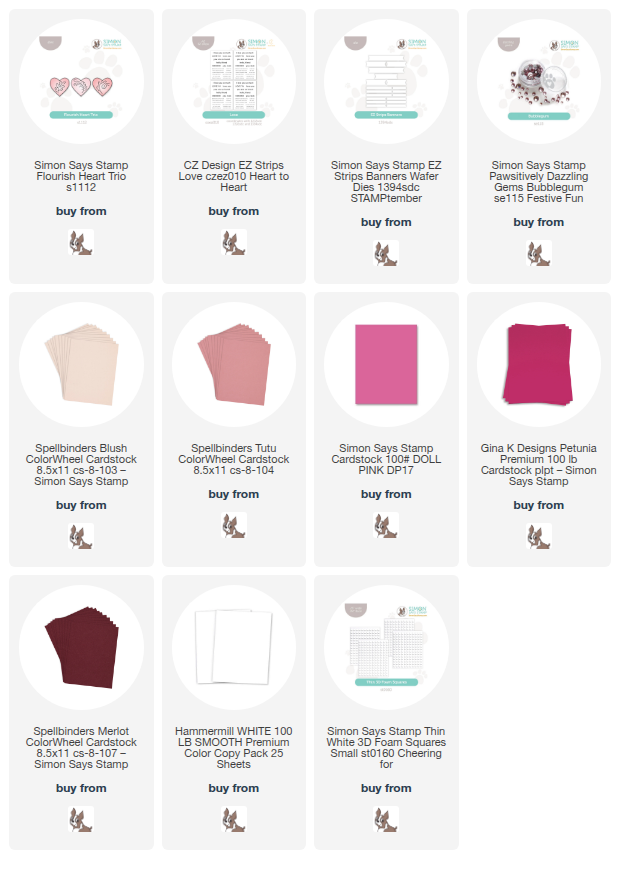
Hi friends! Valentine’s Day is just over a month away, so it’s the perfect time to start thinking about those handmade valentines for your loved ones and friends! Luckily, the new Heart to Heart Release  from Simon Says Stamp (click HERE to check out the entire release!) is filled with beautiful new Valentine’s Day products that will make your crafting so fun. Sometimes, big things come in small packages, and the new Flourish Heart Trio die set, while seemingly humble, can create a big impact, like it did on my ombré valentine for today’s post. Let’s get started on the details!

*I have gathered links to all of the products used at the bottom of the post for your convenience, using affiliate links at no extra cost to you. Thank you for shopping with my links! I truly appreciate your support for my work!*

Whenever I have an image that I love that is just a bit wee, I use my old fallback: when in doubt, triple it. Or in this case, quintuple it! (Is quintuple even a word? Maybe it is now!) To create this pretty pink heart collage, I selected five different shades of pink cardstock, working from light to dark, then die cut the new Flourish Heart Trio from each color of cardstock. It would be super easy to recreate this card using a variety of color combinations. I think it would be really pretty in a pastel rainbow, too!

To keep things simple (and easy for potential mass-production!) I used liquid adhesive to glue each row of hearts to a slightly-smaller-than-A2 panel of white cardstock. I eyeballed it, but you could also use a T-square to keep the lines nice and straight. Using liquid glue also gives you that little extra wiggle room to be sure that each heart is in it’s proper position! Once all of the adhesive on the hearts had dried, I used Thin Foam Squares to adhere the panel in the center of an A2 card front, adding a touch of dimension to the card.

For the greeting, I used my trimmer to cut one of the new Love EZ Strips (you could also use the fabulous and super easy EZ Strips dies to cut them all out at once… my desk is a mess and I couldn’t find mine. A cautionary tale, dear friends: put your dies away when you’re done!) and popped the sentiment strip up in the center of the card using more Thin Foam Squares. I added the tiniest touch of sparkle by flanking the sentiment strip with a pair of Bubblegum Pawsitively Dazzling Gems.

Well, that’s all for me today! A simple, easily replicated and mass-produced valentine that uses up your scraps lickety split. Love creating simple, but pretty, cards that can be customized super easily to your own color preferences! Thanks so much for stopping by today, and have a marvelous day!
Filed Under: simon says stamp Tagged With: ez strips love, flourish heart trio, valentine, valentine's day

Simon Says Stamp New Heart to Heart Release- Now Available!

January 7, 2026

This post was sponsored by Simon Says Stamp. Thanks, Simon!

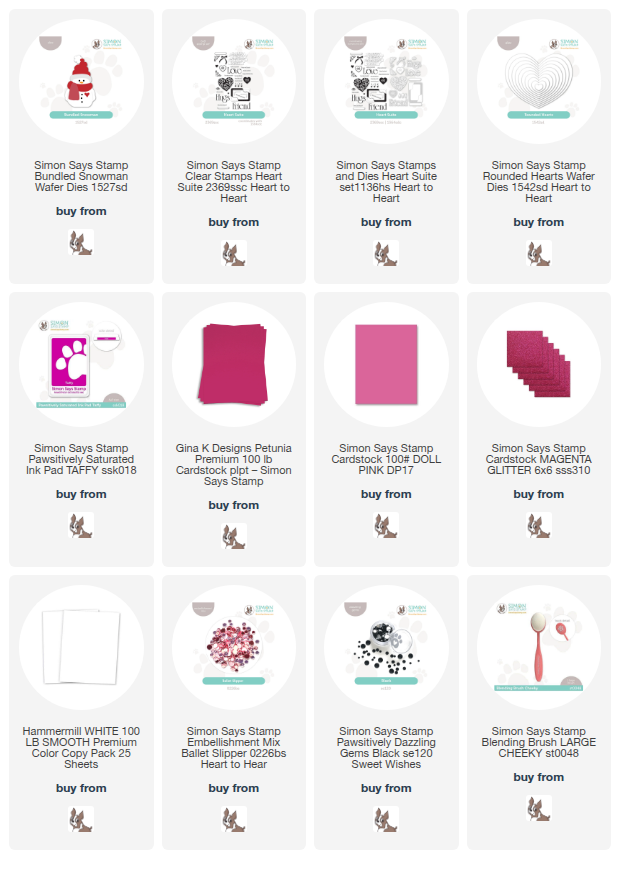
Hi friends! The first Simon Says Stamp release for 2026 is now live, and it’s super duper sweet. The Heart to Heart Release (click HERE to check out the entire release!) is filled with great transitional products, from wintry snowflakes and snowmen to hearts for Valentine’s Day to some pretty floral bouquets (called Loving You Bouquet and Make My Heart Flutter… illustrated by me, so it’s extra exciting in my book!). I have several things planned for my own illustrations, but my family and I were sick for what felt like weeks on end, so those projects are not quite ready yet. I thought I would share a sweet Valentine’s Day shaker card created with an adorable snowman die and some fabulous new nested heart dies. Let’s get started with the details on my project!

*I have gathered links to all of the products used at the bottom of the post for your convenience, using affiliate links at no extra cost to you. Thank you for shopping with my links! I truly appreciate your support for my work!*

The project began with the darling little Bundled Snowman. This little guy was sneak peeked during DieCember, but now he’s officially available for sale…. isn’t he just the cutest?! I die cut the snowman from plain white cardstock and added a few swipes of super pale gray alcohol marker to add some subtle shadows, then die cut the hat and scarf from some super vibrant magenta cardstock and coordinating Magenta glitter cardstock. I added some more alcohol marker shadows on the hat and scarf, just to add a bit of shape and dimension to the image. I adhered all of the pieces with liquid adhesive, then added some Black Pawsitively Dazzling Gems for “coal” eyes and buttons and a sweetly glittering pink die cut heart on his chest. Adorable, right?

To create the shaker card base, I used some pink cardstock with one of the new Rounded Hearts nesting dies to create a shaker window, which I backed with some leftover stamp packaging. I blended some Taffy Pawsitively Saturated Ink on two of the corners, the filled the shaker with the new Ballet Slipper Embellishments, which are just the prettiest shade of pale pink. I also die cut a few extra hearts from some more Magenta glitter cardstock and the same deep magenta cardstock that I used for the snowman’s hat and scarf.

Before assembling the snowman and hearts on my card front, I used Taffy ink to stamp the large “hugs” greeting from the new Heart Suite stamp set, which has some gorgeous, super useful, large scale sentiment stamps that also have detailed coordinating dies. (Isn’t that great when the dies are so super detailed?! I think it makes projects look so much more professional and polished.) I arranged all of the die cuts on my shaker card front, tucking the snowman towards the bottom and creating a visual ping pong from top to bottom, adhering everything with liquid and foam adhesive for lots of dimension.

Well, that’s all for my project today! The new Heart to Heart release is full of so many different styles and cardmaking occasions, surely something for everybody. (Click HERE to check out the entire release!) Thanks so much for stopping by today, and don’t forget to come back later this week for the two day Blog Hop!

Filed Under: simon says stamp Tagged With: bundled snowman, die cutting, heart suite, hugs, shaker card, valentine's day

Adore Frame for Valentine’s Day with Simon Says Stamp!

February 14, 2025

This post was sponsored by Simon Says Stamp. Thanks, Simon!

Hi friends, and Happy Valentine’s Day! As a busy mom, sometimes it’s hard to get organized enough to decorate for each holiday. I am usually able to do some major Christmas decorating, and some autumnal switches, but outside of that… our decor remains pretty neutral throughout the year. I have ambitions to change that, and so have been trying to create more home decor items with my crafting supplies. I went to my local dollar store and found the most adorable wooden frames that are perfect for customizing based on the season! I want to make a series of them that we can easily switch out for each mini-holiday, starting with Valentine’s Day. I covered this frame with pink, hearts, and lots of sparkle, so let’s get started with the details!

*I have gathered links to all of the products used at the bottom of the post for your convenience, using affiliate links. Thank you for shopping with my links! I truly appreciate your support for my work!*

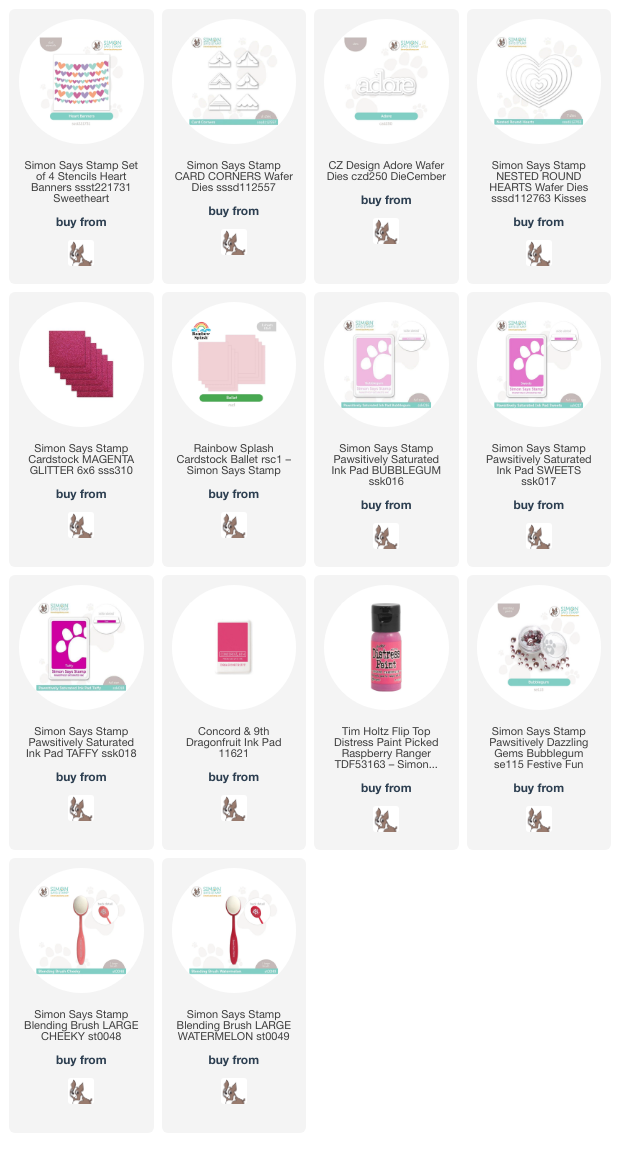
To begin my project, I painted the wooden frame with Tim Holtz Distress Picked Raspberry Distress Paint, creating a perfectly pink base on which to decorate with my stencils and dies! As it was drying, I used Bubblegum, Taffy, and Sweets Pawsitively Saturated Inks with Dragonfruit ink from Concord and 9th to blend the sweet pattern from the Heart Banners Stencil set onto some pale pink cardstock. I love the variated shades of pink on this background!

After my frame had finished drying, I adhered the stenciled heart background panel inside (the original frame comes with a little chalkboard, but that’s easy enough to cover up with some Tear-rifically Tacky Tape!), then die cut the detail layer of the Adore die from some Magenta Glitter Cardstock and the shadow from a leftover piece of the same pale pink used for the background. I popped the sentiment up with foam adhesive, then “framed” it in with the adorable Card Corners dies cut from deep pink and more Magenta Glitter Cardstock. I adorned the wooden frame’s corners with some glittery pink Nested Round Hearts die cuts and some Bubblegum Pawsitively Dazzling Gems for extra sparkle.

Well, that’s all for my project today. This 4×6 frame is just the right size to put on a mantle or even on your desk at work! I am having so much fun customizing these simple wooden frames, and super inexpensively, too! Thanks so much for stopping by today, and Happy Valentine’s Day!

Filed Under: simon says stamp Tagged With: card corners, distress paint, heart banners, home decor, ink blending, layered stencil, nested round hearts, valentine's day

Sweet Hugs & Kisses with New Simon Says Stamp!

January 21, 2025

This post was sponsored by Simon Says Stamp. Thanks, Simon!

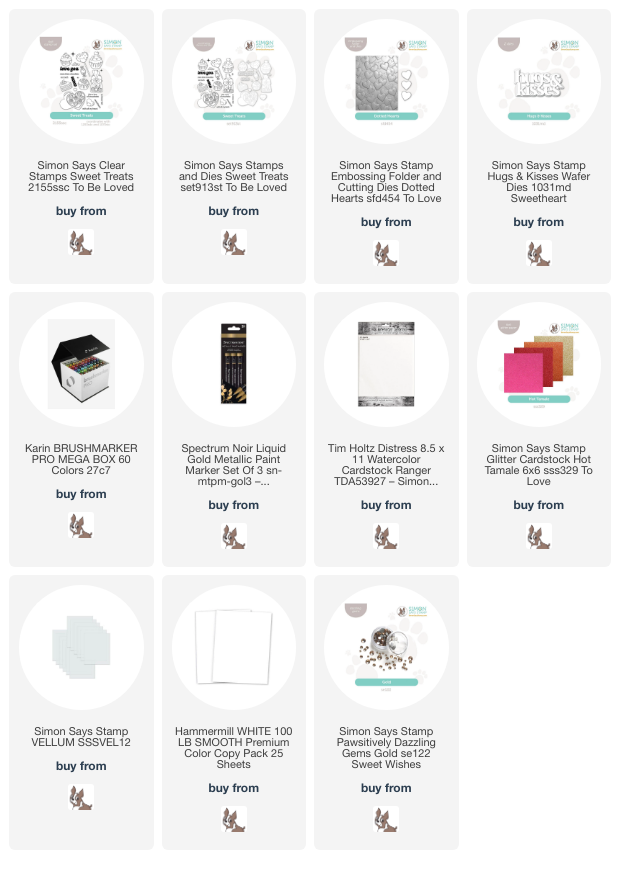
Hi friends! I have a super sweet post to share with you today using some new goodies from the Simon Says Stamp To Be Loved release! From Thanksgiving to Valentine’s Day, we have such scrumptious treats (and a good excuse to eat them!), and the marvelous new Sweet Treats stamp set features some yummy baked goods and treats to make your cards scrumptious, celebratory, and calorie-free. I have a watercolored project to share with you today, so let’s get started with the details!

*I have gathered links to all of the products used at the bottom of the post for your convenience, using affiliate links. Thank you for shopping with my links! I truly appreciate your support for my work!*

I began by gold heat embossing several images from the Sweet Treats stamp set onto Distress Watercolor Cardstock, which is a nice, crisp white and works beautifully with liquid watercolors like Karin Brushmarker Pro markers. After embossing, I used a damp paintbrush and Karin Brushmarker Pro markers to do some simple watercoloring, keeping my color palette to peachy pinks, red, and chocolate brown. When working with watercolor markers, I like to scribble the color out on my ceramic palette or glass mat, then pick up the color with a damp paintbrush. This allows me to control the intensity of the color a bit more easily.

After watercoloring and die cutting my sweets, I embossed a panel of white cardstock using the Dotted Hearts Embossing Folder, keeping the background simple with some added texture. To tie into the gold embossing on the treats, I ran a gold acrylic pen around the edges of the panel of embossed cardstock, creating an elegant gilded edge without adding too much heaviness to the card. I adhered the slightly-smaller-than-A2 embossed panel in the center of a full sized white A2 card front. The gold edge helps to make the white frame more visible and adds another element of interest to the background.

For the greeting, I die cut the detail layer of the previously-released Hugs & Kisses die from the gold glitter sheet in the new Hot Tamale glitter cardstock pack and backed it with a die cut vellum shadow layer, adhering the two together with liquid adhesive. I popped up the greeting on the embossed card front with foam adhesive squares, then arranged the sweets around the sentiment, adhering some with liquid adhesive and some with foam adhesive to add extra interest. I also addd a few Gold Pawsitively Dazzling Gems for extra sparkle and texture. The glass gems from the Pawsitively Dazzling line are absolutely radiant with sparkle!!

Well, that’s all for my project today. I can never get enough sweets, and being able to indulge in some calorie-free goodies was such fun! Thanks so much for stopping by today, and have a marvelous day!

Filed Under: simon says stamp, Uncategorized Tagged With: 3D embossing, die cutting, dotted hearts, hugs & kisses, karin brushmarker pro, sweet treats, valentine, valentine's day, watercolor

  • « Go to Previous Page
  • Page 1
  • Page 2
  • Page 3
  • Page 4
  • Page 5
  • Go to Next Page »

Primary Sidebar

  • Facebook
  • Instagram
  • Pinterest
  • YouTube

Favorite Shops

Secondary Sidebar

Subscribe

Enter your email address to subscribe to this blog and receive notifications of new posts by email.

Instagram
Something is wrong.
Instagram token error.
Follow
Load More

Archives

Tags

3D embossing folder alcohol markers better press birthday birthday card blog hop card kit christmas christmas card christmas tag colored pencil copic copic coloring Daniel Smith die cutting embossing folder embroidery felt giveaway holiday holiday card hot foil ink blending karin brushmarker pro layered stencil masculine my monthly hero new release no line coloring no line watercolor OLO marker olo markers original illustration pawsitively saturated rainbow shaker card slimline stamping stamptember stencil thank you thinking of you valentine's day video watercolor

Popular Posts

Simon Says Stamp October 2026 Card Kit of the Month: Homespun Gratitude!
February 2018 My Monthly Hero Blog Hop!
Altenew Craft A Flower: Poppy Blog Hop+Giveaway!
Felted Gourd Wall Hanging with Simon Says Stamp!
Sunflower Home Decor with Simon Says Stamp!
Craft Your Life Project Kit: Feathered Lilies Blog Hop+Giveaway!
Simon Says Stamp October 2025 Card Kit of the Month!
Altenew Standalone Die Blog Hop+Giveaway!
The Ton Anniversary Release- Day 2
Honey Bee Stamps Cheerful Love Blog Hop!

Disclosure

Some affiliate links are used in my posts. This means that, should you click on one of my links and purchase something from that company, I will receive a small portion of the sale at no extra cost to you. I use the money earned from these sales to help maintain my blog. I so appreciate you visiting and, if you do choose to use one of my affiliate links, thank you so much for your support!
Copyright © 2026 ·Brunch Pro Theme · Genesis Framework by StudioPress · WordPress · Log in
Loading Comments...