• Skip to main content
  • Skip to primary sidebar
  • Skip to secondary sidebar

Sixth Street Sundries

Emily Midgett

  • Home
  • About Me
  • Contact
  • OLO Marker Color Swatch Chart
  • Shop

valentine's day

New Simon Says Stamp To Be Loved Release-Now Available!

January 8, 2025

This post was sponsored by Simon Says Stamp. Thanks, Simon!

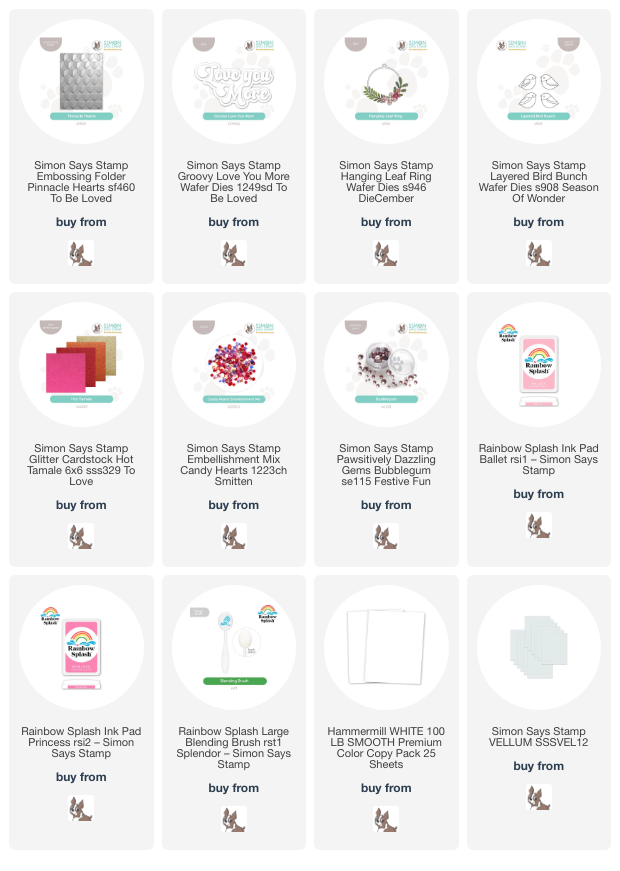
Hi friends! The new To Be Loved release from Simon Says Stamp is now available, and it’s full of gorgeous, lovey-dovey goodness for your Valentine crafting needs! My kiddos used to love to watch Pinkalicious on PBS, and this card may as well be dedicated to Pinkalicious herself with the sheer volume of pinky goodness on it. I used several new products on this card, as well as a few products from last month’s release, creating this color saturated magenta card for my valentine. Let’s get started with the details!

*I have gathered links to all of the products used at the bottom of the post for your convenience, using affiliate links. Thank you for shopping with my links! I truly appreciate your support for my work!*

To begin my card, I ran an A2 panel of white cardstock through my die cutting machine using the Pinnacle Hearts Embossing Folder. I wanted to create a two-tone effect, with lighter pink hearts on a darker pink background, so I flipped over the panel so that it was debossed rather than embossed and blended Ballet Rainbow Splash ink over the hearts using a blending brush. I then placed the Rainbow Splash Princess ink pad directly on the debossed and blended cardstock, swiping the deep pink directly onto the raised areas of the panel. The darker ink covers any over-spray of the light pink blending on the hearts, creating a pretty two-tone background! I also trimmed the panel down slightly and blended some more Princess ink around the edges to add some extra interest to the background, splattered the background with pink glitter watercolors. Finally, I mounted the panel on a full sized A2 card front in a coordinating shade of deep magenta, creating a crisp pink frame around my heart background.

For the focal point, I used the gorgeous new Love You More sentiment die, cutting the generously-sized detail layer from the pink glitter cardstock included in the new Hot Tamale Glitter cardstock pack, then cut the shadow layer from heavyweight vellum and adhered the two pieces together with liquid adhesive. I popped the sentiment up in the center of my heart background using some thin foam adhesive squares.

In my mind’s eye, the card was finished with the bold sentiment centered over the pretty heart background, but I just couldn’t let it be so naked, so I decided to add some lovebirds and botanical die cuts to the card! I die cut some flowers and foliage using the individual dies from the Hanging Leaf Ring die set, then die cut some white Layered Bird Bunch die cut pieces. I adhered the bird components together, then used the residual ink on my blending brushes to add some light color to the birds. I added the lovebirds on my sentiment die cut and tucked the flowers and foliage around them, adding some Candy Hearts Sequins and Bubblegum Pawsitively Dazzling Gems for added sparkle. Definitely pinkalicious!

Well, that’s all for my project today! You can check out the full To Be Loved release from Simon Says Stamp by clicking HERE. Be sure to stop back by later this week for the blog hop. So much inspiration and colorful eye candy to brighten these dreary January days. Thanks so much for stopping by today, and have a marvelous day!
Filed Under: simon says stamp Tagged With: embossing folder, hanging leaf ring, ink blending, ink swiping, layered bird bunch, love you more, lovebirds, pinnacle hearts, valentine, valentine's day

I Wuff You So Much with New Simon Says Stamp To Love Release!

January 7, 2025

This post was sponsored by Simon Says Stamp. Thanks, Simon!

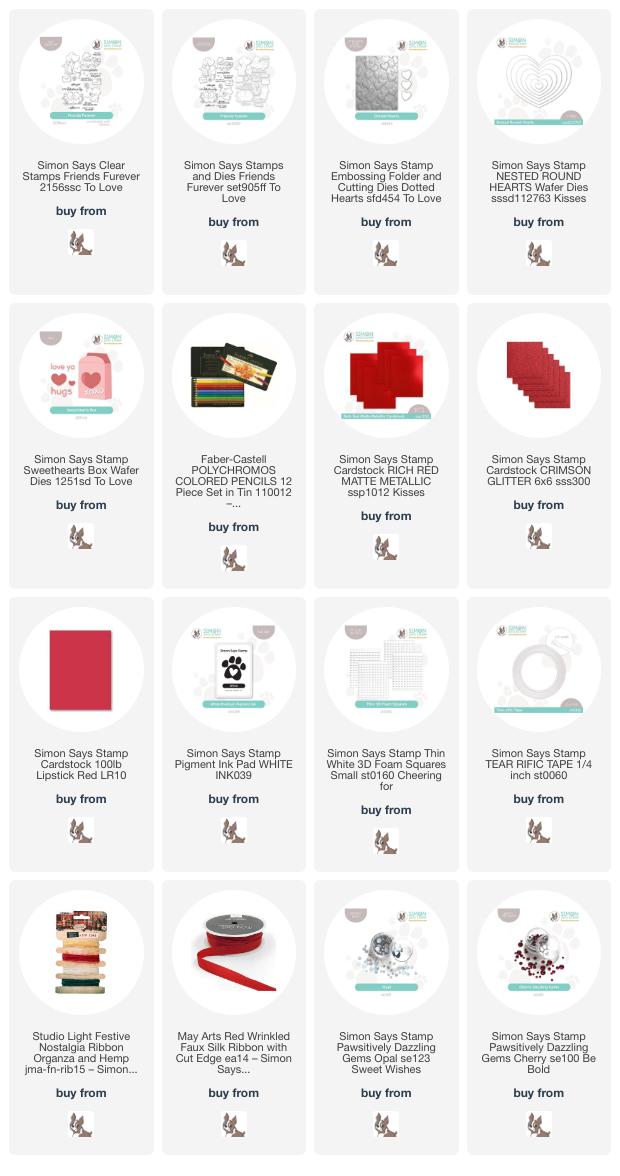
Hi friends! Valentine’s Day prep is in full swing here on my blog, and I have some super cute, vibrant red projects to share with you today featuring some adorable new goodies from the new Simon Says Stamp To Love release! I typically tend to reserve this vibrant cherry red for holiday projects, but I couldn’t resist pairing the luxurious Rich Red Matte foil cardstock from Simon Says Stamp with the gorgeously detailed Dotted Hearts Embossing Folder. Foil cardstock embosses so beautifully with these intricate embossing folders, and the results do not disappoint. Let’s get started with the details!

*I have gathered links to all of the products used at the bottom of the post for your convenience, using affiliate links. Thank you for shopping with my links! I truly appreciate your support for my work!*

For both of my projects today, I used my “color drenching” technique, pulling out all kinds of red eleemnts with different textures: metallic, glitter, and solid cardstock, gems, ribbons, etc. These differently textured-but still monochromatic- elements all work together to keep things as visually interesting as possible! I embossed one full A2 panel of Rich Red Metallic cardstock using the Dotted Hearts Embossing Folder and was able to trim it down to use it on this card and gift box pair.

For the card, I began by stamping the adorable little puppy with his chocolate box (naughty puppy getting into those chocolates, ha! He’s going to get a tummyache!) from Friends Furever using white pigment ink onto some Lipstick Red cardstock. I then used colored pencils to do some no-line coloring on the little guy, adding some final accents with a black pigment pen and a white gel pen. I think this turned out so, so cute! I used the coordinating die to die cut the finished image, as well as a white embossed sentiment from the Friends Furever set.

For the background, I trimmed a slim strip of the Dotted Hearts Embossing Folder embossed foil cardstock down and adhered it to the right side of an A2 Lipstick Red card front, adding a bit more texture with a thin strip of Crimson glitter cardstock. I also die cut a medium-sized heart from more Lipstick Red cardstock using the Nested Rounded Hearts die, adhering the heart to the card base with some thin foam adhesive squares. I added the penciled image and sentiment over the to pof the heart with some more foam adhesive, then tucked a red twine bow beneath the focal point and added a few Cherry Pawsitively Dazzling Gems for added sparkle. This would be such a cute Valentine for a little boy, I think! What little guy doesn’t like a punny Valentine?

For my second project, I used the remainder of the Rich Red Metallic foil Dotted Hearts embossed panel to adorn my gift box, created using the new Sweethearts Box die. I die cut the box itself from some white cardstock, adhering the pieces together using some Tear-rific Tape. I added the foil embossed panel, then used some red ribbon to securely close the box with a fluffy bow.

To further adorn the front of the gift box, I die cut some more Nested Rounded Hearts from both red glitter and Lipstick Red cardstock. I also die cut the “xoxo” sentiment included with the new Sweethearts Box die set, cutting the letters from white cardstock and adhering them onto some vellum cardstock. I used tiny dots of liquid adhesive and thin strips of foam adhesive to add the sentiment over the glitter heart, finally finishing everything off with some Opal Pawsitively Dazzling Gems for added sparkle!

Well, that’s all for my projects today! I am still mentally in Christmas mode, but the crafting world has moved on from Christmas, and so must I. I will cling to my twinkly lights as long as I can, though! Do you still have your holiday decorations up? Be sure to come back later this week for some more inspiration and a new release! Thanks so much for stopping by today, and have a marvelous day!

Filed Under: simon says stamp Tagged With: colored pencils, die cutting, dotted hearts, friends furever, nested round hearts, no line coloring, sweethearts box, valentine, valentine's day

Love You Shake-Shake-Shaker Card with New Simon Says Stamp!

January 6, 2025

This post was sponsored by Simon Says Stamp. Thanks, Simon!

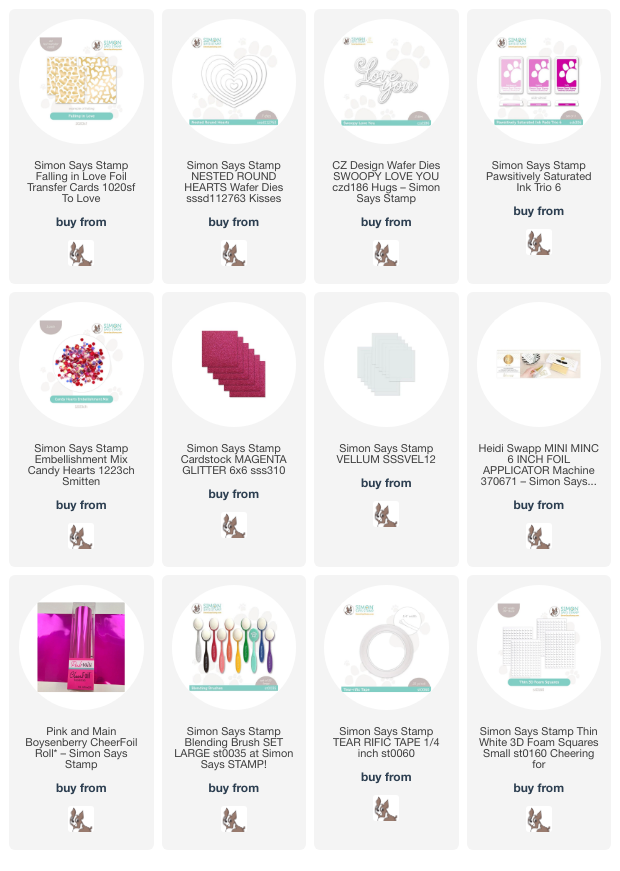
Hi friends! Happy New Year to you! While I still have my Christmas decorations up (a combination of not having time to take them down and not really wanting to be without the glow of the Christmas lights just yet!), the cardmaking world is moving on from the holidays to all things Valentine’s Day and even some spring! Simon Says Stamp had a new release go live on December 19, called the To Love release, which celebrates all things love and romance! I took a break from my holiday crafting to work with pinks, reds, and hearts, and I can’t wait to share all of the projects that I created with you. I am starting things off with this in-your-face-magenta shaker card, so let’s get started with the details!

*I have gathered links to all of the products used at the bottom of the post for your convenience, using affiliate links. Thank you for shopping with my links! I truly appreciate your support for my work!*

I absolutely love the foil transfer cards from Simon Says Stamp. They create the quickest, most fabulous backgrounds lickety split, and the new Falling In Love Foil Transfer Cards feature the loveliest whimsical heart designs! I used my Minc machine with some gorgeous magenta toner transfer foil to foil this whimsical heart background, then used blending brushes to blend Pawsitively Saturated Ink Trio 6-Bubblegum, Sweets, Taffy inks in a dark-to-light ombré. I trimmed down the finished panel slightly, then used some leftover stamp packaging to create a flat shaker pocket, adding strips of super sticky Tear-rific Tape to the back to create my flat shaker pocket. I filled the pocket with Candy Hearts Sequins and mounted it in the center of a full sized A2 panel of coordinating magenta cardstock, creating a thin hot pink frame around the edges of my shaker card front.

For the greeting, I die cut the detail layer of the Swoopy Love You sentiment die set from some coordinating hot pink glitter cardstock, then die cut the shadow layer from some Simon Says Stamp vellum. I used tiny dots of liquid adhesive behind the solid die cuts to the adhere the layered sentiment die cut at an angle to the bottom of my shaker card front.

After adhering the sentiment, I decided to embellish the card front with a visual cascade of hearts, so I die cut a couple of sizes of Nested Round Hearts from some more of the same magenta cardstock used for the card base. I used a blending brush to blend some more hot pink ink around the edges of the hearts, then popped them up on the card front using some thin foam adhesive squares!

Well, that’s all for today’s project. Those foil transfer cards really make quick work of your card, creating such beautiful and detailed backgrounds and focal points for you with minimal effort. Some sequins and a glittery sentiment to finish everything off made this card come together super quickly. Thanks so much for stopping by today, and have a marvelous day!

Filed Under: simon says stamp Tagged With: die cutting, falling in love foil transfer cards, foil transfer card, hot foil, ink blending, minc, nested round hearts, shaker card, swoopy love you, toner foil, valentine's day

With Love on Valentine’s Day!

February 14, 2024

This post was sponsored by Simon Says Stamp. Thanks, Simon!

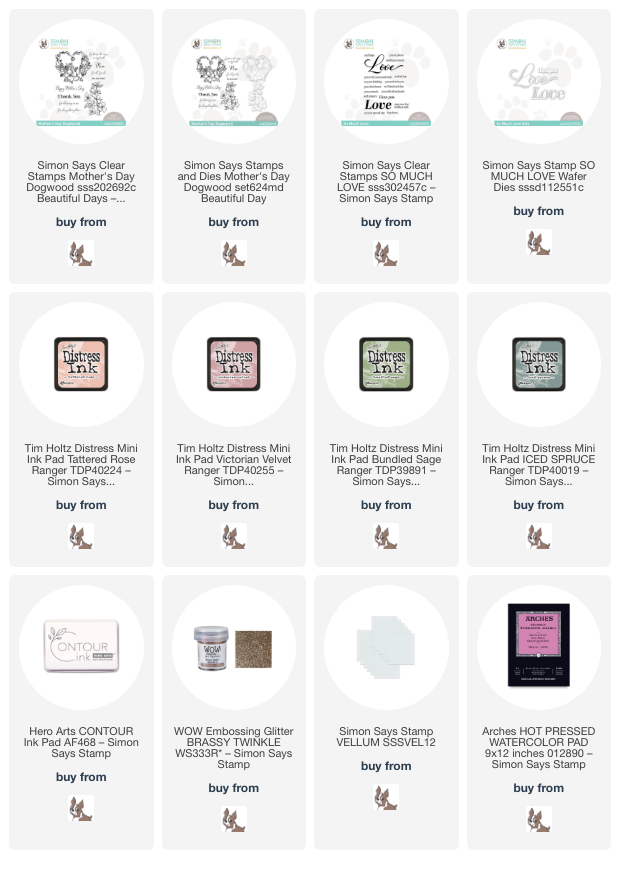
Hi friends! Happy Valentine’s Day! I hope you feel loved today! I am not really huge on hearts; if I’m going to use a basic shape, I’d rather use something a bit more neutral. But, on a day celebrating love, hearts are pretty much the only shape that counts, right? When I was looking through the stamps which I’ve illustrated for Simon Says Stamp, I saw the floral heart in my Mother’s Day Dogwood set and knew that I needed to make a valentine out of it! Let’s get started with the details.

I began by stamping the dogwood heart arrangement from Mother’s Day Dogwood onto some Arches hot press watercolor paper using Contour ink, which is my favorite ink for use with no-line watercolor and alcohol marker coloring techniques. I have really been enoying using Distress Inks for watercoloring lately, so I pulled out my Distress Minis and selected several colors in muted shades of blush and olive green. For today’s project, I used Tattered Rose, Saltwater Taffy, Victorian Velvet, Bundled Sage, and Iced Spruce. I tapped them out on my palette, then used a damp paintbrush to pick the colors up and maneuver them around on my smooth watercolor cardstock. I find that hot press watercolor paper works beautifully with liquid watercolor mediums like the Distress Inks or Karin markers, while the super smooth surface picks up stamped details really well!

After I had finished watercoloring the image, I wanted to take advantage of the coordinating dies for the Mother’s Day Dogwood set to create a shaped card. I die cut the finished image, then trimmed down a piece of cardstock to create a small 3″ x 3.5″ card. I placed the heart die over the seam of the folded notecard and ran it through my die cutting machine so that it would create a shaped notecard. On the interior, I stamped a greeting from the So Much Love stamp set, which would be hidden behind the solid portion on the heart die cut. Such a fun way to take advantage of these detailed dies!

For the greeting on the front, I stamped the scripty “love” from the So Much Love stamp set onto Simon Says Stamp vellum using glittery embossing powder, then die cut it with the coordinating die. I adhered the greeting die cut to the front of my card using small dots of liquid adhesive, making sure to overlap the top portion of the die cut with the top of the floral heart image, adding some more stability to the delicate shaped card. For a final accent, I added a few dots of super sparkly metallic watercolors to the centers of the flowers and the dainty baby’s breath!

Well, that’s all for my project today. I hope you’ll try making a shaped card base the next time you need a special card… it really makes the project extra special and exciting! Thanks so much for stopping by, and Happy Valentine’s Day!

Filed Under: original illustrations, simon says stamp Tagged With: distres ink, distress ink, distress watercolor, mother's day dogwood, no line watercolor, original illustration, shaped card, valentine, valentine's day

New Tim Holtz Love Notes for Simon Says Stamp!

February 6, 2024

This post was sponsored by Simon Says Stamp. Thanks, Simon!

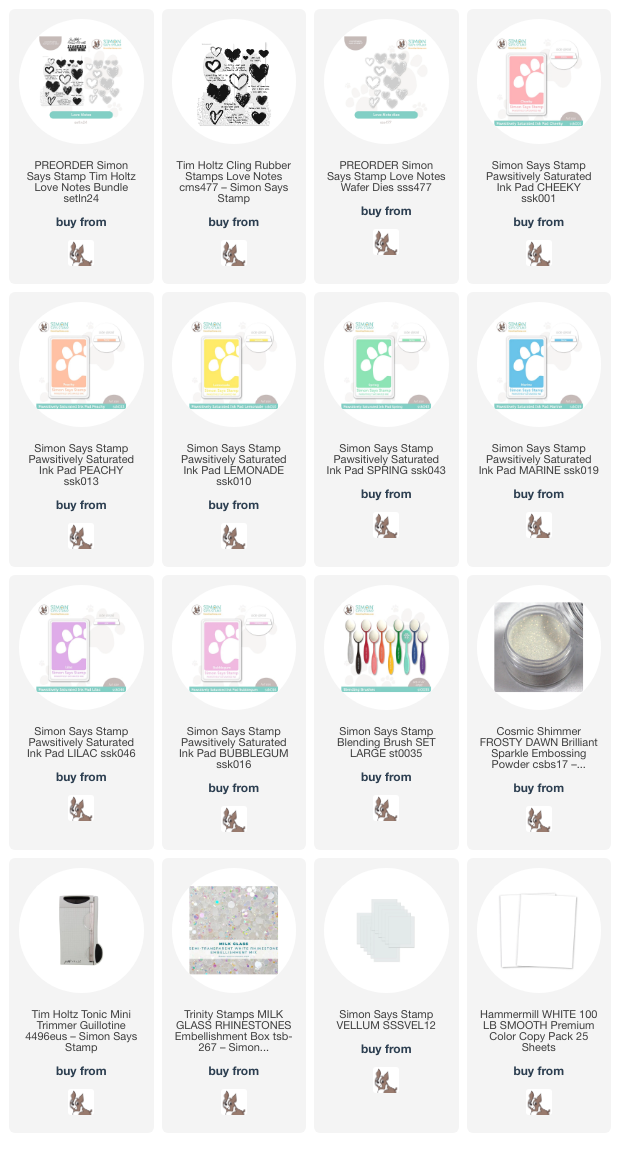
Hi friends! Simon Says Stamp announced a special surprise yesterday: coordinating dies for the Tim Holtz Love Notes cling stamp set! Simon Says Stamp saw how much we all loved the coordinating dies for the Tim Holtz holiday stamp sets, and now we can add these fabulous sketchy hearts to our stash, too. As soon as I saw the multitude of sizes for this set, I knew that I wanted to use as many of the stamps as possible to create a rainbow slimline card with some extra special touches. Let’s get started on the details for my project!

I began my project by using Simon Says Stamp blending brushes to blend Cheeky, Peachy, Lemonade, Spring, Marine, Lilac, and Bubblegum Pawsitively Saturated Inks in the center of a white slimline card base, starting and ending with Bubblegum ink to make each end blend seamlessly with each other. After I had blended my background, I used the different sized hearts in the Love Notes cling stamp set to stamp some subtle heart “shadows,” stamping each heart off on some scrap paper to make sure that patterned background was not too intense. After I had blended and stamped the heart background, I used some of the sentiments in the Love Notes cling stamp set, stamping them with the ink that coordinated to the blending on the spot upon which I was stamping. By overlapping the hearts and the sentiments atop the blended background, it creates a sort of “clean grunge,” which I think is my own take on Tim’s mixed media style! I also splattered some super sparkly, handmade metallic watercolors on the background.

While the background was drying, I used the same shades of ink with tons of the different heart shapes to stamp my focal point. I stamped them in a variety of shapes and sizes, being mindful to keep the sizes staggered as I went down the rainbow order so that things would look somewhat random. I also stamped some extra hearts onto vellum and embossed them with holographic glitter embossing powder. The addition of the vellum hearts helps to lighten things a bit and keep the solid die cuts from being too heavy for the airy, colorful background! I arranged the colorful hearts on their coordinating spot, tucking the vellum hearts behind so that I could hide the foam adhesive.

After I had adhered the heart die cuts, I stamped the greeting from the Love Notes cling stamp set using Marine and Lilac ink, then trimmed it down using the Tim Holtz small guillotine trimmer to keep the edges nice and crisp. I popped the greeting up on my hearts, creating a double layer of foam adhesive so that the sentiment would pop nicely. Finally, I added a smattering of Milk Glass gems from Trinity Stamps, the perfect accompaniment to the holographic glitter embossing and iridescent watercolor splatters!

Well, that’s all for my project today using the new Tim Holtz Love Notes cling stamp set. These coordinating dies are exclusive to Simon Says Stamp, so you will not be able to find them anywhere else! And don’t forget to check out the huge contest that Simon Says Stamp is hosting throught 2024 to celebrate 20 years of Distress Ink magic! (Check out the details HERE.) Thanks so much for stopping by today, and have a marvelous day!

Filed Under: simon says stamp Tagged With: ink blending, love notes, rainbow, tim holtz, valentine's day

  • « Go to Previous Page
  • Page 1
  • Page 2
  • Page 3
  • Page 4
  • Page 5
  • Go to Next Page »

Primary Sidebar

  • Facebook
  • Instagram
  • Pinterest
  • YouTube

Favorite Shops

Secondary Sidebar

Subscribe

Enter your email address to subscribe to this blog and receive notifications of new posts by email.

Instagram
Something is wrong.
Instagram token error.
Follow
Load More

Archives

Tags

3D embossing folder alcohol markers better press birthday birthday card blog hop card kit christmas christmas card christmas tag colored pencil copic copic coloring Daniel Smith die cutting embossing folder embroidery felt giveaway holiday holiday card hot foil ink blending karin brushmarker pro layered stencil masculine my monthly hero new release no line coloring no line watercolor OLO marker olo markers original illustration pawsitively saturated rainbow shaker card slimline stamping stamptember stencil thank you thinking of you valentine's day video watercolor

Popular Posts

Simon Says Stamp October 2026 Card Kit of the Month: Homespun Gratitude!
February 2018 My Monthly Hero Blog Hop!
Altenew Craft A Flower: Poppy Blog Hop+Giveaway!
Felted Gourd Wall Hanging with Simon Says Stamp!
Sunflower Home Decor with Simon Says Stamp!
Craft Your Life Project Kit: Feathered Lilies Blog Hop+Giveaway!
Simon Says Stamp October 2025 Card Kit of the Month!
Altenew Standalone Die Blog Hop+Giveaway!
The Ton Anniversary Release- Day 2
Honey Bee Stamps Cheerful Love Blog Hop!

Disclosure

Some affiliate links are used in my posts. This means that, should you click on one of my links and purchase something from that company, I will receive a small portion of the sale at no extra cost to you. I use the money earned from these sales to help maintain my blog. I so appreciate you visiting and, if you do choose to use one of my affiliate links, thank you so much for your support!
Copyright © 2026 ·Brunch Pro Theme · Genesis Framework by StudioPress · WordPress · Log in
Loading Comments...