• Skip to main content
  • Skip to primary sidebar
  • Skip to secondary sidebar

Sixth Street Sundries

Emily Midgett

  • Home
  • About Me
  • Contact
  • OLO Marker Color Swatch Chart
  • Shop

valentine's day

January 2022 Hero Arts My Monthly Hero Blog Hop+Giveaway!

January 10, 2022

Hi there! Today, Hero Arts is releasing their first My Monthly Hero collection for the new year, and we are hopping along to give you lots of romantic Valentine’s inspiration! You should have arrived here from Debi Adams, and your next stop is Ilina Crouse. You can also start back at the beginning at the Hero Arts Blog. This month’s kit features a beautiful layering stamp set and dies, in addition to a gorgeous, super detailed cover plate die. Here’s a peek at the contents of the January 2022 kit:

This month’s kit includes : 6″ x 8″ Clear Stamp Set, 3 Coordinating Frame Cuts, 4.25″ x 5.5″ Fancy Cover Plate Die, 1 Key Fancy Die, 4 Ink Cubes (Key Lime Fizz, Taffy, Green Apple, Cup O’ Joe), and Red Iridescent Gems. So many beautiful products in this month’s kit, valued at over $80, but is available to you for $34.99! You can also subscribe to be guaranteed to receive these beautiful kits each month. I have a pair of projects using this month’s kit, so let’s get started with the details!

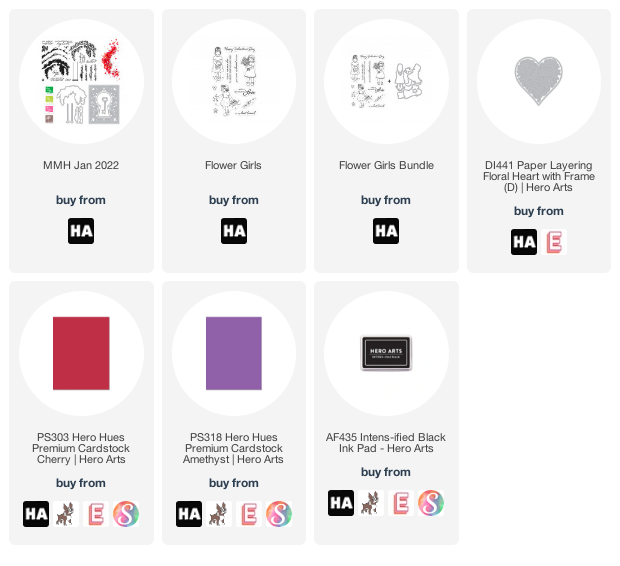
The beautiful fancy dies included in this month’s kit are so gorgeous that they can easily stand on their own, and I thought they’d be perfect to create some valentines for my big kiddos! I used some fancy glitter and foil cardstocks to really allow the details in the cover plate die to shine. I cut the fancy keyhole cover plate once from red glitter cardstock and once from shiny purple foil and backed it with some leftover stamp packaging to create a pocket for a shaker card. I adhered some coordinating Hero Hues colored cardstock on the back (Cherry for the red glitter card, Amethyst for the purple foil) and filled it with some coordinating sequins.

I heat embossed one of the darling greetings from the main kit onto some more coordinating Hero Hues cardstock using white embossing powder so that the sentiment would really pop. I also die cut two white keys using the fancy key die included in the kit.

I adhered the sentiments and the key die cut to the flat shaker card fronts using foam adhesive to help them stand out even more. I love the simplicity of the color schemes for both of these projects! I was going to try to do my favorite white-on-white, but I thought it would be more fun for Valentine’s Day for my minions to make things sparkly, shiny, and colorful.

My next project uses one of the sweet add-on sets: Flower Girls. The sweet images in this set are perfect for Valentine’s Day or just to send a sweet card to a friend or loved one! I began by stamping one of the little girls on some white, Copic-friendly cardstock using Intens-ified Black ink, then colored her in with my Copic markers, adding little black polka dots to her tights using a fine-tipped black pen. I cut the finished image out with the coordinating Flower Girls Frame Cuts.

I wanted to allow her bright raspberry colored frock to really pop from the card front, so I die cut a Paper Layering Floral Heart with Frame die cut from some more white cardstock. I offset the die cut to the right side of my card front, trimming off the edge with my sharp scissors. I adhered the white die cut to the white card base using foam tape to really allow those lovely details in the die cut to pop on the monochromatic background.

I stamped a greeting from Flower Girls on a strip of white cardstock, then trimmed around the sentiment using my sharp scissors to help keep things super delicate. (Isn’t that sentiment just precious?) I adhered the Flower Girls die cut and sentiment over the top of the heart die cut with some more foam tape, creating a double layer of foam tape in some spots and helping to create tons of dimension on this project!

Well, that’s all for my projects today. To celebrate this release, Hero Arts is hosting a giveaway!

Hero Arts will give away a $50 gift card, drawn from the comments left across the hop. Enter by Sunday, January 16th at 11:59pm Pacific, and the winner will be announced on the Hero Arts blog the following week.

Your next stop on the hop is Ilina Crouse. Thanks so much for stopping by today, and happy hopping!
Filed Under: Hero Arts Tagged With: copic coloring, flat shaker, my monthly hero, shaker card, valentine, valentine's day

Glittery Smooches on the Honey Bee Blog!

January 23, 2021

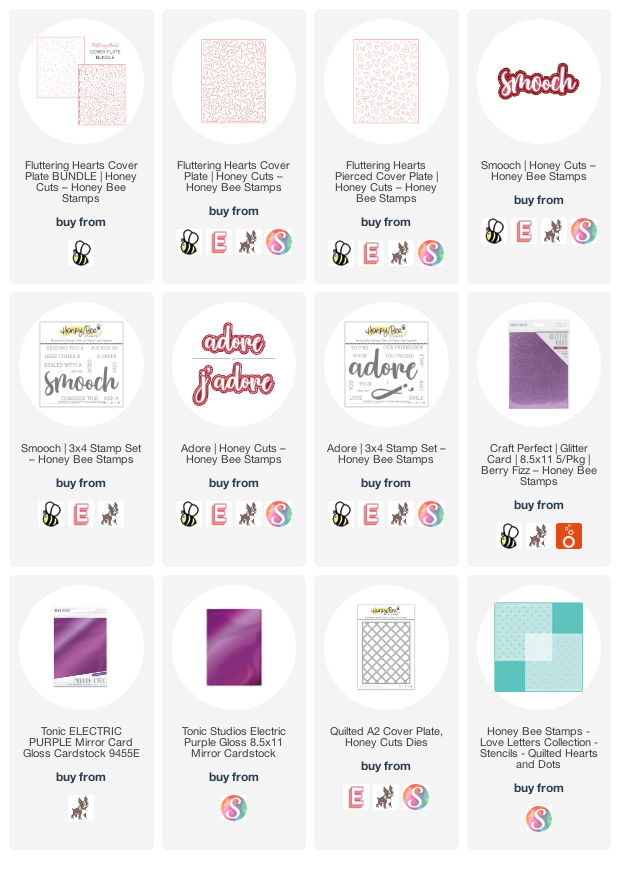
Hi there! I’m over on the Honey Bee Blog today with some super sparkly, shiny cards combining some old and some new products with crazy sparkly and shiny cardstock from Tonic. Valentine’s Day is the perfect day to add all kinds of glitz to your projects, and the new Smooch and Adore Buzzwords look fantastic with the glittery Berry Fizz cardstock.

I hope you’ll stop by the Honey Bee Blog and take a peek at how I made these two-fer cards!

Have a marvelous day, friends!

Filed Under: Honey Bee Stamps, Uncategorized Tagged With: adore, cover plate die, fluttering hearts, glitter paper, quilted cover plate, smooch, stenciling, valentine's day

Spellbinders Stamp of the Month January 2020!

January 6, 2021

Hi there! I’m excited to be helping introduce the Spellbinders Stamp of the Month Club for January 2021. Each month, Spellbinders releases fantastic new kits full of fun stamps, dies, and/or foiling that you can buy individually or, if you know that you’d love to play with them all, you can subscribe and be automatically sent each month’s release. There is even the option to combine multiple kits (the “value” option) at a discounted rate! You can read all about the kits available here.

This month’s Stamp of the Month (a $20 value for only $10!) is perfect for some sweet valentines! It features several different heart designs that you can use in a myriad of ways to create simple or elaborate valentines. My project features lots of white space and some fun glittery embossing powder. Let’s get started with the details!

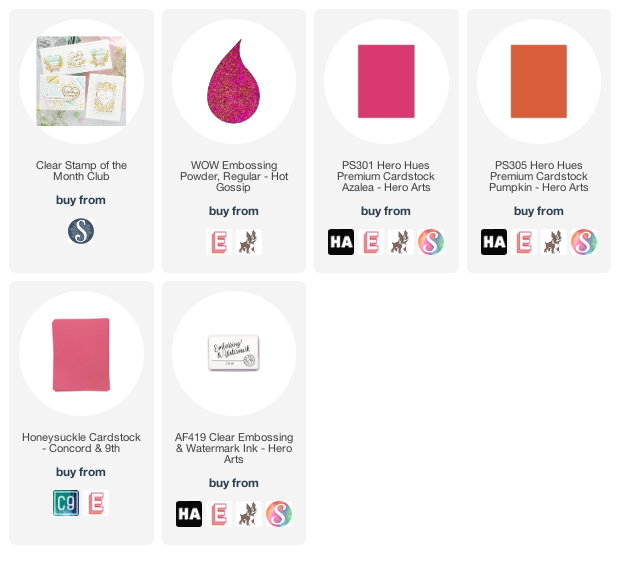
To start, I heat embossed three of the designs from the Stamp of the Month on white cardstock using Hot Gossip glitter embossing powder from WOW! Embossing Powders (linked below). This powder is a fun combination of hot pink powder and orange glitter, which I thought would be something traditional-but-slightly-different for a Valentine’s Day card!

After heat embossing each heart and the greeting, I fussy cut the hearts and trimmed the sentiment using my trimmer. I also trimmed three different, very thin strips of colored cardstock: one hot pink, one coral, and one deep orange to coordinate with the different colors in the glittery embossing powder! I mounted these strips on a white A2 card base on the left side of the card front using liquid adhesive.

I also adhered the thin sentiment strip on a slightly larger strip of hot pink cardstock. Before adding the hearts and sentiment, I trimmed the card front down slightly to make it 4″x5.5,” because I knew that I wanted to have the hearts hang off of the edge slightly, and keeping the card front the same width would make it too big to fit in an A2 envelope. I finally adhered all of the different pieces using foam adhesive for lots of dimension!

Well, that’s all for my project today. I highly encourage you to check out all of the fun monthly kits available from Spellbinders. So many amazing different ways to be creatively inspired every month! Thanks so much for stopping by today, and have a marvelous day!

Filed Under: spellbinders Tagged With: glitter, stamp of the month, valentine, valentine's day, wow embossing powder

Where Creativity Meets C9: Watercolor!

February 9, 2018

Good morning! Today is the start of a new challenge over at the Where Creativity Meets C9 blog… and this one is right up my alley:

Watercolor. And Concord and 9th. Eek! I’m all twitterpated.

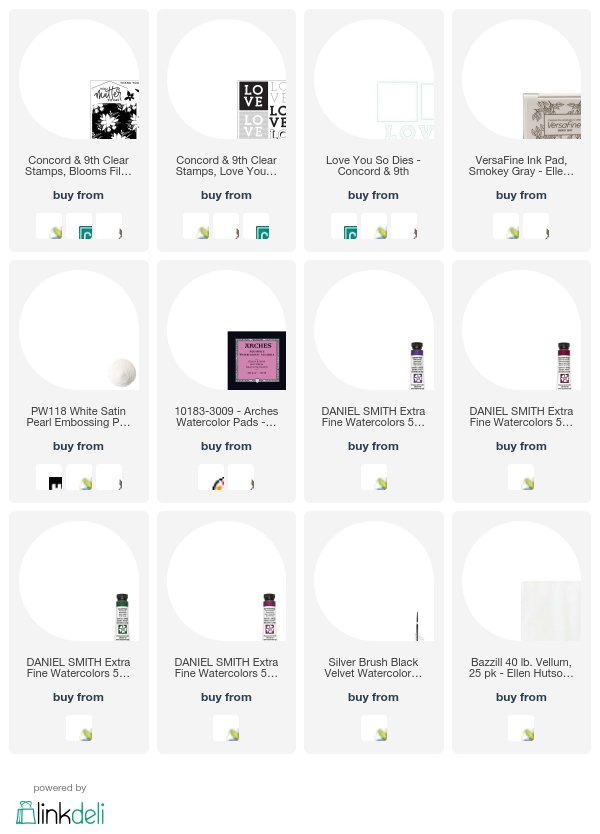
I have ruminated this idea for awhile, and I’m really happy with how it turned out. I started by stamping the Blooms Fill In Background with Smokey Gray Versafine ink onto some Arches Hot Press watercolor paper, then heat embossed it with Hero Arts Silver Pearl embossing powder. (I worked with the Hot Press paper because of it’s smooth texture. The Cold Press is my preferred paper, but has lots of gorgeous texture that would, unfortunately, mottle the heat embossing.) The combination created a lovely pearlescent charcoal finish. I then used my Daniel Smith watercolors in a soft palette of mauves and purples (I’ve always loved silvery gray with mauve…. so soft and romantic.) The heat embossing helps to “contain” the watercolor and makes it pretty easy to add shading, even with no lined guide like we would normally have for our coloring!

After I had finished watercoloring the panel, I used some of the newer stamps and dies from the Valentine’s Day release to create my greeting. To start, I die cut the stitched square from some heavyweight vellum, then added a purple die cut “LOVE” from the same die collection. I stamped the “I love that I know you” from the coordinating Love You So stamp set using the same Smokey Gray Versafine and pearl embossing powder combination, then flagged the ends.

Now, adhering vellum can be tricky. I try to hide my adhesive behind die cuts, so I first adhered my die cut letters and sentiment flag to the vellum square with liquid adhesive, then hid my dimensional foam adhesive behind the adhered die cuts. I wrapped some twine around the bottom third of the watercolored panel and tied a bow, then added my greeting over the top of it.

Now, it’s your turn! Use your Concord and 9th stamps and watercolors to create your own watercolored project and link it up to our blog post! One randomly selected winner will be awarded a $25 shopping spree to the Concord and 9th store, and another participant will be chosen to be a guest designer for a future challenge!  Have fun with this one, and please be sure to read the rules for the challenge. If you don’t follow the rules, you won’t be eligible to win! Have fun and good luck!


Filed Under: Concord and 9th, Uncategorized, watercolor, Where Creativity Meets C9 Tagged With: challenge, heat embossing, valentine's day, vellum, watercolor

My Monthly Hero January 2018 Blog Hop!

January 8, 2018

Well hi!! I am super excited today to be a guest on the Hero Arts My Monthly Hero blog hop for January, 2018! You should have arrived from the amazing Clare Prezzia’s blog, and I’m the last stop on the hop! These kits are just fantastic, and I am SO happy to be a guest on the blog hop this month! If you aren’t familiar with the My Monthly Hero kits, here’s a little summary: every month, Hero Arts carefully curates a kit containing stamps, dies, and complementary inks, papers, and/or embellishments. The kits are always a fantastic value for the price of $34.99, but the value of the individual elements always exceeds the price tag. Talk about bang for your buck! The kit this month is so pretty…. lovely, ornate sentiments and some pretty filigree dies, as well as some really beautiful papers and inks. Gorgeous for Valentine’s Day!

Kit Contents:

4″ x 6″ Layered on Love Clear Stamp Set
Four Coordinating dies
4 ink cubes (Passion Flower, Navy, Red Royal and Mulled Wine)
2 5″x7″ Shizen decorative paper
1 5.5″x8.5″ Stardream Coral Cardstock
1 5.5″x8.5″ Stardream Rose Quartz Cardstock
1 5.5″x8.5″ Stardream Kunzite Cardstock
Heart Sequins Mix 1.5 oz
Pink Prisma Embossing Powder 0.5 oz
I have a project for you today that combines the pretty sentiments of the kit with one of the kit add-ons: Window on Love Confetti Fancy Die. I started by die cutting one of the Love Confetti dies from some masking paper, then placed it on a panel of white card stock. I then used my blending tools to blend Raspberry Jam, Ultra Pink, and Bubble Gum inks over the top of the masking paper. Love when you pull the masking paper away and the pattern magically appears!

For the greeting, I used Hero Arts Silver embossing powder on vellum to emboss the bottom layer of the pretty “Love” and the ampersand from the main stamp set of the January My Monthly Hero kit. I fussy cut both of them out, then embossed the “sending” and “friendship” onto some plain white card stock, trimmed them down, and blended more Raspberry Jam ink so that they would pop from the background.

I trimmed the blended panel down and adhered it to an A2 sized panel of silver glitter paper to help pull the silver of the embossing together. I then adhered the greeting with some dimensional adhesive, finally adding some Ombre Blush sequins to complete the visual cascade.

The kit is available for a limited time only – once it’s gone, it’s gone. Kits begin shipping from Hero Arts on Friday January 12th. Also, you can now subscribe to receive the kit monthly and never miss one! You get such bang for your buck every single month that it’s totally worth it!

Now, for some giveaway fun! Hero Arts is generously giving away a full kit (valued at over $60!) to one lucky reader! All you have to do is comment on the blogs… One winner will be selected from comments across the blog hop, so the more comments you leave, the more chances you have to win! (If you’ve already purchased a kit and are selected as the winner, Hero Arts will reimburse you for the price of the kit!) Giveaway closes Sunday, January 14th at 11:59pm, and the winner will be announced the following week on the Hero Arts blog.

The Hero Arts Blog
Jennifer McGuire
Yana Smakula
Jessica Frost-Ballas
Wanda Guess
Lydia Fiedler
Amy Tsuruta
Laurie Willison
May Park
Janette Kausen
Michelle Short
Libby Hickson
Ilina Crouse
Clare Prezzia
Emily Midgett


Filed Under: Hero Arts Tagged With: blog hop, heat embossing, ink blending, masking, my monthly hero, valentine's day, vellum

  • « Go to Previous Page
  • Page 1
  • Interim pages omitted …
  • Page 3
  • Page 4
  • Page 5

Primary Sidebar

  • Facebook
  • Instagram
  • Pinterest
  • YouTube

Favorite Shops

Secondary Sidebar

Subscribe

Enter your email address to subscribe to this blog and receive notifications of new posts by email.

Instagram
Something is wrong.
Instagram token error.
Follow
Load More

Archives

Tags

3D embossing folder alcohol markers better press birthday birthday card blog hop card kit christmas christmas card christmas tag colored pencil copic copic coloring Daniel Smith die cutting embossing folder embroidery felt giveaway holiday holiday card hot foil ink blending karin brushmarker pro layered stencil masculine my monthly hero new release no line coloring no line watercolor OLO marker olo markers original illustration pawsitively saturated rainbow shaker card slimline stamping stamptember stencil thank you thinking of you valentine's day video watercolor

Popular Posts

Simon Says Stamp Sending Cheer Blog Hop- Day 2 + Freebie + Giveaway!
Altenew October 2026 Release Blog Hop + Giveaway!
Rustic Monochromatic Stars for Christmas with Rainbow Splash!
December 2018 My Monthly Hero Blog Hop + Giveaway!
March 2020 Essentials By Ellen Blog Hop+Giveaway!
The Ton Stamps Summer Release: Day 1
Hero Arts Partners Blog Hop: Lawn Fawn!
Waffleflower July Release Blog Hop!
Simon Says Stamp STAMPtember Tim Holtz Collaboration: Festive Holidays!
Honey Bee Stamps Autumn Blessings Blog Hop-Day 2!

Disclosure

Some affiliate links are used in my posts. This means that, should you click on one of my links and purchase something from that company, I will receive a small portion of the sale at no extra cost to you. I use the money earned from these sales to help maintain my blog. I so appreciate you visiting and, if you do choose to use one of my affiliate links, thank you so much for your support!
Copyright © 2026 ·Brunch Pro Theme · Genesis Framework by StudioPress · WordPress · Log in
Loading Comments...