• Skip to main content
  • Skip to primary sidebar
  • Skip to secondary sidebar

Sixth Street Sundries

Emily Midgett

  • Home
  • About Me
  • Contact
  • OLO Marker Color Swatch Chart
  • Shop

video

ELEGANT CHRISTMAS CARDS IN 20 MINUTES OR LESS-VOLUME 3 with Pinkfresh Studio!

December 17, 2020

Hi there! I’m back with day 3 of my “Christmas Cards in 20 Minutes or Less” series, this time featuring some sparkling poinsettias from Pinkfresh Studio! In today’s video, we let the beautiful Ornate Poinsettia cover plate die from Pinkfresh Studio do the heavy lifting for us to create a simple and very elegant Christmas card in less than 15 minutes!

Here’s the video:

You can also watch it in HD here.

One of the quickest ways that I’ve found to make a huge impact on a card front with minimal effort on my part is to use a detailed cover plate background die. These cover plates are workhorses; you can use them to create subtle texture by using tone-on-tone color scheme; you can watercolor, ink blend, or Copic color on them to add lots of intricate detail and bright color; or, as I’ve done here, you can utilize some sparkling cardstock and a pretty base layer to create a simple but stunning card base that only needs a sentiment to finish it off.

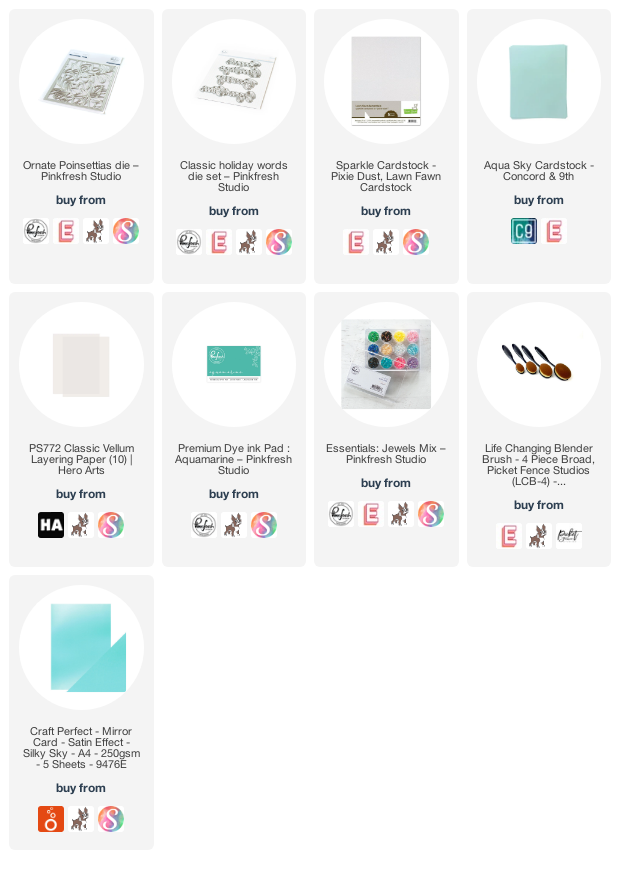
For this card, I’ve die cut the Ornate Poinsettia from some sparkling white glitter cardstock. The beautiful die cut details in this cover plate die cut don’t need much help to create a beautiful card front! I adhered it to a pale aqua card base upon which I lightly blended some Aquamarine ink around the edges to add a bit of extra interest to the background. I added a die cut greeting from Classic Holiday Words dies, which I die cut from some heavyweight vellum and matte teal foil, popped up with clear foam adhesive. The final step was to add some turquoise gems to the center of the poinsettia die cuts, which add a bit more bling and some extra texture to the card front!

Well, that’s all for my “Christmas Cards in 20 Minutes or Less” project today. I hope these videos are giving you some useful tips for your last minute holiday cardmaking! We all are so busy this time of year that any little tricks to simplify things a bit helps! Thanks so much for stopping by today, and have a marvelous day!
Filed Under: pinkfresh studio Tagged With: christmas card, cover plate die, easy christmas card, ink blending, ornate poinsettia, video

So Fresh and So Clean!

June 27, 2019

Hi there! I have some fun projects to share with you today using the new Squeeze the Day stamps and dies from the latest Ellen Hutson release. This release was a fantastic one; a little something for everyone…. and this beautiful lemon set was my favorite. I love all things lemon; the citrus fruits connote such a clean, fresh look, and I had so much fun creating with this beautiful stamp set. I used it in my latest Exploring With Emily video, which you can watch below or here in HD:

I also created this clean, graphic project using the Squeeze the Day stamps. I love pairing black and white with a pop of bright color, and these fresh citrus stamps worked beautifully as limes, in addition to lemons!

I began by stamping and heat embossing the limes, a lime wedge, and some foliage and flowers on some white card stock using Versafine ink and clear embossing powder. I then colored the images using my Copic markers in shades of bright and deep green and die cut them with the coordinating dies.

To continue the super clean and graphic feel of the project, I then stamped the Diamond Tile Background from The Stamp Market again using Versafine and clear embossing powder. I also stamped a greeting from Squeeze the Day onto a strip of white card stock, then matted it on a slightly larger strip of black card stock to create a stark black frame and add some contrast to keep the greeting from fading into the busy background.

After adhering the sentiment strip with foam adhesive, I added the Copic-colored citrus die cuts using both foam and liquid adhesive to create lots of dimension. The final step was to add some Shamrock gems to add some sparkle and help create a visual cascade!

Annnndddd…… the Essentials By Ellen Summer Sale has begun! The Squeeze the Day stamps and dies are in this category, as well as a bunch of other favorites (including Mondo Hydrangea and my favorite Stitches Cover Plate. Gasp!) There are ten pages of sale items, so I’d highly encourage you to go check them out!! Some things will sell out quickly, so run, don’t walk over to the Essentials By Ellen Summer Sale!

Well, that’s all for my projects today! I can’t believe it’s almost July, bringing a new month of releases and fun goodies for you (and me!) to enjoy! Thanks so much for stopping by today, and have a marvelous day!

Filed Under: Ellen Hutson Tagged With: citrus, exploring with emily, limes, squeeze the day, video

Ellen Hutson April 2019 Release!

April 16, 2019

Hi there! Today, I am sharing my projects with you using the newest Essentials By Ellen release! I went out of town earlier this month, and I’m still playing catch up… gah. But I just had to share these projects using these super cute new stamps and dies from Ellen Hutson! Let’s get started with the details!

For my first project, I just had to combine the adorable sentiments from Everyday Punnies and the sweet little critters from Everyday Doodles. I die cut the larger frame from the new Instant Photo Frame die set using some white card stock, then added the sentiment from Everyday Punnies using black ink. I knew I wanted a blue background for my celebratory critter, so I masked off approximately where the photo frame would be, then used Life Changing Blending Brushes to blend some soft blue ink in the bottom right corner.

Next, I stamped the little birdie from Everyday Doodles using Copic-friendly black ink, as well as a trio of balloons, and colored them using cheerful pastel Copic markers. I added the die cuts to the blended panel using foam tape, then added some gems from Pretty Pink Posh for a bit of sparkle!

For my second project, I thought I’d do something a little more elegant using the new Painted Stripes set. I started by stamping one of the stripes repeatedly on a white card base using Industrial Diamond ink. I then cut several of the Wild Garden dies from more white card stock, blending various shades of peach, coral, and mint again using the blending brushes.

I die cut the Scripty Thank You die three times from Slate card stock and adhered them together to create a dimensional die cut. I arranged the blended flowers and foliage on the striped card front, then adhered them using liquid adhesive and added the dimensional die cut sentiment in the center. I added a bit of Crystal Lacquer over the top of the sentiment to add further contrast and help it pop. The final touch was a few metallic silver jewels for a bit of shine.

I also wanted to mention that my latest Exploring With Emily video is up on the Ellen Hutson YouTube channel. This month, I focus on color mixing using the Daniel Smith Essentials set. This is a set of 6 colors, 2 shades of each individual primary color, and in the video I discuss how to make the most of just those six colors to create a veritable rainbow! I hope you’ll check it out!

Filed Under: Ellen Hutson, watercolor Tagged With: essentials by ellen, new release, video

Wplus9 Guest Post and Sneak Peek!

December 12, 2018

Good morning! Happy Wednesday to you! I have some exciting news to share… I’m over on the Wplus9 blog today sharing a video on how I created this watercolored card! Eek!

You can also head to the YouTube channel to see the video in HD! 

I hope you’ll stop by and check it out! 🙂 Have a marvelous day, friends! 

Filed Under: video, watercolor, Wplus9 Tagged With: floral, guest post, holiday, video, watercolor

Neat and Tangled Birthday Blog Hop!

August 8, 2018

Good morning! I am so excited to be taking part in this fun blog hop for the Neat and Tangled 6th Birthday celebration! You should have arrived here from the Neat and Tangled blog, and your next stop for today is Nina-Marie Trapani’s blog. Danielle from Neat and Tangled has released some really darling products this month, including some super versatile and incredibly useful standalone dies, as well as the gorgeous florals that are my focus today. All of the new Neat and Tangled products that I used today are now available for purchase!! I have created a shaker tag (with video!) and a card using the new products for today’s post, so let’s get started with the details!

(You can watch the video in HD here.)

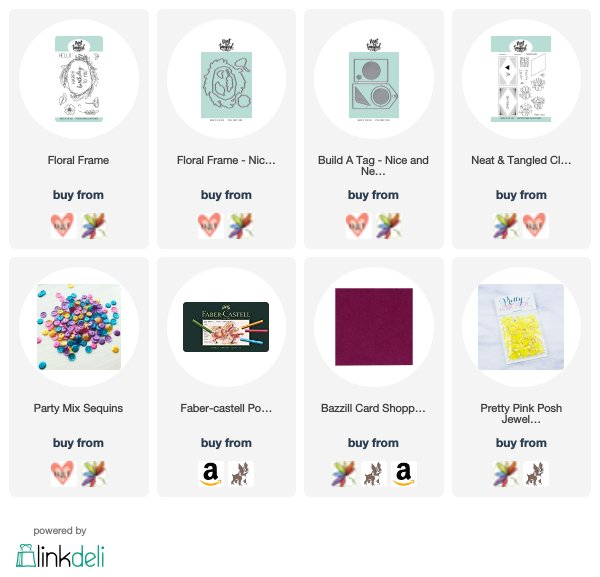
I created a shaker tag using the new Floral Frame, Floral Frame dies, Build A Tag dies, and Thanks So Much stamps. I first laid down a light wash of watercolor using Daniel Smith paints, then added some quick shading details to my watercolored flowers using my Polychromos pencils. For all of the details and to see my process for creating this shaker tag, I encourage you to watch the video!

For my second project, I wanted to keep that same plum and mustard color scheme, but this time with some colored pencil coloring on colored card stock. I began by heat embossing several of the images from the Floral Frame set in silver powder onto some Bazzill Mulberry card stock, then coloring them with my Polychromos colored pencils. I wanted to create as monochromatic a background as possible, so I used only the Mulberry card stock to avoid those annoying white edges on the edge of my die cuts. The colord pencil coloring on the colored card stock is slightly muted, but it’s definitely a unique, fairly monochromatic look, and I just love it!

I heat embossed the sentiment from Floral Frame onto an A2 panel of Mulberry card stock, then added the die cuts with a combination of liquid and dimensional adhesive. The final step was some pretty gems from Pretty Pink Posh to add a little sparkle.

Now, for some fun giveaway information!

Danielle will be giving away one $100 gift certificate to the Neat and Tangled shop and two $50 gift certificate to the Neat and Tangled shop. Winners will be chosen from comments all along the hop all week long. Winners will be announced Friday, August 10th.

Fabulous, right?! Be sure to leave comments on all of the blog posts for the maximum chances to win a Neat and Tangled shopping spree! Your next stop today is Nina-Marie Trapani’s blog. If you get lost along the way, or want to start at the beginning, head on over to the Neat and Tangled blog.

Thanks so much to stopping by today, and a special thanks to Danielle for inviting me to be part of this hop! Congratulations on 6 years of Neat and Tangled fabulousness, and cheers to many more!


Filed Under: neat and tangled, polychromos, video, watercolor Tagged With: blog hop, colored pencil, shaker card, shaker tag, tag, video

  • « Go to Previous Page
  • Page 1
  • Interim pages omitted …
  • Page 3
  • Page 4
  • Page 5
  • Page 6
  • Page 7
  • Go to Next Page »

Primary Sidebar

  • Facebook
  • Instagram
  • Pinterest
  • YouTube

Favorite Shops

Secondary Sidebar

Subscribe

Enter your email address to subscribe to this blog and receive notifications of new posts by email.

Instagram
Something is wrong.
Instagram token error.
Follow
Load More

Archives

Tags

3D embossing folder alcohol markers better press birthday birthday card blog hop card kit christmas christmas card christmas tag colored pencil copic copic coloring Daniel Smith die cutting embossing folder embroidery felt giveaway holiday holiday card hot foil ink blending karin brushmarker pro layered stencil masculine my monthly hero new release no line coloring no line watercolor OLO marker olo markers original illustration pawsitively saturated rainbow shaker card slimline stamping stamptember stencil thank you thinking of you valentine's day video watercolor

Popular Posts

Simon Says Stamp Joy For You Blog Hop- Day 1!
Simon Says Stamp Joy For You Release-Now Available!
Vintage Peach Ornament with New Simon Says Stamp Joy For You Release!
Frozen Fractals All Around with New Simon Says Stamp Joy For You Release!
Shaped Holiday Shaker Card with New Simon Says Stamp Jolly Season Card Kit of the Month!
Holiday Postage with New Simon Says Stamp!
Simon Says Stamp Glory to the Newborn King Holiday Kit-Part II!
Pinkfresh Studio 5th Birthday!
Studio Katia 2nd Anniversary Blog Hop!
Altenew Build A Flower: Fuchsia Blog Hop+Giveway!

Disclosure

Some affiliate links are used in my posts. This means that, should you click on one of my links and purchase something from that company, I will receive a small portion of the sale at no extra cost to you. I use the money earned from these sales to help maintain my blog. I so appreciate you visiting and, if you do choose to use one of my affiliate links, thank you so much for your support!
Copyright © 2026 ·Brunch Pro Theme · Genesis Framework by StudioPress · WordPress · Log in
Loading Comments...