• Skip to main content
  • Skip to primary sidebar
  • Skip to secondary sidebar

Sixth Street Sundries

Emily Midgett

  • Home
  • About Me
  • Contact
  • OLO Marker Color Swatch Chart
  • Shop

wedding card

A Special Shaker for a Special Occasion with New Simon Says Stamp!

April 28, 2024

This post was sponsored by Simon Says Stamp. Thanks, Simon!

Hi friends! I am back with another special occasion card featuring new products from the Simon Says Stamp Celebrate release! I absolutely adored the new Daisy Oval Frame die; something about the tremendous impact of these intricate dies always makes them irresistible to me. I love that you not only get the intricate daisy frame itself, but also an additional delicate scalloped frame and extra individual detail dies to customize this fun frame in tons of different ways! I created a celebratory shaker card today using some of my favorite specialty papers, so let’s get started with the details!

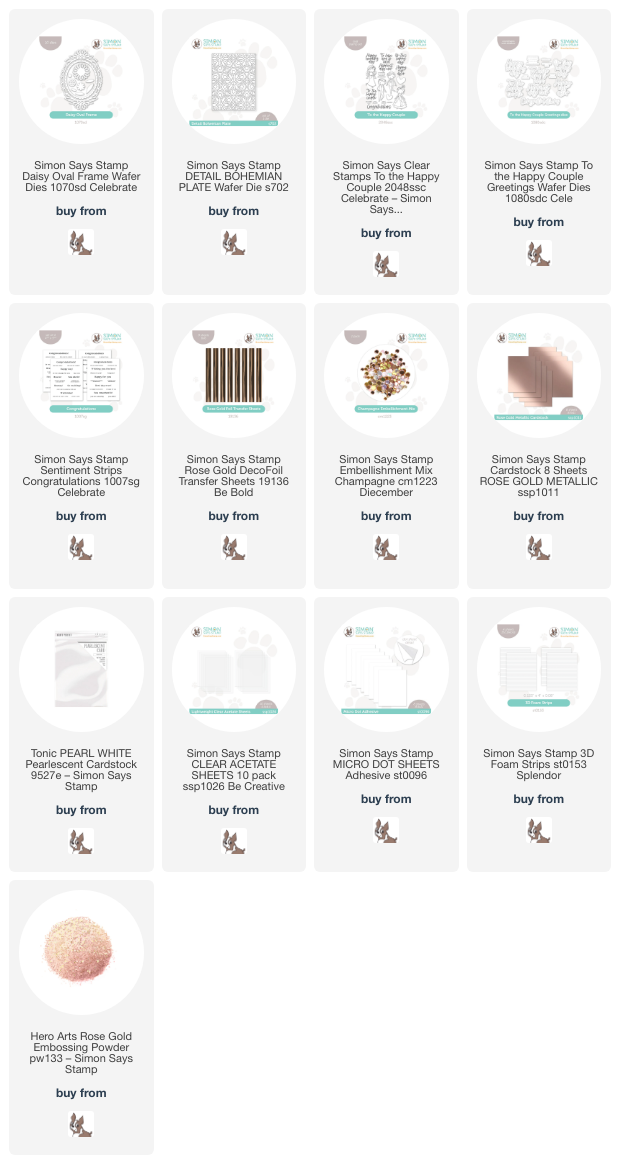
I started my card by die cutting the Daisy Oval Frame die a few times, first from Rose Gold Metallic foil cardstock, then from the center of an A2 panel of pearlescent white cardstock. I reserved that pearlescent white die cut for another project and used the negative frame for this project. I backed that open window on the pearlescent white cardstock piece with some acetate, which will become my shaker window. Because the Daisy Oval Frame die cut is so very delicate, and because I was working with super shiny metallic mirror cardstock and shiny clear acetate, I wanted to keep everything as clean as possible, so I pulled out the Micro Dot Adhesive Sheets from Simon Says Stamp. To use these tiny dots of adhesive, simply remove the release paper from part of your adhesive sheet, place the die cut with the back side touching the adhesive dots, then replace your release paper over the top. I like to flip the entire thing over and then use my bone folder to burnish the back of the die cut to make sure that the adhesive is really stuck on my intricate die cut. Then I flip it back over, remove the release paper, and pull off my new “sticker” die cut. It is so much easier and cleaner to add adhesive to delicate, detailed die cuts than trying to manage globs of glue, especially when dealing with super shiny cardstock!

After I had added adhesive to the back of my daisy frame die cut, I nestled it into the open window of my shaker card front. I flipped the window over and added a long line of continuous foam adhesive around my window using Foam Strips from Simon Says Stamp. To add a bit of texture behind my open shaker window, I ran a panel of white cardstock through my die cut machine using the Detail Bohemian Plate die, which adds a lovely pierced pattern onto your cardstock without actually cutting any shapes. These pierced plates are some of my favorite ways to add texture to my cards! I filled my shaker with some Champagne Sequins, which have lovely shades of metallic sequins that coordinate beautifully with the Rose Gold Metallic foil cardstock.

For the greeting, I heat embossed the Congratulations sentiment from the To the Happy Couple stamps with rose gold embossing powder onto some more white cardstock, then used the coordinating sentiment dies to cut it out. (I love having the option to use dies to cut out sentiments; it makes the stamp set so much more versatile to have dies to cut each piece!) I used some Simon Says Stamp Rose Gold DecoFoil with my Minc machine to add some coordinating shiny rose gold foil to one of the greetings included in the Congratulations toner foil cards. These cards are great on their own, but pairing them with foil just kicks them up a notch and raises the elegance level of the card! I popped up the greeting pieces in the center of the shaker window, leaving plenty of space around the sentiment to see the festive sequins floating about.

Well, that’s all for my project today! This card would work beautifully for a wedding shower or wedding, or even just a congratulatory card for a special occasion! I love multi-purpose sentiments. Thanks so much for stopping by today, and have a marvelous day!
Filed Under: simon says stamp Tagged With: congratulations, congratulations sentiment strips, daisy oval frame, decofoil, detail bohemian plate, sentiment strips, shaker card, to the happy couple, wedding card

Happy Ever After with New Simon Says Stamp Celebrate!

April 20, 2024

This post was sponsored by Simon Says Stamp. Thanks, Simon!

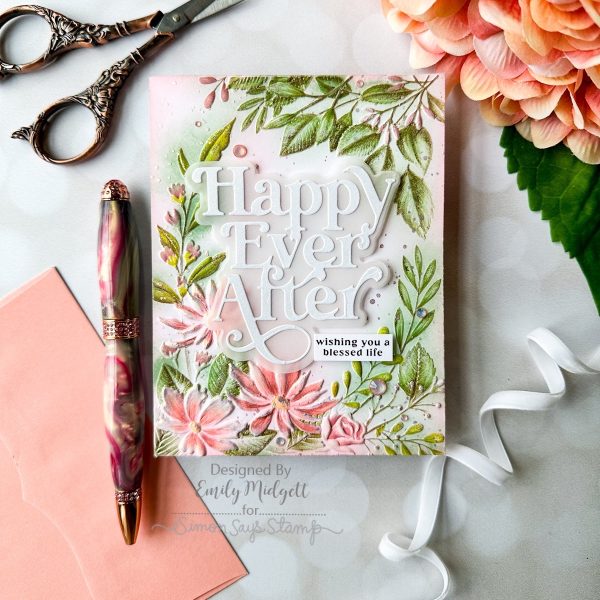
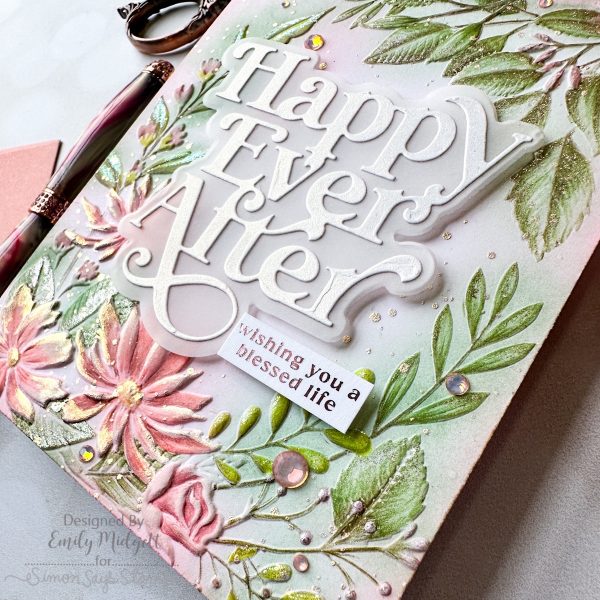
Hi friends! The new Simon Says Stamp Celebrate Release is full of some absolutely stunning new embossing folders, and I fell in love with the grace and elegance of the new Beaufort Floral Frame. It features a beautiful wreath of flowers and lots of lovely foliage, and the images are large enough that you can do tons and tons of techniques to add color and details. I have been super inspired by Suzy Plantamura’s work with colored pencils, (check out her gorgeous work HERE) and thought that I would try out using colored pencils to add details to this delicate embossed image. Let’s get started with the details!

When I first embossed this image from the Beaufort Floral Frame embossing set onto some Hammermill white cardstock, I thought that it reminded me of a magical, ethereal garden, misty and somewhat blurred by the warm, romantic early evening air. I thought the best way to achieve this look was by combining some loose ink blending with colored pencil details. I used small blending brushes to blend Pawsitively Saturated inks Artichoke, Blush, and Cheeky on the floral images, concentrating the deepest colors on the raised areas but also spreading some out over the areas surrounding it, as well. Because coral and green would make a muddy mess if mixed together too intensely, I tried to keep the colors as light as possible where they touched. The result was a lovely garden background, which would have been pretty on it’s own, but I decided to step it up a notch!

To add some extra details and make the flowers more lifelike, I used colored pencils to add details on each individual petal and leaf, working with very sharp points and keeping a light hand so that the blended color did some of the work for me. (My wrists are not huge fans of pencils, but my artistic soul loves the results!) After I had finished adding the pencil details, I used some super sparkly handmade watercolors from my stash to do some “gilding” on the edges of the petals and foliage, also splattering the entire panel with more of the sparkling watercolors. It reminds me of delicate dewdrops or something equally magical! You can get a bit of an idea of just how sparkly this card is in the photo above; that “gilding” technique adds so much to an embossed card!

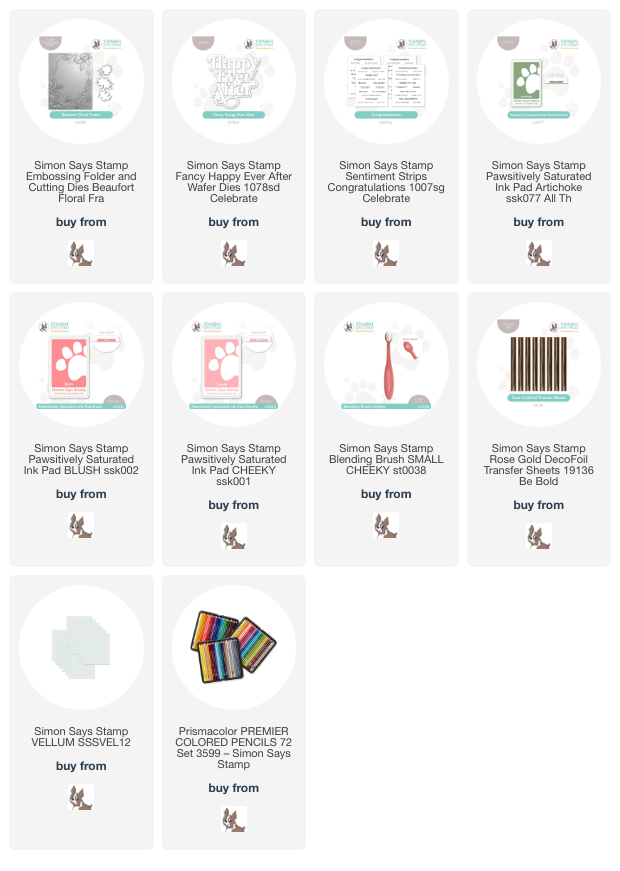
After spending so much time adding the detailed coloring and gilding to the embossed image, I decided to keep the rest of the card simple. I die cut the new Fancy Happy Ever After die from some pearlescent white cardstock and backed it with a vellum shadow to help it stand out a bit from the light background. I also used my Minc machine to add some Simon Says Stamp Rose Gold Deco Foil to the new Congratulations toner foil cards. You can easily leave these sentiment cards black and white, but I think the addition of the foil takes them just one step further towards luxurious elegance. A few gems finished it off with some extra sparkle!

Well, that’s all for my project today. I hope you’ll check out Day 2 of the Celebrate Blog Hop over on the Simon Says Stamp blog. So many prizes and such a wealth of inspiration to be had! You can check out my post from Day 1 of the Celebrate Blog Hop HERE. Thanks so much for stopping by today, and have a marvelous day!
Filed Under: simon says stamp Tagged With: 3D embossing folder, beaufort floral frames, congratulations, happy ever after, pawsitively saturated, toner foil card, wedding card

Simon Says Stamp Celebrate Blog Hop Day 1!

April 19, 2024

This post was sponsored by Simon Says Stamp. Thanks, Simon!

Hi friends! Welcome to Day 1 of the Simon Says Stamp Celebrate Blog Hop! You should have arrived here from Cathy Zielske, and your next stop is Mindy Eggen. You can also start back at the beginning at the Simon Says Stamp Blog in case you get lost! The Celebrate Release features a huge variety of styles and themes, some whimsy, some elegance, and just about everything in between. I have a pair of cards today that would work perfectly for wedding season and could be easily customized to fit the color scheme for the wedding party. Let’s get started with the details!

Aqua is one of those colors that works beautifully as a neutral and as a main element for your color palette. My first home with my husband was painted in varying shades of aqua (the painters called it “the Easter egg house,” ha); such is my love for this color! And I think that Simon Says Stamp’s Sea Glass cardstock is the most perfect shade of aqua: not too intense, but also enough to add a beautiful pop of color to your card, and works beautifully as a neutral. I used it as the jumping off point to create a pair of wedding cards using the new To the Happy Couple and Daisy Oval Frame from the Celebrate Release.

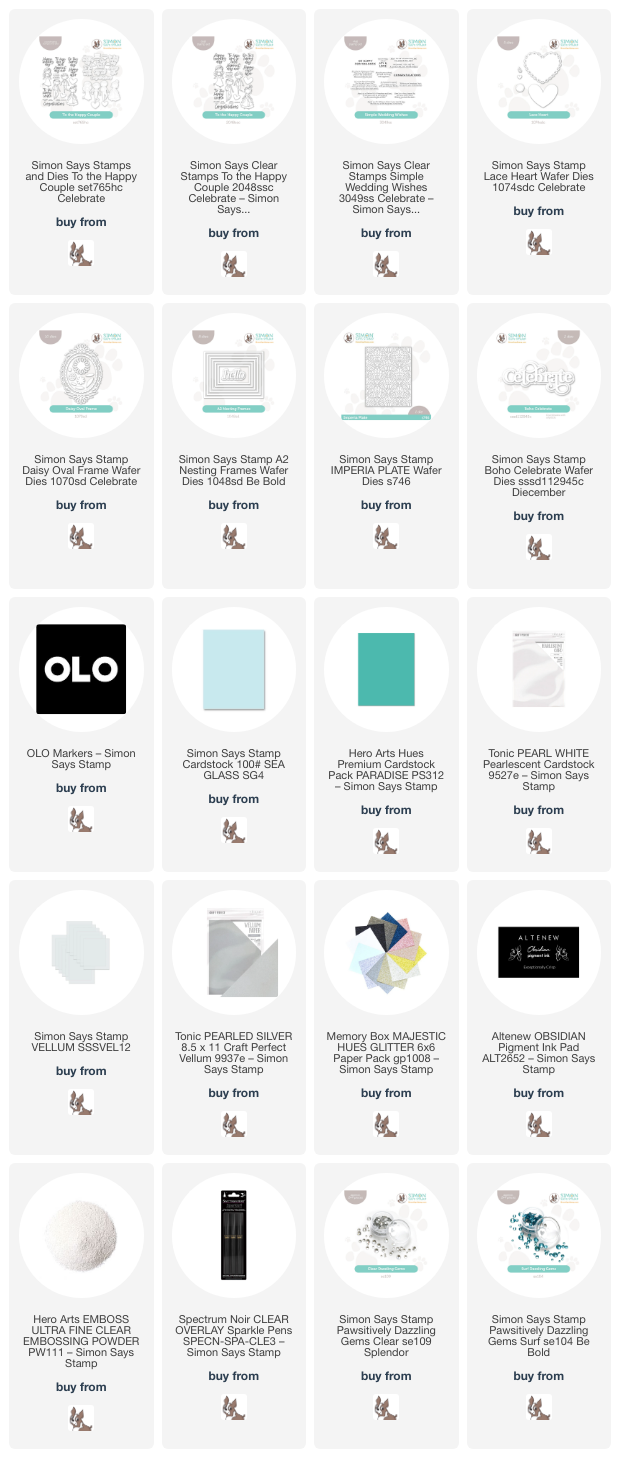
For my first card, I started by stamping images from the new To the Happy Couple set: a bride and groom with one of the lovely scripty sentiments included in the set. I stamped the images using black pigment ink and embossed them with clear embossing powder to make the black lines even more crisp. I used OLO markers to color the images, keeping the bride’s dress “white” by adding some pale BV shadows and softening the lines with the colorless marker. I also used a clear glitter Sparkle Pen to add some extra shimmer to the overlay on the bridal gown, making it that much more special! I die cut the finished images with the coordinating dies, also heat embossing a greeting from Simple Wedding Wishes onto a strip of white cardstock to add to the card.

For the background, I die cut the Lace Heart die from some silver pearl vellum, adding another element of shimmer to the card. (Wedding cards and shimmer go hand in hand in my book!) I offset the heart on my Sea Glass A2 card front, trimming off the edge and adhering it with some foam adhesive in the center of the vellum die cut. The vellum is semi-transparent, but I knew that I would be adding the happy couple over the top of the adhesive, effectively hiding it. I added the bride and groom and sentiment pieces over the vellum heart with more foam adhesive, creating a double layer of foam tape to give the different elements plenty of height.

The simplicity of the bride’s gown makes me think that she would have a simple bouquet of daisies, so I thought that some of the standalone daisy die cuts from the Daisy Oval Frame set would work perfectly to help accent the focal point and provide a little extra interest and sparkle! I die cut the large daisy image from white pearlescent cardstock, as well as some of the smaller florals from white glitter cardstock and foliage from darker aqua cardstock. I arranged the flowers around the focal points, accenting the centers with some Clear Pawsitively Dazzling Gems. Wouldn’t this be such a special card to include with a wedding gift?

My second card features the rest of the totally gorgeous new Daisy Oval Frame. I die cut the frame from some white pearlescent cardstock, reserving the center oval die cut. I ran that oval through my die cut machine with the Imperia Plate die, which adds pierced texture to the image without cutting any shapes. I also die cut the standalone daisy die cuts from some more white pearlescent cardstock. The Daisy Oval Frame has a partial version of this shape at the top and bottom of the frame, so I adhered the standalone pieces to their respective spots with liquid glue, then adhered the overlapping spots to the textured oval piece from the center. This created one cohesive die cut piece to which I could add thin strips of foam adhesive!

For the greeting, I die cut the Boho Celebrate die twice from some medium aqua cardstock and adhering both pieces together with liquid adhesive, backing this dimensional die cut with a vellum shadow layer. I also die cut some iridescent white mirror cardstock from my stash with the A2 Nesting Frames, layering the largest frame around the outside edge of my Sea Glass A2 card front. I popped up the embellished frame in the center of my card front with some foam adhesive, then added the greeting in the center of the frame with some small dots of liquid adhesive behind the solid die cut. Finally, I added a few Surf Pawsitively Dazzling Gems for added sparkle! This card would work well for a bridal shower, wedding, or other celebratory event. It’s neutral enough that it could fit lots of occasions!

Well, that’s all for my projects today. Now for some fun giveaway information!

Simon Says Stamp is giving away a $25 coupon to every stop on the hop, with winners selected from the blog comment section. Winners will be posted on the Simon Says Stamp blog on Wednesday the 24th of April and can email Simon Says Stamp to claim their prize!

Simon Says Stamp is also offering a fun Gift-With-Purchase opportunity to celebrate the new release! Simply follow the instructions in the graphic and enter code GHBD to receive the Groovy Happy Birthday die FREE with any purchase. (This gift with purchase will expire 4/21 at 11:59 pm EDT. While supplies last.)

Your next stop on today’s hop is Mindy Eggen. Don’t forget to check the Simon Says Stamp blog again tomorrow for Day 2 of the Celebrate Release Blog Hop. Lots more inspiration and prizes to be had tomorrow! Thanks so much for stopping by today, and happy hopping!

Filed Under: simon says stamp Tagged With: A2 Nesting Frames dies, boho celebrate, daisy oval frame, imperia plate, lace heart, OLO marker, to the happy couple, wedding card, wedding wishes

Adding Opaque Details to Embossing Folders with Karin!

September 6, 2023

This post was sponsored by Simon Says Stamp. Thanks, Simon!

Hi friends! In the midst of the STAMPtember fun, I will still be sharing some inspiration using the other gorgeous products from Simon Says Stamp, and today’s project features the utterly lovely Garden Spires Embossing Folder. I love taking these beautifully detailed embossed images and turning them into something uniquely my own with various coloring mediums. A couple of weeks ago, I shared THIS project using the opaque Karin Decobrush Pigment markers on black watercolor cardstock, and I loved the results so much that I couldn’t wait to try the technique on another project! I recently purchased the Garden Spires Embossing Folder and thought that the delicate flowers and foliage would be a great image to try putting the combination to use again. This time, though, the tiny flowers lent themselves better to putting a slightly different technique. Let’s get started with the details!

I began by running the Garden Spires Embossing Folder through my die cutting machine using a panel of thick black cardstock. My previous project used black watercolor paper, but I have used the Karin Decobrush Pigment markers successfully with plain black cardstock and thought that these images were small enough that I could do so again! Instead of using a damp paintbrush to move the color on my images as I did in the previous project, I simply put the marker tip directly to the black cardstock and added color that way. I used a pale purple for the tiny flowers and two different shades of pink for the taller, large flowers to achieve a little variation. I also used some metallic watercolors to add some extra sparkle to the larger flowers!

Because the greenery on the embossed image was so delicate, I chose to use the Karin DecoGel Sparkle pens to add some super sparkly accents to the foliage and to the flowers. I also splattered some extra little “dewdrops” on my entire card panel with some more metallic watercolors. It’s so difficult to capture in a photograph, but this card is insanely sparkly!!

After I had finished adding color to the background, it reminded me of an outdoor wedding, perhaps at a vineyard, with a large, scenic meadow of wildflowers beneath a starry sky. I decided to use a beautiful stamp from the Big Old Birthday stamp + die set, one that could easily be used for a wedding card or a birthday card! I heat embossed the greeting on some more black cardstock using silver sparkle embossing powder, then die cut it with the coordinating die. I popped it up amidst the colorful wildflowers, then added a few shimmering gems for some sparkle!

Well, that’s all for today’s project. I wish you could see how sparkly it is in person… the different elements of shimmer are utterly gorgeous! I hope you enjoyed seeing the Karin Decobrush Pigment in action again. They’re such a fun and unique medium to employ to create really special projects! Thanks so much for stopping by today, and have a marvelous day!
Filed Under: simon says stamp Tagged With: big old birthday, CZ design, embossing folder, garden spires, karin, karin decobrush pigment, wedding card

White Wedding with a Pop of Pink!

August 16, 2023

This post was sponsored by Simon Says Stamp. Thanks, Simon!

Wedding cards are some of my favorite cards to make, though at my stage in life, most of our friends are married and have been for quite awhile! Wedding cards, to me, mean that I can be unapologetically free with flowers, sparkles, and basically all things girly, because as I was repeatedly told during my own wedding planning: the wedding is mostly about the bride. (Ha!) My cards today feature some of my favorite things: white on white, sparkles, texture, flowers, and pops of vivid pink. Let’s get started with the details!

When I am working with small images like the ones from Sweet Garden Blooms, I like to stamp and die cut lots of the images before actually starting work on my card. This ensures that I have plenty of little bits and bobs with which to assemble my finished card, and bonus: it usually means that I have leftovers with which to make another project! I knew that I wanted a floral wedding cake, with lots of white on white and pops of vibrant pink, so I stamped the Sweet Garden Blooms using Carnation, Peony, Rose, Taffy, Charcoal, Spring, Dublin, and Lucky Pawsitively Saturated inks onto Hammermill cardstock.

For my first card, I die cut the elements from the Fancy Cake set and the Decorated Cakes die set, both from more Hammermill cardstock, and layered the pieces together with liquid adhesive. I also die cut a circular frame using the Thin Frames dies as a way to ground my cake to my card front.

For my background, I kept things simple, running a slightly-smaller-than-A2 sized panel of white cardstock through my die cutting machine using the Blossom Field Embossing Folder. I also sprayed the embossed panel with some Hero Arts Iridescent White Shimmer Mist to make the background even more festive and special.

I arranged all of my die cuts on my embossed shimmery panel using both liquid and foam adhesive, then trimmed down a sentiment from the Union of Love sentiment card set. I am really loving these sentiment card sets lately; they are perfect for adding a super quick and simple sentiment, especially on a busy and detailed project like this one. I added a few Milk Glass gems to fill in some of the empty areas on the card front.

My second project features the leftover Sweet Garden Blooms flowers. Stamping and die cutting so many small blooms at the very beginning added a bit of extra time onto my project, but it was worth it to be able to quickly create a second card to add to my stash!

Because I didn’t have a ton of the stamped flower die cuts left over, I decided to use the very generously-sized Happily Ever After die as the focal point for my card. I die cut the detail layer from some white glitter cardstock and the outline background layer from some heavyweight vellum. This vellum layer helps to make that super detailed layer pop without adding lots of extra bulk to this delicate card front.

I trimmed down another panel of white cardstock, trimming some cardstock off of the one side, then ran it through my die cutting machine using the Blossom Field Embossing Folder. I oriented this embossed background on the left side of the A2 card front, leaving a strip of flat cardstock on the right for a bit of added interest to the background. I adhered the large Happily Ever After sentiment die cut using clear foam adhesive, then tucked the leftover florals around the sentiment die cut using liquid and foam adhesive. I added an extra sentiment from the Union of Love sentiment card set, popped up with foam adhesive, and a few Milk Glass gemsfor some more sparkle!

Well, that’s all for my projects today! I love pushing myself to use leftover die cuts to create an entirely new project, and I hope you’ll try it too! Thanks so much for stopping by, and have a marvelous day.

Filed Under: simon says stamp Tagged With: blossom field, decorated cakes, embossing folder, fancy cake, sweet garden blooms, thin frames dies, wedding cake, wedding card

  • « Go to Previous Page
  • Page 1
  • Page 2
  • Page 3
  • Page 4
  • Page 5
  • Go to Next Page »

Primary Sidebar

  • Facebook
  • Instagram
  • Pinterest
  • YouTube

Favorite Shops

Secondary Sidebar

Subscribe

Enter your email address to subscribe to this blog and receive notifications of new posts by email.

Instagram
Something is wrong.
Instagram token error.
Follow
Load More

Archives

Tags

3D embossing folder alcohol markers better press birthday birthday card blog hop card kit christmas christmas card christmas tag colored pencil copic copic coloring Daniel Smith die cutting embossing folder embroidery felt giveaway holiday holiday card hot foil ink blending karin brushmarker pro layered stencil masculine my monthly hero new release no line coloring no line watercolor OLO marker olo markers original illustration pawsitively saturated rainbow shaker card slimline stamping stamptember stencil thank you thinking of you valentine's day video watercolor

Popular Posts

Simon Says Stamp Joy For You Blog Hop- Day 1!
Vibrant Poinsettia Holiday Wishes with Simon Says Stamp!
March 2020 My Monthly Hero Blog Hop+Giveaway!
Simon Says Stamp Glory to the Newborn King Holiday Kit-Now Available!
Simon Says Stamp November 2025 Card Kit: Give Thanks!
Pinkfresh Studio September Stamp and Die Release!
Charity Blog Hop!
Vintage Peach Ornament with New Simon Says Stamp Joy For You Release!
2018 Autism Awareness Hop!
April 2018 My Monthly Hero Blog Hop+Giveaway!

Disclosure

Some affiliate links are used in my posts. This means that, should you click on one of my links and purchase something from that company, I will receive a small portion of the sale at no extra cost to you. I use the money earned from these sales to help maintain my blog. I so appreciate you visiting and, if you do choose to use one of my affiliate links, thank you so much for your support!
Copyright © 2026 ·Brunch Pro Theme · Genesis Framework by StudioPress · WordPress · Log in
Loading Comments...