• Skip to main content
  • Skip to primary sidebar
  • Skip to secondary sidebar

Sixth Street Sundries

Emily Midgett

  • Home
  • About Me
  • Contact
  • OLO Marker Color Swatch Chart
  • Shop

well wishes

Serene Blue with Spellbinders!

July 31, 2023

Hi friends! It’s the last day of July… where has the summer gone? My kiddos will be starting school in a few weeks, (even my little guys will be going to preschool for a couple of hours a day) and I am simultaneously longing for it and dreading it. School brings with it a special brand of chaos to temper the peace of when the house is quiet. I am trying to mentally plan the days so that I can still get my work done without my big kids offering their wonderful assistance with their little brothers in the mornings (they get rewarded with an increased allowance and lots of trips to the pool)…. but I won’t lie; I’m a bit worried. It will all fall into place somehow, but those first few weeks will surely be a challenge! In an effort to calm my anxious mental state, I have been using lots of serene blues and greens in my color palette, and I have a card to share today that embodies the calm that I’m trying to keep in my head. Let’s get started with the details!

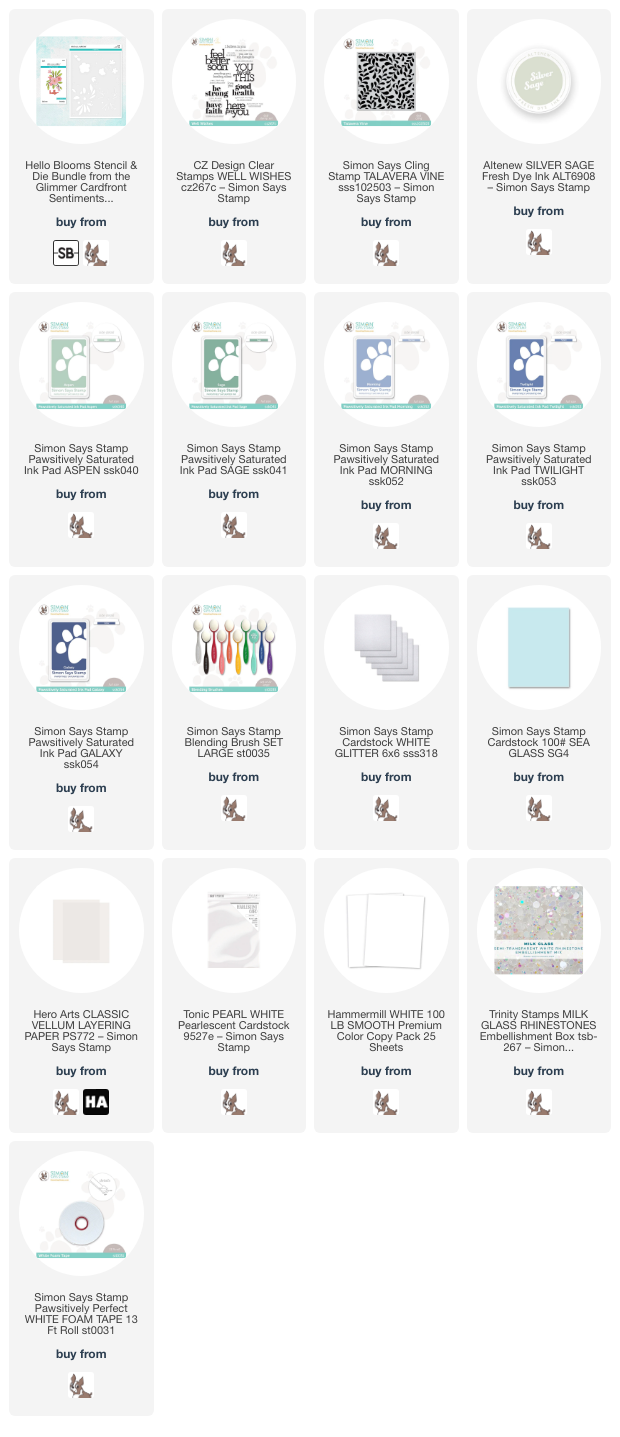
Spellbinders generously sent me the gorgeous Hello Blooms layering stencil and die set (SB | SSS), which creates a large cluster of blooms that remind me so much of Rifle Paper Co designs! I love the wide variety of unique color palettes used within the Rifle Paper Co aesthetic, so I pulled out the Silver Sage ink from Altenew and Aspen, Sage, Morning, Twilight, and Galaxy Pawsitively Saturated Inks from Simon Says Stamp. I used blending brushes to blend these soft and serene ink colors over the Hello Blooms layering stencil. The stencils are super easy to use and line up like a dream! I used the coordinating die from the Hello Blooms layering stencil and die set (SB | SSS) to die cut the large bouquet and set it aside.

Because the general aesthetic of the floral bouquet is fairly simple and graphic, I wanted to continue that feel onto the background of the card. I stamped the Talavera Vine background stamp from Simon Says Stamp using Silver Sage ink to create a lovely, subtly patterned background. The shape of the leaves match the shape of the stenciled leaves almost exactly! I trimmed down the panel on one side, then mounted it to a sheet of coordinating pale blue Sea Glass cardstock. I also added a strip of white glitter paper between the patterned background paper and the blue cardstock to add another level of texture and shimmer.

I popped up the floral bouquet in the center of the card front using foam adhesive, then turned my attention to the greeting. I used the “hello” die included in the Hello Blooms layering stencil and die set (SB | SSS). I die cut the detail layer from white iridescent cardstock and the background layer from heavyweight vellum cardstock and layered them together. The vellum helps to soften the area around the white sentiment die cut to help it stand out a bit from the patterned background. I also stamped a sentiment strip from the Well Wishes stamp set from Simon Says Stamp. I popped both of the sentiment pieces up on the card front directly on top of the stenciled floral die cut to help them both stand out from the background. Finally, I tucked a few Milk Glass gems amongst the floral die cut for a bit of added sparkle and texture!

Well, that’s all for my project today. See you back here tomorrow for my first post for August! Thanks so much for stopping by today, and have a marvelous day!
Filed Under: simon says stamp, spellbinders Tagged With: hello blooms, talavera vine, thinking of you, well wishes, with sympathy

Man Card Monday with Simon Says Stamp!

July 10, 2023

This post was sponsored by Simon Says Stamp. Thanks, Simon!

Hi there! How about another project (or two) for Man Card Monday? I love flowers, and I don’t deny that my blog is lots of flowers lots of the time, but at least once a month, I post a card with decidedly masculine overtones. This helps jumpstart my creativity a little by making me think outside of my normal floral, super feminine box as well as hopefully provide you with a little inspiration for that elusive man card! Last month, I shared some super graphic inspiration, featuring bold cool colors, lots of texture, and a few metallic elements. This month, I have changed things up with these subtle cards that feature a serene color palette and lots of greenery. I think greenery on it’s own is a perfect “neutral” that can be used for both men and women alike. Let’s get started with the details!

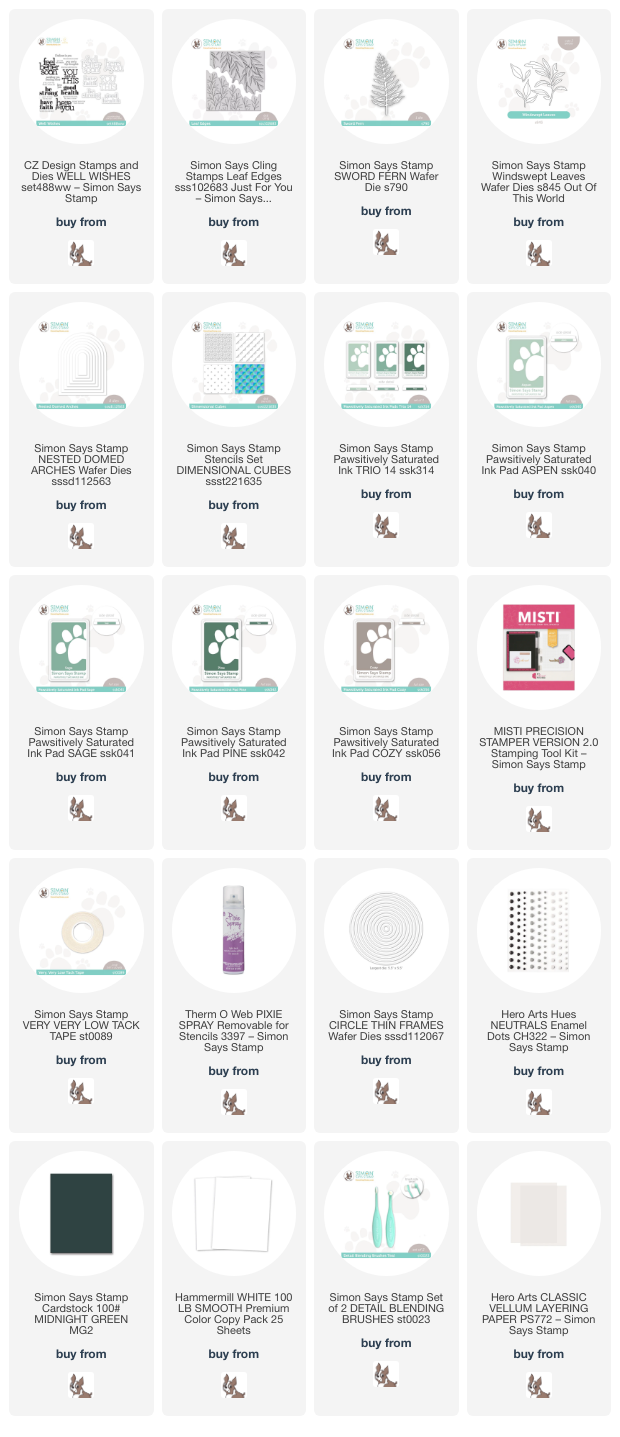
I kept my color palette very muted this month, with some warm gray/platinum and lovely greens created with Pine, Sage, and Aspen Pawsitively Saturated Inks from Simon Says Stamp. I have had the unfortunate need for sympathy and “thinking of you” cards for men recently, and so I wanted to offer encouraging sentiments without going over the top. The Well Wishes stamps and dies by CZ Design from Simon Says Stamp provide poignant sentiments with bold, graphic fonts that work perfectly for these gender neutral projects.

For my first card, I used the Pine, Sage, and Aspen inks to stamp the Leaf Edges in an ombré on my white A2 card front. Using my MISTI stamping tool, I stamped the top with the lightest ink, dabbing the edge of the ink line with my microfiber cloth to let it fade away a bit, which helps the ink colors blend into each other more seamlessly without adding harsh lines. I stamped the middle of the stamp with the middle color, again dabbing the edges with the cloth, then the darkest color at the bottom.

Once I had added all three ink colors to the stamp, I stamped the entire image again with embossing ink and covered it with clear embossing powder, giving me the ability to blend over the top without compromising the crispness of the stamped image. I also blended lightly in the corner using Aspen ink and a blending tool. Such a lovely, serene background!

Next, I die cut two Sword Fern die cuts from white cardstock, leaving them in place in the negative die cut space. I flipped them over and added a few pieces of Simon’s Very Very Low Tack Tape to the back to hold these delicate die cuts in place while I blended Pine ink in the center and Aspen ink on the edges. Despite a plethora of options for colored cardstock amongst my stash, I did not have an exact match for these unique shades of green, so creating my own custom colored cardstock was super easy with some ink pads and blending tools! I die cut a Nested Domed Arches die cut from some heavyweight vellum to soften the area behind the die cuts and sentiment. I popped up the blended ferns and embossed greeting from Well Wishes on top of the vellum arch. I used some neutral twine to add a a fun textural element to the card, as well.

For my second card of the set, I began by blending the detailed stencil from the Dimensional Cubes Stencils using Cozy ink. I did spray the super delicate stencil with some Pixie spray first to make sure that the stenciled lines stayed nice and crisp. I trimmed the stenciled background panel down slightly and matted with some Midnight Green cardstock from Simon Says Stamp to create a thin, super dark green frame around the edge. I also die cut some Windswept Leaves foliage dies, again from white cardstock, then blended Pine ink in the center and Aspen ink on the edges, keeping these delicate die cuts in place with Very Very Low Tack Tape on the back of the negative die cut piece.

Next, I die cut the Circle Thin Frames dies from some white cardstock. I like to leave these frame dies together, though they can be snipped apart, so that I can run them all through my machine at once and have tons of leftover frames to use for future projects! I backed one of the white frames with a vellum die cut circle, again to soften the busy background pattern, and adhered it to the patterned background with liquid adhesive dots on the solid portion of the frame. I arranged the leaf die cuts around the embossed sentiment die cuts from Well Wishes and adhered them to the card front. To avoid adding feminine “sparkle” to the card front, I added a few white enamel dots for a bit of extra textural interest.

Well, that’s all for my Man Card Monday project today! Thanks so much for stopping by today, and have a marvelous day!

Filed Under: Man Card Monday, simon says stamp Tagged With: circle thin frames, dimensional cubes stencil, foliage, gender neutral, leaf edges, man card monday, masculine, nested domed arches, stencil, sword fern, vellum, well wishes

Simon Says Stamp Good Luck Charm Blog Hop-Day 2+Giveaway!

February 19, 2022

Hi there! I’m excited to be joining my friends at Simon Says Stamp for day two of the Good Luck Charm blog hop! You should have arrived here from Tina Smith, and your next stop is Jennifer Kotas. You can also start back at the Simon Says Stamp Blog to find the entire list! This month is Simon Says Stamp’s 20th birthday… so exciting, right? As part of the celebration, Simon is adding the exclusive Birthday Cupcake stamp set to your packages when you add code YUM20 at checkout. I have two projects to share with you today using new goodies from the Good Luck Charm release, so let’s get started with the details!

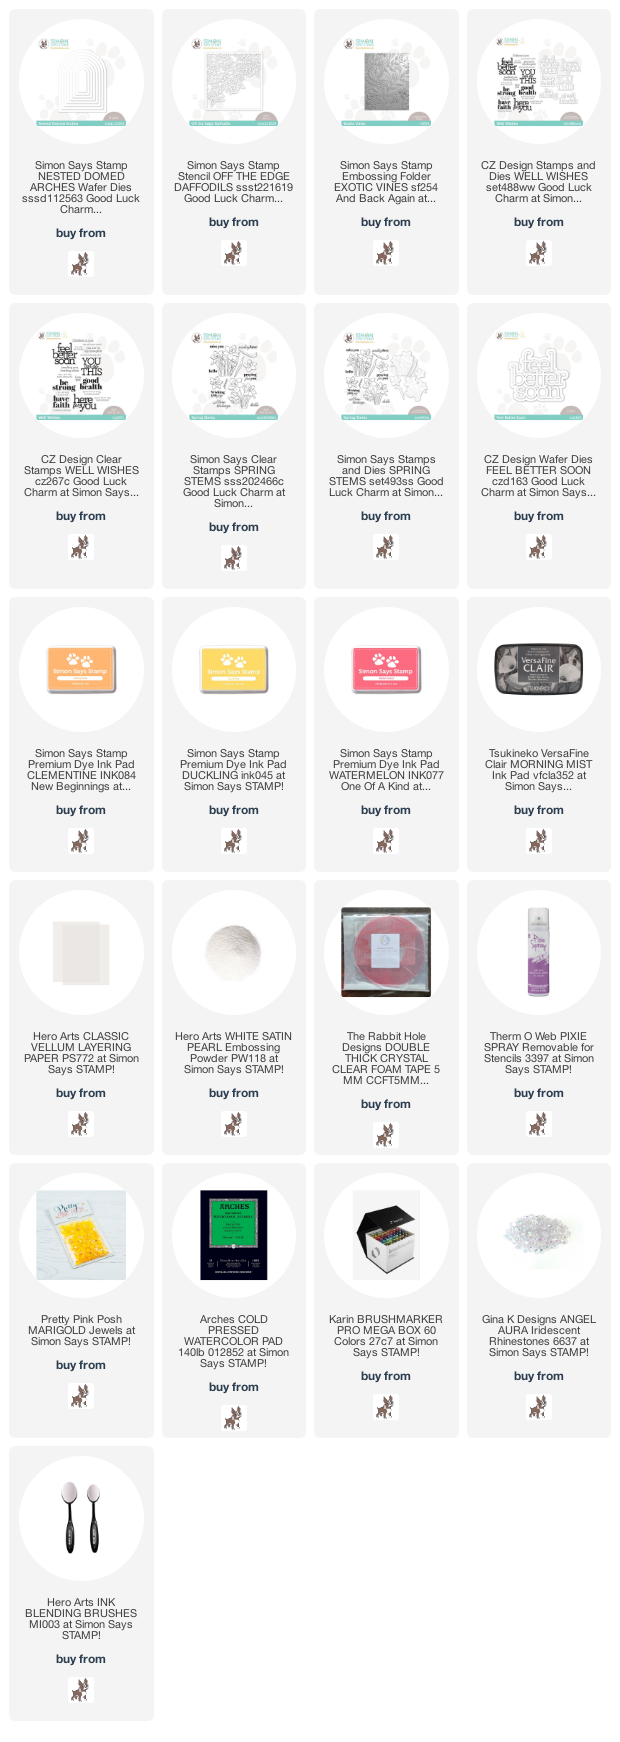
My first project reminds me of a glowing church window on Easter. I began by die cutting two different sizes of the the new Nested Domed Arches dies from some plain white cardstock. I lightly spritzed some Pixie Spray on the back of the Off the Edge Daffodils stencil, then adhered it to corner of the smaller of the two arched die cuts. I used blending brushes to blend some Duckling and Clementine inks. I think the finished product looks like a glowing sunrise on a stained glass window!! (Side note-this is the first time I’ve used the Pixie Dust spray, and I was super impressed at how crisply the stenciled image came out! Definitely going to be using that again!)

Next, I worked on the card base. I wanted something subtle and simple so as not to detract from the stenciled background, but still wanted a bit of texture for added interest. I ran an A2 panel of white cardstock through my die cut machine with the Exotic Vines Embossing Folder.

For the greeting, I used grey pigment ink and pearlescent white embossing powder to emboss a sentiment from Well Wishes stamps+dies onto some heavyweight vellum cardstock. I used the coordinating die to die cut the greeting.

I adhered the two domed die cuts together using liquid adhesive, then added them to the embossed card base using foam adhesive. I added the sentiment using clear dimensional adhesive, hiding it behind the thick letters of the embossed greeting. The final touch was to add a few iridescent yellow gems.

My second project features some watercoloring using the new Spring Stems stamps and dies. I began by heat embossing several of the images from Spring Stems onto some Arches Cold Press watercolor paper using white pearl embossing powder. I used Karin watercolor markers to add lots of color to the images, keeping the color palette a bit muted while still being quite intense and colorful. I love how the colors from the Karin markers almost glow!

After I’d die cut the finished flowers, I die cut a greeting from some white cardstock using the new Feel Better Soon die. I used blending brushes to blend Duckling and Watermelon inks on an A2 panel of white cardstock to help enhance the glow of the watercolored flowers.

I used the negative piece from one of the die cut pieces from the first project as a frame for the background of the flowers. I popped it up using some foam adhesive, then arranged the watercolored daffodils so that they were climbing up the front of the card front. I added the white die cut greeting, finally adding a few iridescent gems for sparkle.

Well, that’s all for my projects today! To celebrate this release, Simon Says Stamp is giving away a $25 coupon for each stop on the hop! Simply leave your comments on each stop on the hop before February 22, and the winners will be announced on the Simon Says Stamp blog.

Your next stop on the hop is Jennifer Kotas. Thanks so much for stopping by today, and happy hopping!

Filed Under: simon says stamp Tagged With: exotic vines embossing folder, feel better soon, ink blending, karin watercolor markers, nested domed arches, off the edge daffodils, spring stems, stencil, watercolor, well wishes

Primary Sidebar

  • Facebook
  • Instagram
  • Pinterest
  • YouTube

Favorite Shops

Secondary Sidebar

Subscribe

Enter your email address to subscribe to this blog and receive notifications of new posts by email.

Instagram
Something is wrong.
Instagram token error.
Follow
Load More

Archives

Tags

3D embossing folder alcohol markers better press birthday birthday card blog hop card kit christmas christmas card christmas tag colored pencil copic copic coloring Daniel Smith die cutting embossing folder embroidery felt giveaway holiday holiday card hot foil ink blending karin brushmarker pro layered stencil masculine my monthly hero new release no line coloring no line watercolor OLO marker olo markers original illustration pawsitively saturated rainbow shaker card slimline stamping stamptember stencil thank you thinking of you valentine's day video watercolor

Popular Posts

Simon Says Stamp Sending Cheer Blog Hop- Day 2 + Freebie + Giveaway!
Altenew October 2026 Release Blog Hop + Giveaway!
Altenew Build A Flower Sweet Violet+Giveaway!
Floral Follies on Canvas with New Simon Says Stamp STAMPtember!
Simon Says Stamp STAMPtember Tim Holtz Collaboration: Festive Holidays!
Altenew March 2020 Release Blog Hop+Giveaway!
Honey Bee Stamps Bee Bold Release Blog Hop!
Waffleflower July Release Blog Hop!
Altenew Paint A Flower: Carnation Blog Hop+Giveaway!
Autumn Legs with Colorado Craft Company and Catherine Pooler!

Disclosure

Some affiliate links are used in my posts. This means that, should you click on one of my links and purchase something from that company, I will receive a small portion of the sale at no extra cost to you. I use the money earned from these sales to help maintain my blog. I so appreciate you visiting and, if you do choose to use one of my affiliate links, thank you so much for your support!
Copyright © 2026 ·Brunch Pro Theme · Genesis Framework by StudioPress · WordPress · Log in
Loading Comments...