• Skip to main content
  • Skip to primary sidebar
  • Skip to secondary sidebar

Sixth Street Sundries

Emily Midgett

  • Home
  • About Me
  • Contact
  • OLO Marker Color Swatch Chart
  • Shop

wonderful in every way

Guest Designing for The Flower Challenge’s 7th Birthday!

October 7, 2023

Hi friends! I was honored to be asked by my friend Aileen (@huhwhatpardon over on Instagram) to again be the guest designer for the The Flower Challenge Blog‘s 7th Anniversary! This month, the challenge is “Anything Goes”! I love flowers so much and have such a wide variety of products from which to choose that I was slightly overwhelmed when trying to come up with a project for today’s post, but I pulled out my favorite blush cardstock and some products from a few of my favorite companies, including one of my own illustrations for Pinkfresh Studio, to create this monochromatic blush card. Let’s get started with the details!

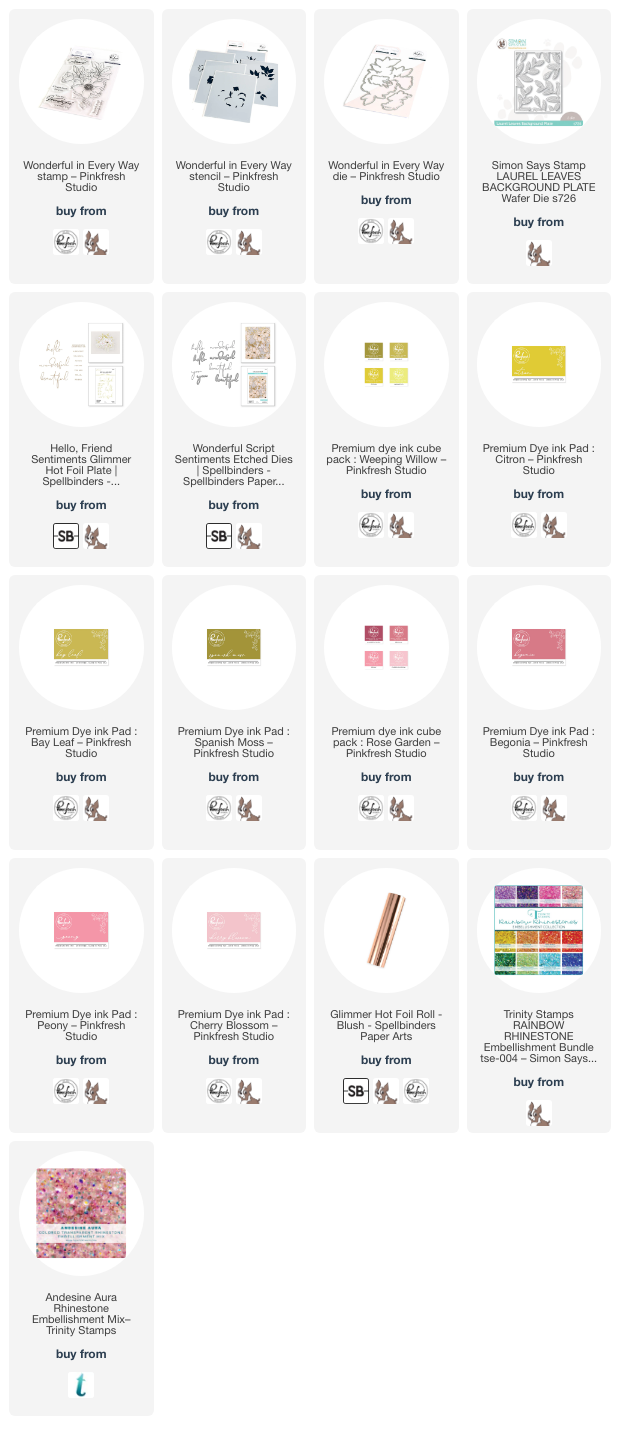
To start, I heat embossed my Wonderful In Every Way illustration for Pinkfresh Studio onto Hammermill cardstock using Rose Gold embossing powder. I then combined some of the new inks from Pinkfresh Studio with the coordinating Wonderful In Every Way stencils to add simple color to the image. These stencils are a great way to add color to these lined floral images if you don’t feel super confident in your coloring skills! I will link all of the individual ink colors that I used below. After I’d finished stenciling, I used the coordinating Wondeful In Every Way die to cut the image out.

For the background, I started by lightly blending some pale pink ink around the edges of a blush A2 card front, adding some interest to the card front and creating a vignette to enhance my floral arrangement. I also die cut the beautiful Laurel Leaves cover plate die from Simon Says Stamp from some blush cardstock, layering it directly over the top of the blended background panel. I love the tone-on-tone texture that this detailed die cut provides behind the floral arrangement.

For the greeting, I used Blush foil to hot foil some greetings on more of the blush cardstock from the Hello Friend Sentiments set, die cutting the “wonderful” using the coordinating outline die from the Wonderful Script Sentiments die set (love that those two sets coordinate so perfectly!). I adhered the floral bouquet to the textured and blended card front using foam adhesive, then added the foiled greetings over the top of the floral arrangement. The final touch was a few shimmering blush gems for sparkle.

Well, that’s all for my project today! I hope you will check out the challenge over at The Flower Challenge. Using flowers is second nature to me, and what more perfect excuse to use your floral stamps and dies than to enter your card in The Flower Challenge Blog‘s 7th Anniversary! Thanks so much to Aileen and Viv for inviting me to be their guest, and Happy Anniversary to The Flower Challenge!
Filed Under: pinkfresh studio, simon says stamp, spellbinders Tagged With: hello friend sentiments, hot foil, laurel leaves background, layered stencil, original illustration, wonderful in every way, wonderful script sentiments

VIDEO: Bright Watercolored Highlights with New Pinkfresh Studio!

February 18, 2023

Hi there! I have a new video over on the Pinkfresh Studio YouTube channel with some tips on how to keep your highlights nice and white on your light colored watercoloring by using “reverse psychology” for your watercoloring! Here’s the video:

Or you can watch the video on YouTube HERE.

In case you can’t watch the video, here’s a quick rundown of how I created this project:

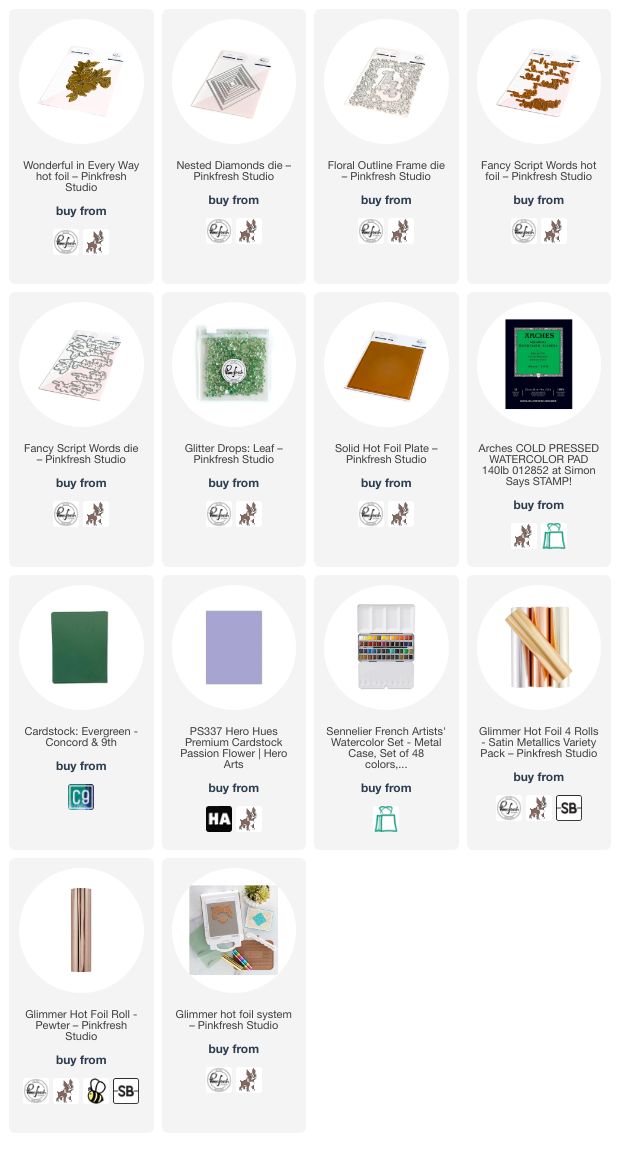
I started with a panel of cold press watercolor paper which I had hot foiled using my newest illustration for Pinkfresh Studio: Wonderful in Every Way. (I am so excited to see this design offered in a stamp set with coordinating stencils and die as well as a hot foil plate!) I used some satin metallic charcoal foil to create this soft silver design on this watercolor paper; the thickness of the watercolor paper creates the look of letterpress!

When I was brainstorming my project, I wanted to create a watercolored card with very pale blooms. Now, I tend to have a bit of a heavy hand when it comes to watercoloring; I love vibrant color, but I so admire the beautifully soft watercoloring that others are so capable of creating. The easiest way that I can achieve soft watercolored flowers is to do “reverse psychology” on myself by watercoloring around the pale image first with a bright contrasting color, then adding very pale watercolor to the image I want to keep pale and pastel. The contrast of the bright color around the image allows me to better visualize the lightness I’m seeking. I add diluted color to the areas that I want to be the most shadowed, pulling out the color with lots of clean water and allowing the whiteness of the watercolor paper to shine through. That extra water is key; it helps to allow the pigment to taper off into nothing, leaving those white highlights.

Once I had finished watercoloring, I trimmed my watercolor panel down to 3.5″x5.5″ in order to create an A7 card (just wanted to switch things up a bit!). I matted it with a coordinating deep green cardstock for extra contrast, then trimmed an A7 card front from some coordinating pale lavender cardstock. I added some interest to the lavender background by die cutting an Outline Floral Frame from some glittery white cardstock and selectively trimming to create a lacy border around the corners. I popped up the watercolored matted panel with some foam adhesive.

For the greeting, I used the Fancy Script Words Hot Foil Plate with the Fancy Script Words Die and some shiny Pewter foil to create this intricate, fairly large sentiment die cut. I also die cut a vellum diamond using the Nested Diamonds dies. I adhered the greeting to the vellum diamond with some foam tape, then flipped it over and added some tiny dots of adhesive to the back of the solid die cut to help hide it. I adhered the vellum diamond to the watercolored panel, slightly offsetting it and trimming off the excess. Finally, I added some Leaf Glitter Drops for a bit of added sparkle and texture.

Well, that’s all for my project today! If creating a light, airy watercolored flower intimidates you, I encourage you to try my “reverse psychology” method to keep that contrast of colors in perspective. Thanks so much for stopping by today, and have a marvelous day!

Filed Under: pinkfresh studio Tagged With: A7, fancy script word dies, fancy script words, floral outline frame, hot foil, nested diamonds, sennelier, solid hot foil plate, watercolor, wonderful in every way

More Pinkfresh Studio January 2023 Release Inspiration!

January 24, 2023

Hi there! I am back today with another project that I’m also sharing over on Instagram as part of the Pinkfresh Studio January 2023 Release Instagram Hop. I always love seeing my illustrations become stamps, but I was even more excited when Kinnari (the owner of Pinkfresh Studio) told me that they were going to create a Wonderful In Every Way Hot Foil Plate in addition to the stamp set, stencils, and coordinating die. I am totally obsessed with hot foiling, and seeing my design as a hot foil plate was so exciting! Yesterday, I shared a watercolored project using my new Wonderful In Every Way stamp set (which you can check out HERE), and today I am sharing a project using the Wonderful In Every Way Hot Foil Plate, coordinating layering stencils, and coordinating die. Let’s get started with the details!

Foiling on colored cardstock is one of my most favorite ways to utilize color in my cards. I think that the finished effect of using one shade of colored cardstock throughout the project makes for such a polished, cohesive final product. To that end, I wanted to do some colorful foiling on a shade of super pale apricot colored cardstock using some pretty pink foil using the new Wonderful In Every Way Hot Foil Plate.

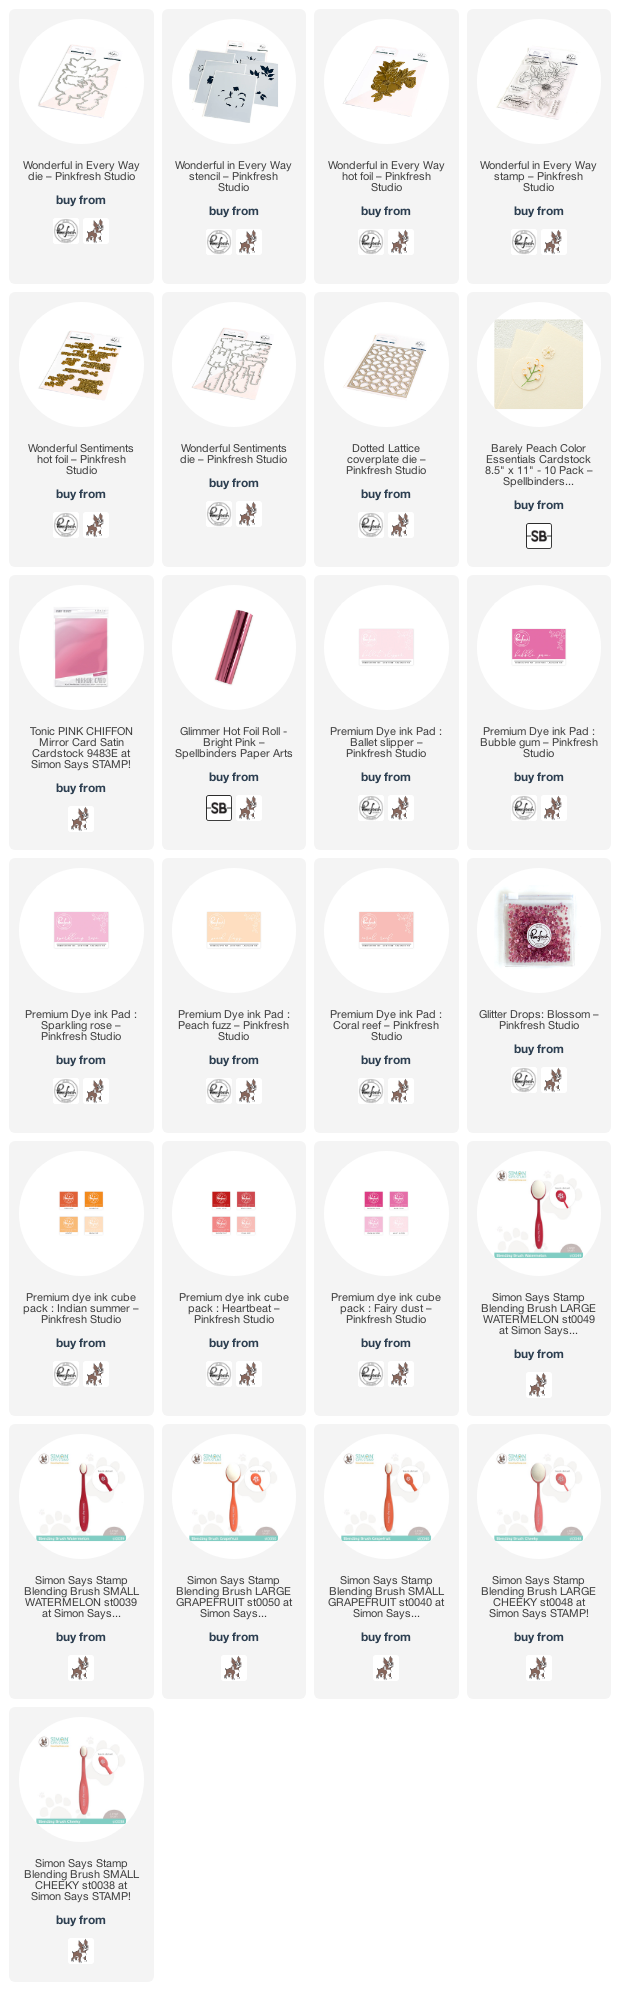
I began by hot foiling the large floral image from Wonderful In Every Way Hot Foil Plate twice on a panel of A2 apricot colored cardstock using some bubblegum pink foil. I arranged the image so that it was slightly off the edge of the cardstock both times. I then used the layering stencils with the Peach Fuzz, Coral Reef, Ballet Slipper, Bubble Gum, and Sparkling Rose inks. I kept the focus on the pretty pink blooms, adding just a hint of color and shadow to the foliage with the peachy inks.

I initially planned on making a one layered card with both of the foiled floral swags creating a sort of frame on my pale apricot card front, but I ended up wanting to add a bit of color and texture to the area behind the blooms, so I used the coordinating die to cut the finished foiled and stenciled images out. Because I had hot foiled them on the edges of the same size panel of cardstock, I had a guide for exactly where to place them on my background. I die cut the Dotted Lattice cover plate die from some coordinating matte pink foil cardstock and layered it on another A2 panel of the pale apricot cardstock. I love how this looks almost tone-on-tone, but still it’s so colorful!

I adhered the die cut blooms to the top and bottom of the card front with foam adhesive, using the straight edges as my guide for placement. I always like to coordinate the foil/cardstock combination for the greetings with the focal points, so when I was foiling (I do all of my hot foiling in a big batch so that I have lots of bits and bobs to use later) I made sure to hot foil the new Wonderful Sentiments Hot Foil set using the same foil/cardstock combination so that everything stayed cohesive. I adhered the greeting with a double layer of foam tape to help it stand out even more from the background, then added a few Blossom Glitter Drops for some more sparkle!

Well, that’s all for today’s project! You should take a peek at the hop happening over on Instagram; Pinkfresh Studio is giving away tons of prizes, and we have even more inspiration to share with you using this month’s new release. Thanks so much for stopping by today, and have a marvelous day!

Filed Under: pinkfresh studio Tagged With: die cutting, dotted lattice, hot foil, ink blending, instagram hop, layered stencils, wonderful in every way, wonderful sentiments

Pinkfresh Studio January 2023 Stamp+Die+Stencil+Hot Foil Plate Release Blog Hop + Giveaway!

January 23, 2023

Good morning, and happy Monday! Today, Pinkfresh Studio is hopping along to celebrate their first new release of the brand new year! I am always delighted to work with Pinkfresh Studio products, but it’s even more exciting for me when I get to use stamps that I’ve illustrated. The new Wonderful In Every Way is one of my most favorite illustrations that I’ve created, and I’m so excited to finally see it in a tangible stamp. And, bonus, Pinkfresh Studio has even created a coordinating hot foil plate to complement the stamp, die, and layering stencils, and I will share another project using that product tomorrow. Today, I have two projects to share using new goodies from this month’s new release using my current color combination obsession. Let’s get started with the details!

Both of my cards today feature bold, dramatic black backgrounds with brightly colored flowers as the focal point. In order to keep my color scheme as cohesive as possible, when coloring, I go one step further by coloring around the edge of my colored image with a black marker. This helps to visually keep the color scheme for both cards as true as possible, avoiding that white outline that detracts from the overall color scheme.

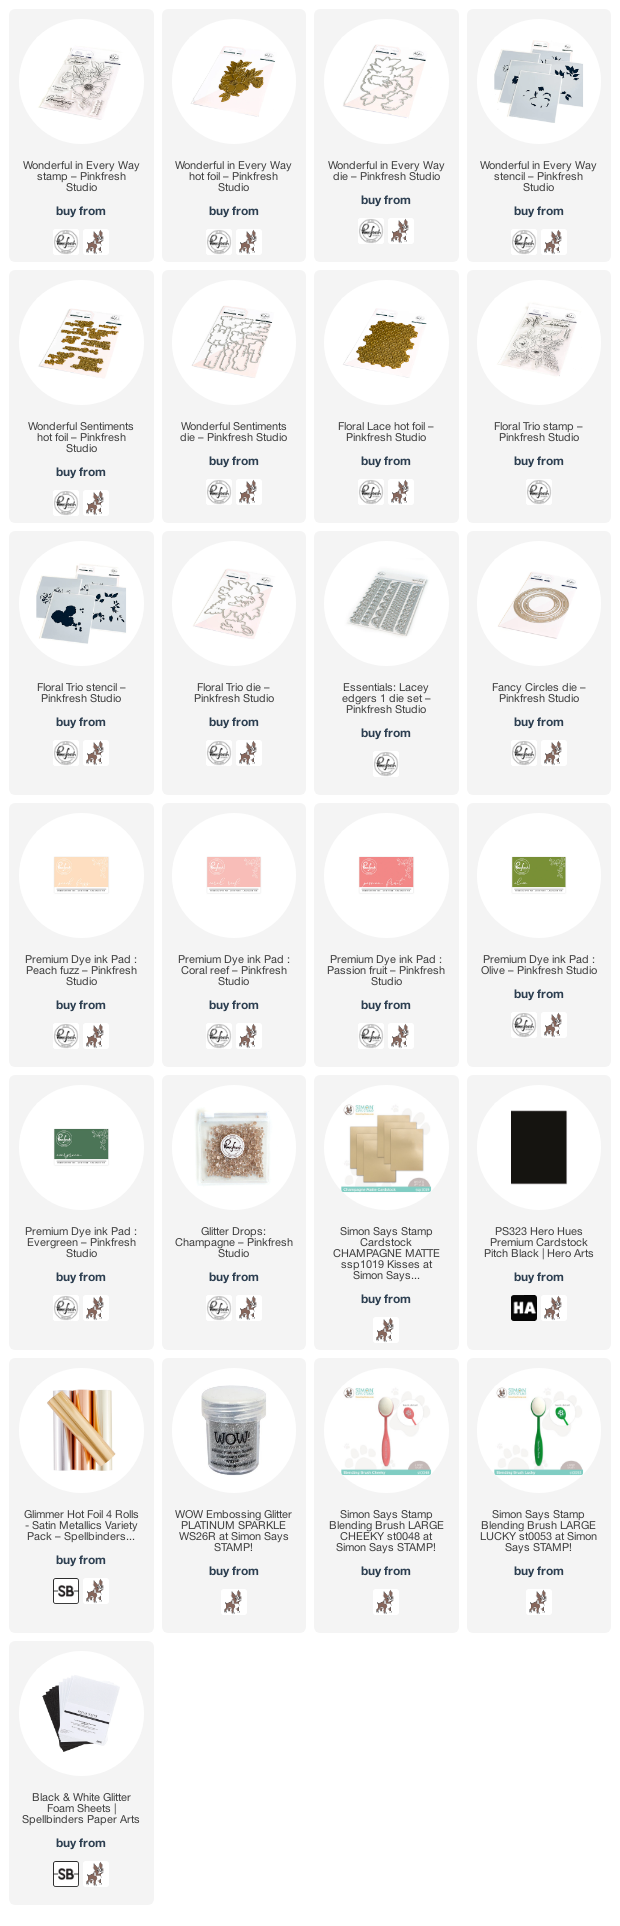
My first card uses the beautiful new Floral Trio stamp, die, and stencil suite. I began by stamping the main floral image from the Floral Trio stamp set onto some white cardstock using black pigment ink, then clear embossed over the top. I like to do this especially with images that will be stenciled, because the clear embossing powder seals the black lines and prevents them from smudging while blending.

I paired the Floral Trio Layering Stencils with Peach Fuzz, Coral Reef, Passion Fruit, Olive, and Evergreen inks from Pinkfresh Studio, using a light touch and some soft blending brushes to achieve a more subtle effect. I can be somewhat heavy-handed sometimes when it comes to ink blending, so I made special effort to use a light touch with these images, and I love the result with the soft peachy flowers and fresh green foliage! I used a black copic marker around the edge of the finished blended flowers, then used the coordinating die to die cut the floral bouquet.

When I am working with new hot foil products, I always try to hot foil with several different colors of foil and cardstock, so that I have lots of options when the time actually comes to start creating with the new goodies. I had hot foiled the beautiful new Floral Lace Hot Foil image onto some black cardstock using matte platinum hot foil from Spellbinders, and I had also hot foiled the greetings from the new Wonderful Sentiments Hot Foil set using the same matte platinum foil so that the two designs could work together nicely. I trimmed down my hot foiled panel, then popped it up on an A2 black card front using foam adhesive.

I added a sparkly black glitter foam die cut border cut using an Essentials: Lacey Edgers die. I adhered the floral bouquet to the card front with some more foam tape, creating a double layer of height, then added the greeting (creating a triple layer of foam-eek!) and a few Champagne Glitter Drops for some sparkle! I love how adding that simple black edge around the die cut makes those lovely peachy blooms pop from the dramatic dark background. Such a simple step, but I think it makes the card so much more interesting.

My second project features my new Wonderful In Every Way stamps and the coordinating dies. I wanted to do some simple watercoloring to show how much fun these stamps are to color! Because I had already hot foiled my black and platinum sentiments using that matte platinum hot foil and the Wonderful Sentiments Hot Foil, I heat embossed the large poppy image from Wonderful In Every Way using platinum sparkle embossing powder, which matches the platinum foil beautifully, onto some Arches cold press watercolor paper.

I taped the panel down to my watercolor board and used my Daniel Smith paints in shades of bright coral and red with olive green for the foliage to watercolor the large, open image. I love how easy the watercoloring for this image can be; the large petals of the flower and simple foliage help simplify the coloring process and give you plenty of area in which to work with those nooks and crannies! I used a black Karin watercolor marker to color around the edges of my image before die cutting, again using that black die cut edge to keep the color scheme true.

For the card base, I heat embossed the poppy image from Wonderful In Every Way along the edge of a black A2 card front using the same sparkling platinum embossing powder. This adds almost a lacy effect to the background, creating an intricate pattern, but maintaining the dramatic black and not adding any extra colors to the background helps to keep the focus on those watercolored poppies.

I die cut a coordinating platinum foil frame using the Fancy Circles die. I popped up the circle on the black embossed background using foam tape, then added the watercolored floral die cut over the top, allowing the simply embossed images on the card front to peek out from behind the colorful watercolored image. I added another greeting from the Wonderful Sentiments Hot Foil set, which I also die cut with the coordinating dies. The last touch was a few sparkling Champagne Glitter Drops.

Well, that’s all for my projects today! I have another project for you tomorrow, featuring my new Wonderful In Every Way Hot Foil Plate with the layering stencils, so I hope you will come back tomorrow to take a peek.

Now for some fun giveaway information! Pinkfresh Studio is giving away their full release over on the Pinkfresh Studio Blog and YouTube channel, as well as ten $25 gift cards to the shop drawn from comments left along the hop! Simply leave a comment at each stop on the hop to be eligible to win! Winners will be announced on the Pinkfresh Studio Blog on January 31, 2023.

Here’s the full list of hop participants:

You are invited to the Inlinkz link party!

Click here to enter

Thanks so much for stopping by today, and happy hopping!

Filed Under: pinkfresh studio Tagged With: fancy circles, floral lace, floral trio, hot foil, layered stencil, original illustration, poppy, stencil, watercolor, wonderful in every way, wonderful sentiments hot foil

Primary Sidebar

  • Facebook
  • Instagram
  • Pinterest
  • YouTube

Favorite Shops

Secondary Sidebar

Subscribe

Enter your email address to subscribe to this blog and receive notifications of new posts by email.

Instagram
Something is wrong.
Instagram token error.
Follow
Load More

Archives

Tags

3D embossing folder alcohol markers better press birthday birthday card blog hop card kit christmas christmas card christmas tag colored pencil copic copic coloring Daniel Smith die cutting embossing folder embroidery felt giveaway holiday holiday card hot foil ink blending karin brushmarker pro layered stencil masculine my monthly hero new release no line coloring no line watercolor OLO marker olo markers original illustration pawsitively saturated rainbow shaker card slimline stamping stamptember stencil thank you thinking of you valentine's day video watercolor

Popular Posts

Simon Says Stamp Sending Cheer Blog Hop- Day 2 + Freebie + Giveaway!
Altenew October 2026 Release Blog Hop + Giveaway!
Rustic Monochromatic Stars for Christmas with Rainbow Splash!
March 2020 Essentials By Ellen Blog Hop+Giveaway!
December 2018 My Monthly Hero Blog Hop + Giveaway!
The Ton Stamps Summer Release: Day 1
Waffleflower July Release Blog Hop!
Hero Arts Partners Blog Hop: Lawn Fawn!
Simon Says Stamp STAMPtember Tim Holtz Collaboration: Festive Holidays!
Altenew Exotic Garden Stamps/Dies/Stencils/Embossing Folders Collection Release Blog Hop + Giveaway

Disclosure

Some affiliate links are used in my posts. This means that, should you click on one of my links and purchase something from that company, I will receive a small portion of the sale at no extra cost to you. I use the money earned from these sales to help maintain my blog. I so appreciate you visiting and, if you do choose to use one of my affiliate links, thank you so much for your support!
Copyright © 2026 ·Brunch Pro Theme · Genesis Framework by StudioPress · WordPress · Log in
Loading Comments...