• Skip to main content
  • Skip to primary sidebar
  • Skip to secondary sidebar

Sixth Street Sundries

Emily Midgett

  • Home
  • About Me
  • Contact
  • OLO Marker Color Swatch Chart
  • Shop

you did it

You Did It Rainbow Encouragement Card with Simon Says Stamp!

June 8, 2026

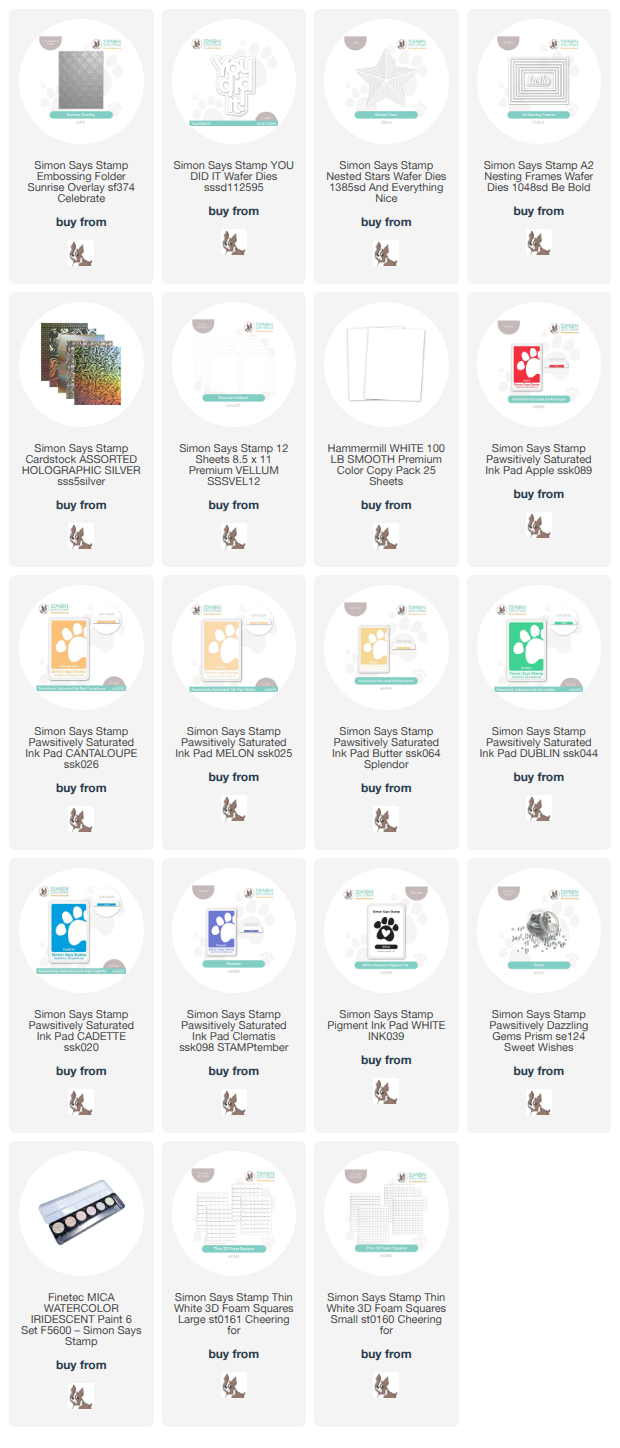
This post was sponsored by Simon Says Stamp. Thanks, Simon! *I have gathered links to all of the products used at the bottom of the post for your convenience, using affiliate links at no extra cost to you. Thank you for shopping with my links! I truly appreciate your support for my work!*

Hi friends! I have a super colorful project to share with you today, perfect for an encouragement or congratulatory card for a special friend. I initially intended this as a graduation card, but I think it would work nicely for so many different occasions. Ink blending, texture, a little sparkle… I love how fun and celebratory this project is! Let’s get started with the details.

To begin, I used blending brushes to blend Pawsitively Saturated Inks in shades of Apple, Cantaloupe, Melon, Butter, Dublin, Cadette, Clematis. I think these shades work so perfectly for a rainbow; not quite primary colors, just a few ticks off of the “expected” rainbow shades. I decided to ink blend first before using the embossing folder, because I wanted to make sure that the blend was completely clean. Sometimes, when blending over an embossed image, the color can pool a bit in the rises and skip over the divots of the embossed image, so to prevent this, I blend first and emboss second. After I had blended and embossed the panel, I ran the piece through my die cutting machine with the the Sunrise Overlay embossing folder.

After I had created the background panel, I swiped the Simon Says Stamp White Pigment Ink Pad directly over the top of the raised areas, helping to bring out the pattern a bit more and add some fun texture to the background. I also splattered the entire panel with some sparkling watercolors to add additional texture and shimmer. I also added a white frame from the A2 Nested Frames die set around the outer edge of the card front.

For the greeting, I die cut the detail layer of the You Did It! from sparkling holographic cardstock and backed it with a white shadow layer, popping up the detail layer with thin foam adhesive. I placed a vellum die cut star cut using the Nested Stars, adhering the die cut sentiment to the star with Tear-rifically Tacky Tape, then flipping it over and adding more thin foam adhesive to the back of the solid die cuts so that it would have a little more height on the colorful card front. I added a silver embossed “so proud of you” sentiment strip and finally finished the project off with some Prism Pawsitively Dazzling Gems!

Well, that’s all for my project today! I think this card would work for so many occasions and ages. Who doesn’t love a pretty rainbow? Thanks so much for stopping by today, and have a marvelous day!
Filed Under: simon says stamp Tagged With: A2 nesting frames, congratulatins, embossing folder, ink blending, nested stars, rainbow, sunrise overlay, you did it

A Tropical Sunset Celebration with Simon Says Stamp!

May 29, 2024

This post was sponsored by Simon Says Stamp. Thanks, Simon!

Hi friends! As I was perusing some of the newer goodies from Simon Says Stamp, I realized that I had not used the fabulous Organic Leaves background stamp. Whenever I am presented with solid silhouette stamps, my mind automatically supplies a tropical sunset background. Perhaps it harkens back to my obsession with the movie The Little Mermaid from when I was a child; I see Ariel silhouetted against an ocean sunset sky very clearly in my mind’s eye. I also think of yummy drinks next to a pool when I think of tropical sunsets, and yummy drinks frequently are imbibed to toast something exciting, so I thought that I would combine a few of these elements to create some fun celebratory cards! Let’s get started with the details.

For both of my projects today, I kept the color palette simple and vibrant: a tropical sunset ombré, created by blending Dandelion Rainbow Splash Ink, and Cheeky and Rose Pawsitively Saturated Ink, accented with lots of crisp, intense black. I love the juxtaposition of the vibrant, almost neon colors with the stark black accents. I think the black keeps the vivid colors from being too overwhelming!

For my first project, I stamped the Organic Leaves background stamp on a panel of white cardstock using Obsidian Black pigment ink, then covered it with clear embossing powder. I think the clear embossing powder really enhances the black image and makes it even more crisp. After I had finished embossing, I took advantage of the embossing overlay to do some emboss/resist blending using Dandelion Rainbow Splash Ink, and Cheeky and Rose Pawsitively Saturated Ink. These three inks blend splendidly together and look magnificent with the crisp black leaf silhouettes!

For the greeting for my celebratory tropical sunset card (anybody else wishing that they were by the ocean in Mexico right now?) I paired a glittery, chunky die cut You Did It! cut with black glitter cardstock with the “fiesta like there’s no mañana” sentiment from Taco ‘Bout It. To accent the fun greeting, I couldn’t resist coloring up a sunset-inspired cocktail, heat embossing the glass and lemon onto some Pitch Black cardstock with white embossing powder, then using colored pencils to create my colorful cocktail. I added the shadow layer for the greeting using some vellum, then arranged all of the die cut components over an A2 Thin Frames die cut, rotated 90* and popped up with adhesive foam strips. Finally, I added a few Rainbow Pawsitively Dazzling Gems for added sparkle!

For my second card, I thought I would do the super popular embossing folder/ink swiping technique with the Sunrise Overlay embossing folder. I started by blending the same Dandelion Rainbow Splash Ink, and Cheeky and Rose Pawsitively Saturated Ink combination on a panel of white cardstock, then running the blended panel through my die cutting machine with the Sunrise Overlay embossing folder, making sure to run it through with the blended colors upside down so that I could do the fun ink swiping technique. After I had debossed the pattern on the blended side, I swiped the Obsidian Black pigment ink pad over the raised areas, creating a fun, almost distressed looking background. I allowed the black ink to dry completely, helping it along with my heat gun, then trimmed the panel down and used some leftover stamp packaging to create a flat shaker card. I filled my shaker card with Be Mine Sequins, which perfectly coordinates with my blended background!

After I had created my shaker panel, I mounted it on an A2 panel of Pitch Black cardstock, leaving a crisp black mat around the edges of my shaker panel. For the greeting, I trimmed down some sentiments from the Reverse Congratulations sentiment cards set, as well as die cutting the Yay You Words die set from black glitter cardstock and vellum. I adhered all of the pieces to the front of the shaker panel for a simple, fairly flat (and thus, easily mailed) congratulatory card!

Well, that’s all for my projects today! I have really been leaning in to bright, almost neon color palettes lately, and I think they’re so much fun for summertime. Thanks so much for stopping by today, and have a marvelous day!

Filed Under: simon says stamp Tagged With: A2 thin frames, embossing folder, flat shaker card, ink swiping, neon, organic leaves, reverse congratulations sentiment strips, shaker card, sunrise overlay, yay you words, you did it

Primary Sidebar

  • Facebook
  • Instagram
  • Pinterest
  • YouTube

Favorite Shops

Secondary Sidebar

Subscribe

Enter your email address to subscribe to this blog and receive notifications of new posts by email.

Instagram
Something is wrong.
Instagram token error.
Follow
Load More

Archives

Tags

3D embossing folder alcohol markers better press birthday birthday card blog hop card kit christmas christmas card christmas tag colored pencil copic copic coloring Daniel Smith die cutting embossing folder embroidery felt giveaway holiday holiday card hot foil ink blending karin brushmarker pro layered stencil masculine my monthly hero new release no line coloring no line watercolor OLO marker olo markers original illustration pawsitively saturated rainbow shaker card slimline stamping stamptember stencil thank you thinking of you valentine's day video watercolor

Popular Posts

Simon Says Stamp Sending Cheer Blog Hop- Day 2 + Freebie + Giveaway!
Altenew October 2026 Release Blog Hop + Giveaway!
Rustic Monochromatic Stars for Christmas with Rainbow Splash!
December 2018 My Monthly Hero Blog Hop + Giveaway!
March 2020 Essentials By Ellen Blog Hop+Giveaway!
The Ton Stamps Summer Release: Day 1
Hero Arts Partners Blog Hop: Lawn Fawn!
Waffleflower July Release Blog Hop!
Simon Says Stamp STAMPtember Tim Holtz Collaboration: Festive Holidays!
Honey Bee Stamps Autumn Blessings Blog Hop-Day 2!

Disclosure

Some affiliate links are used in my posts. This means that, should you click on one of my links and purchase something from that company, I will receive a small portion of the sale at no extra cost to you. I use the money earned from these sales to help maintain my blog. I so appreciate you visiting and, if you do choose to use one of my affiliate links, thank you so much for your support!
Copyright © 2026 ·Brunch Pro Theme · Genesis Framework by StudioPress · WordPress · Log in
Loading Comments...