• Skip to main content
  • Skip to primary sidebar
  • Skip to secondary sidebar

Sixth Street Sundries

Emily Midgett

  • Home
  • About Me
  • Contact
  • OLO Marker Color Swatch Chart
  • Shop

basic banners

VIDEO: Double Letter Press Gatefold Card with Pinkfresh Studio!

March 20, 2024

Hi friends! I am over on the Pinkfresh Studio YouTube channel today with a old-for-most-people-but-new-to-me technique: Gatefold Cards! I used bunches of new Better Press plates, some fancy folding, and touches of springy color to create this unique project. Here’s the video:

Or you can click HERE to watch it on YouTube.

To create this card, I pulled out a supply that doesn’t get much of a spotlight in my office: my score board. This handy little tool has one basic function: to evenly and precisely score your cardstock, creating crisp creases on card bases, fancy folding cards, and rosettes, and you can even use it to create textural patterns in the background of your card front! It’s one of those tools that you don’t realize how much you’ve needed one until you actually have one.

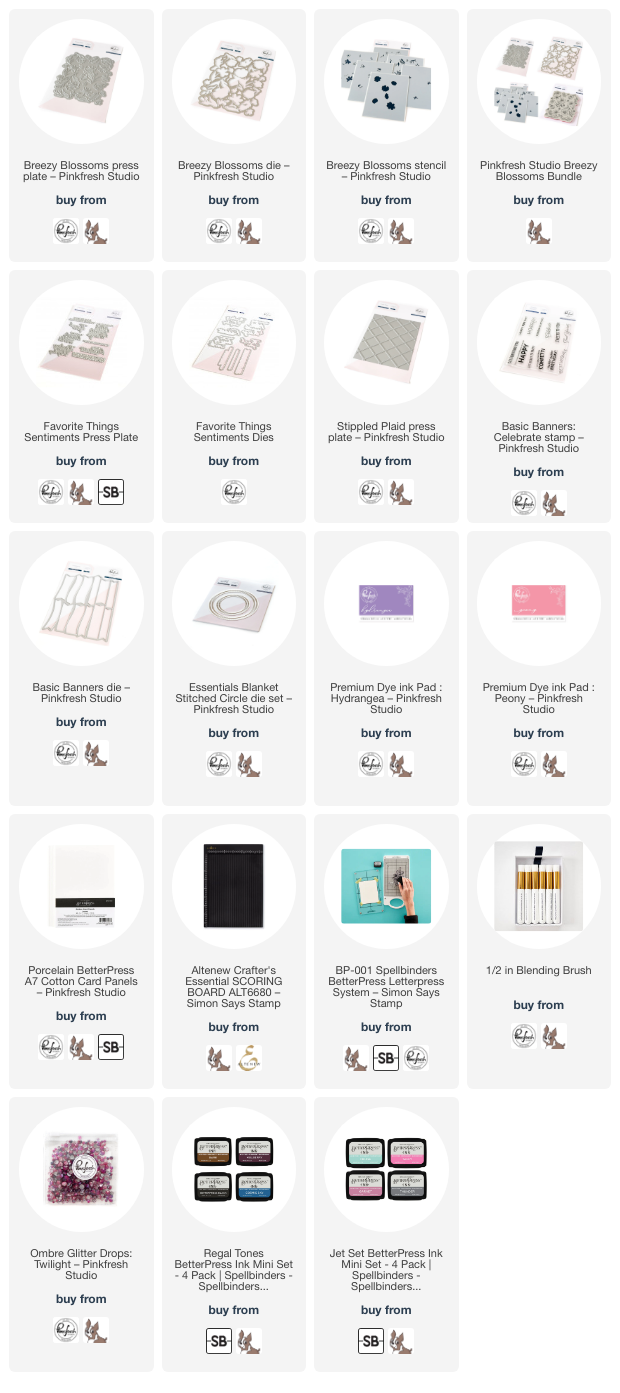
For my project, I used Garnet ink from the Spellbinders Better Press Jet Set Ink Collection to impress the beautiful floral images from the Breezy Blossoms Press Plate set. The Garnet ink is a lovely match for Peony Ink from Pinkfresh Studio, which I paired with Hydrangea Ink to add some softly blended color to my flowers using the Breezy Blossoms coordinating stencils. I used the 1/2″ blending brushes from Pinkfresh Studio to do some soft, but precise, blending on the flowers and foliage, keeping the color palette light and springy with the pink and purple inks. I die cut the finished florals with the Breezy Blossoms coordinating die.

For the interior of my gatefold card, I used the new Stippled Plaid Press Plate without ink to create some subtle texture. I simply ran a panel of Porcelain Press Paper A7 through my Better Press System without inking the plate, which creates a crisp, but still subtle, impression into the letterpress paper. I love to create these subtle patterns for the background of my focal point, enhancing the pattern with some ink blending. I used some larger blending brushes to blend the same Peony Ink and Hydrangea Ink around the edge of my letterpressed panel, trimming the Stippled Plaid panel down to 4″ x 5 1/4″. This slightly smaller size leaves a tiny 1/8″ frame around the edge to make sure that your belly band slides over comfortably!

For the sentiment, I used Mulberry Ink from the Regal Tones Ink Collection to impress a greeting from the Favorite Things Sentiments Press Plate set directly over the center of my letterpressed background. The dark ink creates a stark contrast on the light, slightly textured background!

To create the gatefold card:
Trim down a piece of 4 1/4″ x 11″ vellum. Using a score board and a bone folder, score the cardstock at 2 3/4″, then turn the cardstock 180* and score again at 2 3/4″. This will leave you with a 4 1/4″ x 5 1/2″ rectangle in the center, with symmetrical “gates” on either side.

To create the belly band:
Trim down a 1″ x 11″ strip of cardstock, then score at 2 5/8″, flip 180*, and score at 2 3/4″. The two different scoring measurements leaves a little wiggle room on your belly band so that it slides on and off easily.

After I had created the vellum card base, I die cut a Blanket Stitched Circle die from some pearlescent white cardstock to cover up the gap in my belly band as well as the sentiment behind my vellum “gate.” I popped up a greeting from Basic Banners Celebrate, which I had stamped using Hydrangea Ink and heat embossed over the top with some iridescent purple embossing powder for extra shine and die cut with the coordinating Basic Banners Die. I arranged the floral die cuts around the sentiment banner, popping some up with foam adhesive, adhering others with liquid adhesive for different heights throughout the card. For a little added sparkle, I adhered some Twilight Glitter Ombré Drops on the die cut circle and added some sparkling glitter watercolors to the stamens and flower centers.

Well, that’s all for my project today! I hope this inspires you to use your score board for something other than your typical card bases. I am going to have to look for more fun card folds. So fun to do something outside the box! Thanks so much for stopping by today, and have a marvelous day!
Filed Under: pinkfresh studio Tagged With: basic banners, betterpress, blanket stitched circle, breezy blossoms, favorite things, gatefold card, ink blending, layered stencil, press plate, stippled plaid, video

More Pinkfresh Studio Birthday Inspiration + Instagram Hop!

April 25, 2023

Hi there! Pinkfresh Studio is celebrating their 9th Birthday this month with a gorgeous assortment of products perfect for creating festive, elegant, and trendy birthday cards! We had a blog hop yesterday to share lots of inspiration using the new release, and I actually intended to share these projects then, but I had just gotten back from Simon Says Stamp’s CREATE event and well, to be perfectly honest…. I was exhausted, ha! (You can check out that post HERE.) Luckily for me, though, Pinkfresh Studio is also having an Instagram Hop today, so I have another opportunity to share this pair of birthday cards that are an homage to aqua!

I seem to have an unnecessarily enormous (well, to some people 😉 )collection of colored cardstock, which is funny when you consider how much time I spend coloring on plain white cardstock, but cards like these are exactly the reason why I need to have alllll of the colored cardstock shades, even if they are just slightly different from each other. My cards today use the fabulous and super versatile new Wrap Around Elements dies as the central focus, adding in a few other elements from the April Release, as well! Let’s get started with the details!

The fringe die in the Wrap Around Elements die set is brimming with possibilities for layouts and color schemes, and I couldn’t resist creating a fringed background covering the entire card front in a beautiful aqua ombré! I began by cutting strips of fringe in four different gradient shades of aqua (I will link individual colors below) and adhering them to an A2 card front in light to dark. I also die cut a coordinating frame using one of the Blanket Stitched Rectangle dies. I popped up the frame with some foam adhesive, but there is so much dimension from the fringed die cuts that you can hardly tell!

Once I had created my background, I die cut a few rosettes from the new Rosettes dies (which are out of stock at Pinkfresh, but you can purchase them HERE at Simon Says Stamp!) and then used Aqualicious ink to blend some details on the rosettes with the coordinating stencils (which are also in stock HERE at Simon Says Stamp!). I heat embossed a greeting on one of the darker teal cardstocks using a sentiment from the new Ribbons and Balloons stamp set, and cut it out with the coordinating die. I added the die cut pieces to the card front with some foam tape, then added a few sparkling Aqua Glitter Drops for some sparkle!

My second project is a fairly simple one, but I think it’s super effective and would be great for a gender-neutral birthday card! I started with die cutting the strings from the Wrap Around Elements from some iridescent white foil cardstock, and I die cut the bow die three times from the same white cardstock, layering them together to create a big fluffy bow! I hot foiled a Geo Blocks background on some super pale aqua cardstock using Opal hot foil to create a super subtle and slightly iridescent pattern on my pale aqua cardstock. I trimmed it down, then adhered the die cut strings to the panel, folding them over the edge and adhering them to the back to create a seamless look. I layered the foiled panel on a full size A2 card front using foam adhesive.

To create the greeting, I heat embossed the new Basic Banners: Celebrate stamp onto some more pale aqua cardstock using black pigment ink and heat embossed it with some white pearl embossing powder, creating a charcoal pearl sentiment that is a little softer than a typical black sentiment. I die cut the heat embossed greetings with the one-pass Basic Banners die, leaving me with lots of leftover sentiments to use elsewhere! I added the fluffy die cut bow with a tiny dot of foam tape, then tucked a sentiment banner beneath it with some more foam adhesive. It looks like a little package from Tiffany, I think, but would work perfectly for a gender-neutral birthday card!

Well, that’s all for my projects today. Pinkfresh Studio is hosting an Instagram Hop over on their Instagram page, with tons and tons of prizes, including a chance to win the entire release, so be sure to head over to Instagram to check it out! I will have the hop linked on my Instagram, and you can check me out @eamidgett. Thanks so much for stopping by today, and have a marvelous day!

Filed Under: pinkfresh studio Tagged With: basic banners, birthday, birthday card, fringe, hot foil, ribbons & Balloons, rosettes, wrap around elements

Primary Sidebar

  • Facebook
  • Instagram
  • Pinterest
  • YouTube

Favorite Shops

Secondary Sidebar

Subscribe

Enter your email address to subscribe to this blog and receive notifications of new posts by email.

Instagram
Something is wrong.
Instagram token error.
Follow
Load More

Archives

Tags

3D embossing folder alcohol markers better press birthday birthday card blog hop card kit christmas christmas card christmas tag colored pencil copic copic coloring Daniel Smith die cutting embossing folder embroidery felt giveaway holiday holiday card hot foil ink blending karin brushmarker pro layered stencil masculine my monthly hero new release no line coloring no line watercolor OLO marker olo markers original illustration pawsitively saturated rainbow shaker card slimline stamping stamptember stencil thank you thinking of you valentine's day video watercolor

Popular Posts

Simon Says Stamp Sending Cheer Blog Hop- Day 2 + Freebie + Giveaway!
Joyful Snowman with New Simon Says Stamp Sending Cheer Release!
Simon Says Stamp Sending Cheer Release: Now Available!
Altenew October 2026 Release Blog Hop + Giveaway!
February 2018 My Monthly Hero Blog Hop!
Altenew March 2020 Release Blog Hop+Giveaway!
Special Release: Simon Says Stamp Limited Edition STAMPtember Christmas Card Kit!
Simon Says Stamp Cozy & Bright Inspiration, Part Two!
Waffleflower December Release Blog Hop!
Altenew Build A Flower Japanese Mum Blog Hop!

Disclosure

Some affiliate links are used in my posts. This means that, should you click on one of my links and purchase something from that company, I will receive a small portion of the sale at no extra cost to you. I use the money earned from these sales to help maintain my blog. I so appreciate you visiting and, if you do choose to use one of my affiliate links, thank you so much for your support!
Copyright © 2026 ·Brunch Pro Theme · Genesis Framework by StudioPress · WordPress · Log in
Loading Comments...