• Skip to main content
  • Skip to primary sidebar
  • Skip to secondary sidebar

Sixth Street Sundries

Emily Midgett

  • Home
  • About Me
  • Contact
  • OLO Marker Color Swatch Chart
  • Shop

close to my heart

Close To My Heart Slimline Celebration!

September 27, 2021

Hi there! Today, I have a special post featuring some fantastic goodies from Close To My Heart for National Stamping Month. The Slimline Celebration stamps and dies are a collection of amazing products that are specially designed and proportioned to create that super trendy slimline size. I have two vibrant cards for you today using the Slimline Sentiments stamps and Star Cluster die, with a few tricks on how to create an ombre sentiment and how to get the most out of your die cuts. Let’s get started with the details!

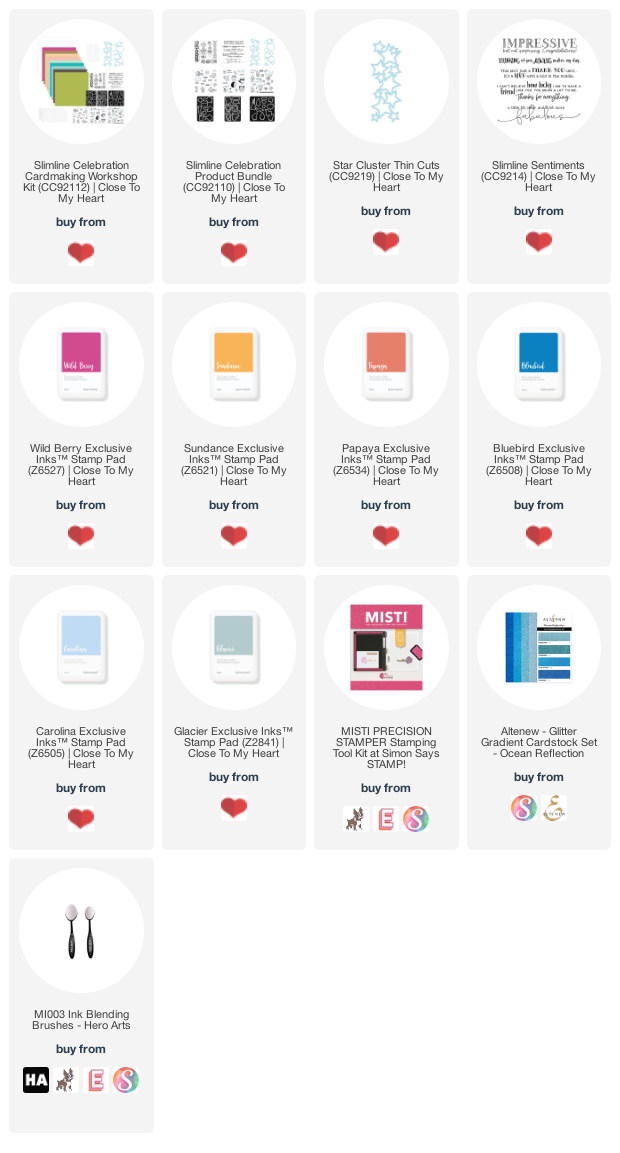
For today’s projects, I started with some ink blending using several of the vibrant inks in the Close To My Heart ink line. For the blue card, I started by taping off the edge of my white slimline card base (3.5″x8″), then, using blending brushes, blended Bluebird, Carolina, and Glacier inks in an ombré down the front. When I pulled off my washi tape from the edges, I was left with a crisp white frame around my colorful ombre background! The sunset card was created by blending Wild Berry, Papaya, and Sundance inks horizontally across my slimline card front, covering the entirety of the card. I love the bold, saturated color for both of these backgrounds!

My sunset card didn’t need much extra, and I wanted to showcase some of those gorgeous slimline dies from the Slimline Celebration kit. I die cut the Star Cluster die three times from plain white cardstock, then adhered them all together using liquid adhesive to create a dimensional die cut. I adhered it to the center of the blended card front. I love how the crisp white pops from the super saturated background!

For the greeting, I created a special ombré sentiment using one of the massive greetings from Slimline Sentiments. I placed my sentiment in my MISTI, along with a strip of white cardstock, then used the same Wild Berry, Papaya, and Sundance inks to create the ombre sentiment. I was able to blend the colors together smoothly by partially inking up my stamp with the first color (Wild Berry), then dabbing the edges of the inked area with a microfiber cloth to soften the ink line. I closed the lid of my MISTI, repeated the process to get good saturation of that first color, then moved to the Papya ink. I inked the center portion of the stamp with the Papaya ink, softening both the top and bottom edges of the inked area, stamped, and repeated for extra vibrant coverage. Finally, I repeated the process with the Sundance ink, which created the finished greeting in that beautiful pink-orange-yellow ombré. I popped the sentiment up using double layer of foam adhesive for lots of extra dimension. The final touch was to add a few of the crystals included in the

Slimline Celebration Cardmaking Workshop kit!

My second project features similar techniques. To create the sentiment, I used the same technique used for the sunset card, this time with Bluebird, Carolina, and Glacier inks. I kept the order of the inks the same on the greeting as I did for the ombré blended background to keep things cohesive. To help the greeting pop even more, I added a very thin mat of sparkling blue glitter paper. This little touch of sparkle helps to make that sentiment strip just pop on the card front!

When I was die cutting the three Star Cluster die cuts for the previous card, I had several intact stars left over from the cutouts in the center of the die cuts. I didn’t want those to go to waste, so I arranged them randomly on the blue blended card front, popping them up with foam tape to give them extra dimension. I love when you can get a two-fer from just a few die cuts! So much versatility. The final touch was to fill in any holes in the star cascade using some more of the gems from the Slimline Celebration Cardmaking Workshop kit. I love the little touch of sparkle the gems add to the card front!

Well, that’s all for my projects today! The Slimline Celebration collection and Slimline Celebration Cardmaking Workshop kit are such wonderful products. I’m so grateful to the folks at Close To My Heart for the opportunity to play with them! If you haven’t checked out Close To My Heart’s dye ink line, you’re missing out…. the colors are absolutely outstanding! Thanks so much for stopping by today, and have a marvelous day!
Filed Under: close to my heart Tagged With: card kit, ink blending, ombre sentiment, ombre stamping, slimline, slimline celebration

Some pretty spring pinks with Close To My Heart! (and a sale!)

March 15, 2018

Good morning! I have a quick post today… nothing fancy about this card, no special techniques, but sometimes all you need is some simple, classic stamps in a pretty color scheme to have create a lovely card. I’m helping to spread the word that Close To My Heart is having a sale this month on all of their metal dies during the month of March! You can purchase current and retired individual Thin Cut sets at 25% off or bundled sets at 30% off! Score one for the bargain hunters! For my project today, I’ve focused on the lovely Beautiful You stamp and die bundle. There’s just something about pretty pink roses that makes my heart go pitter patter.

I started by die cutting several roses and leaves from the Beautiful You bundle from some white card stock. After I had die cut several pieces of each, I stamped them using Altenew’s Red Cosmos inks… that Frosty Pink color just makes me sigh with happiness. What a perfect shade of pale pink. I also stamped the greeting from Beautiful You using black ink on some more white card stock, which I then fussy cut.

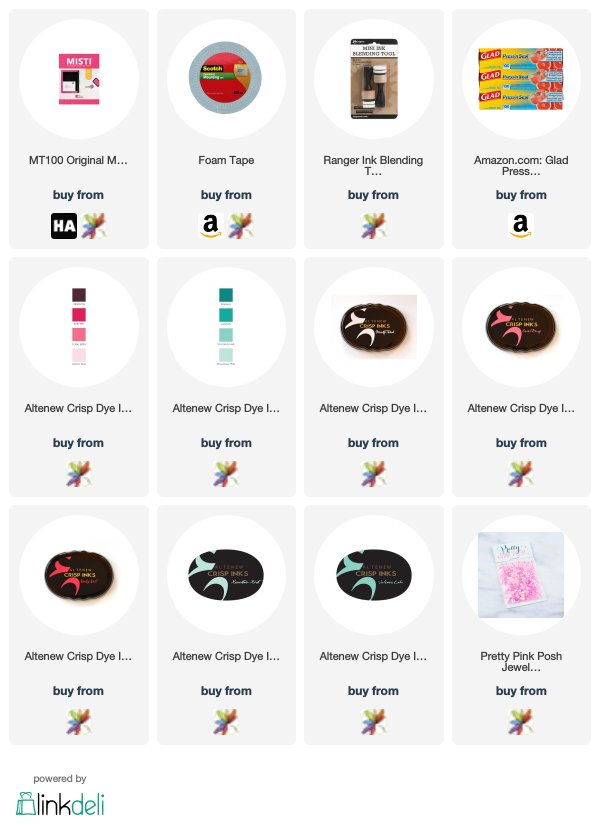
For the card base, I lightly blended some more Frosty Pink ink in the corner using my foam blending tool to balance out the bouquet I planned to place at the bottom. I arranged all of my die cuts in the corner in a pretty bouquet, then used Press’n’Seal to pick them up still in my carefully arranged bouquet. While they were still attached to the Press’n’Seal, I added dimensional adhesive to the back, removed the release paper, and reattached them to card front. I added my greeting, then added a few pretty jewels to add some sparkle.

Well, that’s all for me today! I encourage you to run over and check out this sale from Close To My Heart… some super cute stuff available at great discounts!!

Have a marvelous day, friends!


Filed Under: altenew, close to my heart Tagged With: ink blending, sale, stamping

My kiddos’ nursery.

September 20, 2017

Good morning! I’m back today with my last card created during my stamp-a-thon on Monday using the gorgeous From the Heart kit by Close To My Heart. When I found out I was having boy/girl twins, I immediately started researching gender neutral nursery themes. I ended up choosing a lovely yellow and gray theme, and I’ve been fairly obsessed with the color combo since then. Close To My Heart’s Saffron, Canary, and Heather make such a lovely color combination that I just had to use it on a card with their From The Heart kit for National Stamping Month.

I started by stamping the sentiment in approximately the center of the white A2 panel, then used Canary, Saffron, Fern, and Heather inks to stamp the solid flowers in either corner of the sentiment. I then used a black pen and my T-square to draw some straight lines in each corner, creating a frame around the sentiment.

Next, I trimmed two strips of coordinating saffron colored card stock and added them to the top and bottom of my top-folding A2 card base, then adhered the stamped panel using dimensional foam adhesive. The final touch was to add a few Nuvo Drops in Oyster Gray  and some Glossy Accents to the center of the larger flowers.

And that’s it! I hope you’ve enjoyed my little miniseries of stampy goodness using the Close To My Heart From The Heart kit! I will be back Friday with the blog hop for the Honey Bee Stamps September release. Have a marvelous day, friends!

Filed Under: close to my heart Tagged With: clean and simple, stamping

More From The Heart!

September 19, 2017

Good morning! I’m back today with another card created using the gorgeous From The Heart kit from Close To My Heart. I featured a pretty watercolored card last weekend using some of the outline stamps, but today while my kiddos were at school (preschool is 2 hours each day!), I cranked out not just one, but THREE cards using these lovely solid stamps included in the National Stamping Month Exclusive kit.


For this card, I went super clean and simple. It’s been awhile since I just enjoyed stamping some pretty flowers with no coloring or anything special involved… just me, my stamps, and some lovely inks. (Also, have you tried the inks from CTMH? Oh my gosh, they’re absolutely fabulous. First of al, they have a magnetic lid, so you know for sure that the lid is on nice and tight. They stamp just beautifully; these were all done without the help of my MISTI and look how smooth they are! And they have a massive rainbow of colors available.) I stamped these pretty blooms and leaves using Saffron, Pomegranate, Eggplant, Smoothie, New England Ivy, and Heather inks.

After stamping, I put my scissors to use and fussy cut the images. I arranged them in a little swag on a stitched rectangle die cut, then lifted them up (still in the desired swag shape) using Press ‘n Seal and added foam adhesive to the back. While still attached to the Press ‘n Seal, I laid my floral bouquet on the stitched rectangular die cut. I finally added one of the tiny but very useful sentiments included in the kit beneath the floral swag. The whole thing was mounted on a top-folding white A2 card base.

Clean, simple, and to the point. Pretty flowers don’t really need a whole lot of help, so I just let them be the star in a whole lot of lovely white space.

Remember, if you like the looks of the From the Heart kit, be sure to go over and purchase your own, because they’re only available during September to celebrate National Stamping Month! I’ll be back here tomorrow with some more of my afternoon adventure with this kit! Have a marvelous day. 🙂

Filed Under: close to my heart Tagged With: cardmaking, clean and simple, die cutting, fussy cutting, stamping, sympathy card, thinking of you

From The Heart, Volume 3

September 19, 2017

Hi there! I’m back again today with another card made during my stamping/therapy session using the Close To My Heart From The Heart kit made especially for National Stamping Month. This kit lends itself so well to clean and simple. 

I cut a white panel of card stock slightly smaller than A2, then stamped the pretty solid flowers using various inks from Close To My Heart in the corner of the panel. (I will list them all down at the bottom of the post!) I mentioned in my post yesterday how fantastic the ink pads are… I stamped all of these images without using my MISTI, and it amazes me how smooth the coverage is for only ONE layer of ink. Plus, their packaging has super innovative magnetic closures, so your ink pads are absolutely certain to be totally closed… no worries about drying up! Okay, I’m off my soapbox.

I had mentioned in my post on Saturday that I had trimmed the sentiment stamps and their floral accents apart so that I could use them separately or together. I used my MISTI to stamp this lovely sentiment (didn’t want a crooked sentiment after all of those stamped flowers!)

It’s a little difficult to see in the photo, but I did use some Wink of Stella shimmer pen on the triangular red flowers and the purple flowers, then covered them with Glossy Accents. Finally, I popped up the stamped panel on my A2 card base using some dimensional foam adhesive.

And that’s it for today! I have one more card to show you from my marathon stamping session earlier this week, and I saved my favorite for last. I hope you’ll stop by again tomorrow to see my project! Have a marvelous day, friends!

Inks used: Pixie, Saffron, Canary, Pomegranate, Smoothie, Heather, Eggplant, New England ivy, Fern

Filed Under: close to my heart Tagged With: cardmaking, clean and simple, national stamping month, one layer, papercrafting, stamping

  • Page 1
  • Page 2
  • Go to Next Page »

Primary Sidebar

  • Facebook
  • Instagram
  • Pinterest
  • YouTube

Favorite Shops

Secondary Sidebar

Subscribe

Enter your email address to subscribe to this blog and receive notifications of new posts by email.

Instagram
Something is wrong.
Instagram token error.
Follow
Load More

Archives

Tags

3D embossing folder alcohol markers better press birthday birthday card blog hop card kit christmas christmas card christmas tag colored pencil copic copic coloring Daniel Smith die cutting embossing folder embroidery felt giveaway holiday holiday card hot foil ink blending karin brushmarker pro layered stencil masculine my monthly hero new release no line coloring no line watercolor OLO marker olo markers original illustration pawsitively saturated rainbow shaker card slimline stamping stamptember stencil thank you thinking of you valentine's day video watercolor

Popular Posts

Simon Says Stamp Joy For You Blog Hop- Day 1!
Simon Says Stamp Joy For You Release-Now Available!
Frozen Fractals All Around with New Simon Says Stamp Joy For You Release!
Shaped Holiday Shaker Card with New Simon Says Stamp Jolly Season Card Kit of the Month!
Holiday Postage with New Simon Says Stamp!
Simon Says Stamp Glory to the Newborn King Holiday Kit-Part II!
Pinkfresh Studio 5th Birthday!
Altenew Build A Flower: Fuchsia Blog Hop+Giveway!
Holiday Joy in Pink and Green with New Simon Says Stamp DieCember!
Honey Bee Stamps September Release Blog Hop!

Disclosure

Some affiliate links are used in my posts. This means that, should you click on one of my links and purchase something from that company, I will receive a small portion of the sale at no extra cost to you. I use the money earned from these sales to help maintain my blog. I so appreciate you visiting and, if you do choose to use one of my affiliate links, thank you so much for your support!
Copyright © 2026 ·Brunch Pro Theme · Genesis Framework by StudioPress · WordPress · Log in
Loading Comments...