• Skip to main content
  • Skip to primary sidebar
  • Skip to secondary sidebar

Sixth Street Sundries

Emily Midgett

  • Home
  • About Me
  • Contact
  • OLO Marker Color Swatch Chart
  • Shop

art deco

Pinkfresh Studio January 2024 Stamp, Die, Stencil, and Hot Foil Release

January 26, 2024

Hi friends! The new Pinkfresh Studio January 2024 Release is now available, and it’s absolutely smashing! We are celebrating and inspiring with a blog hop featuring these delicious new goodies (and giving away tons of prizes, too!). I have a pair of cards filled with tons of sparkling details and vibrant colors, so let’s get started with the details!

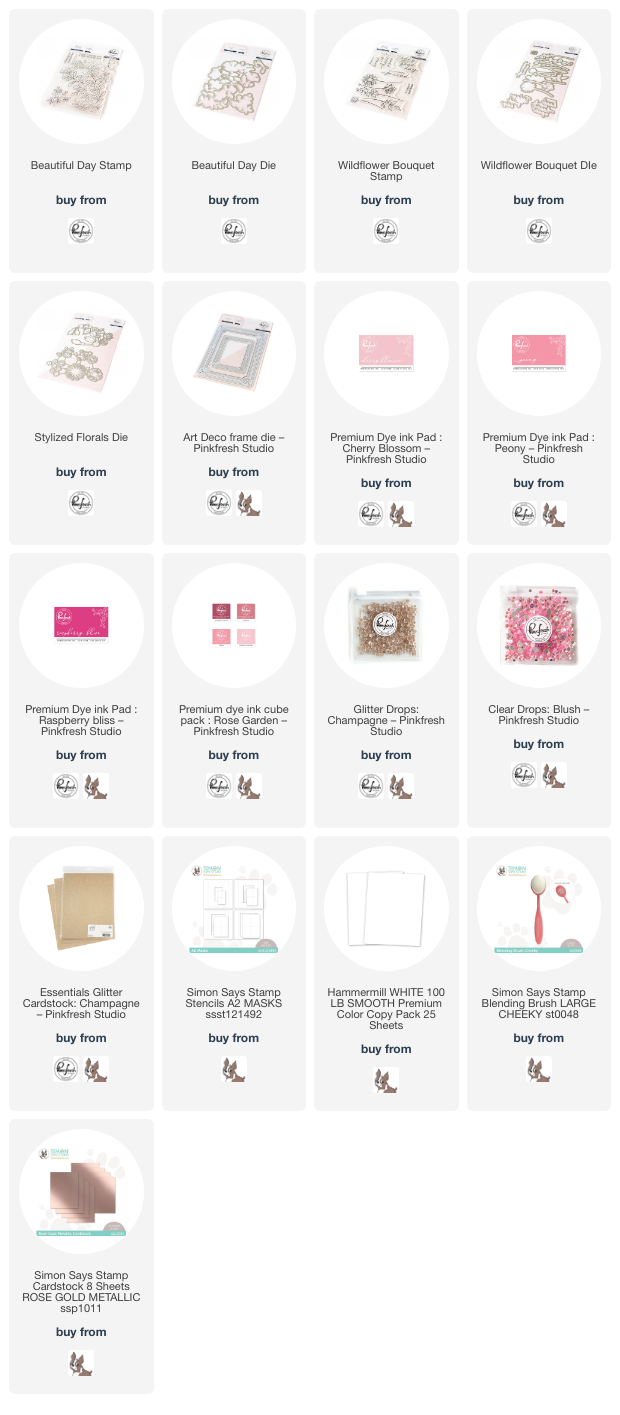
For both of my cards today, I started with some bright ink blended backgrounds using Cherry Blossom, Peony, and Raspberry Bliss inks. Cherry Blossom and Peony are both in the somewhat muted Rose Garden ink quartet, but when you add in that crazy vibrant Raspberry Bliss ink it creates a completely different overall look. I love how tweaking your ink choices has such an incredible effect on the general aesthetic of your card!

For my first project, I showcased the new Beautiful Day stamps + coordinating dies. I started by heat embossing the floral stamp from Beautiful Day stamps onto some white cardstock with pearlescent white embossing powder, then blending the Cherry Blossom, Peony, and Raspberry Bliss ink combination on the embossed panel as well as another panel of plain white cardstock, keeping the proportions approximately the same with both panels so that they could be layered together seamlessly. I die cut the blended Beautiful Day image with the coordinating die and splattered the blended background with some rose gold shimmer watercolors from my stash.

To accent my vibrant floral arrangement, I used some rose gold foil to die cut the smaller Art Deco Frame die. I arranged the blended bouquet around my popped up shiny frame using more foam tape, then die cut some of the standalone foliage sprigs from the Wildflower Bouquet coordinating die set, which contains both coordinating dies for the stamped images as well as some standalone foliage sprigs that you can use on their own. I die cut these sprigs from Champagne Glitter Cardstock and tucked them amongst the blended, embossed die cut. I heat embossed a greeting from the Wildflower Bouquet stamp set and die cut it with the super detailed and delicate coordinating die. To create a seamless transition from the background to the greeting, I used the residual ink left over on my blending brushes to blend on the sentiment, which I popped up with a double layer of foam adhesive. The final touch was to add a few Champagne Glitter Drops! The texture, vivid color, and gorgeous sparkles on this card are absolutely stunning in person. I wish you could see how sparkly it is in real life!

My second card takes advantage of the lovely details in the new Stylized Florals dies. I love layering white die cuts and adding metallic accents, especially when the die cuts have beautiful debossed details like they do on the new Stylized Florals dies. I started my card by masking the edges of a white A2 card front, then used blending brushes to blend the same Cherry Blossom, Peony, and Raspberry Bliss ink combination from the previous card. I splattered the background with some more of the glittering watercolors while the mask was still in place; removing the mask is like doing a magic trick for me! Such crisp lines and a vibrant background couple with that clean white frame… love!

I die cut the new Stylized Florals dies from both white cardstock and Pinkfresh Studio’s Champagne Glitter Cardstock, layering the white die cut flowers on the glittering foliage. I love that these bouquets are already arranged for you, because it makes everything super simple to assemble! I popped up the floral bouquets on the corners of my blended background, adding some Blush Clear Drops to the flower centers for a bit of extra shine and texture. I heat embossed a greeting from the new Best Wishes stamp set and die cut it with the coordinating die. (I am so glad that Pinkfresh includes dies for their sentiments in nearly all of their sets! So nice to not have to fussy cut them or try to get the trimmer exactly straight!) I popped the greeting up in the center of my blended background using foam adhesive.

Well, that’s all for my projects today! Now for some fun giveaway information:

Pinkfresh Studio will be giving away a total of TEN $25  gift cards along the hop. The winners will be selected from the comments. Winners will be posted on February 5, 2024 on our GIVEAWAY PAGE. Winners must check that page & claim their prize within 2 weeks. Pinkfresh Studio is also giving away the full release on the Pinkfresh blog & YouTube channel. 

Here’s the full hop list in case you get lost:

You are invited to the Inlinkz link party!

Click here to enter

Thanks so much for stopping by today, and happy hopping!
Filed Under: pinkfresh studio Tagged With: art deco, beautiful day, ink blending, stylized flroals, wildflower bouquet

Pinkfresh Studio April 2023 Stamp, Die, Stencil, and Hot Foil Release

April 24, 2023

Good morning! Happy Monday! It’s extra happy today, because it’s the Pinkfresh Studio 9th Birthday release day, and we are celebrating with a blog hop! You should have arrived here from Cheryl Espie, and your next stop is Heather Hoffman. You can also start at the beginning at the Pinkfresh Studio blog in case you get lost! The new collection celebrating Pinkfresh’s 9th birthday is absolutely darling, full of elegant birthday stamps, stencils, dies, and hot foil plates to make birthday cards such a joy to create! I have a fun shaker card to share with you today, so let’s get started with the details!

I started by silver embossing the adorable cake with the festive banner from the new Sweet Day stamp set onto some Fabriano Artistico hot press watercolor paper. The Fabriano Artistico is a nice, crisp white, so I like to use it when I’m going to be pairing watercolored images with white cardstock. I watch lots of cake decorating videos on Instagram, and cakes iced with colorful frosting and topped with drips of shiny chocolate are all the rage, so I thought that I would try to emulate that with the color scheme for my yummy-looking chocolate cake. I watercolored the image with my Karin Brushmarker Pro markers, scribbling the color out onto my glass mat and picking the color up with my damp paintbrush, allowing me to better control the saturation of color on my image. I die cut the image with the handy-dandy one piece Sweet Day die that die cuts the full cake, as well as the cupcake and candle on the stamped image! I used a black pen and a white gel pen to add some “crumb” texture to the interior of my chocolate cake, as well as some swipes with a white gel pen on the shiny chocolate ganache dripping down the cake. It’s making me hungry!

Nothing is quite as appropriate for a birthday card as a shaker card, so I hot foiled the Art Deco background onto some crisp white cardstock using silver hot foil to coordinate with my silver embossing on the cake. I also hot foiled a silver arch using the Nested Arches Hot Foil Plates and cut it out with the coordinating dies to create a shiny silver frame. I cut a window in the center of a white A2 card front using the smaller arch die, then backed it with acetate and adhered the hot foiled arch die cut around the window. I find it easier to line up the single die in the center of my card front than to try to perfectly line up my hot foil plate in the center of my card front. Plus, this adds a bit of extra dimension and texture!

I filled my shaker with some coordinating aqua sequins, adding in some iridescent stars to make things extra festive, then adhered the cake with another layer of foam adhesive. For the greeting, I used one of the perfect greetings from the new Foiled Sentiments 6, which is chock full of fabulously shiny birthday greetings that are so easy to add to your card!

Well, that’s all for my project today! Now for some fun giveaway information:

Pinkfresh Studio will be giving away the full release on the Pinkfresh blog & YouTube channel, so be sure to leave comments there to be entered to win! They will also be giving away a total of TEN $25  gift cards along the hop. The winners will be selected from the comments.Winners will be posted on May 3, 2023 on our GIVEAWAY PAGE. Winners must check that page & claim their prize within 2 weeks.

Here’s the full hop list:

You are invited to the Inlinkz link party!

Click here to enter

Thanks so much for stopping by today, and happy hopping!

Filed Under: pinkfresh studio Tagged With: art deco, birthday card, hot foil, karin brushmarker pro, shaker card, sweet day, watercolor

My Monthly Hero February 2019 Blog Hop+Giveaway!

February 4, 2019

Good morning! Today is the first Monday of the month, so that means that we have the first My Monthly Hero blog hop for the new year! This month’s kit is just plain fun, featuring a unique Art Deco theme, and an absolutely gorgeous cover plate die included in the kit itself, along with lots of fun add-ons. You should have arrived from Caly Person’s blog and your next stop is Ilina Crouse’s blog.

The main kit this month features a large 6×8 stamp set full of fabulous stylized images from the 1920’s, coordinating frame cuts, an absolutely stunning Art Deco cover plate die, and some fun embellishment options, including some utterly fabulous gold and silver foil papers!

The add-ons this month are particularly great, too, and I’ll have a post later this month with some fun things that you can do with them!! These kits frequently sell out, and once they’re gone, they’re gone… so don’t wait and miss out! You can also subscribe to make sure that you get first dibs every month. The kits will begin shipping from the warehouse on Friday, February 8th.

Today, I kept my project fairly easy, with some Copic coloring, some blending, and some heat embossing. Let’s get started with the details!

I began by stamping some of the fabulous images included in the main kit: the silhouette of the beautiful flapper and super fun sentiment, flanked on the top and bottom by the sunburst image to help add some interest and balance. I eyeballed it, but you could use a T-square if you were really wanting to be precise. 😉 I stamped them with Versafine and heat embossed with clear embossing powder to really make those black lines stand out. I then used Copic markers to color in the details using a coral and pistachio color scheme that screamed 1920’s to me.

Copic colors used: R20, R21, R22, E000, E00, E23, YG61, G46, G94, N1, N3, 0

After I had finished coloring the image from the February My Monthly Hero kit, I trimmed it down to a long rectangle, then mounted it on a very slightly larger panel of black card stock.

For the background, I chose to heat emboss the new Deco Flourish Bold Prints using Silver Pearl embossing powder on some plain white card stock. I then used the Picket Fence Studios Life Changing Blending Brushes to blend some Fresh Peach ink around the edge to coordinate with the peach sash on her dramatic and gorgeous chapeau. Finally, I mounted the black-matted Copic panel with some foam adhesive to add some extra dimension!

Now, for some fun giveaway information! Hero Arts is giving away one kit to a lucky commenter (and if you’ve already purchased one, they will reimburse you!). All you have to do to be eligible is leave a comment on each stop on the blog hop. The more comments you leave, the more chances you have to win! Here’s the full lineup in case you got lost:

The Hero Arts Blog Caly Person Emily Midgett Ilina Crouse Janette Kausen Jessica Frost-Ballas Michelle Short Nichol Spohr Yana Smakula Amy Kolling Debi Adams Jennifer McGuire Julee Tilman Laurie Willison Lydia Fiedler Libby Hickson

Thank you for stopping by, and have a marvelous Monday!

Filed Under: Hero Arts Tagged With: art deco, copic coloring, giveaway, my monthly hero

Primary Sidebar

  • Facebook
  • Instagram
  • Pinterest
  • YouTube

Favorite Shops

Secondary Sidebar

Subscribe

Enter your email address to subscribe to this blog and receive notifications of new posts by email.

Instagram
Something is wrong.
Instagram token error.
Follow
Load More

Archives

Tags

3D embossing folder alcohol markers better press birthday birthday card blog hop card kit christmas christmas card christmas tag colored pencil copic copic coloring Daniel Smith die cutting embossing folder embroidery felt giveaway holiday holiday card hot foil ink blending karin brushmarker pro layered stencil masculine my monthly hero new release no line coloring no line watercolor OLO marker olo markers original illustration pawsitively saturated rainbow shaker card slimline stamping stamptember stencil thank you thinking of you valentine's day video watercolor

Popular Posts

Simon Says Stamp Joy For You Blog Hop- Day 1!
Simon Says Stamp Joy For You Release-Now Available!
Frozen Fractals All Around with New Simon Says Stamp Joy For You Release!
Shaped Holiday Shaker Card with New Simon Says Stamp Jolly Season Card Kit of the Month!
Holiday Postage with New Simon Says Stamp!
Simon Says Stamp Glory to the Newborn King Holiday Kit-Part II!
Altenew Build A Flower: Fuchsia Blog Hop+Giveway!
Holiday Joy in Pink and Green with New Simon Says Stamp DieCember!
Pinkfresh Studio 5th Birthday!
Honey Bee Stamps September Release Blog Hop!

Disclosure

Some affiliate links are used in my posts. This means that, should you click on one of my links and purchase something from that company, I will receive a small portion of the sale at no extra cost to you. I use the money earned from these sales to help maintain my blog. I so appreciate you visiting and, if you do choose to use one of my affiliate links, thank you so much for your support!
Copyright © 2026 ·Brunch Pro Theme · Genesis Framework by StudioPress · WordPress · Log in
Loading Comments...