• Skip to main content
  • Skip to primary sidebar
  • Skip to secondary sidebar

Sixth Street Sundries

Emily Midgett

  • Home
  • About Me
  • Contact
  • OLO Marker Color Swatch Chart
  • Shop

best year yet

Man Card Monday: Birthday Chalkboard with Simon Says Stamp!

August 24, 2026

This post was sponsored by Simon Says Stamp. Thanks, Simon! *I have gathered links to all of the products used at the bottom of the post for your convenience, using affiliate links at no extra cost to you. Thank you for shopping with my links! I truly appreciate your support for my work!*

Hi friends! Happy Monday! Or should I say…. Happy Man Card Monday!! I have another pencil card to share with you, this time with a more masculine color palette and a chalkboard feel. (Remember the chalkboard trend from…. several years ago? I am outing myself with that one! My first published projected was a chalkboard wine bottle tag!) I pulled together some fun birthday-themed, gender-neutral products to create this festive card with pops of vibrant pencil coloring. Let’s get started on the details!

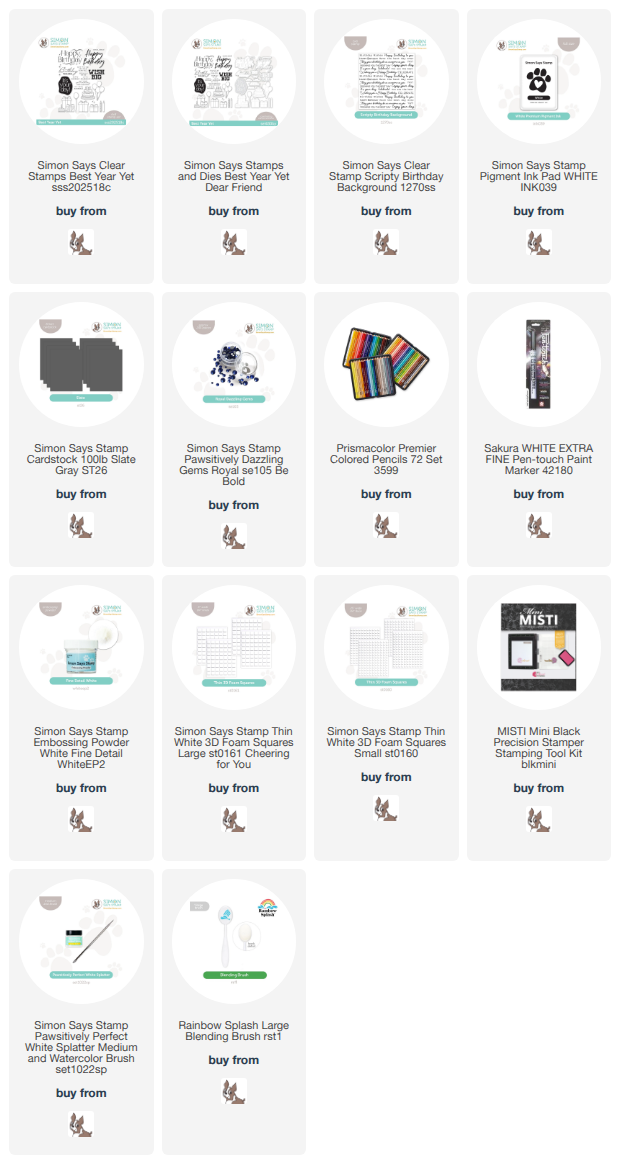
The main elements of this card come from the older Best Year Yet stamp and die set. This is such a great set, filled with perfect birthday imagery and tons of fabulous sentiments. Truly jam-packed and a requirement for your stash if you make many birthday cards! I chose to do some no-line coloring on Simon Says Stamp Slate cardstock, so I stamped several of the images on the deep gray cardstock using Simon Says Stamp White Pigment Ink and used colored pencils to color them all in a vibrant cobalt, lime, and aqua color palette. The white pigment ink lines blend nicely into the vibrant pencil coloring! I used a white paint pen to add some additional details to the wrapping paper, balloon strings, candle, etc to help make them extra special.

After I had finished coloring the main focal point elements, I used the same white pigment ink to stamp the Scripty Birthday Background on an A2 panel of Slate cardstock. I think it is just fabulous how beautifully that white ink pops on the deep gray. Such a great white ink if you don’t already have one! (and maybe even if you do.) I wanted to ground my focal point images and sentiment a bit, as well as provide a bit of visual rest from the busy background, so I used a blending brush that I’ve dedicated to white pigment ink to blend some white pigment ink directly over the stamped background. I also splattered the entire background with some Simon Says Stamp White Splatter Paint to help add to the masculine (i.e.-mixed media) aesthetic!

For the greeting, I stamped two different sentiments from the Best Year Yet stamp set using white pigment ink again on Slate cardstock, then sprinkled white embossing powder over the top while the ink was still wet and heated it. This combination of white pigment ink and white embossing powder really makes that white sentiment nice and crisp! I die cut the sentiments with their coordinating dies, then arranged all of the die cut elements on my stamped, blended, and splattered card front, adhering everything with thin foam adhesive squares. Finally, I added a few Royal Pawsitively Dazzling Gems for a bit more blue and a bit more sparkle!

Well, that’s all for my project today! This card could easily be adapted to a more feminine color palette… how pretty would this look in shades of magenta and purple instead of blues and greens? Thanks so much for stopping by today, and have a marvelous day!
Filed Under: simon says stamp Tagged With: best year yet, birthday card, colored pencil, ink blending, no line coloring, scripty birthday background

Daisy Birthday Cards For the Win!

May 30, 2024

This post was sponsored by Simon Says Stamp. Thanks, Simon!

Hi friends! The moment that the Daisy Oval Frame came in the mail to me, I was absolutely entranced by its delicate scallops and symmetrical design. I am a great lover of symmetry, in case you haven’t noticed, and this beautiful die is right up my alley. I used it with a few light, airy designs during the release, but I couldn’t get the notion of a vivid, color saturated design out of my head. As we head into summer, I find myself reaching for more vibrant colors, emulating the vibrancy of the colors outside my window. This shocking pink, aqua, and black color palette has stolen my heart! I created a pair of coordinating projects with a pink daisy theme running through both of them, so let’s get started with the details!

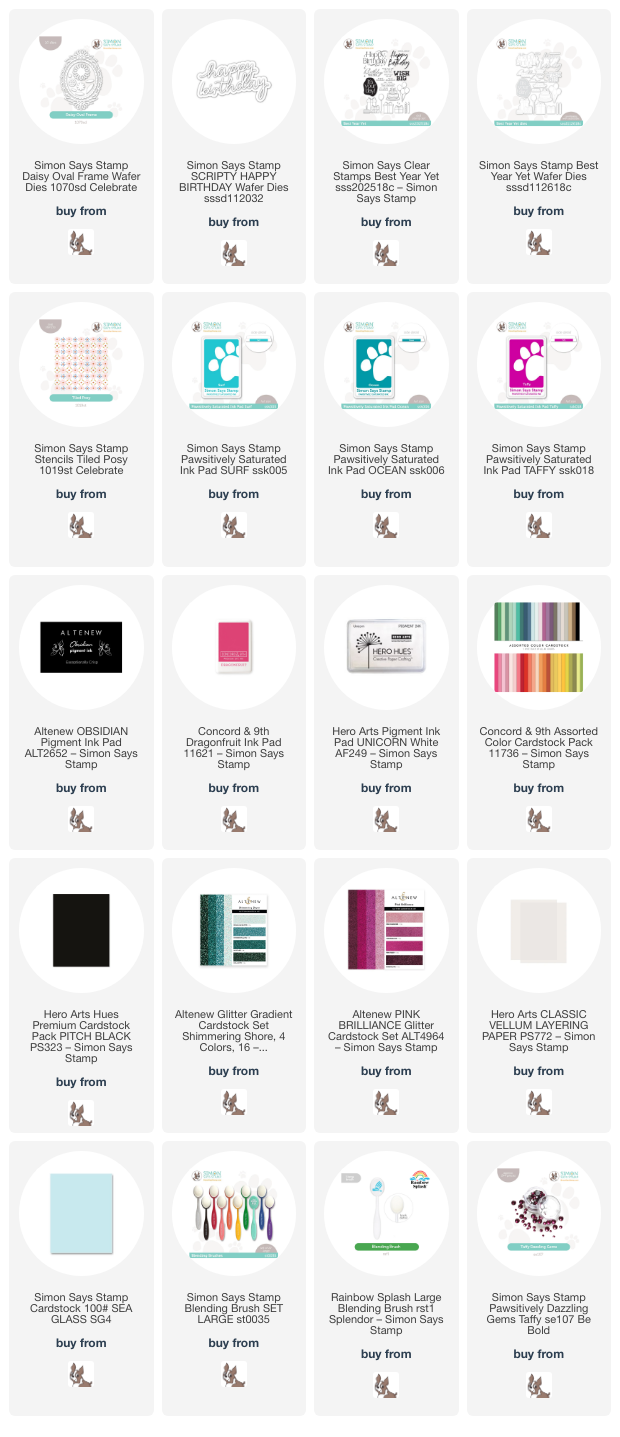
Both of my projects feature the unbelievably gorgeous Concord & 9th Dragonfruit cardstock as the main color for my floral accents. I think this color is one of the most unique amongst the Concord & 9th color palette; even though the sampler pack is currently out of stock on the Simon website, you could easily recreate this color by ink blending with the Dragonfruit inkpad, some white cardstock, and a blending brush!

I started my first project by die cutting the beautiful Daisy Oval Frame from some pale Sea Glass cardstock. I layered them in the center of a crisp Pitch Black cardstock A2 card front using liquid adhesive. I die cut the daisy accents from Dragonfruit cardstock and some deep teal leaves from a scrap in my scrap pile, layering them in the appropriate spots on the outer daisy frame. I popped them up with some thin foam adhesive for a bit of extra dimension.

Taffy Pawsitively Dazzling Gems

For the greeting, I wanted to keep things simple and on a larger scale, so I die cut the Scripty Happy Birthday from some glittery aqua cardstock in the Altenew Shimmering Shore glitter cardstock pack. I layered the detail layer on a vellum shadow layer, then popped it up with some thin strips of clear foam adhesive. For a final sparkling touch, I added a few Taffy Pawsitively Dazzling Gems, tucking them symmetrically amongst the die cut frame arrangement. The simplicity of this card and the vivid color palette allow the gorgeous details of the die set to truly shine!!

For my second card, I continued the vibrant color palette, this time creating a bright and graphic stenciled background using the Tiled Posy Stencil and some lovely aqua cardstock. I started by adhering my A2 panel of aqua cardstock to my sticky mat, then, using blending brushes, blended the different layers of the Tiled Posy Stencil with Pawsitively Saturated Inks in shades of Surf, Ocean, and Taffy. Harkening back to my elementary school art class days, I made sure to avoid mixing the tones of the blue background with the transparent pink Taffy dye ink by first blending a layer of white pigment ink with a blending brush dedicated to white pigment ink, then zapping it with my heat gun to ensure that it was completely dried, then blending the Taffy ink over the top. The opaque white pigment ink acts as a barrier between the pink and blue, keeping the pink a true pink rather than a deep lavender.

After I had created my vibrant background, I used some of the smaller accents in the Daisy Oval Frame to create the focal point for my sentiment. I die cut the small scalloped oval from some more black cardstock, then die cut the large center frame from the main daisy frame and adhered the black scalloped frame in the center. I also die cut a large standalone pink glitter daisy from Altenew Pink Brilliance glitter cardstock. I stamped a greeting from Best Year Yet using Obsidian Black pigment ink and clear embossed it to make it nice and crisp against the blue background, then die cut both sentiments with the coordinating dies. I arranged the different die cut components on the vellum oval, accenting the greeting with the glittery flower and some teal foliage, then adhered them with foam adhesive. I added small dots of liquid adhesive behind the solid die cuts to keep the vellum nice and clean, then added a smattering of Taffy Pawsitively Dazzling Gems for a bit of added sparkle!

Well, that’s all for my projects today. I can’t believe we are already almost to June! The year is definitely flying by. Thanks so much for stopping by today, and have a marvelous day!

Filed Under: simon says stamp Tagged With: best year yet, birthday card, daisy oval frame, ink blending, layered stencil, scripty happy birthday, tiled posy stencils

Primary Sidebar

  • Facebook
  • Instagram
  • Pinterest
  • YouTube

Favorite Shops

Secondary Sidebar

Subscribe

Enter your email address to subscribe to this blog and receive notifications of new posts by email.

Instagram
Something is wrong.
Instagram token error.
Follow
Load More

Archives

Tags

3D embossing folder alcohol markers better press birthday birthday card blog hop card kit christmas christmas card christmas tag colored pencil copic copic coloring Daniel Smith die cutting embossing folder embroidery felt giveaway holiday holiday card hot foil ink blending karin brushmarker pro layered stencil masculine my monthly hero new release no line coloring no line watercolor OLO marker olo markers original illustration pawsitively saturated rainbow shaker card slimline stamping stamptember stencil thank you thinking of you valentine's day video watercolor

Popular Posts

Simon Says Stamp Joy For You Blog Hop- Day 1!
Simon Says Stamp Joy For You Release-Now Available!
Frozen Fractals All Around with New Simon Says Stamp Joy For You Release!
Shaped Holiday Shaker Card with New Simon Says Stamp Jolly Season Card Kit of the Month!
Holiday Postage with New Simon Says Stamp!
Simon Says Stamp Glory to the Newborn King Holiday Kit-Part II!
Altenew Build A Flower: Fuchsia Blog Hop+Giveway!
Holiday Joy in Pink and Green with New Simon Says Stamp DieCember!
Pinkfresh Studio 5th Birthday!
Honey Bee Stamps September Release Blog Hop!

Disclosure

Some affiliate links are used in my posts. This means that, should you click on one of my links and purchase something from that company, I will receive a small portion of the sale at no extra cost to you. I use the money earned from these sales to help maintain my blog. I so appreciate you visiting and, if you do choose to use one of my affiliate links, thank you so much for your support!
Copyright © 2026 ·Brunch Pro Theme · Genesis Framework by StudioPress · WordPress · Log in
Loading Comments...