• Skip to main content
  • Skip to primary sidebar
  • Skip to secondary sidebar

Sixth Street Sundries

Emily Midgett

  • Home
  • About Me
  • Contact
  • OLO Marker Color Swatch Chart
  • Shop

fresh florals

VIDEO: Pinkfresh Studio Rainbow Ombré Trifold Birthday Card!

March 27, 2025

Hi friends! I am up on the Pinkfresh Studio YouTube channel today with a super happy and vibrant tri-fold birthday card that is so fun and celebratory… and so much fun to make! You can watch the video below or HERE on YouTube.

In case you can’t watch the video, I will give a brief summary of the techniques used to create this card below!


*I have gathered links to all of the products used at the bottom of the post for your convenience, using affiliate links. Thank you for shopping with my links! I truly appreciate your support for my work!*

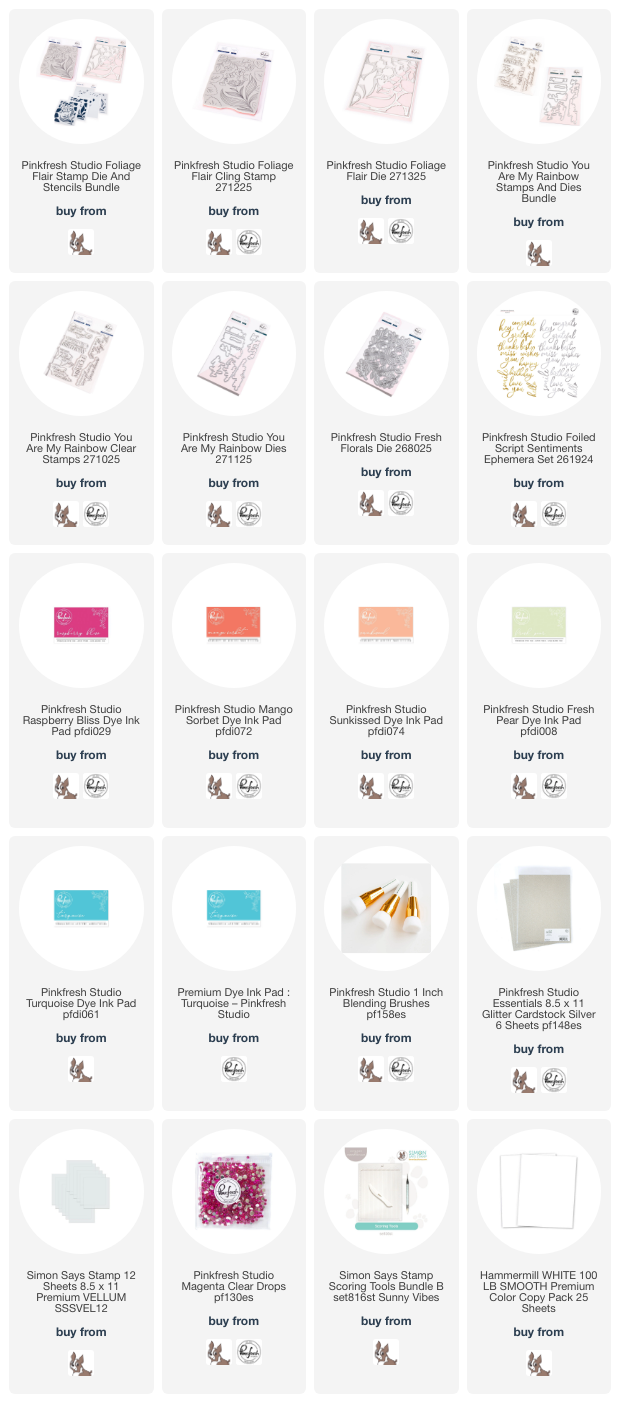
To begin, I heat embossed the new Foliage Flair stamp onto some white cardstock using clear embossing ink and powder before using blending brushes to blend Raspberry Bliss, Mango Sorbet, Sunkissed, Fresh Pear, and Turquoise inks, using the emboss-resist technique to create a vibrant card front, taking advantage of that super detailed stamped image to create a beautiful and vivid background. I also flipped a plain A2 card base 180 degrees so that the opening was on the left hand side and blended the same colors in a rainbow ombré down the front, masking the edge of the back side to keep the back nice and clean.

Once I had finished my blending, I used some super strong double sided tape to adhere the thin flap on the vellum on the left hand side of the blended card base, creating a trifold card! I used the Foliage Flair die to die cut the embossed image and backed it with some vellum that I had cut to 4.5″ x 5.5″ and scored 1/8″ from the long edge, then adhered the blended die cut to the vellum panel. The vellum slightly softens the blended rainbow background in the middle panel of the trifold card, but is transparent enough to create an almost tone-on-tone background!

After I had finished creating the trifold card base, I began embellishing the front of the card. I heat embossed the super appropriate “Wishing you a bright, beautiful birthday” sentiment from the new You Are My Rainbow stamp set with some silver sparkle embossing powder, then die cut it with its’ coordinating die. I paired the embossed sentiment with a silver foil “hello” from the new Foiled Script Sentiment Ephemera pack, adhering them to the card front with foam adhesive for added dimension. The neutral metallic colors pop beautifully on the vibrant card front!

To embellish my sentiment and add a touch more shimmer and sparkle to the card front, I used some leftover Fresh Florals die cuts, which I’d cut from Pinkfresh Studio’s Silver Glitter Cardstock, tucking them in amongst the sentiment and creating a visual triangle around my sentiment components. I added some Magenta Clear Drops to the centers of the flowers for one last pop of color!

Well, that’s all for my project today! I had so much fun experimenting with this super colorful trifold card and can’t wait to make another. Thanks so much for watching, and have a marvelous day!
Filed Under: pinkfresh studio Tagged With: birthday card, die cutting, foiled script sentiments ephemera, foliage flair, fresh florals, ink blending, rainbow, trifold, you are my rainbow

Pinkfresh Studio “Pure Bliss” Release Blog Hop

February 11, 2025

Hi friends! I am hopping along with my friends at Pinkfresh Studio to help introduce the new Pure Bliss collection for February 2025! You should have arrived here from Isha, and your next stop is Erica. You can also start at the beginning over on the Pinkfresh Studio Blog. We had about 5 days with absolutely stunning temperatures amidst the bitterly cold days, so I am channeling that springtime feeling with my projects today, adding in a bit of icy blue to cool things back down to the winter temps that came back with a vengeance. Let’s get started with the details on my projects!

*I have gathered links to all of the products used at the bottom of the post for your convenience, using affiliate links. Thank you for shopping with my links! I truly appreciate your support for my work!*

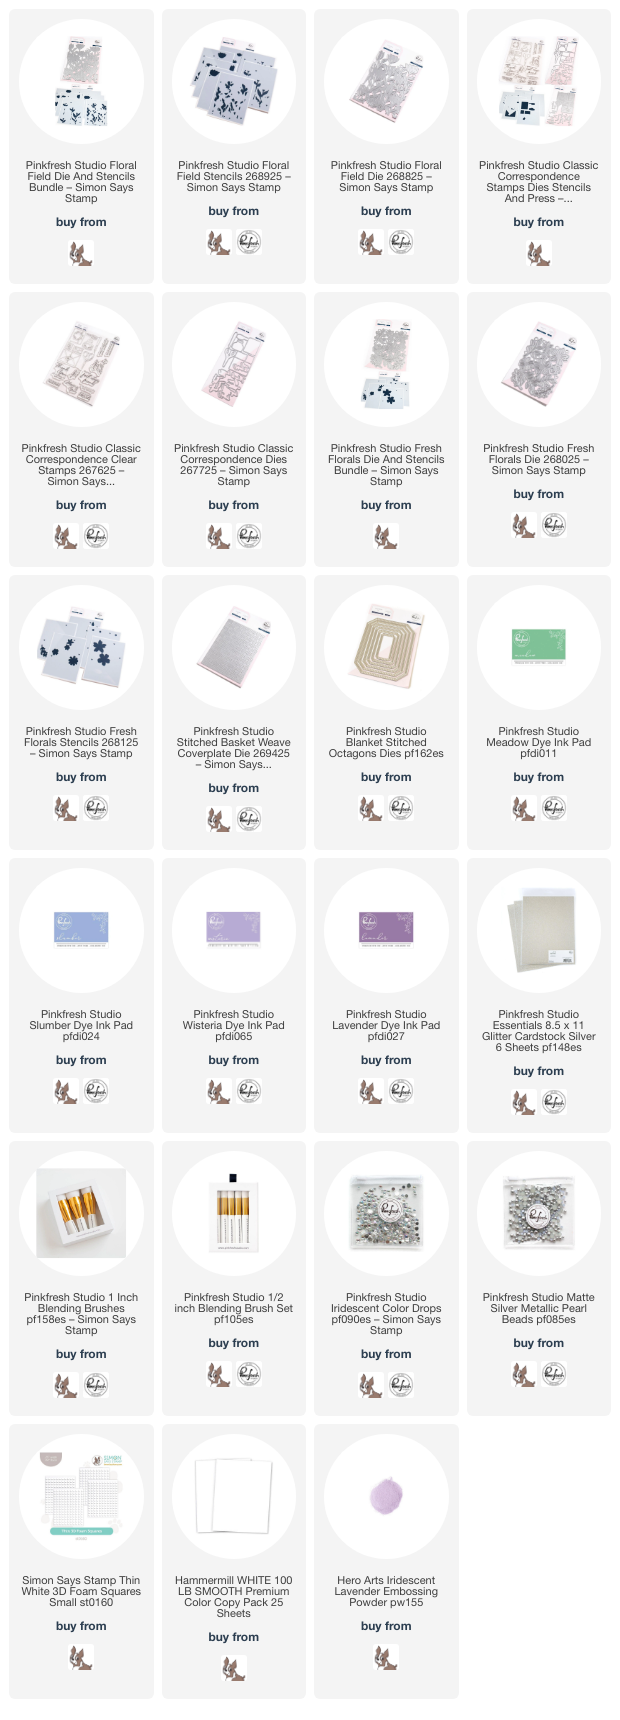
For both of my projects today, I chose to work with a cool palette featuring Meadow, Wisteria, Lavender, Slumber inks, pulling in the soft blues and purples of late winter with the cheery, vibrant fresh green of early spring. The images in the new Floral Field die and stencil set reminded me so much of a field of tulips!

To begin, I die cut a panel of plain white cardstock using the new the new Floral Field die, and I even contemplated leaving it plain, allowing the beautiful debossed details to enhance the beauty of the image. I decided to pair those gorgeous ink colors with the coordinating layering stencils, however, using Pinkfresh Studio’s exceptional blending brushes to add super soft blending. I kept the purple tulips simple, concentrating the color towards the bottom of hte bloom, and kept the color concentrated at the top of the blue blooms, fading gently down into white towards the base of the bloom. For the greenery, I kept things simple with one shade of ink, only increasing or decreasing the amount of pressure used to make the images more or less vibrant.

After I had finished blending the beautiful field of flowers, I used the large blending brushes to gently blend Lavender, Slumber, and Meadow inks on a panel of plain white cardstock, concentrating the green down towards the bottom to indicate “grass,” while softly blending the blue and purple together to create a serene sky backdrop. I popped up the floral die cut on the blended background with some foam adhesive, then added a die cut Blanket Stitched Octagons frame, cut from plain white cardstock. For the greeting, I used a sentiment from the Classic Correspondence stamp set, stamping the sentiment in Lavender, then again directly over the top with embossing ink, then adding Iridescent Lavender embossing powder, which adds a delightful iridescent shimmer to the sentiment, the unique texture of which helps the sentiment to stand out amongst the matte blended background. Finally, I added a smattering of Iridescent Bubble Drops for an additional bit of shine!

For my second project, I continued my cool, springy color palette into this card featuring the new Fresh Florals stencil + die set. The new standalone floral die sets from Pinkfresh Studio are so much fun to play with, because not only do they feature Pinkfresh’s unique one-pass die design allowing you to die cut many images at once, the coordinating stencils allow you to blend multiple colors for the different blooms to create tons of versatility within each product suite! I used the same Meadow, Wisteria, Lavender, and Slumber color palette to blend the flowers and greenery from the Fresh Florals stencil set onto a panel of white cardstock. I kept the colors very light, concentrating the darkest areas around the edges of the stenciled images and fading towards the center of each bloom. I used the 1/2″ blending brushes to add some touches of Slumber on the tips of the greenery, adding some fun color gradation on the foliage. I also die cut another set of the Fresh Florals images from some Pinkfresh Studio Silver Glitter cardstock to use for the flower centers and to add some sparkling foliage to my bouquet.

For the background, I used the new Stitched Basketweave die on a panel of coordinating lavender cardstock, trimming the long edges so that I could offset the panel on a piece of coordinating cornflower blue cardstock. The Stitched Basketweave die is a crafty staple design; the neutral, consistent pattern provides lovely texture behind your focal point without detracting from it, while also keeping the backdrop subtly interesting. I popped up the basketweave strip with some thin foam adhesive and added a vellum Nested Hexagon Blanket Stitch Die cut, around which I built my bouquet of stenciled and die cut flowers. For the greeting, I stamped a sentiment from the Classic Correspondence stamp set onto some light gray cardstock using white pigment ink, then added some more Iridescent Lavender embossing powder to add luminous shimmer and a touch of subtle purple color. I die cut the sentiment with its coordinating die and tucked it amongst the flowers. Finally, I added some touches of silver with the glittering foliage, flower centers, and some Matte Silver Pearls, finishing everything off with a delicate white silk bow.

Well, that’s all for my projects today! Now for some fun giveaway information:

Pinkfresh Studio will give away the full release on the Pinkfresh blog and YouTube channel. They also will give away TEN $50 gift cards along the hop. The winners will be selected from the comments.
All winners will be posted on February 19, 2025, on our GIVEAWAY PAGE. Winners must check that page and claim their prize within 2 weeks.

Here’s the full hop list in case you get lost:

You are invited to the Inlinkz link party!

Click here to enter

Thanks so much for stopping by today, and happy hopping!

Filed Under: pinkfresh studio Tagged With: blanket stitched octagons, classic correspondence, floral field, fresh florals, ink blending, layered stencil, stitched basket weave

Preppy Trio with The Greetery!

March 18, 2021

Hi, I’m Emily, and I have a slight obsession with colored cardstock and ink. In my opinion, few things have such an impact as your color choices. I love crisp, clean, bright white projects almost as much as I love intense, bold, vibrant color. I have a trio of projects today using products from The Greetery, cardstock from Hero Arts and Concord and 9th, and inks from Pinkfresh Studio… deep pinks, emerald green, turquoise, and lilac. Let’s get started with the details!

Today’s projects feature the Fresh Floral Background Stamp, Budding Beauties Summer, Pitcher-esque (which is on sale!), Fresh Florals, and word dies: Sentiment Starters, Slim Alphabet, Let’s Have A Word: Beautiful. I paired them with pretty inks from Pinkfresh Studio: Emerald City, Meadow, and Mint, Candy Violet, Soft Lilac, and Lavender, Raspberry Bliss, Bubble Gum, and Sparkling Rose, and Aquamarine, Mermaid Cove, and Tidal Pond.

My first card uses the Pitcher-esque stamps and dies, stamped with Aquamarine, Mermaid Cove, and Tidal Pond ink. I stamped the flowers from Budding Beauties Summer using a variety of pinks and purples, then die cut them using the coordinating dies.

I stamped the Fresh Floral Background Stamp on a panel of deep teal cardstock using Emerald City. (Side note-I absolutely love the combination of the deep teal cardstock with the green ink over the top. Such a unique combo that I’m definitely going to have to remember for the future!) I arranged the flowers and put them with the pitcher, adhering them to the patterned card front using foam adhesive. I added a bright white greeting cut from Sentiment Starters and Slim Alphabet and threw a few iridescent gems on for a touch of sparkle.

My second card features the same stamps and dies, but with a bright pink tone-on-tone color scheme. I stamped the Fresh Floral Background Stamp on some deep pink cardstock using Raspberry Bliss ink. I trimmed the edges down and mounted the patterned panel on a full size A2 panel of mint cardstock, so that the mint was just peeking out on the sides.

I arranged some more of the flowers from Budding Beauties Summer on the floral patterned card front and adhered them using foam tape. I stamped a greeting from Sentiment Suite: Thinking of You and die cut it with a flagged strip from the Sentiment Suite Basics dies. A few pink gems finished it off!

My final project features a deep green background. I stamped the Fresh Floral Background Stamp on a panel of green cardstock using Emerald City ink, then used a blending brush to blend some more Emerald City ink in the center. I love this technique, because it helps to create a spotlight area for the sentiment! I trimmed the green patterned panel down slightly and mounted it on another A2 panel of hot pink cardstock.

I stamped a few individual blooms from Fresh Florals and fussy cut them. I die cut a sentiment from Let’s Have A Word: Beautiful using white cardstock and adhered it in the center of the blended patterned panel using liquid adhesive, then arranged the fussy cut florals around it. I adhered the flowers to the card front with foam adhesive, then added some more gems for sparkle.

A trio of springy, preppy cards!! I don’t often get the time to just sit and play, so it was great fun to pull out these beautiful stamps and dies from The Greetery and gorgeous inks from Pinkfresh Studio. Thanks so much for stopping by today, and have a marvelous day!

Filed Under: The Greetery Tagged With: budding beauties summer, card set, fresh floral background, fresh florals, let's hav a word: beautiful, pitcher-esque, sentiment starters, slim alphabet, thinking of you

Primary Sidebar

  • Facebook
  • Instagram
  • Pinterest
  • YouTube

Favorite Shops

Secondary Sidebar

Subscribe

Enter your email address to subscribe to this blog and receive notifications of new posts by email.

Instagram
Something is wrong.
Instagram token error.
Follow
Load More

Archives

Tags

3D embossing folder alcohol markers better press birthday birthday card blog hop card kit christmas christmas card christmas tag colored pencil copic copic coloring Daniel Smith die cutting embossing folder embroidery felt giveaway holiday holiday card hot foil ink blending karin brushmarker pro layered stencil masculine my monthly hero new release no line coloring no line watercolor OLO marker olo markers original illustration pawsitively saturated rainbow shaker card slimline stamping stamptember stencil thank you thinking of you valentine's day video watercolor

Popular Posts

Simon Says Stamp Joy For You Blog Hop- Day 1!
Simon Says Stamp Joy For You Release-Now Available!
Frozen Fractals All Around with New Simon Says Stamp Joy For You Release!
Shaped Holiday Shaker Card with New Simon Says Stamp Jolly Season Card Kit of the Month!
Holiday Postage with New Simon Says Stamp!
Simon Says Stamp Glory to the Newborn King Holiday Kit-Part II!
Holiday Joy in Pink and Green with New Simon Says Stamp DieCember!
Pinkfresh Studio 5th Birthday!
Altenew Build A Flower: Fuchsia Blog Hop+Giveway!
July My Monthly Hero Blog Hop+Giveaway!

Disclosure

Some affiliate links are used in my posts. This means that, should you click on one of my links and purchase something from that company, I will receive a small portion of the sale at no extra cost to you. I use the money earned from these sales to help maintain my blog. I so appreciate you visiting and, if you do choose to use one of my affiliate links, thank you so much for your support!
Copyright © 2026 ·Brunch Pro Theme · Genesis Framework by StudioPress · WordPress · Log in
Loading Comments...