• Skip to main content
  • Skip to primary sidebar
  • Skip to secondary sidebar

Sixth Street Sundries

Emily Midgett

  • Home
  • About Me
  • Contact
  • OLO Marker Color Swatch Chart
  • Shop

harvest blooms

Miss You, Friend!

February 6, 2021

Hi there! I am up on the Honey Bee Stamps blog today with a card using Harvest Blooms, one of the sets that I illustrated for Honey Bee Stamps. One of the things I’ve most enjoyed since coming “back” is having an excuse to use stamps that have been a bit neglected. I hadn’t had a chance to color the image with Copic markers yet, so I thought I’d pull out some of my favorite combos and go to town!

I started by stamping the pretty 6×6 Harvest Blooms on some white cardstock using Copic-friendly ink. I used a pretty combination of pale lavender, coral, and pink to color the floral images. I trimmed the panel down to 3.25″x5.75″ to create a panel for a mini-slimline card. I quite like this size, especially for a busy background like the Harvest Blooms.

I cut down a 3.5″x6″ black panel of cardstock to create a mat for the floral panel. To be a bit economical with my black cardstock, I cut out the “friend” (from the Slimline Stitched die set) and “miss you” (using the Tailgate Alphabet) from the center of the black panel. It will be hidden behind the floral panel, so the die cut areas will be hidden. Sneaky sneaky!

I adhered the floral panel to the black card base to create a black mat around the edge, then added the die cut greeting to the card front with liquid adhesive. Finally I added a few Obsidian gems for some sparkle.

Well, that’s all for my project today! I love the sentiment, especially now… so many friends that I miss and can’t wait to see them when things get a bit more normal! Thanks so much for stopping by today, and have. marvelous day!

Filed Under: Honey Bee Stamps Tagged With: copic coloring, copics, harvest blooms, stitched slimline dies, tailgate alpha

Honey Bee Stamps- More Autumn Afternoon Florals!

September 24, 2020

Good morning! I have three more cards to share with you using my latest stamp sets from Honey Bee Stamps. I’m not going to lie; I am super proud of these sets. I’m so grateful to Melissa from Honey Bee Stamps for her support and giving me the chance to design stamp sets. I hope you’ll indulge me in sharing a few more projects!

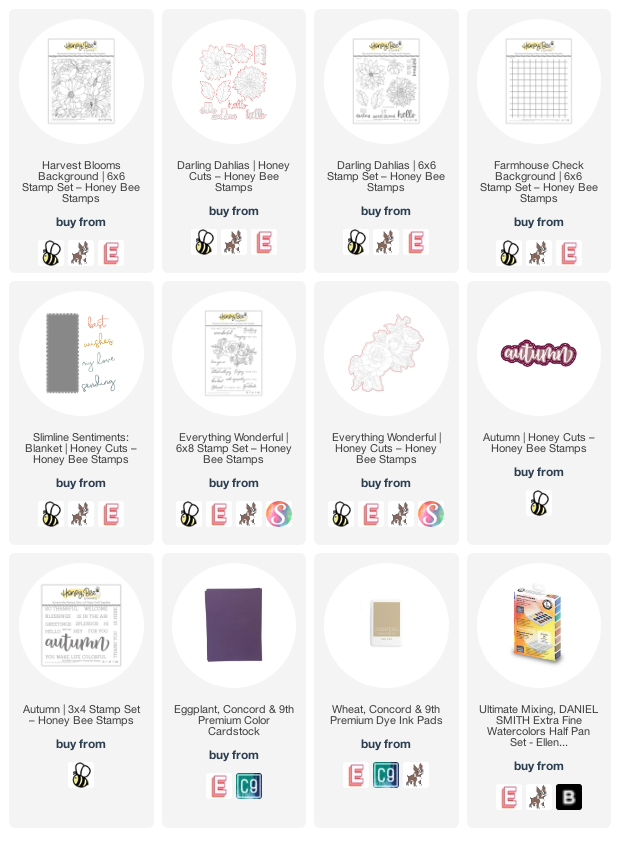
I shared this video yesterday showing me watercoloring the new Harvest Blooms background using Karin markers; today’s projects feature the same concept: watercolor the entire 6×6 stamped panel, then cut it into sections to create two cards from one panel! I used Daniel Smith watercolors to create a pretty plum, rose, lavender, and pinky-coral color combination for this card set, so let’s get started with the details!

For this first project, I trimmed a thin rectangular panel from the watercolored Harvest Blooms panel, then backed it with a slightly wider strip of metallic, dark gold cardstock. I then created a tone-on-tone textured panel using the Garden Lattice cover plate die and two pieces of deep plum cardstock. I mounted the floral/gold strip on the textured background, orienting everything to the right hand side of the card front.

Next, I die cut some concentric circles using some more plum cardstock and the Circle Thin Frames dies, adhering it over the watercolored strip using foam adhesive. I die cut a greeting using the Thinking of You Honey Cuts die set. The final touch was to add some sparkling gems.

For my second project, I used the remainder of the watercolored Harvest Blooms panel as the background, pairing it with the new Slimline Sentiments: Blanket dies to allow the background to really shine. I trimmed the watercolored panel down just a tad to add a plum mat. I also used my trimmer to create a very thin pink metallic frame.

I added the greeting from Slimline Sentiments: Blanket cut from some more deep plum cardstock, adhering it to the card front with Honey Bee’s Precision Glue and adding some crystal glaze to the top to add a little textural difference, which helps the sentiment stand out more. The final touch was some more sparkling jewels!

For my final project (for a few days, at least), I wanted to combine the new Darling Dahlias with the very first set that I illustrated: Everything Wonderful. The scale of these two sets works perfectly together, and the slimline card base provides a nicely sized canvas to fit all of these larger blooms!

I started by heat embossing several images from Darling Dahlias and Everything Wonderful onto some watercolor paper using gold embossing powder. I then used my Daniel Smith watercolors in a feminine autumnal palette of rose, deep orange, plum, and dark lavender.

After I’d finished watercoloring, I die cut the images using Darling Dahlias Honey Cuts and Everything Wonderful Honey Cuts. I also die cut the new Slimline Sentiments: Blanket from some white linen cardstock, then added some washi tape around the edges as a mask and stamped the new Farmhouse Check background using some tan ink.

I mounted the blanket die cut on a white linen slimline card base using foam adhesive, then mounted the floral spray on the card front. I created an extra long bouquet by cutting the Everything Wonderful floral spray in half and hiding the cut edges behind the large dahlia die cut. I added a greeting from the new Autumn Buzzword Die and Stamp set, finally finishing the entire project off with some more jewels!

Well, that’s all of my projects for the Honey Bee Stamps Autumn Afternoon release. I hope you’re loving these new sets as much as I do. Thank you all so much for the kind and supportive comments about my newest collaboration sets. It truly means the world to me to read your sweet words! Thanks so much for stopping by today, and have a marvelous day!

Filed Under: Honey Bee Stamps, watercolor Tagged With: Daniel Smith, darling dahlias, harvest blooms, slimline, watercolor

Honey Bee Stamps Autumn Afternoon Blog Hop-Day 2!

September 23, 2020

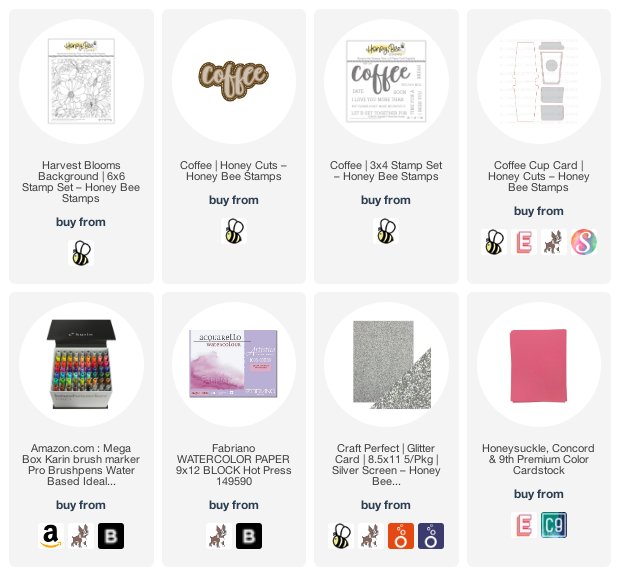
Hi there!! Today is day two of the Honey Bee Stamps Autumn Afternoon Blog Hop, and I’m super excited to be the final stop on the hop. You should have arrived here from Becky Roberts. You can also start back at the beginning at the Honey Bee Stamps blog. I actually was able to create my first video in six months just to celebrate! I used my new Harvest Blooms stamp set with Karin Brush Marker Pro markers.

You can also watch the video in HD here.

In the video, I created two different projects using the entirety of the watercolored 6×6 Harvest Blooms panel. I began by heat embossing the Harvest Blooms on a panel of Fabriano Artistico Hot Press watercolor paper using silver embossing powder, then used Karin Brush Marker Pro markers to watercolor the image.

I used the Coffee Cup Card Dies, die cutting the coffee sleeve from the floral watercolored panel. I also added a greeting from the new Coffee Buzzword Stamp and Die set, cut from silver glitter cardstock.

I adhered the die cuts to the sleeve, then slid the finished coffee cup sleeve over the top of the coral gift card holder.

I put the rest of the Harvest Blooms watercolored panel Harvest Blooms to use as the background for this A2 card front. I added some strips of coral cardstock along the edges of the watercolored panel, then mounted it in the center of a silver glitter A2 panel. The coral cardstock helps to break up the busy-ness of the watercolored panel and the super textured and glitzy silver glitter cardstock.

I adhered a white Coffee Cup Card Die to the left side of the card front, then layered the sentiment from Coffee Buzzword Stamp and Die set over the top using foam adhesive. The final touch was to add some gems for even more sparkle!

Well, that’s all for my projects today. To celebrate this release, Honey Bee Stamps is giving away a $25 gift certificate on each day of the hop. The more comments you leave on the hop, the more chances you have to win! Thanks so much for stopping by today, and happy hopping!

Filed Under: Honey Bee Stamps Tagged With: coffee, gift card, harvest blooms, karin markers, watercolor

Honey Bee Stamps Autumn Afternoon Florals!

September 21, 2020

Hi there! I am so, so, SO excited to introduce my latest stamp sets for the Honey Bee Stamps Autumn Afternoon release! I have three sets coming out with this release: Darling Dahlias, Sweet Sunflowers, and Harvest Blooms! If I’m being honest, when I started stamping ten years ago, I never in a million years would have thought that I’d design stamps. I am incredibly proud of these designs, so I hope you love them as much as I do! I have three projects to share with you today, so let’s get started.

My first two projects utilize the new Darling Dahlias, Sweet Sunflowers, and Farmhouse Check stamp sets. When using a large 6×6 background stamp, I like to make use of the entire piece by creating two projects. For the Darling Dahlias project, I began by stamping the Farmhouse Check on a panel of white cardstock using black ink. I trimmed it down to an A2 card front, then layered some green and black cardstock at an angle across the center of the card front.

Next, I stamped the Darling Dahlias images on some more white cardstock using Copic-friendly black ink. I colored them using Copic markers, then die cut them using the coordinating Honey Cuts. I added a greeting using some white embossing powder and a glittering “hello” die cut. I added a few Unicorn gems for some more sparkle!

My next project utilizes the leftover Farmhouse Check stamped panel and the Sweet Sunflowers stamp set. I stamped several images from the Sweet Sunflowers in some more Copic-friendly black ink, then colored the images using some pastel yellow Copic markers and emerald green for the foliage. I die cut them using the coordinating Honey Cuts.

I added a black panel to the checked panel, then layered the die cut sunflowers in a pretty swag using foam adhesive. I heat embossed a greeting from Sweet Sunflowers on black cardstock and die cut it with the coordinating Honey Cuts. I added some more gems for some sparkle!

For my last project, I have a super graphic project using my new Harvest Blooms stamp set. This stamp set is super detailed, so I wanted to focus on that by leaving the background black and white and adding some very pale pastel to the background. I stamped Harvest Blooms using Copic-friendly black ink, then colored the background with some mint Copic marker to highlight the detail of the flowers.

Next, I die cut a hexagon frame using the Hexagon Thin Frames dies from some emerald green cardstock. I trimmed the patterned panel down slightly and matted it with a piece of A2 black cardstock.

Finally, I added a greeting from the Slimline Sentiments: Blanket Honey Cuts. I die cut the Best Wishes from black cardstock three times, then adhered them together to create a dimensional die cut sentiment. Super simple and graphic with that clean color scheme!

Well, that’s all for these projects. I have several more projects to share with you over the next few days, so be sure to check back! The new Autumn Afternoon release is now live, and there are SO MANY cute products. I hope you go take a look!! Thanks so much for stopping by, and happy shopping!

Filed Under: Honey Bee Stamps Tagged With: copic, copic coloring, darling dahlias, harvest blooms, sweet sunflowers

Primary Sidebar

  • Facebook
  • Instagram
  • Pinterest
  • YouTube

Favorite Shops

Secondary Sidebar

Subscribe

Enter your email address to subscribe to this blog and receive notifications of new posts by email.

Instagram
Something is wrong.
Instagram token error.
Follow
Load More

Archives

Tags

3D embossing folder alcohol markers better press birthday birthday card blog hop card kit christmas christmas card christmas tag colored pencil copic copic coloring Daniel Smith die cutting embossing folder embroidery felt giveaway holiday holiday card hot foil ink blending karin brushmarker pro layered stencil masculine my monthly hero new release no line coloring no line watercolor OLO marker olo markers original illustration pawsitively saturated rainbow shaker card slimline stamping stamptember stencil thank you thinking of you valentine's day video watercolor

Popular Posts

Simon Says Stamp October 2026 Card Kit of the Month: Homespun Gratitude!
February 2018 My Monthly Hero Blog Hop!
Altenew Craft A Flower: Poppy Blog Hop+Giveaway!
Felted Gourd Wall Hanging with Simon Says Stamp!
Sunflower Home Decor with Simon Says Stamp!
Craft Your Life Project Kit: Feathered Lilies Blog Hop+Giveaway!
Simon Says Stamp October 2025 Card Kit of the Month!
Altenew Standalone Die Blog Hop+Giveaway!
The Ton Anniversary Release- Day 2
Altenew Build A Flower Japanese Mum Blog Hop!

Disclosure

Some affiliate links are used in my posts. This means that, should you click on one of my links and purchase something from that company, I will receive a small portion of the sale at no extra cost to you. I use the money earned from these sales to help maintain my blog. I so appreciate you visiting and, if you do choose to use one of my affiliate links, thank you so much for your support!
Copyright © 2026 ·Brunch Pro Theme · Genesis Framework by StudioPress · WordPress · Log in
Loading Comments...