• Skip to main content
  • Skip to primary sidebar
  • Skip to secondary sidebar

Sixth Street Sundries

Emily Midgett

  • Home
  • About Me
  • Contact
  • OLO Marker Color Swatch Chart
  • Shop

altenew

Altenew September Stamp and Die Release Blog Hop+Giveaway!

September 5, 2019

Hi there! I’m super excited to be taking part in Altenew’s September Stamp and Die Release Blog Hop! This month, we have a huge variety of stamps and dies to share with you for the September release, including some floral, some holiday, and some autumn… a little something for everyone! You should have arrived here from Christine Pennington‘s blog, and your next stop is Erum Tasneem‘s blog. I have four projects to share with you today, as well as some giveaway information, so be sure to read all the way to the end!

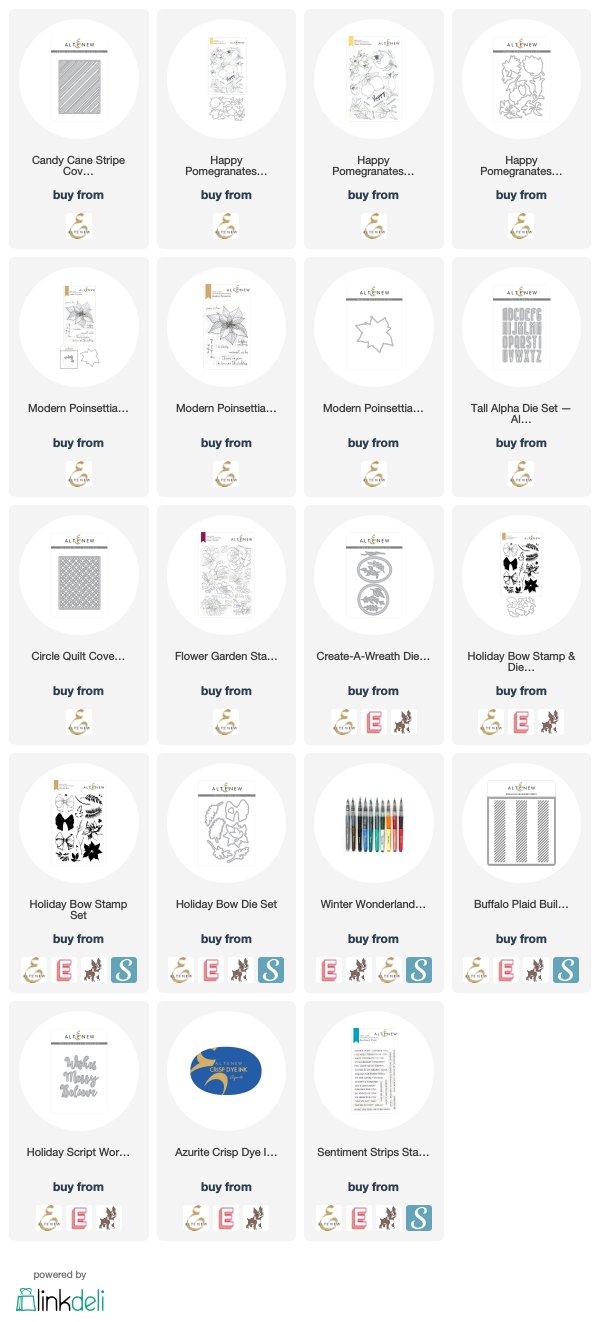
For my first project today, I wanted to use the fabulous new Candy Cane Stripe Cover Die. I love cover plate dies; they create such a huge impact with just a swift pass in your die cutting machine. I took it one step further and added an inlaid, die cut oval frame in the center of the cover plate die cut.

To create the inlaid die cut frame, I first die cut a panel of deep red card stock using the Candy Cane Stripe Cover Die. I then used the oval frame from the Create A Wreath die set to die cut the center from the striped red die cut. I also die cut another red oval frame die from a solid panel of cardstock. I adhered the striped die cut piece to a panel of white cardstock using liquid adhesive, then inlaid the oval die cut frame in the center.

I used the beautiful Holiday Bow stamps and dies with a variety of red and green inks to create a pretty holiday swag, which I layered above a sentiment from the new Modern Poinsettia stamp set. A few jewels finished it off!

For my second project, I used the new Happy Pomegranates stamps and dies to create a Thanksgiving card! I began by gold embossing several of the images on some watercolor cardstock, then used the Winter Wonderland Watercolor Brush markers to add lots of layers of deep, saturated color to the images.

For the card base, I used the Buffalo Plaid Builder stencil to add a bit of subtle, tone-on-tone texture to a brick red card base. I layered the watercolored die cuts on the stenciled card base using foam tape, then added a greeting, heat embossed on the same shade of brick red card stock, as well as a few gold glitter gems.

My next project uses some non-traditional holiday colors, but who says that Christmas cards can only come in reds and greens? I did some no-line coloring on the new Modern Poinsettia stamp with my Copic markers in shades of deep, deep fuchsia , accenting the bright pop of pink with some silver foil and navy glitter foliage cut from the Create A Wreath die set.

I layered the large flower and foliage images on a white Circle Quilt Cover Die cut that I had adhered to a white A2 card base. Using white cover plate die cuts over a white card base is one of my most favorite ways to add subtle texture and dimension to a background without overwhelming the main focal point. For the greeting, I used the new Tall Alpha die set and the older Holiday Script Words die set. A few sparkling gems finished it off!

For my final project, I used the new Flower Garden stamp set to create a pretty watercolored floral bouquet. I began by embossing several flowers and foliage using silver pearl embossing powder onto some watercolor cardstock. I then used my Daniel Smith watercolors to add some pretty cool pinks, blues, and aquas to the flowers.

After I’d finished watercoloring all of the flowers and foliage, I blended some Azurite ink around the edge of a panel of pale blue cardstock. I then spritzed some water into my hand and dribbled drops of water on the blended panel, tapping the water droplets with a paper towel to lift some of the color up. I arranged the flowers in a pretty bouquet and adhered them to the blended panel using foam adhesive. I added a sentiment from Sentiment Strips stamped in more Azurite ink. A few gems added a touch of sparkle!

Well, that’s all for my projects today! Now, for some fun giveaway information!

To celebrate this release, Altenew is giving away a $50 gift certificate to 6 lucky winners! Please leave a comment on the Altenew Card Blog and/or Altenew Scrapbook Blog by 9/10/2019 for a chance to win.

We’ll also draw a winner to receive a $20 gift certificate from the comments left on each designer’s blog on the blog hop list below. All winners will be announced on the Altenew blogs on 9/13/2019.

Also, Altenew is having a fun promotion: Limited Time Offer! Get a FREE mini inspiration guide with every order from the September 2019 Stamp/Die Release collection! Free gift will be added to cart automatically. One gift per order. While supplies last! Shop the latest release here.

Your next stop on the hop is Erum Tasneem‘s blog. Thanks so much for stopping by today, and happy hopping!
Filed Under: altenew, holiday card, watercolor Tagged With: altenew, altenew watercolor markers, buffalo plaid, candy cane striped cover plate, circle quilt cover die, create a wreath, happy pomegranates, holiday bow, holiday script words, modern poinsettia, tall alpha

Altenew Giveaway Winner!

December 19, 2018

I just wanted to pop in quickly in between batches of cookies going in and out of the oven to announce the winner of the $30 gift certificate from the December 2018 Altenew Stamp and Die release!

The winner is…..

Jan Castle! 

Jan, please email winners@altenew.com with the subject “winner from Emily Midgett’s blog” as your subject line. 

Congratulations to Jan, and thank you to everyone who visited my blog and left such kind comments! I read and appreciate every single one! 

Filed Under: altenew Tagged With: altenew, giveaway, winner

Pretty Purple Posies 

August 3, 2017

Good morning! Today, I have a pair of cards for you, along with a review of some new brushes that I just purchased. If you follow me on Instagram, you may remember that I mentioned purchasing some new synthetic brushes. My favorite brush line, the Black Velvet by Silver Brush Company, is made with both synthetic and squirrel hair, and while I absolutely adore the brushes themselves and the results they produce, it’s never really sat well with me that squirrels had to lose their hair for the purpose of making of my brush. 🙁 So, last week, I purchased a few of the Silverwhite Brushes from Dick Blick to test out, hoping they would be a synthetic alternative to my beloved brushes since they are made by the same company. Today, I’d like to share some initial thoughts on the brushes, as well as my final cards that I created with the watercolored pieces.

For these cards, I used what I think is one of my favorite florals from Altenew, possibly one of my favorite florals ever…. Beautiful Day. The graceful curves of the main floral image…. the perfect little sprigs of foliage…. the bunches of “filler” flowers that work so nicely to fill in the gaps… beautiful. If you only own one floral set (which would be a travesty, but to each his own), I would recommend this one, because it has so many pieces to it. Plus, you can choose to either color or multi-step stamp the main flower. Isn’t that fabulous?

Anyway, on to the cards. I stamped several of the berries, foliage, and the main flower from Beautiful Day onto some Arches Cold Press watercolor paper using Versamark ink, then heat embossed them with white embossing powder. I watercolored them using my new Silverwhite Round #4 synthetic paintbrush and my Daniel Smith watercolors, including Rose of Ultramarine for the main flower, adding in a touch of Shadow Violet to create some depth and shadows here and there. I combined Carbazole Violet with some Moonglow to create my berries, and used plain Carbazole Violet for the other pretty floral sprigs.

I die cut all of the watercolored pieces with the coordinating dies, then separated them into two groups for two separate cards. For the first card, I used just one of the blooms and some of the foliage, die cut the Pretty Frame die from Papertrey Ink from some linen card stock, and stamped this beautiful sentiment from Ellen Hutson’s Amazing Women stamp set onto some more of the same linen card stock.

For the second card, I used the same watercolored flowers, but arranged them in a large bouquet on my card front, then used the Press ‘n Seal method to pick them up and add dimensional adhesive to the back. I added only a simple die cut “congratulations” (from Papertrey Ink’s Big Basics line), which I also covered in Glossy Accents to add a bit of texture.

A simple layout, but I didn’t want to take away from those pretty blooms.

As for my initial thoughts on the synthetic Silverwhite watercolor brushes. On the whole, I found them to be very similar to the Black Velvet. Some of the things that I really liked: they come to a very fine point, so detail work is fairly simple; they seem to be very sturdy and well made; their price point is considerably lower than the Black Velvet; and (probably the most obvious pro in this list from my perspective) they’re animal friendly. There were a few significant differences between the Black Velvet and the Silverwhite Brushes. First, the synthetic bristles are a bit stiffer than the Black Velvet, which I found made the paper pill more easily when using Hot Press paper. The textured paper that I used today, however, I found to be quite forgiving and very workable with these brushes. The stiffness of the brush required some adjustments in the way I moved the bristles on the paper, as well, because I was used to the very flexible nature of the Black Velvet line, but these adjustments were quite easily managed overall. Because the bristles are white, they do stain quite easily, which may not be a cause for concern to some, but it sometimes gives me pause when I’m switching colors to wonder whether I’ve truly gotten the previous color cleaned off.

The biggest change was the amount of water they hold. I have found that, with my Black Velvet brushes, it takes only a simple dab on my wet absorber to get the excess water off of my brush, making it the perfect level of dampness to pull color out. With the Silverwhites, however, I have to dab two or three times on my wet Absorber to remove a sufficient amount of water from my brush. If I did not initially remove the water, it would release as I was working the color, which in turn created unwanted blooms that had to be siphoned off. Though it takes more time to dab the excess water from the brush on the Absorber, I found that siphoning the unwanted water/color from the paper to be more of a challenge.

On the whole, I found these brushes to be quite easy to use and was very pleased with the results that I was able to achieve. There is definitely a learning curve, but that’s to be expected with anything new, right? My advice is to play until you’re comfortable. Don’t immediately start out with them expecting to paint a masterpiece, but give yourself a little leeway and time to play with them to learn their quirks.

Filed Under: altenew, Papertrey Ink, watercolor Tagged With: altenew, black velvet, Daniel Smith, die cutting, ellen hutson, florals, product review, silverwhite, stamping, watercolor

Pink and blue…

May 19, 2017

Good morning! A quick card today… I had some pretty watercolored die cuts hanging around from the last Daily Marker 30 Day challenge from March, and I decided to (ahem, finally) create a card with them.

I started by die cutting and heat embossing the pretty blooms and foliage from Altenew’s Beautiful Day stamp and die set using silver embossing powder. Next, I used my Zig markers (Light Blue, Sugared Almond Pink, and Persian Green) and damp paintbrush to color the images and add shading. I arranged them in a pretty swag and used Press ‘n Seal to pick it up and add adhesive to the back.

Before I adhered everything down, I used my Clarity Stencil Brushes and some pale blue ink to add a bit of light shading around the edges of my pale blue card front. After that, I placed my floral swag on the card front, then added a dimensional silver glitter die cut Thinking of You from Papertrey Ink’s Big Basics line. The final touch was a few sequins from my stash to add a bit of shimmer and sparkle.

Well, that’s all for me today! I hope you enjoyed my project. I love working on bits and bobs of projects. Whenever I’m feeling down, both creatively and in real life, I find myself reaching for my watercolors and some pretty flowers to paint. That usually does the trick for my blues, and then I have pretty watercolored flowers just waiting to be made into a quick project!

Have a marvelous day, friends!

Filed Under: Uncategorized Tagged With: altenew, watercolor, zig clean color

A bittersweet day. 

May 11, 2017

Good morning! Today is a bittersweet day for me and my little family, one that we’ve been simultaneously longing for and dreading. We’ve had our house on the market since last July, and after a long and tumultuous road, today the new owners take possession. This little house has meant so much to my husband and I. We bought it in 2008 and completely remodeled the entire thing, from the stud walls out, so every cabinet, every light fixture, every faucet holds sentimental meaning, because with each new addition, it meant we were one step closer to it being finished. It truly was our first home, in so many senses. We got our first (and only) positive pregnancy test in that house after longing for a baby for years. We brought our babies home from the hospital to that house. We watched them do all of their major “firsts” in that home. Seeing them in their empty room was a little heartbreaking. But, the silver lining in all of this is that the couple who bought the house seem to truly love it and are so excited to live there. I wanted to do something special for them, so I created a card to leave with a little message inside.

I’ve been waiting to use these stamps and dies from Lil Inker since last Christmas. I am superstitious enough, especially after the tumultuous time we had selling the house, that I didn’t want to jinx it by making the card too early. I started by die cutting and stamping all of the floral bits from the Warm Welcome set from Lil Inker. I used the beautiful Rose Petal inks from Altenew to stamp the pretty blooms, while the foliage was stamped using Altenew’s Mountain Mist and Lagoon inks.

I die cut the wreath from some smokey gray card stock that I had on hand, then die cut the coordinating “Welcome” die from Lil Inker twice, once using white card stock and once using some black glittery paper from my stash. For the blue background, I die cut one of the stitched rectangles from The Ton’s Double Stitched Rectangle dies from some pool colored card stock. I then used one of the floral centers to stamp little random white dots all over the blue panel, just to give it some interest. I adhered it to the white card base, then adhered all of my die cut pieces using a combination of liquid and dimensional adhesive to give plenty of dimension.

We took the card, along with some homemade banana bread and a mason jar of pretty pink flowers, and left them on the counter of their new home last night. I truly hope they are as happy there as we were. I know that we are moving on to bigger and better, plus we are a lot closer to hubby’s job, so he can be home with us more, but it’s still sad to see the rooms so empty, with no toys littered everywhere and no kids running around.

My apologies for the semi-maudlin post today…. I’m in an odd mood haha. I hope you have a marvelous day, friends! Thanks for sticking with me for this long! 🙂

Filed Under: Lil Inker Tagged With: altenew, lil inker, the ton

Primary Sidebar

  • Facebook
  • Instagram
  • Pinterest
  • YouTube

Favorite Shops

Secondary Sidebar

Subscribe

Enter your email address to subscribe to this blog and receive notifications of new posts by email.

Instagram
Something is wrong.
Instagram token error.
Follow
Load More

Archives

Tags

3D embossing folder alcohol markers better press birthday birthday card blog hop card kit christmas christmas card christmas tag colored pencil copic copic coloring Daniel Smith die cutting embossing folder embroidery felt giveaway holiday holiday card hot foil ink blending karin brushmarker pro layered stencil masculine my monthly hero new release no line coloring no line watercolor OLO marker olo markers original illustration pawsitively saturated rainbow shaker card slimline stamping stamptember stencil thank you thinking of you valentine's day video watercolor

Popular Posts

Simon Says Stamp Sending Cheer Blog Hop- Day 2 + Freebie + Giveaway!
Altenew October 2026 Release Blog Hop + Giveaway!
Rustic Monochromatic Stars for Christmas with Rainbow Splash!
March 2020 Essentials By Ellen Blog Hop+Giveaway!
December 2018 My Monthly Hero Blog Hop + Giveaway!
The Ton Stamps Summer Release: Day 1
Waffleflower July Release Blog Hop!
Hero Arts Partners Blog Hop: Lawn Fawn!
Simon Says Stamp STAMPtember Tim Holtz Collaboration: Festive Holidays!
Simon Says Stamp August 2026 Card Kit of the Month: Made to Flourish!

Disclosure

Some affiliate links are used in my posts. This means that, should you click on one of my links and purchase something from that company, I will receive a small portion of the sale at no extra cost to you. I use the money earned from these sales to help maintain my blog. I so appreciate you visiting and, if you do choose to use one of my affiliate links, thank you so much for your support!
Copyright © 2026 ·Brunch Pro Theme · Genesis Framework by StudioPress · WordPress · Log in
Loading Comments...