If you’re looking for The Ton’s Summer Release, Day 1 post, please click here.

Good morning, again! I’m back with my second post for today! Today marks the beginning of a new challenge for A Blog Named Hero. This month, we are teaming up with Chibitronics, those wonderful purveyors of lights for your crafty projects! Our theme for June is “interactive.” For my card today, I chose to use these fabulous little lights to create an interactive night sky scene with some great Hero Arts products. Let’s get started on the details of how I created this card!
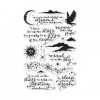
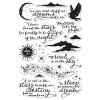
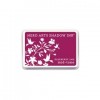
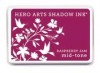
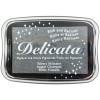
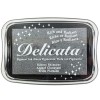
I started by creating my night sky. I used an A2 sized panel of white card stock, then used my blending sponges to blend Hero Arts’s True Navy, Grape Juice, and Raspberry Jam down the front to create a beautiful summer night sky. Next, I heat embossed my sentiment (from Hero Arts’s Dreams Are Made) along with the pretty star clusters using silver embossing powder. Next, I added some more stars from the same stamp set, but for a more subtle look, I stamped them first in silver Delicata ink, then brushed some Perfect Pearls over the top to add a bit more shimmer. I punched out three holes, then backed them with vellum to create a pretty glow. The last step was to add a die cut bridge using some pretty glossy black card stock. After the card front was finished, I punched some holes in the front so that I could begin my light construction on the card base using the Chibitronics starter kit.

I’m not going to lie, I was a tad intimidated by these fantastic little lights. My husband is an electrician, and when he talks about specifics from his job, my eyes start to kinda glaze over in boredom, because it’s so far outside of my realm of expertise that I have utterly NO clue what he’s talking about. (Love you, mean it, buddy!) I asked him if he would mind being on standby in case my complete right-brain-ness took over and I was unable to complete the circuits for my project. However!!! I am pleased to report that after watching a few videos on YouTube (namely this one from fellow teammate Jessica and this one from the ever helpful Jennifer McGuire), I was able to create my project without his help! Using my holes as a guide, I created a template on my card base, complete with a map of where to put my circuits and which direction to place the positive and negative stickers, then added the copper tape and battery (I found the battery “house” tip from Jennifer McGuire’s video extremely helpful!). Hooray!!!

I will say, that in Jennifer McGuire’s video, she recommends using 3 layers of foam tape as the “walls” for her battery house so that you have to push down on the battery to complete the circuit, thus creating the “interactive” element, but my tape must be slightly thinner than hers, as my lights stay on by themselves if the stars are aligned right and I don’t breathe directly on it haha. Next time I will use four layers of foam tape. 🙂 Hindsight is 20/20.

Here is the finished product with the lights off. Amazing how bright those tiny little lights are!! Love it.
Now, it’s your turn! Create an interactive card using your Hero Arts products, then be sure to link it up to our blog post to be entered to win a prize from our fabulous sponsor, Chibitronics!





Good luck!! Thanks for stopping by!
