• Skip to main content
  • Skip to primary sidebar
  • Skip to secondary sidebar

Sixth Street Sundries

Emily Midgett

  • Home
  • About Me
  • Contact
  • OLO Marker Color Swatch Chart
  • Shop

Hero Arts

Meet the Maker-Hero Arts at Ellen Hutson!

June 22, 2019

Hi there! The folks at Ellen Hutson and Hero Arts have a fun blog hop for you today, featuring two of my favorite companies!! You should have arrived here from Ilina Crouse’s blog, and your next stop is Libby Hickson! Aaron, the owner of Hero Arts, was featured yesterday on the Ellen Hutson blog as part of their Meet the Maker series, and to celebrate, all in-stock Hero Arts products are on sale 25% off through the end of the weekend! I am honored and lucky enough to work for both Hero Arts and Ellen Hutson, so combining the two was a no-brainer. I did a little ink blending, a heat embossing, and a lot of die cutting for today’s project, so let’s get started with the details! Be sure to read all the way to the end to find out the details of the giveaway!

I began by blending Rose Madder, Orchid, Indigo, and Navy inks (all dye inks from Hero Arts) on a panel of A2 card stock using blending brushes to get a nice smooth blend. I die cut the starry background using the Ellen Hutson Starry Night die and backed it with some glittery silver card stock to create twinkling stars.

Next, I did some die cutting using Pitch Black card stock from Hero Arts and the Tree Arch and European Plaza dies. I layered them over the top of my blended night sky using both foam and liquid adhesives to create lots of dimension and different depths.

Finally, I added a sentiment from All My Love on a small rectangle of more black card stock using silver embossing powder. I love the drama of the black card stock die cuts against the vibrant night sky! The stars just poking out from behind the trees are the perfect added touch, I think!

Now, for some fun giveaway information:

You can win one of three $25 gift certificates to the Ellen Hutson shop! Winners will be drawn from commenters along the blog hop so make sure to comment at each stop before Friday, June 28th at 11:59pm PST. The more comments you leave, the more chances you have to win! Winners will be notified by email. Your next stop on the hop is Libby Hickson!

Thanks so much for stopping by today, and have a marvelous day!

Filed Under: Ellen Hutson, Hero Arts Tagged With: giveaway, Hero Arts, ink blending, meet the maker

Man Card Monday: May Edition!

May 28, 2018

Good morning! Happy Memorial Day! It’s the last Monday of May (ahem, how did that happen!?), so it’s time for Man Card Monday! Today, I’m using some new products from Hero Arts (you might have seen this project if you’ve peeked at the new Hero Arts catalog. 😉 ) to create a handsome cowboy sunset scene.

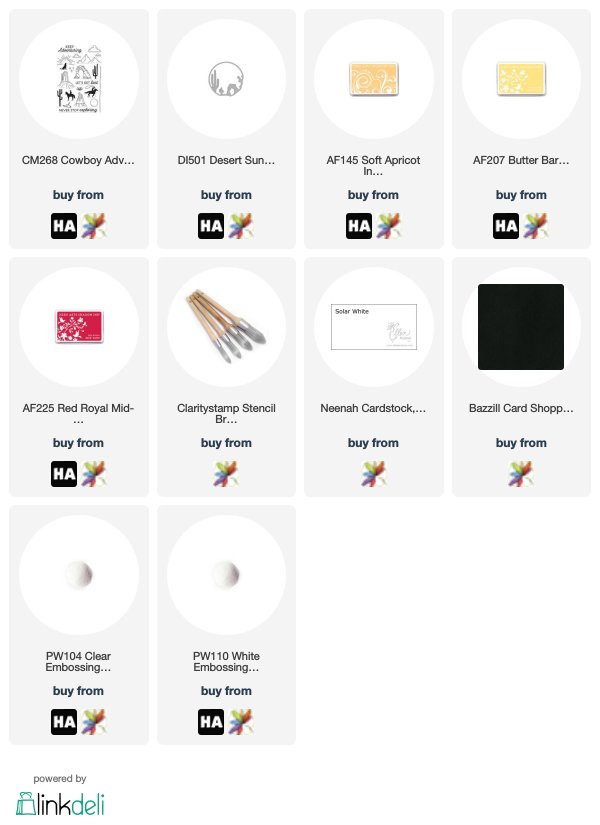
I started by die cutting the new Desert Sunset die from some plain black A2 sized card stock. It creates a lovely silhouette, so I had to back it with a beautifully blended sunset. I created the sunset by blending Red Royal, Soft Apricot, and Butter Bar inks. I added a sentiment in white embossing and a cowboy silhouette both using clear embossing powder from Hero Arts’ Cowboy Adventure.

Well, that’s all for me today! I hope you have a wonderful holiday. Thanks for stopping by!


Filed Under: Hero Arts, Man Card Monday Tagged With: cowboy, Hero Arts, ink blending, man card monday, masculine, sunset

A Blog Named Hero and Chibitronics!

June 5, 2017

 If you’re looking for The Ton’s Summer Release, Day 1 post, please click here. 

 Good morning, again! I’m back with my second post for today! Today marks the beginning of a new challenge for A Blog Named Hero. This month, we are teaming up with Chibitronics, those wonderful purveyors of lights for your crafty projects! Our theme for June is “interactive.” For my card today, I chose to use these fabulous little lights to create an interactive night sky scene with some great Hero Arts products. Let’s get started on the details of how I created this card!

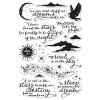
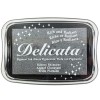
I started by creating my night sky. I used an A2 sized panel of white card stock, then used my blending sponges to blend Hero Arts’s True Navy, Grape Juice, and Raspberry Jam down the front to create a beautiful summer night sky. Next, I heat embossed my sentiment (from Hero Arts’s Dreams Are Made) along with the pretty star clusters using silver embossing powder. Next, I added some more stars from the same stamp set, but for a more subtle look, I stamped them first in silver Delicata ink, then brushed some Perfect Pearls over the top to add a bit more shimmer. I punched out three holes, then backed them with vellum to create a pretty glow. The last step was to add a die cut bridge using some pretty glossy black card stock. After the card front was finished, I punched some holes in the front so that I could begin my light construction on the card base using the Chibitronics starter kit.

I’m not going to lie, I was a tad intimidated by these fantastic little lights. My husband is an electrician, and when he talks about specifics from his job, my eyes start to kinda glaze over in boredom, because it’s so far outside of my realm of expertise that I have utterly NO clue what he’s talking about. (Love you, mean it, buddy!) I asked him if he would mind being on standby in case my complete right-brain-ness took over and I was unable to complete the circuits for my project. However!!! I am pleased to report that after watching a few videos on YouTube (namely this one from fellow teammate Jessica and this one from the ever helpful Jennifer McGuire), I was able to create my project without his help! Using my holes as a guide, I created a template on my card base, complete with a map of where to put my circuits and which direction to place the positive and negative stickers, then added the copper tape and battery (I found the battery “house” tip from Jennifer McGuire’s video extremely helpful!). Hooray!!!

I will say, that in Jennifer McGuire’s video, she recommends using 3 layers of foam tape as the “walls” for her battery house so that you have to push down on the battery to complete the circuit, thus creating the “interactive” element, but my tape must be slightly thinner than hers, as my lights stay on by themselves if the stars are aligned right and I don’t breathe directly on it haha. Next time I will use four layers of foam tape. 🙂 Hindsight is 20/20.

Here is the finished product with the lights off. Amazing how bright those tiny little lights are!! Love it.

Now, it’s your turn! Create an interactive card using your Hero Arts products, then be sure to link it up to our blog post to be entered to win a prize from our fabulous sponsor, Chibitronics!

InLinkz.com


Good luck!! Thanks for stopping by!

Filed Under: A Blog Named Hero, Hero Arts Tagged With: chibitronics, Hero Arts, ink blending, interactive

Merci 

May 16, 2017

Good morning! I’m back today with this project that would make any Francophile proud. I have been obsessed with my Daniel Smith watercolors lately… I’m loving all of the color options, and the pigment moves SO beautifully on the watercolor paper. I’m in love. Happy sigh…

Anyway, I purchased the Eiffel Tower add on with April’s My Monthly Hero… What is more Parisian than the Eiffel Tower? A beautiful stack of macarons fit to grace the window of a French patisserie. I’ve been watching The Great British Baking Show while I craft at night, and all of the delicate French goodies they make are swoon-worthy. Since I’m too chicken to attempt to make my own tower of real macarons, I thought I would stick with a medium I know: watercolor.

I started with a few stamp sets from The Ton: Sweet Macarons and dies, and the Sending Peonies and their coordinating dies. I die cut them from Arches Cold Press paper, then used my silver detail embossing powder to heat emboss the images. I watercolored the macarons and the pretty peonies using Alizarin Crimson and Quinacridone Magenta. To create my background, I used the same watercolors to create a pretty ombre wash down the front of an A2 sized panel. I started by getting the panel really wet, then using watered down color to start, then gradually adding more color and using clean water to pull the color down into a nice faded wash.

I die cut the beautiful Eiffel Tower from some black glitter paper and added the “merci” from Hero Arts Ooh La La stamp set heat embossed on a strip of vellum. I added a pretty rouge shimmer frame cut from the Double Stitched Rectangle dies from The Ton. I popped it up with some dimensional adhesive, then added the pretty tower of macarons and the peonies.

This might be one of my new favorite cards. I love when products from other companies work so well together! Thanks for stopping by today. Have a wonderful day, friends!


Filed Under: Hero Arts Tagged With: Daniel Smith, Hero Arts, the ton, watercolor

Primary Sidebar

  • Facebook
  • Instagram
  • Pinterest
  • YouTube

Favorite Shops

Secondary Sidebar

Subscribe

Enter your email address to subscribe to this blog and receive notifications of new posts by email.

Instagram
Something is wrong.
Instagram token error.
Follow
Load More

Archives

Tags

3D embossing folder alcohol markers better press birthday birthday card blog hop card kit christmas christmas card christmas tag colored pencil copic copic coloring Daniel Smith die cutting embossing folder embroidery felt giveaway holiday holiday card hot foil ink blending karin brushmarker pro layered stencil masculine my monthly hero new release no line coloring no line watercolor OLO marker olo markers original illustration pawsitively saturated rainbow shaker card slimline stamping stamptember stencil thank you thinking of you valentine's day video watercolor

Popular Posts

Simon Says Stamp Sending Cheer Blog Hop- Day 2 + Freebie + Giveaway!
Altenew October 2026 Release Blog Hop + Giveaway!
Simon Says Stamp Sending Cheer Release: Now Available!
Simon Says Stamp October 2026 Card Kit of the Month: Homespun Gratitude!
A Double Leftovers Card Set with New Simon Says Stamp Stencils and Dies!
Joyful Snowman with New Simon Says Stamp Sending Cheer Release!
Simon Says Stamp November 2025 Card Kit: Give Thanks!
Hero Arts Partners Blog Hop: Lawn Fawn!
Altenew Standalone Die Blog Hop+Giveaway!
March 2020 My Monthly Hero Blog Hop+Giveaway!

Disclosure

Some affiliate links are used in my posts. This means that, should you click on one of my links and purchase something from that company, I will receive a small portion of the sale at no extra cost to you. I use the money earned from these sales to help maintain my blog. I so appreciate you visiting and, if you do choose to use one of my affiliate links, thank you so much for your support!
Copyright © 2026 ·Brunch Pro Theme · Genesis Framework by StudioPress · WordPress · Log in
Loading Comments...