This post was sponsored by Simon Says Stamp. Thanks, Simon! *I have gathered links to all of the products used at the bottom of the post for your convenience, using affiliate links at no extra cost to you. Thank you for shopping with my links! I truly appreciate your support for my work!*
Hi friends! I have a super intricate card to share with you today using some gorgeous new snowflake dies from the Joy For You release (click HERE to see the full release!) with a fun color palette and lots of unique details. I won’t lie; this project took me a bit to complete with so many layers and so much blending but I am so happy with the results. The Frozen Fractals dies are some of the most gorgeous and delicate snowflake dies that I have seen!! Let’s get started with the intricate A7 card.
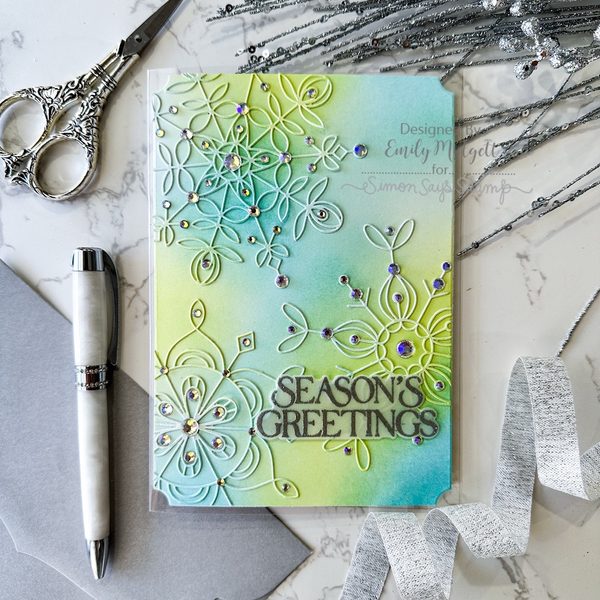
Because the Frozen Fractal Love, Frozen Fractal Joy, and Frozen Fractal Hope dies are so generously sized, I thought that they would work perfectly to create a bold A7 card! I love using texture to highlight tone-on-tone projects, but this time I wanted to create a bold and bright color palette with ink blending. I die cut two of the larger A7 Notched Rectangles from plain white cardstock and used Shading Brushes to blend Jade, Dew, and Celery Pawsitively Saturated Inks in approximately the same spots on both die cuts, creating two nearly-identical panels.
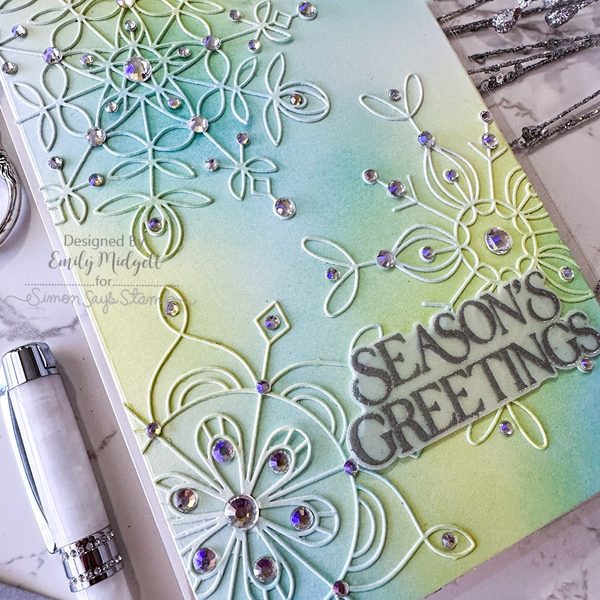
After I had blended both panels, I set one aside and then laid out the Frozen Fractal Love, Frozen Fractal Joy, and Frozen Fractal Hope dies on my second blended panel. This allowed me to maneuver the placement to get an accurate view of how the finished die cuts would look on the card! I die cut the snowflakes from the blended panel, then used the new Tim Holtz Picket Fence Metallic Distress Spray to add gorgeous shimmer to the snowflakes. Once they had dried completely, I adhered them in their appropriate spots on the second blended Notched Rectangle die cut using liquid adhesive. I love the subtle texture that the shimmering die cuts provide on the card front!
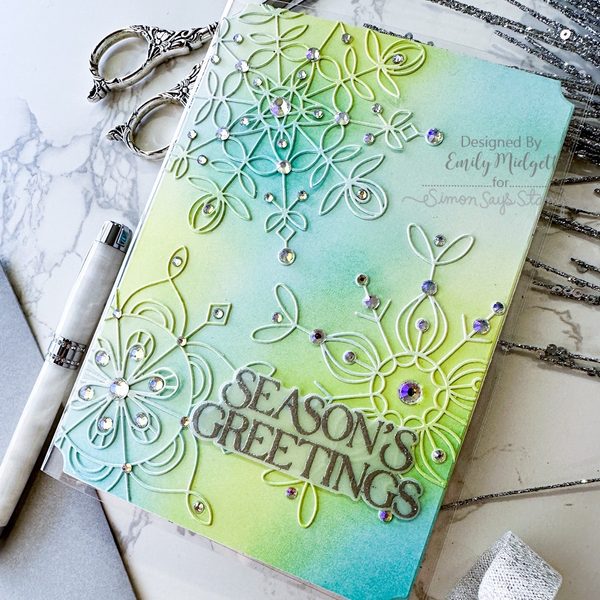
For the greeting, I decided to heat emboss a sentiment from Christmas Star Flakes using silver sparkle embossing powder on vellum, then die cut it with it’s coordinating die and popped it up with some very thin strips of foam adhesive. Before adhering my finished die cut front panel to an A7 Clear Card Base, I added tons of gorgeous Prism Pawsitively Dazzling Gems to create extra special and festive sparkle!
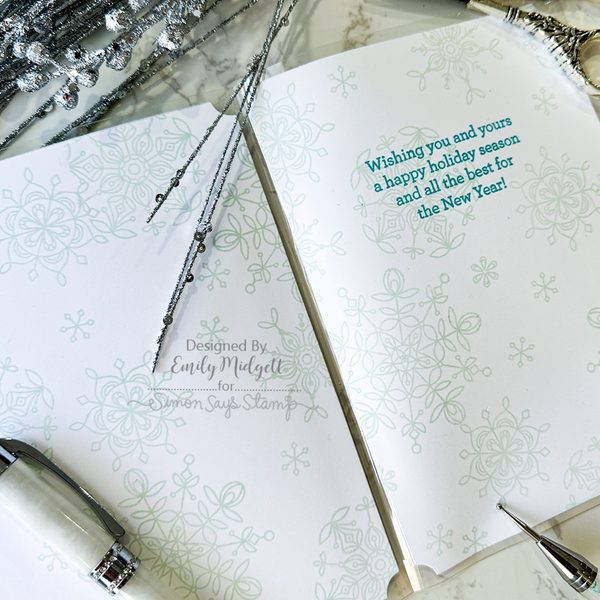
For the interior of the card, I wanted to cover up the super strong double sided adhesive on the back of the front panel, so I die cut two more A7 Notched Rectangles in the same size as the front panel using some lighter weight white cardstock. Before adhering them, I used Jade Pawsitively Saturated Ink Ink to stamp a blizzard of snowflakes from the Frozen Fractals stamp set, which features the same gorgeous and detailed snowflakes as the dies on the front of the card! Having detailed snowflake dies and coordinating snowflake stamps makes for the perfect level of professionalism on your holiday cards, in my opinion! I also stamped a sentiment from Inside Greetings Holiday using Dew ink and adhered both of the snowflake panels to the interior of the card with more double sided adhesive.
Whew, that was a long one! It did take me a minute to complete everything, but I think the results were so worth the extra time investment. Sometimes, you need a really special holiday card, and this one fits the bill. Thanks so much for stopping by today, and don’t forget to come back this weekend for the blog hop with lots of inspiration, freebies, and prizes! Have a marvelous day, friends!