• Skip to main content
  • Skip to primary sidebar
  • Skip to secondary sidebar

Sixth Street Sundries

Emily Midgett

  • Home
  • About Me
  • Contact
  • OLO Marker Color Swatch Chart
  • Shop

inside greetings holiday

Frozen Fractals All Around with New Simon Says Stamp Joy For You Release!

November 5, 2026

This post was sponsored by Simon Says Stamp. Thanks, Simon! *I have gathered links to all of the products used at the bottom of the post for your convenience, using affiliate links at no extra cost to you. Thank you for shopping with my links! I truly appreciate your support for my work!*

Hi friends! I have a super intricate card to share with you today using some gorgeous new snowflake dies from the Joy For You release (click HERE to see the full release!) with a fun color palette and lots of unique details. I won’t lie; this project took me a bit to complete with so many layers and so much blending but I am so happy with the results. The Frozen Fractals dies are some of the most gorgeous and delicate snowflake dies that I have seen!! Let’s get started with the intricate A7 card.
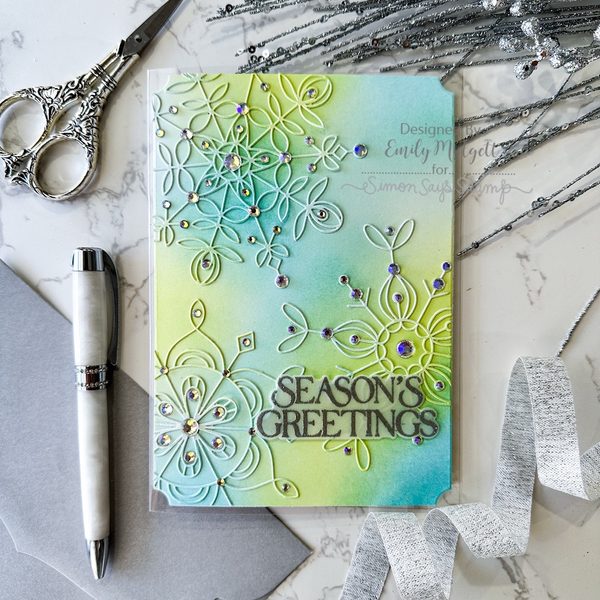
Because the Frozen Fractal Love, Frozen Fractal Joy, and Frozen Fractal Hope dies are so generously sized, I thought that they would work perfectly to create a bold A7 card! I love using texture to highlight tone-on-tone projects, but this time I wanted to create a bold and bright color palette with ink blending. I die cut two of the larger A7 Notched Rectangles from plain white cardstock and used Shading Brushes to blend Jade, Dew, and Celery Pawsitively Saturated Inks in approximately the same spots on both die cuts, creating two nearly-identical panels.
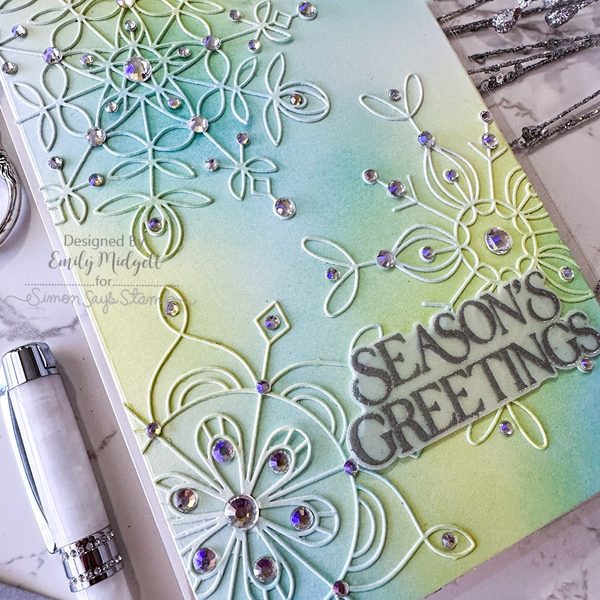
After I had blended both panels, I set one aside and then laid out the Frozen Fractal Love, Frozen Fractal Joy, and Frozen Fractal Hope dies on my second blended panel. This allowed me to maneuver the placement to get an accurate view of how the finished die cuts would look on the card! I die cut the snowflakes from the blended panel, then used the new Tim Holtz Picket Fence Metallic Distress Spray to add gorgeous shimmer to the snowflakes. Once they had dried completely, I adhered them in their appropriate spots on the second blended Notched Rectangle die cut using liquid adhesive. I love the subtle texture that the shimmering die cuts provide on the card front!
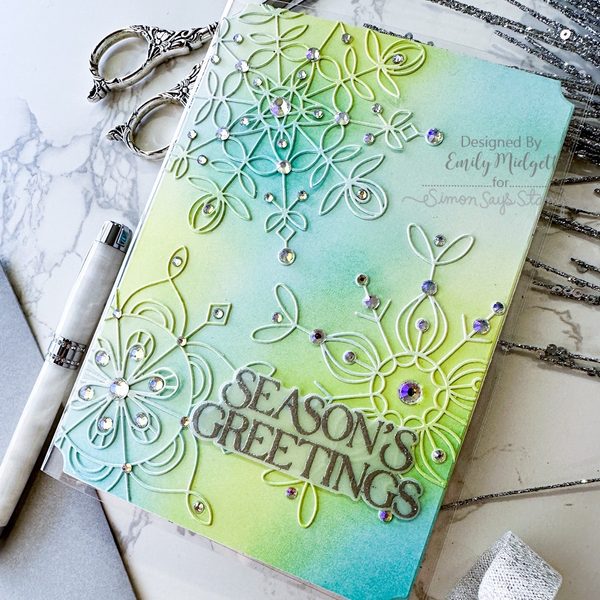
For the greeting, I decided to heat emboss a sentiment from Christmas Star Flakes using silver sparkle embossing powder on vellum, then die cut it with it’s coordinating die and popped it up with some very thin strips of foam adhesive. Before adhering my finished die cut front panel to an A7 Clear Card Base, I added tons of gorgeous Prism Pawsitively Dazzling Gems to create extra special and festive sparkle!
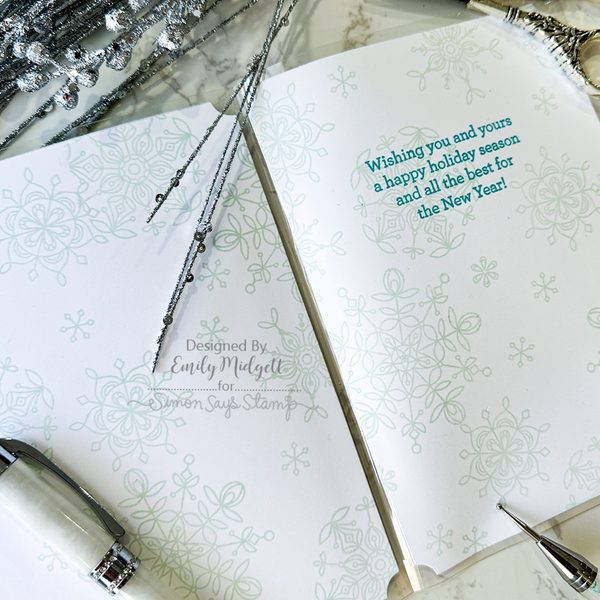
For the interior of the card, I wanted to cover up the super strong double sided adhesive on the back of the front panel, so I die cut two more A7 Notched Rectangles in the same size as the front panel using some lighter weight white cardstock. Before adhering them, I used Jade Pawsitively Saturated Ink Ink to stamp a blizzard of snowflakes from the Frozen Fractals stamp set, which features the same gorgeous and detailed snowflakes as the dies on the front of the card! Having detailed snowflake dies and coordinating snowflake stamps makes for the perfect level of professionalism on your holiday cards, in my opinion! I also stamped a sentiment from Inside Greetings Holiday using Dew ink and adhered both of the snowflake panels to the interior of the card with more double sided adhesive.

Whew, that was a long one! It did take me a minute to complete everything, but I think the results were so worth the extra time investment. Sometimes, you need a really special holiday card, and this one fits the bill. Thanks so much for stopping by today, and don’t forget to come back this weekend for the blog hop with lots of inspiration, freebies, and prizes! Have a marvelous day, friends!
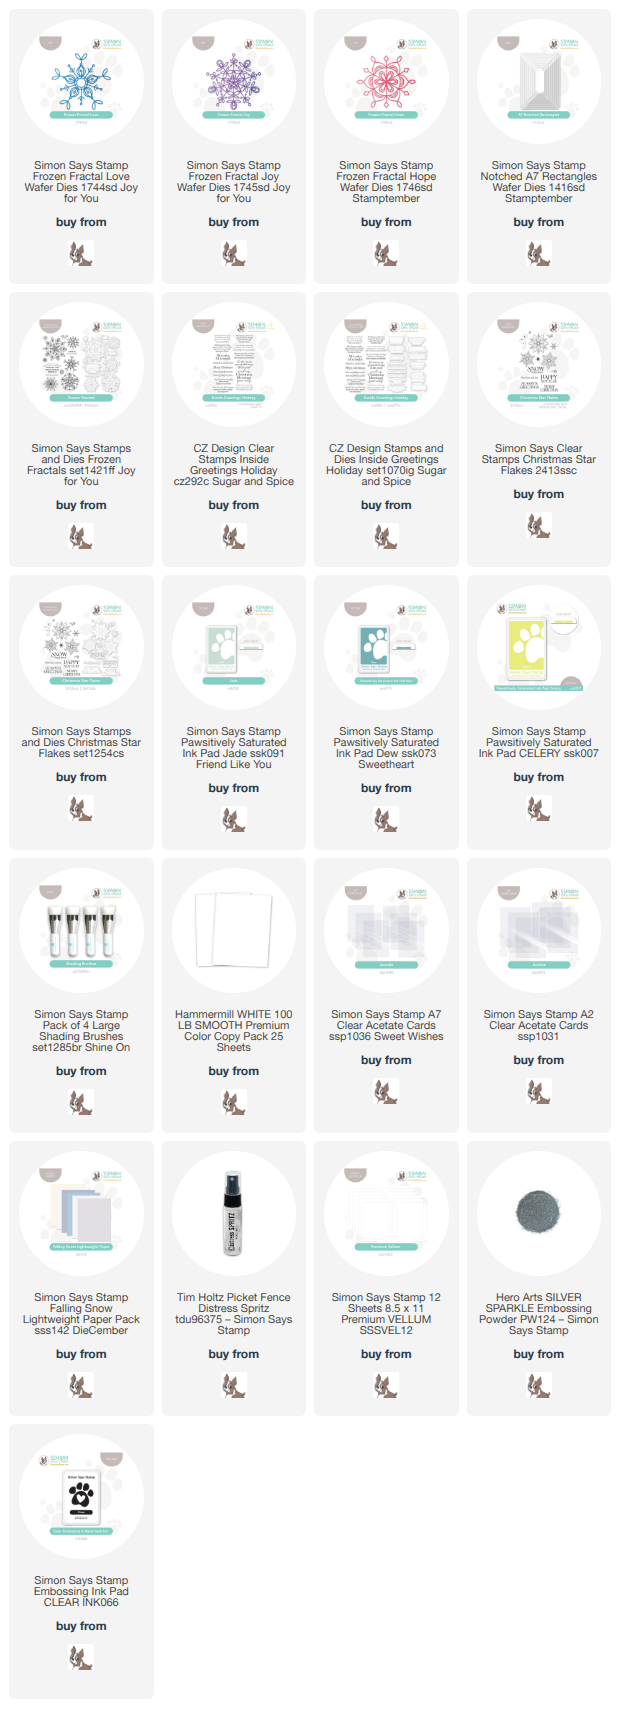
Filed Under: simon says stamp Tagged With: A7, christmas card, christmas star flakes, die cutting, distress spra, distress spray, frozen fractal hope, frozen fractal joy, frozen fractal love, frozen fractals, holiday card, ink blending, inside greetings holiday, notched A7 rectangles, picket fence distress spray, snowflakes

Brown for Christmas with New Simon Says Stamp!

October 15, 2025

This post was sponsored by Simon Says Stamp. Thanks, Simon!

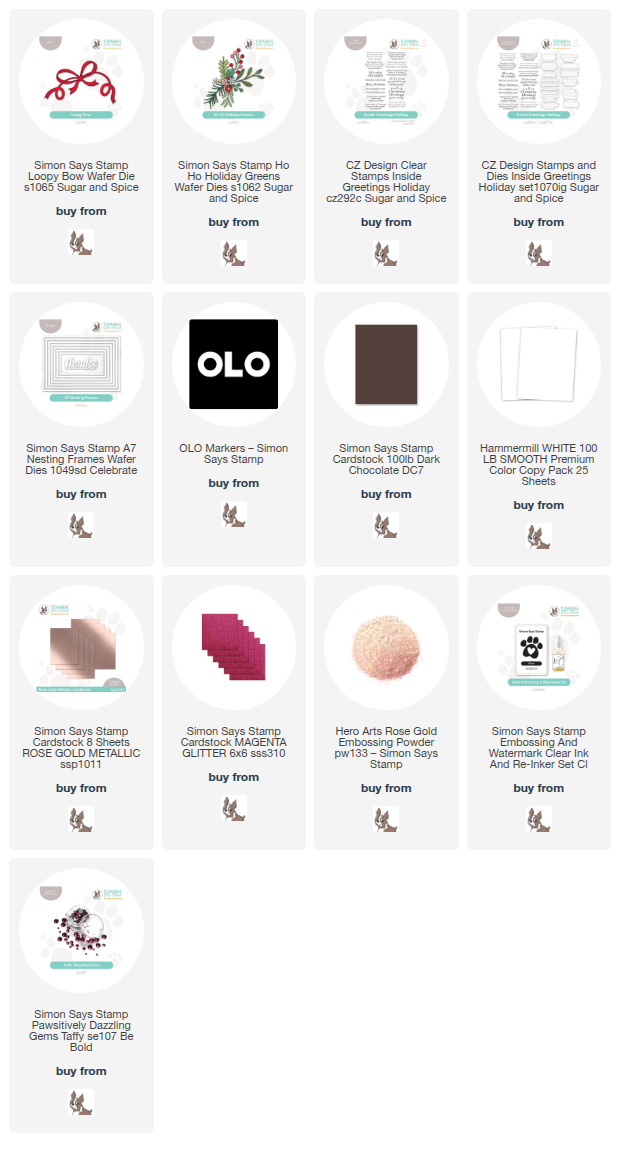
Hi friends! I am back today with a project featuring several new products from the marvelous Sugar and Spice release from Simon Says Stamp. (Click HERE to check it out!) This release has put me in full-on holiday cardmaking mode, and I am totally here for it. I love pairing vibrant, festive greenery with non-traditional color palettes, and the new Ho Ho Holiday Greens standalone die set features so many different options for gorgeous greenery! I couldn’t resist pairing it with the utterly fabulous new Loopy Bow die set (man, is that bow gorgeous or what?) to create a lush bouquet of holiday greenery. Let’s get started with the details on my project!

*I have gathered links to all of the products used at the bottom of the post for your convenience, using affiliate links. Thank you for shopping with my links! I truly appreciate your support for my work!*

To begin, I die cut the Ho Ho Holiday Greens die set twice from plain white cardstock, then used my OLO Markers to add vibrant color to each individual branch and berry. I kept the color palette vibrant, with minty greens and vivid fuchsia, because I wanted those colors to really pop on that chocolate brown background. I also die cut the new Loopy Bow from some Simon Says Stamp Magenta Glitter Cardstock.

Before assembling my bouquet, I trimmed down an A7 panel of Simon Says Stamp’s Chocolate cardstock, a deep, rich brown that is the perfect neutral backdrop for my vibrant die cuts. I also added a rose gold frame, cut using Simon Says Stamp’s Metallic Rose cardstock (a most perfect rose gold foil cardstock!) using the A7 Frame dies. I adhered the frame around the edge of my A7 card front with liquid adhesive, then used a mixture of foam and liquid adhesive to add my bouquet in a lush swag along the bottom right corner of my card front.

For the greeting, I heat embossed two different sentiments from Inside Greetings Holiday using rose gold embossing powder on the same Chocolate cardstock, then die cut the finished sentiments. I nestled the sentiment pieces amongst the bouquet, then popped them up with a double layer of foam adhesive to give them a bit of extra visibility amongst the foliage. Finally, I added a few Taffy die cuts for one last pop of pink and some added sparkle!

Well, that’s all for my project today! These fiddly cards with large foliage arrangements are so detailed and lush, well worth the time to color each piece and carefully arrange them. And placing them on an A7 card makes such a huge visual impact, I think! Thanks so much for stopping by today, and have a marvelous day!

Filed Under: simon says stamp Tagged With: A7 frames, christmas card, ho ho holiday greens, holiday card, inside greetings holiday, loopy bow, olo markers

Rainbow Christmas Trees with Simon Says Stamp Sugar and Spice!

October 10, 2025

This post was sponsored by Simon Says Stamp. Thanks, Simon!

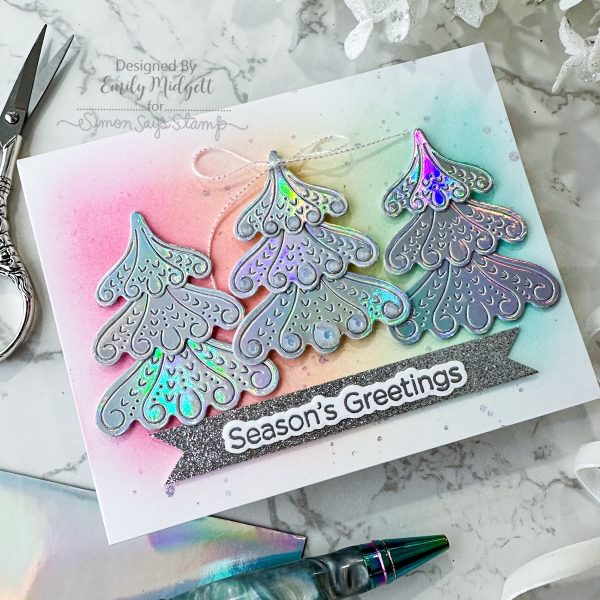
Hi friends! I am back today with some more inspiration using the marvelous new goodies from the Simon Says Stamp Sugar and Spice release (check it out HERE), which features so many gorgeous new holiday products that will make your Christmas cardmaking simple and enjoyable! I shared a vintage inspired project yesterday (check it out HERE), but for today’s project, I thought I’d switch gears completely and work with a totally modern color palette. To me, any color combination can be considered “holiday;” pairing the unique colors with holiday imagery and lots of sparkle and shine creates that overall holiday feeling. Let’s get started with the details on my rainbow Christmas card!

*I have gathered links to all of the products used at the bottom of the post for your convenience, using affiliate links. Thank you for shopping with my links! I truly appreciate your support for my work!*

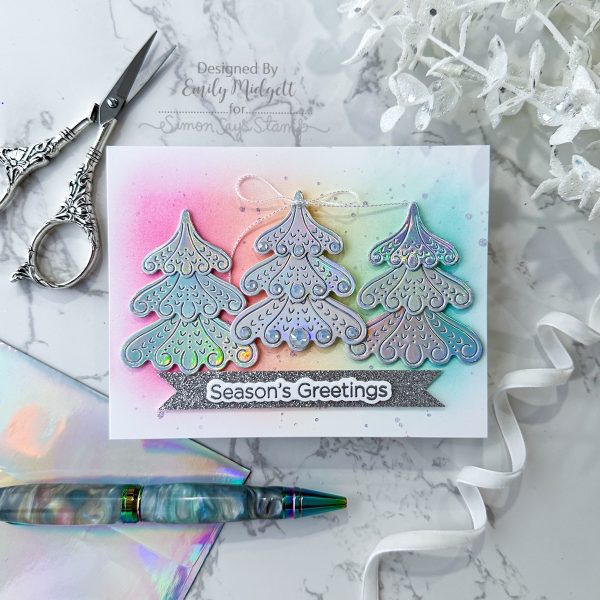
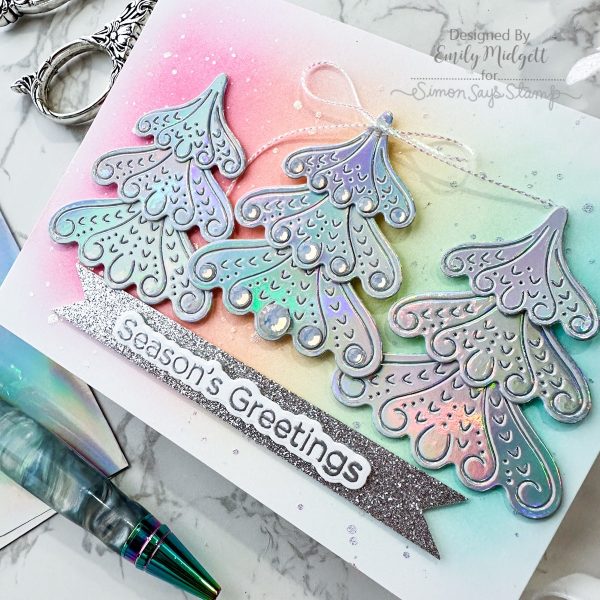
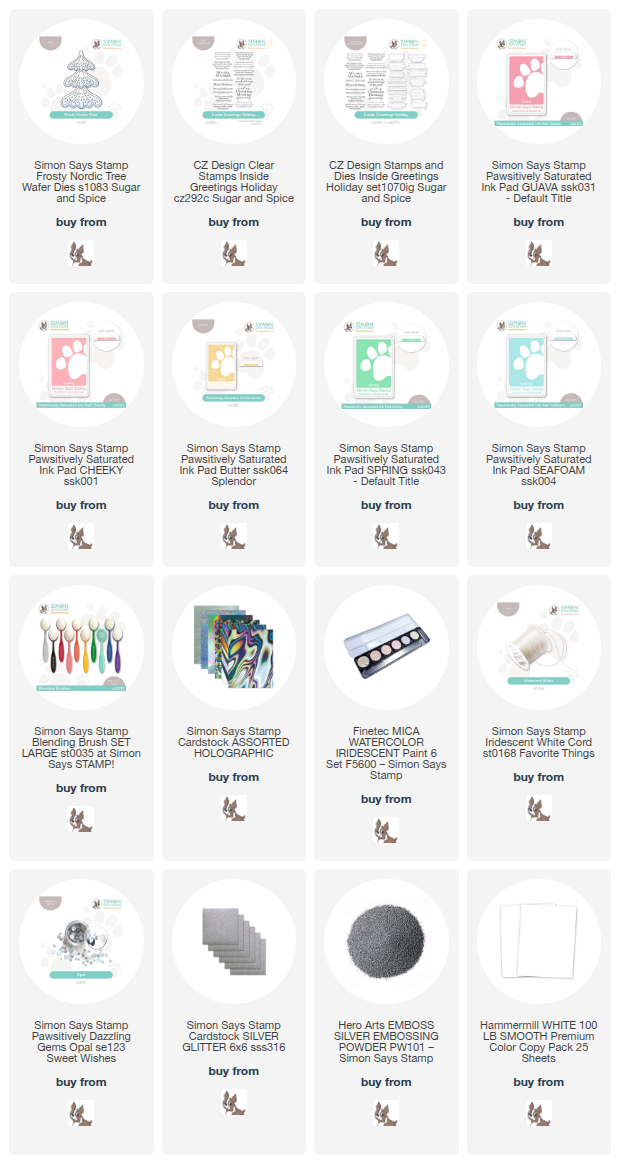
When in doubt, triple it. Occasionally, when I am working with a smaller image, I will use this adage to create a full focal point. By using multiples of the same image and arranging them on your card front, you can create a lush focal point that fills your card with ease! I die cut three of the new Frosty Nordic Tree from Simon Says Stamp Holographic Cardstock, which adds that gorgeous iridescent rainbow shimmer over the top of main silver foil.

In order to enhance the gorgeous colors on the iridescent holographic cardstock, I selected Pawsitively Saturated Inks in shades of Guava, Cheeky, Butter, Spring, and Seafoam, blending them in rainbow order on my card front. I splattered some iridescent glitter watercolors on the blended background, then arranged the die cut holographic trees on the card front and adhered them with thin foam adhesive, popping the middle one up with a double layer of foam adhesive to help it pop.

For the greeting, I silver embossed a sentiment from the new Inside Greetings: Holiday onto some white cardstock, then die cut it with its coordinating dies. I flagged the ends of a strip of silver glitter cardstock and placed the sentiment in the center of the strip, tucking it beneath the grove of shiny trees with some foam adhesive. Because you can never have enough shine on a Christmas card, I used liquid adhesive to add some Opal Pawsitively Dazzling Gems to the middle tree, as well as an Iridescent White Cord bow for added texture!

Well, that’s all for my project today!  You can check out the entirety of the Sugar and Spice release HERE, and don’t forget to check out the Simon Says Stamp Sugar and Spice Blog Hop this weekend for tons of fabulous inspiration using these new goodies. Thanks so much for stopping by today, and have a marvelous day!

Filed Under: simon says stamp Tagged With: christmas card, die cutting, frosty nordic tree, holiday card, ink blending, inside greetings holiday, rainbow christmas

Primary Sidebar

  • Facebook
  • Instagram
  • Pinterest
  • YouTube

Favorite Shops

Secondary Sidebar

Subscribe

Enter your email address to subscribe to this blog and receive notifications of new posts by email.

Instagram
Something is wrong.
Instagram token error.
Follow
Load More

Archives

Tags

3D embossing folder alcohol markers better press birthday birthday card blog hop card kit christmas christmas card christmas tag colored pencil copic copic coloring Daniel Smith die cutting embossing folder embroidery felt giveaway holiday holiday card hot foil ink blending karin brushmarker pro layered stencil masculine my monthly hero new release no line coloring no line watercolor OLO marker olo markers original illustration pawsitively saturated rainbow shaker card slimline stamping stamptember stencil thank you thinking of you valentine's day video watercolor

Popular Posts

Simon Says Stamp Joy For You Blog Hop- Day 1!
Simon Says Stamp Joy For You Release-Now Available!
Frozen Fractals All Around with New Simon Says Stamp Joy For You Release!
Shaped Holiday Shaker Card with New Simon Says Stamp Jolly Season Card Kit of the Month!
Holiday Postage with New Simon Says Stamp!
Simon Says Stamp Glory to the Newborn King Holiday Kit-Part II!
Pinkfresh Studio 5th Birthday!
Altenew Build A Flower: Fuchsia Blog Hop+Giveway!
Holiday Joy in Pink and Green with New Simon Says Stamp DieCember!
Honey Bee Stamps September Release Blog Hop!

Disclosure

Some affiliate links are used in my posts. This means that, should you click on one of my links and purchase something from that company, I will receive a small portion of the sale at no extra cost to you. I use the money earned from these sales to help maintain my blog. I so appreciate you visiting and, if you do choose to use one of my affiliate links, thank you so much for your support!
Copyright © 2026 ·Brunch Pro Theme · Genesis Framework by StudioPress · WordPress · Log in
Loading Comments...