• Skip to main content
  • Skip to primary sidebar
  • Skip to secondary sidebar

Sixth Street Sundries

Emily Midgett

  • Home
  • About Me
  • Contact
  • OLO Marker Color Swatch Chart
  • Shop

corner pine frame

Christmas In July: Holiday Cheer with a Holiday Cardinal!

July 17, 2024

This post was sponsored by Simon Says Stamp. Thanks, Simon!

Hi friends! I am back with another post for my Christmas In July week here on my blog! As a St. Louis native, Cardinals have always held a special place in my heart, and the symbolism of cardinals representing visitors from heaven has always given me comfort. We have lots of cardinals in our yard, and it seems like when I am having a stressful day with my kiddos, a cardinal will appear in the window, reminding me of the immense patience that my grandparents showed my sister and me. I love the winter imagery of a vivid red cardinal amongst the beautiful snowy landscape, which is what I tried to create with this crisp white card, adding pops of holiday color with cherry and cranberry red. Let’s get started with the details!

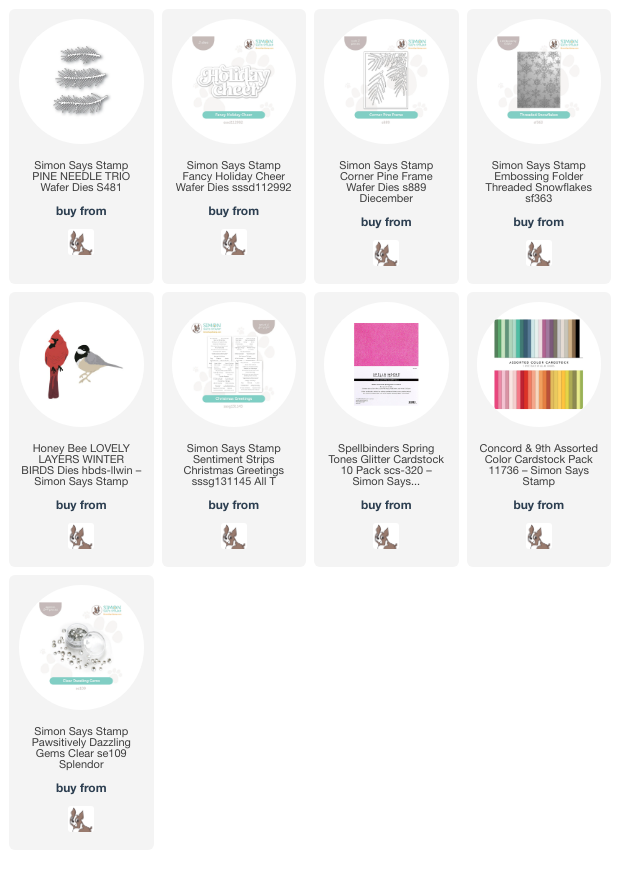
I started my project by die cutting the cardinal from the Honeybee Stamps Lovely Layers Winter Birds using three different shades of red cardstock. These Lovely Layers die sets from Honeybee Stamps are super detailed and very simple to assemble, with incredible results! I also die cut the beautiful Corner Pine Frame from some white glitter cardstock to create the snowy branches for my cardinal. I die cut a few extra sprigs of pine using some iridescent white foil cardstock and the Pine Needle Trio die set. The combination of different types of white textured cardstock creates a lush pine bough for the bright crimson cardinal!

Once I had die cut all of the different foliage elements for my project, I ran a panel of A2 sized white cardstock through my die cutting machine using the Threaded Snowflakes embossing folder. The beautifully detailed snowflakes add marvelous texture behind the delicate pine die cuts. I adhered the glittery white Corner Pine Frame to the textured snowflake background using liquid adhesive. Before arranging the rest of the die cuts, I turned my attention to the sentiment.

For the greeting, I die cut the detail layer of the Fancy Holiday Cheer die set from some deep cranberry cardstock, then layered it on the shadow layer cut from vellum cardstock. I also trimmed down a pre-printed holiday sentiment (that I think may be discontinued, but THESE are similar!). I arranged all of the different die cuts and sentiment pieces on the white-on-white textured background, adhering them with a combination of liquid and foam adhesive for lots of different levels of height and dimension. I had some leftover die cut berries from THIS card, so I nestled some berry clusters amongst the pine boughs for some extra pops of red. Finally, I added a few Clear Pawsitively Dazzling Gems for extra sparkle. The sparkly, shiny white specialty cardstocks with the pops of bright, cheery red make for such a festive color palette!

Well, that’s all for my project today! I have a few more holiday projects up my sleeve to share with you, so be sure to come back again. Thanks so much for stopping by today, and have a marvelous day!
Filed Under: simon says stamp Tagged With: cardinal, christmas, christmas card, corner pine frame, die cutting, holiday, holiday card, holiday cheer, pine needle, threaded snowflakes, winter, winter birds

Simon Says Stamp DieCember(R) Release Blog Hop!

December 2, 2023

This post was sponsored by Simon Says Stamp. Thanks, Simon!

Hi friends! The spectacular DieCember release has finally arrived, and we are celebrating and inspiring you with Day 1 of our DieCember blog hop! You should have arrived here from Barbara Tarayao, and your next stop is Keisha Charles. You can also start back at the beginning at the Simon Says Stamp Blog. You can check out tons of inspiration on the  DieCember® release gallery (and maybe add some inspiration of your own, too!).

Every year, I create tons of cards with traditional color schemes, sometimes with slight variations or additions to modernize things a bit, and because I make holiday cards for several months, traditional red and green can get a bit boring to me. To combat my color palette doldrums, almost all of the cards that I created for this month’s DieCember release featured non-traditional color palettes, including this pair of blue and champagne projects for today’s hop! Let’s get started with the details.

To start my first project, I die cut the Corner Pine Frame using Matte Champagne cardstock. This beautiful champagne cardstock is a lovely alternative to traditional gold; it has a bit cooler undertones and so it works beautifully with cool blues and greens. To create an interesting background for my detailed pine sprigs, I used a blending brush to blend Galaxy Pawsitively Saturated ink on the top corners of an A2 Cornflower blue cardstock panel. I splattered the blended area with some coordinating champagne glitter watercolors from IUILE. After my panel was dry, I mounted the corner die cut over the blended area using liquid adhesive. I think the contrast of the Champagne matte foil with the deep blue background is simply splendid!

Next, I heat embossed some greeting stamps from the new Joyful Greetings stamp set using Platinum sparkle embossing powder onto some heavyweight vellum. I die cut the large sentiment piece using the previously-released Joyful die outline, though the Joyful Greetings set with more detailed word die is also available. I arranged the extra pine branch die cut behind the greeting die cuts, then adhered the sentiments over the top with some foam tape. Finally, I added a fewChampagne glitter drops from Pinkfresh Studio. The color combination makes for a unique Christmas card, to be sure!

My second card features the utterly scrumptious new Florence Plate. The detail on this plate is amazing and would work for so many different cards, not just holiday projects! I die cut the Florence Plate from Cornflower blue cardstock, then backed it with a piece of champagne Luxe Glitter Cardstock. The sparkle on this background is unreal and so difficult to capture in a photograph. (If you haven’t picked up the Luxe Glitter Cardstock yet, I highly encourage you to try some. The sparkle is out of this world!)

I die cut the new Fancy Holiday Cheer die from some dark blue shimmer paper that I found in my stash of specialty papers, backing it with the solid bubble piece cut from more vellum. I die cut the marvelous new Aurora Blooms dies from Rainbow Splash Buttercream, Soft Navy, and Matte Champagne cardstock. I already can tell that these spectacular blooms are going to be a favorite in my craft room! You can make them as simple or as elaborate as you like. I popped up the die cut greeting with foam adhesive, then arranged the flowers and foliage around the large-scale sentiment die cut. This card might be my favorite out of all of the projects that I created for this release!

Well, that’s all for my projects today. Now, to celebrate the new DieCember release, Simon Says Stamp is offering a gorgeous freebie die with any purchase! *Follow the instructions on the graphic at the top of the post to find the Aidan Snowflake die, then use code FLURRY at checkout to receive the die for free.* The gift with purchase promotion will expire at 11:59 EST on 12/8 or while supplies last.

Simon Says Stamp is also giving away a $25 coupon at every stop on the blog hop! Simply leave a comment on each stop on the hop for maximum entries into the giveaway. Winners will be selected and announced on the Simon Says Stamp blog on Wednesday, December 13. Winners must email Simon Says Stamp to claim his or her prize!

Your next stop on the hop is Keisha Charles. Don’t forget to check out the second part of the blog hop on 12/8!! More fantastic inspiration and more prizes to be had. Thanks so much for stopping by today, and happy hopping!

Filed Under: simon says stamp Tagged With: christmas card, corner pine frame, die cutting, diecember, fancy holiday cheer, florence plate, holiday card, ink blending, joyful greetings

Primary Sidebar

  • Facebook
  • Instagram
  • Pinterest
  • YouTube

Favorite Shops

Secondary Sidebar

Subscribe

Enter your email address to subscribe to this blog and receive notifications of new posts by email.

Instagram
Something is wrong.
Instagram token error.
Follow
Load More

Archives

Tags

3D embossing folder alcohol markers better press birthday birthday card blog hop card kit christmas christmas card christmas tag colored pencil copic copic coloring Daniel Smith die cutting embossing folder embroidery felt giveaway holiday holiday card hot foil ink blending karin brushmarker pro layered stencil masculine my monthly hero new release no line coloring no line watercolor OLO marker olo markers original illustration pawsitively saturated rainbow shaker card slimline stamping stamptember stencil thank you thinking of you valentine's day video watercolor

Popular Posts

Simon Says Stamp Joy For You Blog Hop- Day 1!
Simon Says Stamp Joy For You Release-Now Available!
Frozen Fractals All Around with New Simon Says Stamp Joy For You Release!
Shaped Holiday Shaker Card with New Simon Says Stamp Jolly Season Card Kit of the Month!
Holiday Postage with New Simon Says Stamp!
Simon Says Stamp Glory to the Newborn King Holiday Kit-Part II!
Pinkfresh Studio 5th Birthday!
Altenew Build A Flower: Fuchsia Blog Hop+Giveway!
Holiday Joy in Pink and Green with New Simon Says Stamp DieCember!
Honey Bee Stamps September Release Blog Hop!

Disclosure

Some affiliate links are used in my posts. This means that, should you click on one of my links and purchase something from that company, I will receive a small portion of the sale at no extra cost to you. I use the money earned from these sales to help maintain my blog. I so appreciate you visiting and, if you do choose to use one of my affiliate links, thank you so much for your support!
Copyright © 2026 ·Brunch Pro Theme · Genesis Framework by StudioPress · WordPress · Log in
Loading Comments...