• Skip to main content
  • Skip to primary sidebar
  • Skip to secondary sidebar

Sixth Street Sundries

Emily Midgett

  • Home
  • About Me
  • Contact
  • OLO Marker Color Swatch Chart
  • Shop

fashion inspiration

Alex Syberia Designs-August 2024 Blog Hop + Giveaway!

August 1, 2024

Hi friends! I am delighted to be hopping along with my friends at Alex Syberia Designs to celebrate Alex’s latest release. You should have arrived here from Emelie, and your next stop is Keisha. You can also find the full list on the Alex Syberia Designs in case you get lost! I was inspired by a dress from my closet (not an uncommon inspiration spot for me!) that I recently purchased, featuring brilliant pink and red blooms with pale sage green foliage and accented by a lacy white pattern all on a stark black background. (You can check out the dress HERE if you’re interested!) I love finding floral dresses that have lots of different colors for our family photos, because that gives me lots of different color options to tie together with my four kids and husband’s outfits. And, bonus, they provide me with lots of artistic inspiration, as well!

I was so inspired by the colors and design elements on my dress that I was able to create three different cards using the new Alex Syberia release for August 2024! I am just sharing the two cards on the left today, saving the details of the third for a later post. 😉

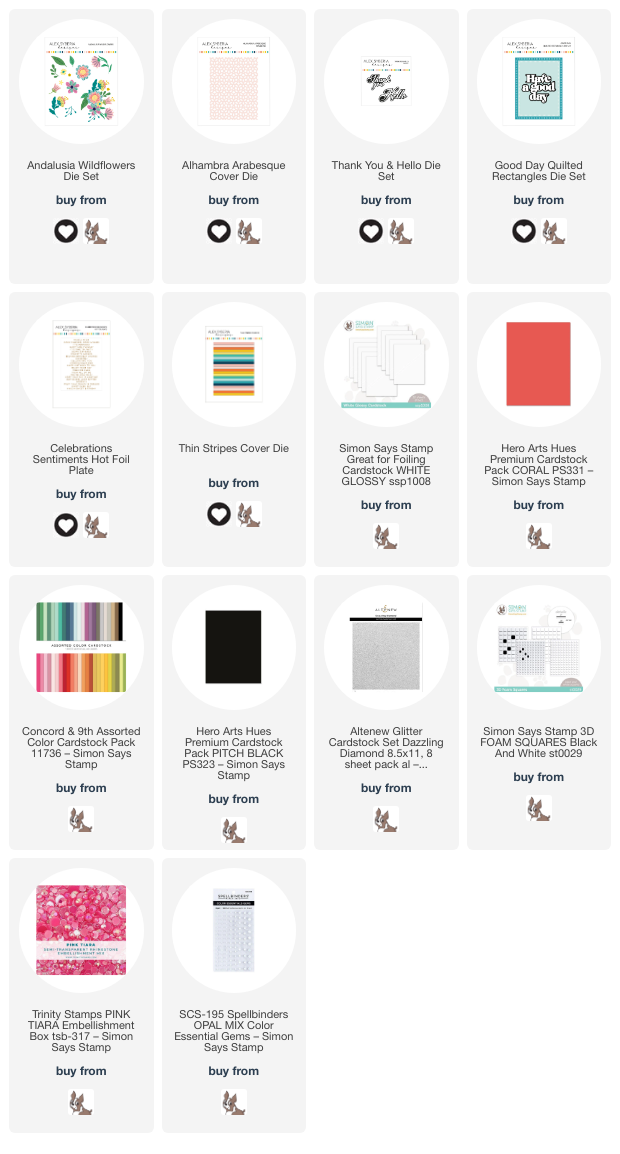
Both of my projects today feature the absolutely gorgeous blooms of the new Andalusia Flower Dies. These blooms are so bold and gorgeous and are super easy to use. I examined my cardstock collection and pulled out several colors that I thought would work nicely together: Coral from Hero Arts, several different shades of pink, red, and green from the Concord & 9th colored cardstock, as well as some Simon Says Stamp glossy white cardstock and white glitter cardstock to accent the Hero Arts Pitch Black background.

Whenever I am working with lots of cardstock colors and intricate layered dies, I always like to die cut bunches of the different elements and spend some time assembling the images. This allows me to get a good feel for the size and start formulating a layout in my head. Because I wanted to replicate those beautiful pinks and reds from my dress, I kept the color palette fairly monochromatic, mixing and matching the different layers of the new Andalusia Flower Dies with similar colors and adhering all of the elements with liquid adhesive.

After I had die cut and assembled the floral elements, I also die cut the new Alhambra Arabesque die, a lacy patterned background cover plate die that creates the most luscious and intricate pattern. I die cut the background once from a full A2 panel of glossy white cardstock, then trimmed it into two separate pieces so that I could create two backgrounds reminiscent of the pattern on my dress. I adhered the lacy patterned piece with liquid adhesive on my black background, then added some strips of white glitter cardstock and some more glossy white cardstock. For the greeting, I die cut the large scale sentiment die from the new Good Day Quilted Rectangles dies from some more white glitter cardstock, then backed it with a vellum shadow layer. I arranged the flowers around the large sentiment die cut, popping them up with multiple layers of foam adhesive, then added some sentiment strips that I had previously created using the Celebrations Sentiments hot foil plate and Thin Stripes cover die. Finally, I added a few shimmering gems for even more luxurious sparkle!

My second project uses the “leftovers” from the first project, this time flipped to a portrait orientation to keep things interesting. I used a slightly thinner portion of the Alhambra Arabesque die, adding three accent strips cut from white glitter and glossy white cardstock. After I had my dramatic black and white background, I arranged the floral die cuts, leaving space for a greeting!

I die cu the “hello” from the new Thank You and Hello dies, again from some white glitter cardstock and backed with a vellum shadow layer. I tucked another silver foiled sentiment strip beneath the die cut sentiment. I think the vivid florals and intricate background makes it perfect for an anniversary card! Finally, I added a few gems to the flower centers and around the bouquet to add lots of extra sparkle.

Well, that’s all for my projects today. I will have all of the details of the third card in the sneak peek image at the top of the post in a later post, so be sure to come back again! Now for some fun giveaway information:

Alex Syberia Designs is giving away a $50 gift certificate to 1 winner and a $15 gift card to 3 lucky winners. To play along, simply leave a comment on each stop of the hop.

Open internationally. All 4 winners will be drawn from the entrants that have played along with this Blog hop by midnight BST August 10th, 2024. Winners will be announced on the Alex Syberia Designs blog ‘Giveaway Winners’ page on August 11th, 2024.

Your next stop on the hop is Keisha. Thanks so much for stopping by today, and happy hopping!
Filed Under: alex syberia designs Tagged With: alhambra arabesque die, andalusia flower dies, anniversary card, birthday card, celebrations sentiments, die cutting, fashion inspiration, good day quilted rectangles, thank you and hello dies, thin stripes cover die

Inspired By A Sweater!

August 2, 2023

This post is sponsored by Simon Says Stamp. Thanks, Simon!

Hi friends! I have mentioned before that fashion is a huge inspiration for me, and today’s project is one that was inspired by one of the boutiques that I follow. Around Valentine’s Day (yes, I know that was almost 6 months ago) one of my favorite boutiques posted a photo of a sweater with big red, coral, and purple hearts all over it, with some of the hearts edged with pearl beads. I immediately thought what a cute card it would make! The shape of the Nested Round Hearts from Simon Says Stamp is so unique; I immediately started constructing this card in my head using those dies. Fast forward six months and I finally put those hearts in my head onto a card! Let’s get started with the details.

I began by selecting several shades of cardstock and ink from Concord and 9th: Fig, Dragonfruit, Sweet Pea, and Nectar. Using the Nested Round Hearts dies, I die cut several sizes of heart from each of the cardstock colors, reserving the A2 Dragonfruit panel for my background. I also heat embossed a greeting from From the Heart Messages stamp set using white embossing powder on a Fig heart die cut. I love the contrast of the bright white embossing powder and the dark purple! I used blending brushes and the coordinating ink colors to blend around each heart die cut to add a little more interest and dimension to the die cuts.

For the background, I used the Spun Glass embossing folder with the Dragonfruit cardstock panel to add some extra texture to the card base. I initially was searching for a cable knit embossing folder, but didn’t have one. I thought that the repetitive placement and shape of the images in the Spun Glass folder was really similar a cable knit and am really happy at how it worked with the project. I blended Dragonfruit ink around the edges of the blended panel, then splattered some white gouache on the background.

After arranging my hearts carefully on the blended and textured background, I popped them up with foam adhesive for tons of dimension. The heart sweater had one other element that I still needed to add: pearl edging! I pulled out some adhesive gems and added them around the edges of the Sweet Pea hearts. I noticed that there were a few holes in the background that needed a little extra something, so I die cut a few tiny glittering hearts and tucked them here and there. I think this turned out to be so fun and cheerful! The bright colors would make anyone smile!

Well, that’s all for my project today! If you’re needing a jumpstart for your creativity, I highly encourage you to check out your favorite boutique for fun patterns, textures, and color palettes. Thanks so much for stopping by today, and have a marvelous day!

Filed Under: simon says stamp Tagged With: die cutting, fashion inspiration, from the heart messages

Primary Sidebar

  • Facebook
  • Instagram
  • Pinterest
  • YouTube

Favorite Shops

Secondary Sidebar

Subscribe

Enter your email address to subscribe to this blog and receive notifications of new posts by email.

Instagram
Something is wrong.
Instagram token error.
Follow
Load More

Archives

Tags

3D embossing folder alcohol markers better press birthday birthday card blog hop card kit christmas christmas card christmas tag colored pencil copic copic coloring Daniel Smith die cutting embossing folder embroidery felt giveaway holiday holiday card hot foil ink blending karin brushmarker pro layered stencil masculine my monthly hero new release no line coloring no line watercolor OLO marker olo markers original illustration pawsitively saturated rainbow shaker card slimline stamping stamptember stencil thank you thinking of you valentine's day video watercolor

Popular Posts

Simon Says Stamp Joy For You Blog Hop- Day 1!
Simon Says Stamp Joy For You Release-Now Available!
Frozen Fractals All Around with New Simon Says Stamp Joy For You Release!
Holiday Postage with New Simon Says Stamp!
Shaped Holiday Shaker Card with New Simon Says Stamp Jolly Season Card Kit of the Month!
Hero Arts Partners Blog Hop: Lawn Fawn!
Holiday Joy in Pink and Green with New Simon Says Stamp DieCember!
Simon Says Stamp STAMPtember Tim Holtz Collaboration: Festive Holidays!
Greenery for Christmas with New Simon Says Stamp!
The Ton Anniversary Release: Day 1!

Disclosure

Some affiliate links are used in my posts. This means that, should you click on one of my links and purchase something from that company, I will receive a small portion of the sale at no extra cost to you. I use the money earned from these sales to help maintain my blog. I so appreciate you visiting and, if you do choose to use one of my affiliate links, thank you so much for your support!
Copyright © 2026 ·Brunch Pro Theme · Genesis Framework by StudioPress · WordPress · Log in
Loading Comments...