• Skip to main content
  • Skip to primary sidebar
  • Skip to secondary sidebar

Sixth Street Sundries

Emily Midgett

  • Home
  • About Me
  • Contact
  • OLO Marker Color Swatch Chart
  • Shop

gift bag die

Eggplant Sparkle Gift Set with Simon Says Stamp DieCember!

December 23, 2024

This post was sponsored by Simon Says Stamp. Thanks, Simon!

Hi friends! I have some sparkling holiday inspiration to share with you today using some newer goodies from the Simon Says Stamp DieCember release. I adore die cutting, putting saturated colored cardstock color palettes together with lots of sparkles and foam tape for tons of dimension on each layer. I was so happy to see the new cardstock colors in the DieCember release, with incredibly vibrant hues that also die cut splendidly. I used the new Whirl Nordic Plate detailed cover plate die to create this intense and dramatic, sparkling, monochromatic eggplant gift set. Let’s get started with the details!


*I have gathered links to all of the products used at the bottom of the post for your convenience, using affiliate links. Thank you for shopping with my links! I truly appreciate your support for my work!*

There are very few color palettes I love more than a dramatic and bold monochromatic color scheme. I have said before: putting together monchromatic cards is like putting pieces of a puzzle together; you have to search your stash to see which elements in the same color family can be layered together to create a unique and visually interesting project. I paired the new Eggplant cardstock with the previously-released Eggplant Glitter Cardstock to create this super saturated card and gift bag set!

For my first project, I used the Whirl Nordic Plate to adorn the most perfect little gift bag! I die cut the Gift Bag Die from the new Simon Says Stamp Eggplant Glitter cardstock, then measured a panel of Eggplant Glitter Cardstock to fit the front panel perfectly. I ran the smaller glitter panel through my die cutting machine using the new Whirl Nordic Plate and added it to the front of my assembled gift bag, creating a gorgeous tone-on-tone glittery gift bag!

After I had finished adorning the gift bag with the glittering patterned die cut, I added a Perfect Bow die cut from the same Eggplant cardstock to make it extra festive! I put some pretty rose gold tissue paper inside the bag, then decided to accent the pattern even further with some coordinating Lilac Pawsitively Dazzling Gems. (Those Lilac gems are really a chameleon; they can work with so many different color palettes!) Isn’t this such a perfect gift bag for smaller gifts, like cosmetics, jewelry, hand sanitizer/lotion, and gift cards?

For my second project, I used the same Whirl Nordic Plate die to create a beautifully sparkling background for my holiday card! I die cut the image from the SSS Eggplant Glitter cardstock and adhered it to an A2 panel of SSS Eggplant cardstock using liquid adhesive. I also used the same Eggplant cardstock to die cut the flowers from the new Woodland Floral Frame Embossing Folder +die set. I die cut the flower images first, then lined them up in the appropriate spot on the embossing folder and ran it through my die cutting machine to create exquisite dimension and detail! I used some super sparkly handmade glitter watercolors to add some glittery dimension to the edges of the petals and the center of the flowers.

To create a holiday bouquet, I used the same Eggplant cardstock to die cut the holly sprig from the Two Stems and Berries die set, cutting the berries themselves from some pearlescent white cardstock. For the greeting, I stamped the bold “Merry Everything” sentiment from the Good Cheer stamp set onto some more Eggplant cardstock using Simon Says Stamp White Pigment ink and added Hero Arts Iridescent Purple embossing powder over the top to create a gorgeous iridescent shimmer for my sentiment. I die cut the sentiment using the coordinating die, then began arranging my die cuts on top of the glittery background. I adhered the sentiment with foam adhesive, then arranged the glittery embossed floral die cuts in the corner, tucking the leaves and berries behind them. Finally, I added a few Opal Pawsitively Dazzling Gems for even more sparkle, as well as to complete the “rule of three” for my shimmering white accents!

Well, that’s all for my projects today! It doesn’t seem possible that Christmas is this week, much less that 2025 is just around the corner. Some days, I feel like I’m still processing 2020! Unreal! Thanks so much for stopping by today, and have a marvelous day!

Filed Under: simon says stamp Tagged With: 3D embossing, christmas card, die cutting, diecember, gift bag, gift bag die, good cheer, holiday card, perfect bow, two stems and berries, whirl nordic plate, woodland floral embossing folder

Gift Bag and Matching Tissue Paper with New Simon Says Stamp!

September 5, 2024

This post was sponsored by Simon Says Stamp. Thanks, Simon!

Hi friends! I am back today with a sweet little gift bag made using the older Gift Bag Die and embellished with some gorgeous new products from the Simon Says Stamp STAMPtember release! I love creating gift packaging; before I became a mom, I had grand intentions of being one of those moms who made tags, lunchbox notes, and little teacher surprises and gifts all the time. Then I actually became a mom and got so busy that I forgot to make those things haha! However, my love of coordinated and embellished packaging is something that has stayed with me, and I channeled that love into today’s project. Let’s get started with the details!

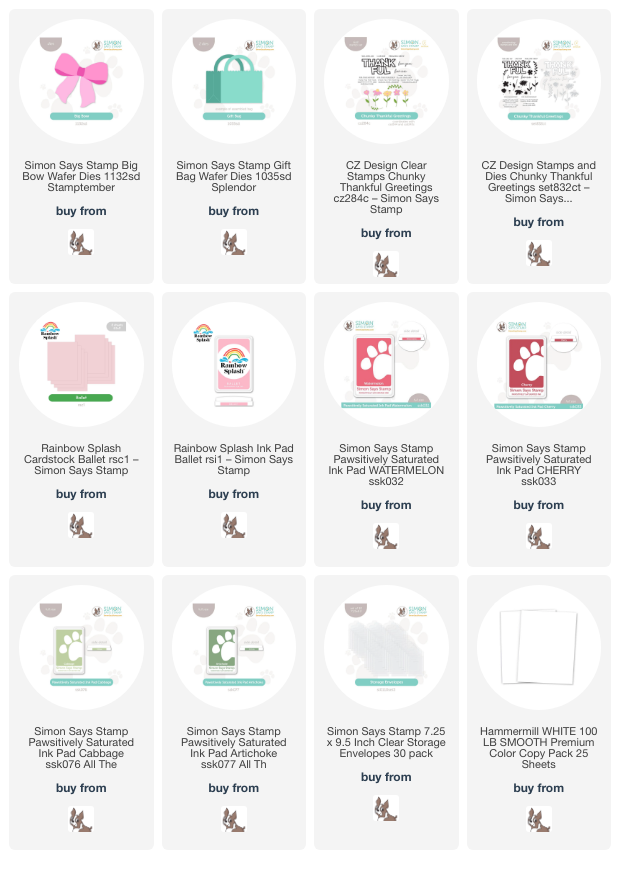
I began my project by assembling the gift bag using some plain white cardstock cut twice with the Gift Bag Die. The finished product is the perfect size for all kinds of gifts… lip gloss, gift cards, sweet treats… anything that’s a little dainty in size! I wanted to keep things simple, bright, and clean, so I did not embellish the bag at all, preferring instead to use the oversized Big Bow die to create the prettiest pink bow! I used Rainbow Splash Ballet cardstock for the lighter areas and some darker pinks from my stash of pink cardstock scraps. (I like to keep my cardstock scraps in Simon Says Stamp’s Clear Storage Pouches to organize my cardstock scraps by color. So convenient to be able to find just the right shade of cardstock to match my project!)

To coordinate with the pretty pink bow on the bag, I decided to stamp my own tissue using the pretty, simplistic floral stamps in the new Chunky Thankful Greetings. I cut down a square of plain white tissue paper to better fit the dainty gift bag, then used Rainbow Splash Ballet ink with Pawsitively Saturated Inks in shades of Watermelon, Cherry, Cabbage, and Artichoke to stamp a floral pattern on the plain white tissue. I will say that these super juicy inks bled through on the back of the tissue, which caused some smudging, but I found that if I placed a piece of spare scrap of computer paper beneath it, that helped to soak up some of the extra dye ink without smudging the rest of the paper! I think it looks so pretty with the somewhat simplistic die cut gift bag and pretty pink bow.

For the greeting, I kept things very simple, so that the bag could be used for any number of occasions. I heat embossed a sentiment also from the new Chunky Thankful Greetings onto some coordinating pink cardstock, then die cut it with the coordinating die. I popped up the greeting with some foam adhesive to allow it to stand out a bit more from the background. I just love the crisp white juxtaposed with the different shades of pink and that gorgeous, fluffy bow!

Well, that’s all for my project today! Don’t forget, each day at noon Eastern time, Simon Says Stamp will be revealing that day’s limited edition collaboration stamp set. And, bonus, for a limited time, Simon Says Stamp will gift you FREE SHIPPING for any US purchase over $25!! Simply add code FRSHP at checkout to receive your free shipping discount! Thanks so much for stopping by today, and happy STAMPtember!

Filed Under: simon says stamp Tagged With: chunky thankful greetings, die cutting, gift bag, gift bag die, rainbow splash

Primary Sidebar

  • Facebook
  • Instagram
  • Pinterest
  • YouTube

Favorite Shops

Secondary Sidebar

Subscribe

Enter your email address to subscribe to this blog and receive notifications of new posts by email.

Instagram
Something is wrong.
Instagram token error.
Follow
Load More

Archives

Tags

3D embossing folder alcohol markers better press birthday birthday card blog hop card kit christmas christmas card christmas tag colored pencil copic copic coloring Daniel Smith die cutting embossing folder embroidery felt giveaway holiday holiday card hot foil ink blending karin brushmarker pro layered stencil masculine my monthly hero new release no line coloring no line watercolor OLO marker olo markers original illustration pawsitively saturated rainbow shaker card slimline stamping stamptember stencil thank you thinking of you valentine's day video watercolor

Popular Posts

Simon Says Stamp Joy For You Blog Hop- Day 1!
Simon Says Stamp Joy For You Release-Now Available!
Frozen Fractals All Around with New Simon Says Stamp Joy For You Release!
Shaped Holiday Shaker Card with New Simon Says Stamp Jolly Season Card Kit of the Month!
Holiday Postage with New Simon Says Stamp!
Simon Says Stamp Glory to the Newborn King Holiday Kit-Part II!
Holiday Joy in Pink and Green with New Simon Says Stamp DieCember!
Pinkfresh Studio 5th Birthday!
Altenew Build A Flower: Fuchsia Blog Hop+Giveway!
July My Monthly Hero Blog Hop+Giveaway!

Disclosure

Some affiliate links are used in my posts. This means that, should you click on one of my links and purchase something from that company, I will receive a small portion of the sale at no extra cost to you. I use the money earned from these sales to help maintain my blog. I so appreciate you visiting and, if you do choose to use one of my affiliate links, thank you so much for your support!
Copyright © 2026 ·Brunch Pro Theme · Genesis Framework by StudioPress · WordPress · Log in
Loading Comments...