• Skip to main content
  • Skip to primary sidebar
  • Skip to secondary sidebar

Sixth Street Sundries

Emily Midgett

  • Home
  • About Me
  • Contact
  • OLO Marker Color Swatch Chart
  • Shop

gift tags

Simon Says Stamp Sending Cheer Blog Hop- Day 2 + Freebie + Giveaway!

October 10, 2026

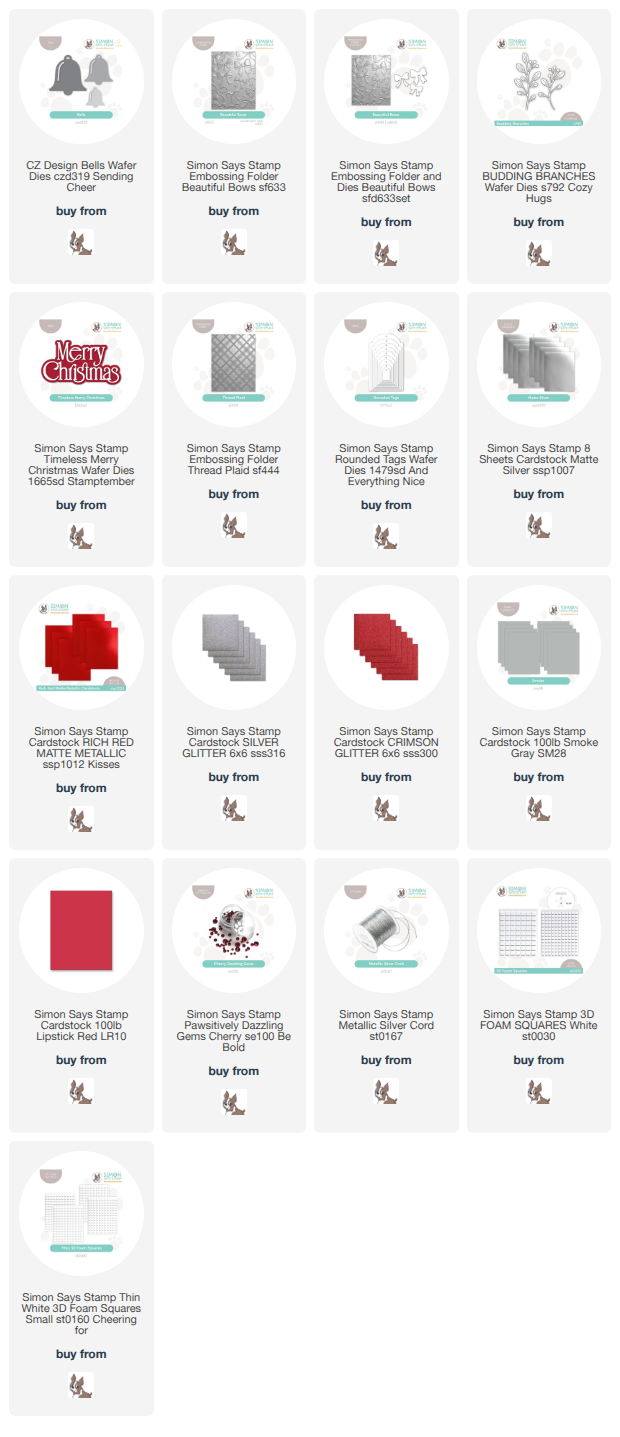
This post was sponsored by Simon Says Stamp. Thanks, Simon! *I have gathered links to all of the products used at the bottom of the post for your convenience, using affiliate links at no extra cost to you. Thank you for shopping with my links! I truly appreciate your support for my work!*

Hi friends! I am so excited to be hopping along with my friends at Simon Says Stamp to celebrate their new Sending Cheer Release! (Click HERE to see everything!) You should have arrived here from Nina-Marie Trapani, and your next stop isSandi MacIver. You can also start at the beginning at the Simon Says Stamp Blog!

I just love Christmas crafting. I love the colors, the excuse to use excessive sparkle and shine, the imagery, the textures… I can’t get enough. My love of Christmas meshes nicely with my love of coordinated gift sets, and it is with that in mind that I created this festive set of tags and a matching holiday card using new (and old!) dies. Let’s get started with the details on my projects!

The new Beautiful Bows embossing folder with coordinating dies was an immediate favorite of mine from this release. I absolutely love the incredible detail and texture that the embossing folder provides, and the option to create die cut embossed bows just adds to the versatility of this product! Now, embossing on regular cardstock is gorgeous, but embossing on foil cardstock is absolute magic. I used Simon Says Stamp’s Matte Red Metallic cardstock with the Beautiful Bows folder and dies and it is *perfection* for Christmas! I created a detailed and sparkling holiday card filled with texture and layers, then created two very simple-but-effective tags that coordinate perfectly with the card!

For the card, I die cut some sparkling silver glitter bells using the new Bells dies, which come in multiple sizes and are just simple enough that you can embellish without restraint! I created a background with the timeless Thread Plaid embossing folder and Simon Says Stamp’s Fog cardstock, embellished with some strips of red glitter and silver foil cardstock at the bottom. I created a dimensional die cut greeting with the spectacular Timeless Merry Christmas die, cutting twice from plain white cardstock and adding a top layer of red glitter cardstock to give it lots of dimension and sparkle. I arranged the bells and the die cut red foil Beautiful Bows, then filled out the arrangement with matte silver foil Budding Branches die cuts. Multiple textures of specialty paper helps add to the luxury of the card! I finished the card off by adding bejeweled “berries” to the foliage with Cherry Pawsitively Dazzling Gems. I just love how this card turned out, and it would look so pretty in so many different color ways!!

For the tags, I took advantage of the variety of sizes included with the new Bells die set and paired them with more of the gorgeous embossed, die cut red foil Beautiful Bows. I die cut both sizes of bells from silver glitter cardstock, as well as a small tag from the previously-released Rounded Tags die set, cut from Simon Says Stamp’s Lipstick Red cardstock. I layered the bows atop the silver glitter bells; I think the pop of shiny red looks wonderful against the sparkling silver glitter cardstock!

To create the folded tag for the larger silver bell, I used a folded piece of cardstock and placed the same size Bells die on it, making sure that the fold was below the top of the bell so that the die created a shaped card! I adhered the silver glitter bell to the folded tag with liquid adhesive and added the smaller silver glitter bell and bow to the red tag with foam adhesive. Finally, I added some silver cord to allow for easy application to a holiday gift! These tags are simple, but they are so very festive and, I think, very elegant, like something from an upscale stationery store!

Well, that’s all for my projects today! Now for some fun giveaway information:

Simon Says Stamp is giving away a $25 coupon to one lucky winner from every stop on the hop! The winners will be selected from each blog’s comment section. Winners will be selected and posted on the Simon Says Stamp blog!

On top of the giveaway, Simon Says Stamp is also running a special freebie! You can receive the not-yet-released Hedge Hugs stamp set for free with any purchase from the Sending Cheer collection! (Click HERE!) No code necessary; the free set will be added to your cart automatically with any purchase from Sending Cheer!

Your next stop is Sandi MacIver. Thanks so much for stopping by today, and happy hopping!
Filed Under: simon says stamp Tagged With: beautiful bows, bells, budding branches, christmas tags, die cutting, embossing folder, gift tags, holiday, holiday card, rounded tags, sending cheer, shaped card, shaped tags, thread plaid, timeless merry christmas

Easy Tag Set for Gifting or Wrapping with Simon Says Stamp DieCember!

December 19, 2025

This post was sponsored by Simon Says Stamp. Thanks, Simon!

Hi friends! We are charging ever closer to Christmas with just a few more days to get everything ready, wrapped, baked, mailed, etc etc etc! My immune system decided check out, so I have been sickly for the last two weeks… not ideal with four kiddos and all of the school activities, plus work and house remodeling! Because of this, I am on an extra tight time crunch this year, so I can always appreciate a quick and simple project that still adds that little handmade touch to my holiday gifts without a huge time investment. The new 4-for-1 Christmas product suite offers an opportunity to create beautifully detailed and illustrated tags that you can customize to perfectly match your wrapping, but with the added bonus of stamping and die cutting four individual tags with one go! I have created a little tag gift set with this new suite using ink and white cardstock as well as white embossing powder and colored cardstock. Let’s get started with the details on my project!

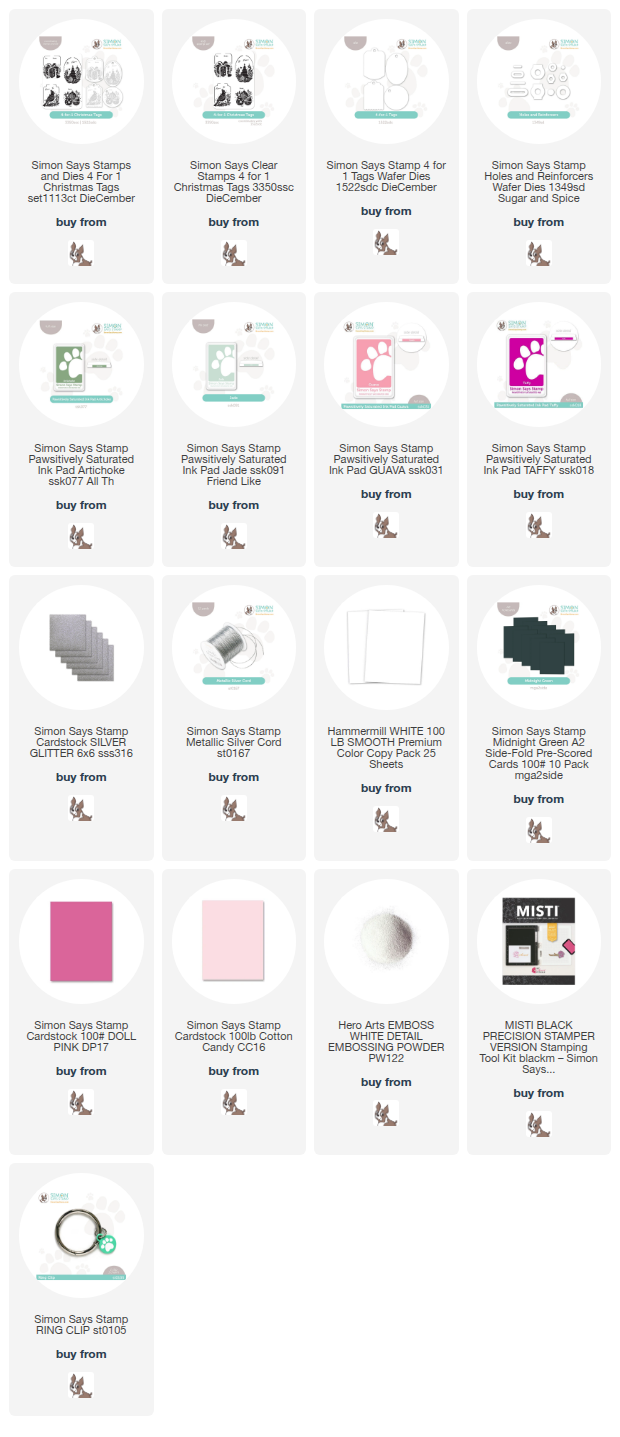
*I have gathered links to all of the products used at the bottom of the post for your convenience, using affiliate links at no extra cost to you. Thank you for shopping with my links! I truly appreciate your support for my work!*

I find that the older I get, the more I appreciate a truly useful and thoughtful gift. Giving handmade projects as gifts is one of my favorite ways to show people that I care about them, and if they are truly useful gifts, so much the better! I decided to put the new 4-for-1 Christmas suite to the test to create sets of tags to give as gifts (and maybe to keep a few for my own gifts!). The images are on one large stamp, so you stamp one time and have a full sheet of tags ready to be die cut (with the handy dandy 4-for-1 Christmas Tag Die that cuts all four images in one fell swoop!) and added to your gift!

For this set, I stamped the 4-for-1 Christmas suite eight different times on eight sheets of A2 cardstock, which sounds like a lot, but when using the MISTI, it went quite quickly! I stamped the first four using embossing ink on different shades of pink and green cardstock, then embossed them with white detail embossing powder. For the next batch, I stamped the tags using Pawsitively Saturated Inks in shades of Jade, Artichoke, Guava, and Taffy, continuing my pink and green theme. Which technique do you like better: embossed or inked?

After I had stamped, embossed, and die cut all of the tags, I die cut the newer Holes & Reinforcers dies from silver glitter cardstock, then added them to the top of each tag. Not only does this addition reinforce the tag’s hanger, it adds a little extra bling to the tag and makes it look so professional, I think!

Finally, I added loops of Simon Says Stamp Silver Cord to each reinforced hole, creating an easy way to add your handmade tags to a gift. To give these as a gift, I simply strung a variety of the tags onto a Simon Says Stamp Ring Clip and added a pretty coordinating pink bow to make it extra festive!

Well, that’s all for my projects today! Are you feeling the last minute holiday crunch or are you more prepare (and healthier! Cough cough) than me? My kiddos get out of school early today for their Christmas break… nearly 3 weeks of fun and plenty of cookies, chaos, and celebrating! Thanks so much for stopping by today, and happy holidays!

Filed Under: simon says stamp Tagged With: 4-for-1 christmas, christmas card, christmas tags, die cutting, gift tags, holes & reinforcers, holiday card, holiday tags

Hero Arts December 2023 My Monthly Hero Kit Launch Blog Hop + Giveaway!

December 4, 2023

Hi friends! Happy Monday! It’s the first Monday of the month, and that means that it’s time for another kit release from my friends at Hero Arts! You should have arrived here from the marvelous Kelly Taylor, and this is your last stop on the hop! This month’s theme is dedicated to all things alphabet. I received my kit a bit late, so I have some very quick and easy tags to share with you. We can all use “quick and easy” around this time, can’t we? Here’s a peek at this month’s Classic Kit:

And a look at the Premium Kit:

The contents of these kits retail individually for over double the kit purchase price. The My Monthly Hero Classic kit can be yours for $36.99, and the Premium Kit can be purchased for $49.99! There are also a ton of marvelous, universally-useful add-ons which coordinate with the kits or can be used as standalone products. Let’s get started with my projects!!

Whenever I see alphabet dies, my mind immediately goes to personalized stationery. I started my cardmaking journey when I was newly married and wanted to create the perfect monogram stationery to send as thank you notes, and so new alphabet products always bring me back to my roots. Now, as a momma of four kids, personalization is important, because my kids like to make sure that everybody knows whose toy is whose!! (lol and cry simultaneously) I die cut the new cover plate die from the Classic Kit from using Pitch Black cardstock and realized that my boys’ names are short enough that the die cut letters could easily be added onto some tags. My little boys are learning how to spell their names in preschool, and seeing their letters anywhere (stop sign, mail, gas station sign, etc) brings them a thrill that I thought seeing a personalized tag on their “want” gift would make them so happy!

I die cut three tags from Cherry cardstock using the Bulb Ornament Infinity Dies which are unfortunately out of stock at the moment, but you can easily sign up for email notification for when they come back in stock! They’re super useful, especially considering the variety of sizes included in the set. I used a Post-It note to mask off the top of the ornament bulbs and blended Cranberry ink around the edges to add some extra dimension. I then used the Snowflake Fancy Die and white glitter cardstock from the Glitter Basics cardstock pack to add a festive snowflake pattern to each snowflake, snipping off the extras spilling over the edges. I popped up the die cut letters from the My Monthly Hero Classic Kit using foam adhesive and added a bit of sparkly silver twine from which my tag could swing!

On the back of the tag, I used more Pitch Black cardstock to add a die cut “from” from the Holiday Words Fancy Die set. I love that these tags came together so quickly and easily. They’d be super easy to mass produce and would be darling as tags for gifts or even place cards for a family meal!

For my lone girl child, I wanted to create a variation on the same tags with a bit more feminine color palette. Her name is a bit longer than the boys’ names, so I used the “V” die from the new S-V Fancy Dies. Having a V for her first initial makes it a bit more challenging to find monogrammed items, so she really enjoys seeing her monogram on anything!! I die cut the large Bulb Ornament Infinity Dies from Mist cardstock, then placed my Post-It Note mask on the top and blended Paradise ink around the edges. I added more sparkly snowflakes, then die cut the large V from S-V Fancy Dies from Adriatic cardstock and popped it up with foam adhesive, I added a sparkly silver twine bow and loop. Super cute and sparkly! I think she will probably even keep it as an ornament for her little Christmas tree in her bedroom.

When I opened my release package last week, I was immediately struck by the generous size of the new Alphabet Fancy Dies and knew that I wanted to create a festive word garland for my office Christmas tree! My new office gave me enough space to have a tree of my very own, a white tree decorated in blush pink and rose gold, and it was such fun to create this little banner to decorate it. I die cut the Alphabet Fancy Dies from some light pink shimmer cardstock as well as regular white cardstock, then adhered them together to add a bit of extra stability. Then, I dug out my glue gun (haven’t used that in awhile!) and adhered the letters to some sparkly rose gold twine.

I think it looks fabulous on my little tree!

Well, that’s all for my projects today! Now for some fun giveaway information:

Hero Arts will give away a $50 gift card, drawn from the comments left across the hop. Enter by Sunday, December 10th at 11:59pm Pacific, and the winner will be announced on the Hero Arts blog the following week.

I’m the last stop on the hop, so if you’ve made it this far, you’re all done! You can also start back a the beginning at the Hero Arts blog if you got out of order. Thanks so much for stopping by today, and have a marvelous day!

Filed Under: Hero Arts Tagged With: christmas tags, gift tags, holiday decor, my monthly hero

Primary Sidebar

  • Facebook
  • Instagram
  • Pinterest
  • YouTube

Favorite Shops

Secondary Sidebar

Subscribe

Enter your email address to subscribe to this blog and receive notifications of new posts by email.

Instagram
Something is wrong.
Instagram token error.
Follow
Load More

Archives

Tags

3D embossing folder alcohol markers better press birthday birthday card blog hop card kit christmas christmas card christmas tag colored pencil copic copic coloring Daniel Smith die cutting embossing folder embroidery felt giveaway holiday holiday card hot foil ink blending karin brushmarker pro layered stencil masculine my monthly hero new release no line coloring no line watercolor OLO marker olo markers original illustration pawsitively saturated rainbow shaker card slimline stamping stamptember stencil thank you thinking of you valentine's day video watercolor

Popular Posts

Simon Says Stamp Joy For You Blog Hop- Day 1!
Simon Says Stamp Joy For You Release-Now Available!
Frozen Fractals All Around with New Simon Says Stamp Joy For You Release!
Shaped Holiday Shaker Card with New Simon Says Stamp Jolly Season Card Kit of the Month!
Holiday Postage with New Simon Says Stamp!
Simon Says Stamp Glory to the Newborn King Holiday Kit-Part II!
Altenew Build A Flower: Fuchsia Blog Hop+Giveway!
Holiday Joy in Pink and Green with New Simon Says Stamp DieCember!
Pinkfresh Studio 5th Birthday!
Honey Bee Stamps September Release Blog Hop!

Disclosure

Some affiliate links are used in my posts. This means that, should you click on one of my links and purchase something from that company, I will receive a small portion of the sale at no extra cost to you. I use the money earned from these sales to help maintain my blog. I so appreciate you visiting and, if you do choose to use one of my affiliate links, thank you so much for your support!
Copyright © 2026 ·Brunch Pro Theme · Genesis Framework by StudioPress · WordPress · Log in
Loading Comments...